
Related Manuals for Reed Instruments R7900


Summary of Contents for Reed Instruments R7900
- Page 1 R7900 Ultrasonic Thickness Gauge Instruction Manual 1.800.561.8187 information@itm.com www. .com...
-
Page 2: Table Of Contents
Table of Contents Introduction ....................4 Product Quality ................... 4 Safety ......................4 Features ...................... 4 Specifications ..................... 5 Included ...................... 5 Instrument Description ................6 Keypad Description ..................6 Display Description ..................7 Operating Instructions ................8-13 Setting Ultrasonic Sensor Frequency ............ 8 Zero Calibration .................. - Page 3 Maintenance ..................... 16 Cleaning the Test Piece ............... 16 Protecting the Ultrasonic Sensor ............16 Replacing the Ultrasonic Sensor ............16 Battery Replacement ................17 Applications ....................17 Accessories and Replacement Parts ............17 Appendix .....................18-22 Measurements on Cylindrical Surfaces ..........18 Measuring Compound Profiles ............
-
Page 4: Introduction
Introduction Thank you for purchasing your REED R7900 Ultrasonic Thickness Gauge. Please read the following instructions carefully before using your instrument. By following the steps outlined in this manual your meter will provide years of reliable service. Product Quality This product has been manufactured in an ISO9001 facility and has been calibrated during the manufacturing process to meet the stated product specifications. -
Page 5: Specifications
Specifications Measuring Range: 0.03 to 15.7" (0.65 to 400mm) Accuracy: ±0.04mm (< 10mm) ±(0.1% rdg.+ 0.04mm) (< 100mm) ±(0.3% rdg.) (> 100mm) Resolution: 0.01mm or 0.1mm (< 100mm) 0.1mm (>100mm) Velocity Range: 1000 to 9999 m/s (0.039 to 0.394 in/µs) Compatible Materials: Ultrasonic conductive materials (ie. metals, plastics, ceramics, composites, epoxies, glass) Sampling Time: Less than 1 second Display: 4-Digit, LCD Backlit Display: Probe Length: 3' (36") Internal Memory: Yes (up to 500 readings, 5 files up to 100 each) Low Battery Indicator: Power Supply: 2 AA Batteries Battery Life: Approx. 100 hours (Alkaline) Product Certifications: Operating Temperature: 32 to 122°F (0 to 50°C) Storage Temperature:... -
Page 6: Instrument Description
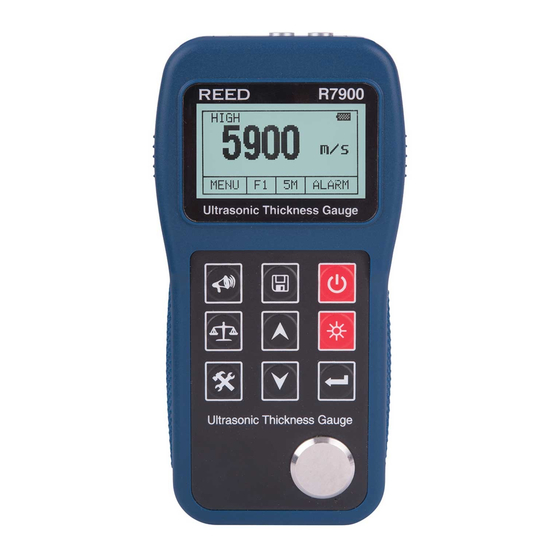
Instrument Description 1. LCD Display 2. Calibration Test Block R7900 3. Probe Inputs Ultrasonic Thickness Gauge Ultrasonic Thickness Gauge Keyboard Description 1. Zero Button 2. Mode Button 3. Down Button 4. Enter Button 5. Up Button 6. Backlight ON/OFF Button 7. Power Button 8. Save/Browse Button Ultrasonic Thickness Gauge 9. -
Page 7: Display Description
Display Description HIGH MENU ALARM 1. Measured Value 6. Battery Indicator 7. Minimum Capture Mode 2. Menu Settings 8. Coupling Indicator 3. Saved File Name 9. Gain Indicator 4. Ultrasonic Sensor Frequency 5. Alarm Thickness Settings 1.800.561.8187 information@itm.com www. .com... -
Page 8: Operating Instructions
Operating Instructions Insert the ultrasonic sensor into the probe sockets on the meter. Press, hold an release the button for 2 seconds to turn the meter on. Press the button to turn the meter off. The LCD will briefly display information about the meter, and then show the current set sound velocity. Setting Ultrasonic Sensor Frequency Press the button to highlight the ultrasonic sensor frequency... - Page 9 Sound Velocity Material (m/s) (inch/µs) Aluminum 6320 to 6400 0.250 Zinc 4170 0.164 Silver 3607 0.142 Gold 3251 0.128 2960 0.117 Steel, Common 5920 0.233 Steel, Stainless 5740 0.226 Brass 4399 0.173 Copper 4720 0.186 Iron 5930 0.233 Case Iron 4400 to 5820 0.173 to 0.229 Lead...
-
Page 10: Preparing The Measurement Surface
Preparing the Measurement Surface Clean any dust, dirt or rust off the object, and remove any coating such as paint. Smooth the surface of the object by grinding or polishing it. You can also use a coupling gel with a high viscosity. Important Note: In any ultrasonic measurement scenario, the shape and roughness of the desired test material are of great importance. Rough, uneven surfaces will prevent the ultrasonic sensor from seating properly against the surface, thus limiting the penetration of ultrasound through the material, resulting in unstable and therefore, unreliable measurements. -
Page 11: Sound Velocity Measurements Of A Material With A Known Thickness
Sound Velocity Measurements of a Material with a Known Thickness The sound velocity of a material can be measured using a test piece with a known thickness. Select a test piece with a minimum wall thickness of 20.0mm. Turn off the minimum capturing function (see System Setup section for details) prior to taking measurement. Measure the test piece with a caliper or micrometer to confirm the thickness. -
Page 12: Two Point Calibration
Take another measurement of the test piece to verify if the thickness reading is getting closer to the known thickness or not. If for some reason it is now farther away than before, reduce the velocity a little by pressing the button. -
Page 13: Setting Alarm Thickness Limits
Setting Alarm Thickness Limits The R7900 will alarm when the measured value is beyond the pre-set limits. When the measurement is lower than the low pre-set limit or higher than the high pre-set limit, the alarm will sound. To enter the alarm setting, follow steps 1 through 6 below. -
Page 14: Menu Options
Multi-point measurement: This method involves performing a number of measurements within a circle having a maximum diameter of about 1.18" (30mm) (see image below). Take the minimum indicated value as the thickness of the material. Menu Options The menu function controls the settings and functions of the meter. To enter the menu, press the button to highlight the menu option on the LCD and press the... -
Page 15: Memory Manager
Baud Rate: 1200, 2400, 4800, 9600 Set Brightness: UP to darken, DOWN to lighten Memory Manager While in the menu, highlight the "Memory Manager" option and press button to enter this menu. Press the buttons to scroll through the "Memory Manager"... -
Page 16: Internal Memory Operation
Internal Memory Operation The internal memory is divided into 5 files, F1 to F5. Each file can save up to 100 measurement values. Note: Before saving your data, be sure to set the file number first. Press the button to highlight the "Save File Name" on the LCD. Press the button to scroll through the memory files, F1 to F5. -
Page 17: Battery Replacement
• Industrial manufacturing Accessories and Replacement Parts • CA-52A Soft Carrying Case • R8888 Hard Carrying Case • R7900-PROBE Replacement Probe • R7950 Ultrasonic Couplant Gel • R7950/5L Ultrasonic Couplant Gel, 5L • R7950/12 Ultrasonic Couplant Gel, pack of 12 Don't see your part listed here? For a complete list of all accessories and replacement parts visit your product page on www.reedinstruments.com. -
Page 18: Appendix
Appendix Measurements on Cylindrical Surfaces When measuring cylindrical material, such as pipes or oil tubes, it is important to properly adjust the angle between the ultrasonic sensor's crosstalk interlayer plate and the axial line of the material being measured. Couple the sensor with the material being measures. Make the sensor's crosstalk interlayer plate perpendicular or parallel to the axial line of the material under test. -
Page 19: Influence Of Material's Temperature
Influence of Material's Temperature Both the thickness and transmitting speed of ultrasonic waves are influenced by temperature. If there is a high requirement of measuring accuracy, please use one of the comparison methods listed below: Use a test piece of the same material being measured, under the same temperature. Obtain the temperature compensation coefficient. Use this coefficient to correct the actual measurement of the material being tested. -
Page 20: Preventing Errors
Preventing Errors Reference Test Pieces To maintain high accuracy when taking measurements of different materials, it is important to use a standard test piece that resembles the material and conditions being measured. The ideal reference test pieces should be a group of test pieces with different thicknesses made of the same materials that is going to be measured. -
Page 21: Ultra-Thin Material
Ultra-Thin Material An error will occur when the thickness of a material under test is less than the low limit of the ultrasonic sensor. When necessary, measure the minimum limit thickness by comparing it with test pieces. When measuring an ultra-thin material, sometimes errors called "double refraction"... -
Page 22: Abnormal Readout Of Thickness
In addition, different thicknesses in oxidation layers will cause different errors. Make a reference piece from a batch of objects by measuring with a micrometer or calliper, and using it to calibrate the instrument. Abnormal Readout of Thickness The operator should be able to identify an abnormal measuring reading. Generally the rust, corrosion, pit, and internal defect of the material under test will cause abnormal measuring readings. -
Page 23: Product Warranty
REED Instruments guarantees this instrument to be free of defects in material or workmanship for a period of one (1) year from date of shipment. During the warranty period, REED Instruments will repair or replace, at no charge, products or parts of a product that proves to be defective because of improper material or workmanship, under normal use and maintenance. - Page 24 TesT & MeasURe wITh ConfIdenCe CheCk oUT oUR laTesT PRodUCTs! 1.800.561.8187 information@itm.com www. .com...
Need help?
Do you have a question about the R7900 and is the answer not in the manual?
Questions and answers