
Related Manuals for Reed Instruments R7800


Summary of Contents for Reed Instruments R7800
- Page 1 R7800 Coating Thickness Gauge Instruction Manual GlobalTestSupply www. .com Find Quality Products Online at: sales@GlobalTestSupply.com...
-
Page 2: Table Of Contents
Table of Contents Introduction ....................3 Product Quality ....................3 Safety ......................4 Features ......................4 Included ......................4 Specifications ....................5 Instrument Description .................. 6 Display Description ..................6 Operating Instructions ................... 7 Power ON/OFF ..................7 Measuring Procedure ................7 Setup Mode ....................8-12 Enabling/Disabling Audible Beep ............. -
Page 3: Introduction
Product Disposal and Recycling ..............18 Product Support ..................18 Introduction Thank you for purchasing your REED R7800 Coating Thickness Gauge. Please read the following instructions carefully before using your instrument. By following the steps outlined in this manual your meter will provide years of reliable service. -
Page 4: Safety
Safety Never attempt to repair or modify your instrument. Dismantling your product, other than for the purpose of replacing batteries, may cause damage that will not be covered under the manufacturer's warranty. Servicing should only be provided by an authorized service center. Features • Automatically detects ferrous and non-ferrous substrates • Easy-to-read color LCD display... -
Page 5: Specifications
Specifications Measuring Range: 0 to 1250µm 0.1 to 49.2mils Accuracy: 0 to 1250µm: ±3% +1µm 0 to 49.21mils: ±3% +0.04mils Resolution: 0 to 99.9µm: 0.1µm 100 to 1250µm: 1µm 0 to 4.99mils: 0.01mils 5.0 to 49.2mils: 0.1mils Measurement Modes: Single and Continuous Display: 4-digit color LCD display Resolution:... -
Page 6: Instrument Description
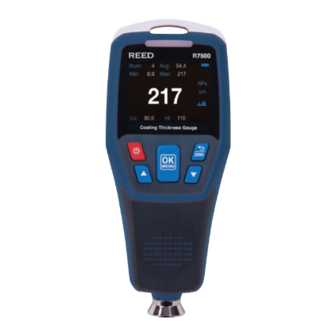
Instrument Description 1. Wrist Strap Anchoring Point 2. LED Status Indicator R7800 3. LCD Display 4. Power Button 5. Menu/Confirm/Calibration Coating Thickness Gauge Button 6. Increase Value/Up/Lock ZERO MENU Screen Button 7. USB Port 8. Cancel/Clear/Return Button 9. Decrease Value/Down/Quick Decision Mode Button 10. Battery Compartment (Back) -
Page 7: Operating Instructions
Operating Instructions Power ON/OFF To turn the meter ON or OFF press and hold the power button for 2 seconds. Note: If the buzzer is enabled, there will be an audible beep when the instrument is powered ON or OFF. Measuring Procedure Before each test session perform a Zero Calibration. -
Page 8: Setup Mode
Setup Mode Press the button to enter Setup Mode. ZERO MENU MENU um/mil Use the arrows to scroll through the following parameters. Enabling/Disabling Audible Beep Setting the Brightness um/mil Selecting the thickness Unit of Measure ZERO ZERO MENU MENU Selecting Calibration Mode Setting Higher Limit Value ZERO MENU... -
Page 9: Enabling/Disabling Audible Beep
Enabling/Disabling Audible Beep Press the OK button when the audible beep icon is selected in Setup Mode. Use the arrows to select between ON or OFF Press the OK button to confirm selection. Press the button to exit Setup Mode and resume normal operation. MENU ZERO ZERO... -
Page 10: Setting Higher Limit Value
Setting Higher Limit Value Press the OK button when the higher limit value icon is selected in Setup Mode. Use the arrows to increase or decrease the higher limit value. Press the OK button to confirm selection. ZERO MENU Press the button to exit Setup Mode and resume normal ZERO MENU... -
Page 11: Enabling/Disabling Led Indicators
Enabling/Disabling LED Indicators Press the OK button when the LED alarm icon is selected in Setup Mode. Use the arrows to turn the LED alarm ON or OFF. ZERO MENU Press the OK button to confirm selection. Press the button to exit Setup Mode and resume normal operation. ZERO MENU Factory Reset... -
Page 12: Delete Recorded Data
Delete Recorded Data Press the OK button when the delete recorded data icon selected in Setup Mode. Use the arrows to turn the delete recorded data mode ON or OFF. Press the OK button to confirm selection. Press the button to exit Setup Mode and resume normal operation. ZERO MENU ZERO... -
Page 13: Single-Point Decision Configuration
Single-Point Decision Configuration Press the arrows to set the target thickness value, and press the button to confirm selection. MENU ZERO Press the arrows to set the tolerance value, and press the button to confirm. ZERO MENU Use the gauge to measure the coating thickness of the measured object. The screen displays the measured value and whether or not the ZERO ZERO... -
Page 14: Zero Calibration
When completed, the gauge will automatically exit the zero calibration mode and resume normal operation. Note: At any time, you can press the button to cancel the calibration ZERO MENU and resume normal operation. R7800 R7800 Coating Thickness Gauge Coating Thickness Gauge ZERO ZERO MENU... -
Page 15: Two-Point Calibration
Figure 6 will now appear on the screen, prompting users to place the instrument vertically on the uncoated substrate again. MENU MENU MENU MENU Lift the instrument after 2 seconds. Zero will be displayed (as shown in MENU ZERO MENU ZERO R7800 R7800 Figure 7). R7800 R7800 R7800 Coating Thickness Gauge Coating Thickness Gauge um/mil um/mil Coating Thickness Gauge... -
Page 16: Calibration Verification
When disabled, the lock screen symbol appears on the screen. MENU ZERO Data Upload Connect the R7800 via the included cable to a USB port on your PC, to download the recorded data and generate reports or view the data in MENU ZERO real-time. -
Page 17: Battery Replacement
Battery Replacement When the " " icon appears on the LCD, the batteries should be replaced. Remove the screw with a Philips screwdriver and open the battery cover. Replace the 2 x "AA" batteries. Secure the battery cover back and tighten the screw. Applications • Verification of paint thickness • Automotive industry... -
Page 18: Product Warranty
REED Instruments guarantees this instrument to be free of defects in material or workmanship for a period of one (1) year from date of shipment. During the warranty period, REED Instruments will repair or replace, at no charge, products or parts of a product that proves to be defective because of improper material or workmanship, under normal use and maintenance. - Page 19 TesT & MeasuRe wITh ConfIdenCe CheCk ouT ouR laTesT PRoduCTs! GlobalTestSupply www. .com Find Quality Products Online at: sales@GlobalTestSupply.com...
- Page 20 GlobalTestSupply www. .com Find Quality Products Online at: sales@GlobalTestSupply.com...
Need help?
Do you have a question about the R7800 and is the answer not in the manual?
Questions and answers