Table of Contents
Advertisement
Advertisement
Table of Contents

Related Manuals for IDVille ID Maker Apex


Summary of Contents for IDVille ID Maker Apex
-
Page 2: Table Of Contents
CONTENTS General Informa�on: Safety Instruc�on Cau�on Printer Installa�on Welcome Printer and Dye Film Environmental Requirements Printer Key Components Installing the Dye Film Connec�ng the Power Supply Installing the Driver USB Installa�on Ethernet Installa�on Advanced Errors Accessing the Driver Se�ngs Printer Front Display Menu Op�ons Addi�onal Useful Informa�on Maintaining Your Printer is Important Caring for Your Printer... - Page 3 Upgrading to Duo Opera�on General Data Protec�on Regula�on (GDPR) Printer Error Codes FCC Declara�on CE Declaraton...
-
Page 4: General Informa�On
ID C rd Printer - User nu l GENERAL INFORMATION: This document contains proprietary informa�on belonging to Magicard Ltd. and may not be wholly or par�ally copied, stored in a data retrieval system, or used for any purpose other than that for which it was supplied, without the express wri�en authority of Magicard Ltd. -
Page 5: Printer Installa�On
ID C rd Printer - User nu l PRINTER INSTALLATION Welcome. Thank you for choosing your ID Card Printer. This guide will help you make your prin�ng experience more enjoyable and cost effec�ve. Please ensure you have the following items outlined in the Quickstart Guide below before you begin the installaion... -
Page 6: Printer And Dye Film Environmental Requirements
ID C rd Printer - User nu l PRINTER AND DYE FILM ENVIRONMENTAL REQUIREMENTS Below Normal Office Environment With: • Ambient temperature +10 to 30°C (50 to 86°F). • Protec�on from direct sunlight and chemicals. • Protec�on from sudden temperature changes. •... -
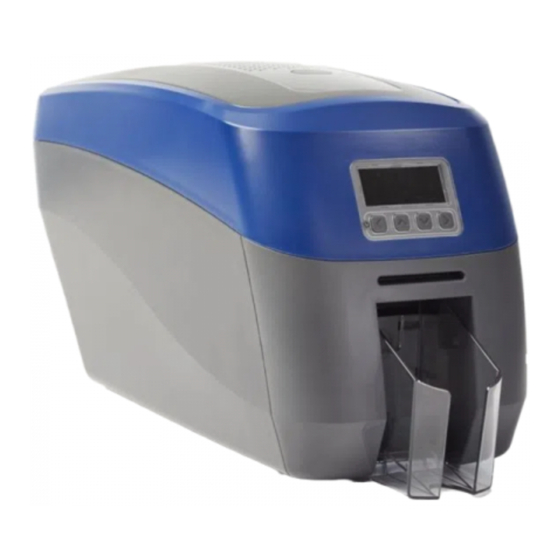
Page 7: Printer Key Components
ID C rd Printer - User nu l PRINTER KEY COMPONENTS PRINTER FRONT VIEW Print Head Assembly Read Card Hopper Dye Film Sensor Blue Cleaning Roller Printer Front Display Front Card Flipper Front Card Stacker (70 card capacity) Reer Card Hopper (100 card capacity) WiFi Dongle Insert the WiFi dongle plug into the corresponding... -
Page 8: Installing The Dye Film
ID C rd Printer - User nu l INSTALLING THE DYE FILM Open the printer’s lid and insert the dye film as shown in the diagram below. If the printer’s lid is closed (with the printer powered on and the dye film fi�ed), the printer will begin to ini�alise. -
Page 9: Connec�Ng The Power Supply
ID C rd Printer - User nu l CONNECTING THE POWER SUPPLY Connect power supply lead as shown below but do not connect the USB lead at the stage (the USB is connected a�er the driver and successfully been installed). DO NOT CONNECT THE USB LEAD AT THIS STAGE. -
Page 10: Installing The Driver
ID C rd Printer - User nu l INSTALLING THE DRIVER The latest version of Driver for your 600 printer can be downloaded using the following weblink: h�ps://start.magicard.com. The Driver installa�on so�ware will guide you through the installa�on process. To set up WiFi, the printer must be installed via USB first. - Page 11 ID C rd Printer - User nu l INSTALLER GUIDE • Click on “setup.exe” icon • Select the relevant language • Wait for the installer to ini�alize.
- Page 12 ID C rd Printer - User nu l • Click “install”. • Select the port type for installa�on.
-
Page 13: Usb Installa�On
ID C rd Printer - User nu l USB INSTALLATION • Select “USB & WiFi” and click “next”. • Agree to license agreement. - Page 14 ID C rd Printer - User nu l • Wait for the installa�on progress bar to finish. • You will be prompted for a printer to be connected via USB. • If no printer is connected, you will be asked to reconnect and retry. •...
-
Page 15: Ethernet Installa�On
ID C rd Printer - User nu l ETHERNET INSTALLATION • Select “Ethernet” and model. • Enter the IP address of the printer (this can be obtained using the printer’s front panel menu). - Page 16 ID C rd Printer - User nu l • Agree to the license agreement. • Wait for the installa�on progress bar to finish.
- Page 17 ID C rd Printer - User nu l • A�er comple�on of the installa�on, you will be prompted with the following dialog to signal the installa�on is complete: CONGRATULATIONS - The driver installa�on is now complete! You can now print from your chosen applicaiton.
-
Page 18: Advanced
ID C rd Printer - User nu l ADVANCED The “Advanced” dialog will allow you to perform the following: • Enable or Disable the WiFi dongle • Set sta�c addresses • Connect to hidden networks • Obtain the MAC address... -
Page 19: Errors
ID C rd Printer - User nu l ERRORS • No WiFi dongle installed in the printer: • Incorrect password/unable to connect:... -
Page 20: Accessing The Driver Se�Ngs
ID C rd Printer - User nu l ACCESSING THE DRIVER SETTINGS Accessing the driver “Prin�ng Preferences” se�ng (Windows 10 (64bit) shown for informa�on purposes). The printer’s driver se�ngs (Prin�ng Preferences) can be accessed as follows: • Right-click on the “Start” menu icon (bo�om le� of PC screen) and select the “Search” op�on. •... - Page 21 ID C rd Printer - User nu l PRINTING PREFERENCES DRIVER TABS PRINTER This is the default tab and offers the user the op�on to change card orienta�on, size and print resolu�on. CARD FRONT/BACK Op�ons to change the color format, image rota�on and security layer image.
-
Page 22: Printer Front Display Menu Op�Ons
ID C rd Printer - User nu l PRINTER FRONT DISPLAY MENU OPTIONS Press the “Menu” bu�on... The first menu op�on will be displayed. Press the “>” bu�on (where indicated) to step through each op�on in the menu. The front display panel consists of a text display and four push bu�ons. The func�on of each bu�on will depend on the text displayed immeadiately above that bu�on. - Page 23 ID C rd Printer - User nu l NOTE: To accept a menu op�on or return to a previous menu, press the displayed “OK” or “Back” op�ons respec�vely. Serial number Serial number 12345678 So�ware info So�ware info < Firmware version > Hardware info Hardware info <...
-
Page 24: Addi�Onal Useful Informa�On
ID C rd Printer - User nu l ADDITIONAL USEFUL INFORMATION CARING FOR YOUR PRINTER: MAINTAINING YOUR PRINTER IS IMPORTANT! • Maintenance is an important factor of your printer’s good op�on and longevity. • Maintaining a regular cleaning rou�ne will give you op�mum print quality and prevent down �me. We recommend that you clean the printer’s rollers and print head each �me you change dye films •... -
Page 25: How To Clean Your Printer
CLEANING SUPPLIES ID C rd Printer - User nu l How to Clean your Printer To clean your printer, simply press the “Menu” bu�on and follow the on-screen instruc�ons (also shown below). Use the right-most bu�on ( ) to progress the op�ons below. -
Page 26: Replacing The Cleaning Roller
ID C rd Printer - User nu l REPLACING THE CLEANING ROLLER • Remove the blue cleaning roller from the pirnter and then remove the protec�ve paper cover. • Refit the blue cleaning roller (with the s�cky coa�ng now exposed) back into the printer. •... -
Page 27: Using The Cleaning Pen
ID C rd Printer - User nu l USING THE CLEANING PEN The cleaning pen (supplied with the cleaning kit) is used to clean the face of the print head. The contains isopropyl alcohol (IPA) and is very effec�ve at removing light grease (such as finger prints) which would otherwise spoil a printed card. -
Page 28: Choosing The Correct Dye Film
ID C rd Printer - User nu l CHOOSING THE CORRECT DYE FILM Below is a general guide to selec�ng the most suitable film for any typical applicatoin. “Scratch” film lays down a so� film on the cards surface which can easily be removed by a light scraping. Film Panel Print Capacity Dye Film Part Number... -
Page 29: Choosing The Correct Cards
ID C rd Printer - User nu l CHOOSING THE CORRECT CARDS Not all white PVC cards are the same. For best image quality always user high grade PVC card. Pure PVC card stock or laminated PVC/Polyester card are available. The la�er are more durable and be�er suited to heavy use and heat lamina�on when required. -
Page 30: Using Magne�C Stripe Cards
ID C rd Printer - User nu l USING MAGNETIC STRIPE CARDS If you have a printer fi�ed with the opiton magne�c encoding module, you can print and encode the data on the rear of the card in one opera�on. The magne�c enconding module can encode both HiCo and LoCo magne�c stripe card specifica�ons. - Page 31 ID C rd Printer - User nu l ERROR TEXT DISPLAYED ERROR DESCRIPTION SOLUTION BY CATEGORY ON PRINTER LID OPEN The lid was opened while the Close the Lid and try again. print engine was performing an operation. The lid was opened at the point the printer was about to begin a print job.
- Page 32 ID C rd Printer - User nu l ERROR TEXT DISPLAYED ERROR DESCRIPTION SOLUTION BY CATEGORY ON PRINTER While feeding a card from the smart encoder to the ipper, it took too long for the smart extract sensor to indicate that the card was free of the encoder.
- Page 33 ID C rd Printer - User nu l ERROR TEXT DISPLAYED ERROR DESCRIPTION SOLUTION BY CATEGORY ON PRINTER 4:14 While moving the card from the rear sensor to the standby position, it took too long for the rear sensor to unblock. 4:15 While moving a card from the ipper into the smart encoder, it...
- Page 34 ID C rd Printer - User nu l ERROR TEXT DISPLAYED ERROR DESCRIPTION SOLUTION BY CATEGORY ON PRINTER sensor took too long to unblock. In other cases, this means it took too long for the rear sensor to block. 4:19 While trying to eject the card, it took too long for the leading edge of the card to block the...
- Page 35 ID C rd Printer - User nu l ERROR TEXT DISPLAYED ERROR DESCRIPTION SOLUTION BY CATEGORY ON PRINTER OUT OF FILM While moving a dye panel edge Check dye lm is tted and from the dye sensor to the not expired. Also check the printhead, it took too long for Film is not torn.
- Page 36 ID C rd Printer - User nu l ERROR TEXT DISPLAYED ERROR DESCRIPTION SOLUTION BY CATEGORY ON PRINTER While moving the dye lm, too Check dye lm. great a time elapsed between tacho sensor counts. The lm has probably either run out or snapped.
- Page 37 ID C rd Printer - User nu l ERROR TEXT DISPLAYED ERROR DESCRIPTION SOLUTION BY CATEGORY ON PRINTER The tted dye lm does not have the right grade code for this printer. Try another roll of REMOVE FILM The printer detected lm was loaded when trying to calibrate dye LEDs and dye motor.
- Page 38 ID C rd Printer - User nu l ERROR TEXT DISPLAYED ERROR DESCRIPTION SOLUTION BY CATEGORY ON PRINTER FLIP ERROR While initialising the ipper, it took too long to detect the start of the blocked region of the ange. While initialising the ipper and having detected the start of the blocked region of the ange, it took too long to...
- Page 39 ID C rd Printer - User nu l ERROR TEXT DISPLAYED ERROR DESCRIPTION SOLUTION BY CATEGORY ON PRINTER 10:3 The printer received a print job containing magnetic track data. The number of bits speci ed for one of the tracks was out of range.
- Page 40 ID C rd Printer - User nu l ERROR TEXT DISPLAYED ERROR DESCRIPTION SOLUTION BY CATEGORY ON PRINTER 10:8 The printer received a print job. The payload provided was not large enough to hold the image width speci ed. This probably means the print job le was corrupt.
- Page 41 ID C rd Printer - User nu l ERROR TEXT DISPLAYED ERROR DESCRIPTION SOLUTION BY CATEGORY ON PRINTER 10:15 The printer received a print job. The y adjustment speci ed for a panel was out of range. This probably means the print job le was corrupt.
- Page 42 ID C rd Printer - User nu l ERROR TEXT DISPLAYED ERROR DESCRIPTION SOLUTION BY CATEGORY ON PRINTER 12:3 While feeding a card from the hopper, the front sensor blocked before the mid one. 12:4 While feeding a card from the hopper, the front sensor blocked before the rear one.
- Page 43 ID C rd Printer - User nu l ERROR TEXT DISPLAYED ERROR DESCRIPTION SOLUTION BY CATEGORY ON PRINTER 13:5 The print engine microcontroller reported an error. If rebooting the printer does not x this problem, try updating the rmware. If that does not work, there is probably a hardware fault.
- Page 44 ID C rd Printer - User nu l ERROR TEXT DISPLAYED ERROR DESCRIPTION SOLUTION BY CATEGORY ON PRINTER 17:2 While attempting to validate an upgrade le, the printer could not interpret the le’s upgrade commands. Either it is not the right type of le, or the data has been corrupted.
- Page 45 ID C rd Printer - User nu l ERROR TEXT DISPLAYED ERROR DESCRIPTION SOLUTION BY CATEGORY ON PRINTER 20:3 While attempting to install a custom Holokote image, the printer was unable to create the overcoat directory on the SD card. Either the SD card is missing, unformatted or functioning incorrectly.
- Page 46 ID C rd Printer - User nu l ERROR TEXT DISPLAYED ERROR DESCRIPTION SOLUTION BY CATEGORY ON PRINTER NO OVERCOAT 25:0 MOTOR FAULT 26:0 The print engine MCU reported a dye lm motor fault. 26:1 The print engine MCU reported a card feed motor fault.
- Page 47 ID C rd Printer - User nu l ERROR TEXT DISPLAYED ERROR DESCRIPTION SOLUTION BY CATEGORY ON PRINTER PRINTHEAD ERROR 28:0 The printhead does not seem to be tted. SD CARD MISSING 29:0 The internal SD card could not be detected. MAG VERIFY FAIL 30:0 While attempting to verify mag...
- Page 48 ID C rd Printer - User nu l FCC DECLARATION: : This equipment has been tested and found to comply with the limits for a Class B digital device, pursuant to part 15 of the FCC Rules. These limits are designed to provide reasonable protec�on against harmful interference in a residen�al installa�on.
Need help?
Do you have a question about the ID Maker Apex and is the answer not in the manual?
Questions and answers