Siemens MindConnect Nano Getting Started
Getting connected to mindsphere
Hide thumbs
Also See for MindConnect Nano:
- System manual (131 pages) ,
- Quick start (2 pages) ,
- Quick start (2 pages)
Table of Contents
Advertisement
MindSphere
Getting Connected to MindSphere
Getting Started
05/2018
___________________
Safety Notes
___________________
Introduction
___________________
Overview of MindConnect
Elements
___________________
Mounting and installing
MindConnect Elements
___________________
Connecting MindConnect
Elements
___________________
Onboarding MindConnect
Elements
___________________
Configuring data in Asset
Manager
___________________
Visual analysis of assets in
Fleet Manager
___________________
Appendix
1
2
3
4
5
6
7
8
A
Advertisement
Table of Contents

Related Manuals for Siemens MindConnect Nano


Summary of Contents for Siemens MindConnect Nano
- Page 1 ___________________ Safety Notes ___________________ Introduction ___________________ Overview of MindConnect MindSphere Elements ___________________ Mounting and installing MindConnect Elements Getting Connected to MindSphere ___________________ Connecting MindConnect Elements ___________________ Onboarding MindConnect Elements Getting Started ___________________ Configuring data in Asset Manager ___________________ Visual analysis of assets in Fleet Manager ___________________ Appendix...
- Page 2 Note the following: WARNING Siemens products may only be used for the applications described in the catalog and in the relevant technical documentation. If products and components from other manufacturers are used, these must be recommended or approved by Siemens. Proper transport, storage, installation, assembly, commissioning, operation and maintenance are required to ensure that the products operate safely and without any problems.
-
Page 3: Table Of Contents
Connecting MindConnect Elements ....................31 Commissioning MindConnect Element................31 Firewall / Proxy rules for MindSphere ................35 Connecting MindConnect Nano to MindSphere network ............ 35 Connecting MindConnect IoT2040 to MindSphere network ..........37 Connecting Port X2 P1 for MindConnect Element .............. 39 Onboarding MindConnect Elements .................... - Page 4 Overview of datatypes ......................75 A.1.1 Overview of S7 datatypes ....................75 A.1.2 Overview of OPC UA datatypes ..................78 Technical specifications of MindConnect Nano ..............81 Technical specifications of MindConnect IoT2040 ...............84 Firewall Settings .........................86 ESD guideline ........................88 List of abbreviations ......................90 Glossary ............................ 93...
-
Page 5: Safety Notes
PC to find out which system expansion devices may safely be installed. Observe the information on electromagnetic compatibility (EMC). Refer to the chapter Technical specifications of MindConnect Nano (Page 81)/Technical specifications of MindConnect IoT2040 (Page 84). NOTICE "Open Type"... - Page 6 Safety Notes 1.1 General safety instructions Battery and rechargeable battery WARNING Risk of explosion and release of harmful substances Improper handling of lithium batteries can result in an explosion of the batteries. Explosion of the batteries and the released pollutants can cause severe physical injury. Worn batteries jeopardize the function of the device.
- Page 7 MindConnect Nano. Should the license(s) applicable to any part of the open source software require the distribution of the open source software’s source code and build...
-
Page 8: Notes On Usage
Safety Notes 1.2 Notes on usage Notes on usage NOTICE Possible functional restrictions in case of non-validated plant operation. The device is tested and certified on the basis of the technical standards. In rare cases, functional restrictions can occur during plant operation. Validate the correct functioning of the plant to avoid functional restrictions. -
Page 9: Introduction
● MindConnect IoT2040 Convention The term “device” is used to refer to MindConnect Nano and MindConnect IoT2040. The terms for MindSphere can be found in Glossary in the Appendix of this documentation. The configuration parameters should be extracted out of the text or tables and depend respectively on the needs and constellation of the individual system. -
Page 10: Purpose Of This Document
Purpose of this document This Getting Started provides you with information to become familiar with commissioning the device MindConnect Nano or IoT2040 (MindConnect Elements) and working with MindSphere. By using the examples given in this manual, you will be able to develop or change your service. -
Page 11: Working With Mindsphere
● Provide standard HTTPS capabilities for MindConnect Nano/IoT2040 - outbound HTTPs connection(s) on port 443 ● Link to the online Launchpad with user and password data as supplied by Siemens ● Device (PC, tablet etc.) with minimum screen resolution of 1024x768... - Page 12 1. Log in to MindSphere with your account. 2. Create an asset in Asset Manager. 3. Configure the datapoints you want to use. 4. MindConnect Nano/IoT2040 receives the configuration from MindSphere via an existing Internet connection. 5. MindConnect Nano/IoT2040 starts the data acquisition.
-
Page 13: Overview Of Mindconnect Elements
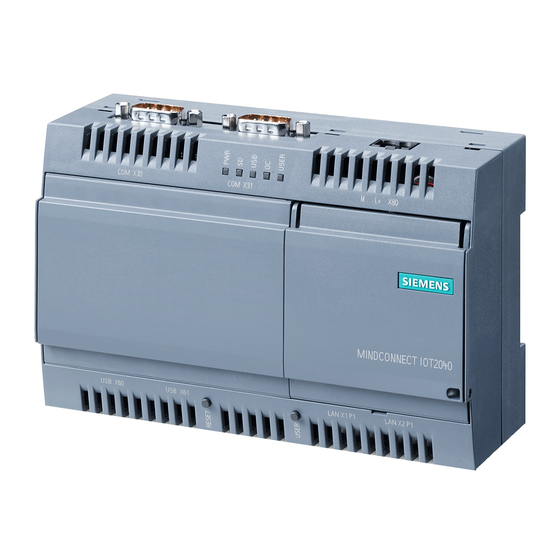
MindSphere. MindConnect Nano MindConnect Nano is a preconfigured Industrial PC that allows connectivity to MindSphere. The device supports the transmission of data encrypted through a secured Internet connection to MindSphere. MindConnect Nano allows fast and easy IoT connectivity of machines and systems. - Page 14 Overview of MindConnect Elements MindConnect IoT2040 MindConnect IoT2040 has compact a design and can also be used for collecting and transferring data to MindSphere in smaller production environments. The device supports the transmission of encrypted data over a secured Internet connection to enable cloud-based applications and services.
- Page 15 Overview of MindConnect Elements Getting Connected to MindSphere Getting Started, 05/2018...
-
Page 17: Mounting And Installing Mindconnect Elements
Mounting and installing MindConnect Elements Checking package upon delivery 1. When accepting a delivery, please check the package for visible transport damage. 2. If any transport damage is present at the time of delivery, submit a complaint at the shipping company in charge. Have the shipper confirm the transport damage immediately. - Page 18 Mounting and installing MindConnect Elements 4.1 Checking package upon delivery 6. If the content of the package is incomplete, damaged or does not match your order, inform the responsible delivery service immediately. WARNING Electric shock and fire hazard due to damaged device A damaged device can be under hazardous voltage and trigger a fire in the machine or plant.
-
Page 19: Mounting Mindconnect Nano
Please make sure there’s enough empty space around the device ● Above the device: ≥ 50 mm ● Below the device: ≥ 100 mm Note Maximum height The maximum altitude to install MindConnect Nano is 4000 m. Getting Connected to MindSphere Getting Started, 05/2018... -
Page 20: Connecting The Protective Earth
Mounting and installing MindConnect Elements 4.3 Mounting MindConnect IoT2040 4.2.2 Connecting the protective earth Figure 4-1 Connecting protective earth Mounting MindConnect IoT2040 4.3.1 Permitted mounting positions and surrounding temperature The following mounting positions and surrounding conditional temperature are permitted: ● Horizontal mounting position: The horizontal mounting position is the preferred position. Maximum surrounding temperature is 50°C. -
Page 21: Mounting Types
Mounting and installing MindConnect Elements 4.3 Mounting MindConnect IoT2040 Free space around the device Please make sure there’s enough space around the device ● Above the device: ≥ 50 mm ● Below the device: ≥ 50 mm 4.3.2 Mounting types Note Ensure that the mounting surface on the wall can bear four times the total weight of the device, including attached elements. -
Page 22: Led Lights Of Mindconnect Elements
4.4.1 LED lights of MindConnect Nano LED lights The LED lights status provide information on efficient self-diagnostics. The following graphics show the LED lights of the MindConnect Nano: Figure 4-4 LED lights - bottom view 1 Getting Connected to MindSphere... - Page 23 “Troubleshooting”. Blinking ORANGE Connection to MindSphere is being established. Blinking GREEN Onboarding is in progress. GREEN MindConnect Nano is onboarded to MindSphere. L2 - ERROR Blinking ORANGE Firmware update active. ORANGE No connection to the datasources ·...
-
Page 24: Led Lights Of Mindconnect Iot2040
Mounting and installing MindConnect Elements 4.4 LED lights of MindConnect Elements 4.4.2 LED lights of MindConnect IoT2040 LED lights The LED lights provide information on the status of the device for efficient self-diagnostics. MindConnect IoT2040 features the following LED lights: LED-Name Status Description... - Page 25 Mounting and installing MindConnect Elements 4.4 LED lights of MindConnect Elements Name Status Description ORANGE NO CONNECTION TO PROXY Network cable is missing or damaged · Ethernet port on MindConnect IoT2040 is damaged · “ipconfig” of MindConnect IoT2040 is incorrect ·...
-
Page 26: Troubleshooting
Check configuration of your Incorrect Asset · cannot onboard to asset (Network Configuration MindSphere Configuration). Not accomplished Asset · Configuration (Network Connection) Invalid ID of MindConnect Check if MindConnect Nano Nano ID is correct. Getting Connected to MindSphere Getting Started, 05/2018... - Page 27 4.4 LED lights of MindConnect Elements Error Problem Possible cause Possible remedy MCN L2- ERROR LED Data loss MindConnect Nano/IoT2040 Check outbound · o was too long offline, so it blinking RED connection could not send data to IoT2040 USER LED Check Ethernet cables ·...
- Page 28 Mounting and installing MindConnect Elements 4.4 LED lights of MindConnect Elements Error Problem Possible cause Possible remedy MCN L3- MAINT LED Onboarding failed Configuration file on the Make sure that the data · · ORANGE USB stick is invalid on the USB stick still is valid.
- Page 29 GREEN) and MindConnect Nano stick cannot be read or internet connection is OK, accepted by Check the diagnosis file · MindConnect Nano still MindConnect Nano: on the USB stick. cannot be onboarded to MindSphere Problems with · Check the name of the ·...
-
Page 31: Connecting Mindconnect Elements
● A slotted screwdriver with a 3 mm blade. NOTICE Power supply requirements MindConnect Nano should only be connected to a 24 V DC to power supply which satisfies the requirements of safety extra low voltage (SELV) according to IEC/EN/DIN EN/UL 60950-1. - Page 32 1. Switch off the power supply on the device. 2. Connect the cores of the power supply. 3. Insert the terminal at the indicated position. – The graphic shows how to connect the power supply for MindConnect Nano: Figure 5-1 Connecting the power supply for MindConnect Nano...
- Page 33 Connecting MindConnect Elements 5.1 Commissioning MindConnect Element – The graphic demonstrates the steps how to connect the power supply for MindConnect IoT2040: Figure 5-2 Connecting the power supply for MindConnect IoT2040 Getting Connected to MindSphere Getting Started, 05/2018...
- Page 34 5.1 Commissioning MindConnect Element 4. Power on the power supply. – For MindConnect Nano, set the on/off switch to position "I" (ON). The "PC ON/WD" LED lights up green. – For MindConnect IoT2040, switch on the power supply. The graphic shows the “PWR”...
-
Page 35: Firewall / Proxy Rules For Mindsphere
The above mentioned DNS names can be resolved to a large range of IP addresses based on the context of the caller and the state of the backend. Connecting MindConnect Nano to MindSphere network The following options are available for integrating the device in existing or planned system environments and networks. - Page 36 5.3 Connecting MindConnect Nano to MindSphere network Procedure Before you start onboarding, connect MindConnect Nano to MindSphere, as follows: Insert Ethernet cable into the port labeled with X1 P1 to connect MindConnect Nano to MindSphere. Figure 5-5 Connecting the port X1 P1 for Internet (MindSphere)
-
Page 37: Connecting Mindconnect Iot2040 To Mindsphere Network
Connecting MindConnect Elements 5.4 Connecting MindConnect IoT2040 to MindSphere network Connecting MindConnect IoT2040 to MindSphere network The following options are available for integrating the device in existing or planned system environments and networks. ① X60 port ② PN/IE LAN X1 P1 port ③... - Page 38 Connecting MindConnect Elements Procedure Before you start onboarding, connect MindConnect IoT2040 to MindSphere, as follows: Insert Ethernet cable for Internet into the port labeled with X1 P1. Figure 5-7 Connecting the port X1P1 for internet (MindSphere) Note During the onboarding process, only one USB stick is supported. Do not plug in more than one USB stick.
-
Page 39: Connecting Port X2 P1 For Mindconnect Element
To connect the MindConnect Element to your plant network or asset, insert the Ethernet cable into the port labeled with X2 P1. The following graphic shows the connecting port of the MindConnect Nano: Figure 5-8 Connecting Ethernet Port X2 P1 MindConnect Nano... -
Page 41: Onboarding Mindconnect Elements
Onboarding MindConnect Elements Overview of onboarding MindConnect Element This chapter describes the initial configuration of an asset and MindConnect Nano/IoT2040 in order to onboard MindConnect Nano/IoT2040 to MindSphere. Onboarding is the process of attaching a MindConnect Element to MindSphere. To establish the initial connection between MindConnect Nano/IoT2040 and MindSphere (onboarding), you have to configure the essential asset and MindConnect Nano/IoT2040 data. -
Page 42: Preparing Mindconnect Element
Onboarding MindConnect Elements 6.2 Preparing MindConnect Element Preparing MindConnect Element To prepare your MindConnect Element for MindSphere V3 please follow the next two steps: ● Set MindConnect to factory settings ● Load new firmware on your MindConnect Element Set MindConnect to factory settings Note This procedure is only necessary for boxes that were already connected to MindSphere V2 (SAP). - Page 43 Onboarding MindConnect Elements 6.2 Preparing MindConnect Element Load new firmware on your MindConnect Element 1. Download the firmware ZIP file from Siemens Industry Online Support Page. – Firmware download MindConnect Nano (https://support.industry.siemens.com/cs/ww/en/view/109745561) – Firmware download MindConnect IoT2040 (https://support.industry.siemens.com/cs/ww/en/view/109745562) 2. Unzip the firmware on your local machine.
-
Page 44: Logging In To Mindsphere
Logging in to MindSphere To log in to MindSphere, proceed as follows: 1. Click the link provided via mail by the Siemens AG. – The MindSphere landing page for login will appear. 2. Log in to MindSphere with your Webkey login credentials. -
Page 45: Creating An Asset
3. To create a new asset click The asset type overview window is opened. 4. Select the respective asset type for your MindConnect Element, e. g. MindConnect Nano. 5. Enter a name and the data for the asset, e. g. "Windmill1"... - Page 46 Onboarding MindConnect Elements 6.4 Creating an asset Result The new asset is available at the asset list. The following graphic shows the created asset: Getting Connected to MindSphere Getting Started, 05/2018...
-
Page 47: Enable Connection To Mindconnect Element
To enable the connection to the MindConnect Element proceed as follows: 1. Select the asset in the "Asset" tab. 2. Click on the asset icon, e. g. "MindConnect Nano". The "Create MindConnect" screen appears. 3. Enter the unique ID from your hardware. -
Page 48: Configuring Network Settings
6.6 Configuring network settings Configuring network settings Network configuration of MindConnect Nano/IoT2040 requires information on the ethernet interfaces for data acquisition (ethernet labeled with X2P1) and MindSphere (ethernet labeled with X1P1). If your company uses a proxy server, it must also be configured to connect MindConnect Nano/IoT2040 to MindSphere. -
Page 49: Transferring Configuration To Mindconnect Element
– In this case, contact your network administrator to get the proxy data. Note If nothing else is configured manually, MindConnect Nano/IoT2040 will try to obtain IP addresses for both adapters via DHCP. 6. Click on "Save", to complete the configuration. . - Page 50 Onboarding MindConnect Elements 6.7 Transferring configuration to MindConnect Element Procedure WARNING USB stick information The configuration created in this step includes security relevant information. Take care of the USB stick and the information flow from MindSphere to USB stick and from USB stick to the MindConnect Element.
- Page 51 MindConnect Element. The connection between the MindConnect Element and MindSphere is established. Once MindConnect Nano/IoT2040 is onboarded, the connection to your asset is permanent and your asset for data collection can be configured. This requires configuration of machine data to be monitored.
- Page 52 Onboarding MindConnect Elements 6.7 Transferring configuration to MindConnect Element Getting Connected to MindSphere Getting Started, 05/2018...
-
Page 53: Configuring Data In Asset Manager
Configuring data in Asset Manager After onboarding a MindConnect Element, you need to configure the data in Asset Manager. You have to set up a data connection to receive data from your MindConnect Element. In order to use the data from your MindConnect Element in MindSphere you need to a map the received data to the Asset Manager data model. - Page 54 Configuring data in Asset Manager 7.1 Creating aspects and variables Procedure To add an aspect type in Asset Manager, e. g. "Generator", follow these steps: 1. On the start screen click "Aspects". 2. To create a new aspect click 3. Enter your Tenant ID for the aspect, e. g. "idevdoc.generator". Note All custom aspects and types must be named as "<TenantID>.xxx"...
- Page 55 Configuring data in Asset Manager 7.1 Creating aspects and variables Result The new aspect type with its variables is available in the aspect list. Getting Connected to MindSphere Getting Started, 05/2018...
-
Page 56: Creating An Asset Type
Configuring data in Asset Manager 7.2 Creating an asset type Creating an asset type To enable datamapping you first have to create an asset type. An asset type is a pre- configured template for an asset. The asset type predefines which aspects are integrated into the template. - Page 57 Configuring data in Asset Manager 7.2 Creating an asset type 4. Enter ID and name for asset type, e. g. "Windmill". Note The ID must be named as "TenantID.xxx". 5. Select an aspect type from the dropdown menu, e. g. "Generator". You can find additional information on aspects in the chapter Creating aspects and variables (Page 53) 6.
-
Page 58: Adding A Datasource And Datapoints
Configuring data in Asset Manager 7.3 Adding a datasource and datapoints Result You created a new asset type. The new asset type is now available in the presets. The following graphic shows the new available asset type "Windmill" in assets. Adding a datasource and datapoints 7.3.1 Adding datasource... - Page 59 To add a datasource to an asset of type MindConnect, e. g. "Generator", follow these steps: 1. Click on the asset in the "Assets" tab, e. g. "Windmill". 2. Click on the asset icon, e. g. "MindConnect Nano". 3. Click "Add new Datasources".
-
Page 60: Adding Datapoints
To add a datapoint to a datasource, e. g. "RotationSpeed", follow these steps: 1. Click on the asset in the "Assets" tab, e. g. "Windmill". 2. Click on the asset icon, e. g. "MindConnect Nano". 3. To edit the datasource you have to click on "Enter Edit Mode". - Page 61 Configuring data in Asset Manager 7.3 Adding a datasource and datapoints 5. Enter datapoint data. Note · The units and data types specified here will need to match exactly with the aspects and variables. If they are different, the aspect cannot be connected to the datapoint. ·...
-
Page 62: Datamapping
To map a variable to a datapoint, e. g. "RotationSpeed", follow these steps: 1. Click on the asset in the "Assets" tab, e. g. "Windmill1". 2. Click on the asset icon, e. g. "MindConnect Nano". 3. Click "View Datamapping". 4. Select the aspect, e. g. "Generator". - Page 63 Configuring data in Asset Manager 7.4 Datamapping 7. Select the previously created asset type and click "Accept", e. g. "Windmill". Note You can find additional information on asset types in the chapter Creating an asset type (Page 56). Getting Connected to MindSphere Getting Started, 05/2018...
- Page 64 Configuring data in Asset Manager 7.4 Datamapping 8. Select the variable you want to link, e. g. "RotationSpeed". Note Only units and data types that match exactly with the aspects and variables are available. If they are different, the aspect can’t be connected to the datapoint(also case sensitive). 9.
- Page 65 Configuring data in Asset Manager 7.4 Datamapping Getting Connected to MindSphere Getting Started, 05/2018...
-
Page 67: Visual Analysis Of Assets In Fleet Manager
Fleet Manager. For more information refer to the MindSphere documentation. Requirements ● MindConnect Nano/IoT2040 is connected to the internet and onboarded. ● Aspects and variables are configured in Asset Manager. Procedure To see the visualized data in Fleet Manager, you can proceed as follows: 1. - Page 68 Visual analysis of assets in Fleet Manager 8.2 Selecting assets 3. To see the map view, click 4. To quickly find the created asset e.g. "Windmill", choose one of the following features: – Select the asset that is linked to your aspect and asset type. –...
- Page 69 Visual analysis of assets in Fleet Manager 8.2 Selecting assets – Or click the “Filter & sort" button to restrict the asset list. Figure 8-2 Finding the asset "Filter & sort" Result The navigation displays the selected asset that corresponds to the search or filter parameters.
-
Page 70: Viewing Aspects
Visual analysis of assets in Fleet Manager 8.3 Viewing aspects Viewing aspects After you have selected an asset to be monitored, you can open an extension to see the status of its single aspects or events in detail in the right column. To view variables of aspects Fleet Manager offers you the "Aspects"... - Page 71 Visual analysis of assets in Fleet Manager 8.3 Viewing aspects Result The "Aspects" extension shows the chosen aspect of an asset. Getting Connected to MindSphere Getting Started, 05/2018...
-
Page 72: Viewing Events
Visual analysis of assets in Fleet Manager 8.4 Viewing events Viewing events All events are displayed in an overview of the "Events" extension and you can influence the view through different filter criteria. You can also assign a specific status to events. You can find additional information on creating events in the Fleet Manager documentation. - Page 73 Visual analysis of assets in Fleet Manager 8.4 Viewing events Getting Connected to MindSphere Getting Started, 05/2018...
-
Page 75: Appendix
Appendix Overview of datatypes A.1.1 Overview of S7 datatypes Address format examples DB15.DBX6.3 Reads 3rd bit of byte 6 of datablock 15 DB15.DBB4 Reads a byte starting from offset 4 of datablock 15 DB15.DBBYTE4 Reads a byte starting from offset 4 of datablock 15 DB15.DBCHAR6 Reads a char starting from offset 6 of datablock 15 DB15.DBW10... - Page 76 Appendix A.1 Overview of datatypes Area Types S7 datapoint addresses must contain an area type. I: Process Input Reads Input value of Process image. PI: Peripheral Input Reads Input value directly from hardware. Q: Process Output Reads Input value of Process image. PQ: Peripheral Output Reads Output value directly from hardware.
- Page 77 Appendix A.1 Overview of datatypes String Datatype Length in bytes Format STRING[n] or STRING ASCII character of any length. n specifies the length of the character string. A maximum length of 254characters is permitted. If no length is specified, the default setting is 254 characters.
-
Page 78: Overview Of Opc Ua Datatypes
Appendix A.1 Overview of datatypes Format The DT (DATE_AND_TIME) datatype saves the information on date and time of day in BCD format. The following table shows the properties of datatype DT: Length (bytes) Format Range of values Example of value input Date and time (year-month-day A.1.2... - Page 79 Appendix A.1 Overview of datatypes Examples NodeId Below you can see examples of an OPC UA Addresses (NodeId) representation: String String IdentifierType Example ns=[id];s=[string] ns=5;s=Counter1 Attribute NodeId Value NodeId NamespaceIndex IdentifierType String Identifier Counter1 Note String for Identifier The string you enter at the four Identifier will be case sensitive. Numeric Numeric IdentifierType Example ns=[id];i=[number]...
- Page 80 Appendix Datatypes Conversion The following table shows the Datatype Conversion: IEC61131 elementary datatypes OPC UA built-in datatypes Required IOT Datapoint Type BOOL Boolean boolean SINT SByte USINT Byte Int16 UINT UInt16 DINT Int32 UDINT UInt32 LINT Int64 long ULINT UInt64 long BYTE Byte...
-
Page 81: Technical Specifications Of Mindconnect Nano
A.2 Technical specifications of MindConnect Nano Technical specifications of MindConnect Nano Functions Field protocol – S7 Siemens S7 (for S7-3xx / S7-4xx / ET-200s PLCs) Field protocol – OPC UA Part 8 of the OPC UA specification (Data Access) Configuration of data collection... - Page 82 Appendix A.2 Technical specifications of MindConnect Nano Interference immunity on signal ±2 kV acc. to IEC 61000-4-5, surge, length > 30 m; · cables >30m Interference immunity on signal ±1 kV acc. to IEC 61000-4-4; burst; length < 3 m;...
- Page 83 Appendix Ambient conditions Ambient temperature during operation Ambient temperature during 0 °C up to 60 °C operation min. 0 °C max. 60 °C Ambient temperature during storage/transportation min. -20 °C max. 60 °C Relative humidity Relative humidity Tested according to IEC 60068-2-78, IEC 60068-2-30: Operation: 5% to 80% at 25 °C (no condensation), Storage: 5% to 95% at 25 °C (no condensation) Vibrations Vibration load in operation...
-
Page 84: Technical Specifications Of Mindconnect Iot2040
A.3 Technical specifications of MindConnect IoT2040 Technical specifications of MindConnect IoT2040 Functions Field protocol – S7 Siemens S7 (for S7-3xx / S7-4xx / ET-200s PLCs) Field protocol – OPC UA Part 8 of the OPC UA specification (Data Access) Configuration of data collection... - Page 85 Appendix A.3 Technical specifications of MindConnect IoT2040 Interference immunity against high-frequency electromagnetic fields Interference immunity against high 10 V/m for 80 - 1000 MHz, 80% AM acc. to IEC 61000-4-3; · frequency radiation 3 V/m for 1.4 - 2 GHz, 80% AM acc. to IEC 61000-4-3; ·...
-
Page 86: Firewall Settings
In the direction to Automation Network a firewall supporting NAPT (in case of DMZ, see section “List of abbreviations”) or supporting the “Ghost-Mode” is required. Siemens offers many types of Firewalls for fulfilling these requirements. - Page 87 Appendix A.4 Firewall Settings ① Production / Machine Network ② Corporate / Office Network with route to the internet or direct internet access, e.g. via a DSL modem Getting Connected to MindSphere Getting Started, 05/2018...
-
Page 88: Esd Guideline
Appendix A.5 ESD guideline “Ghost-Mode”, also known as “Transparent Mode”, is used to protect individual, event alternating, devices by dynamically taking over the IP address. ESD guideline What does ESD mean? An electronic module is equipped with highly integrated components. Due to their design, electronic components are highly sensitive to overvoltage and thus to the discharge of static electricity. - Page 89 Appendix A.5 ESD guideline Charge Every person without a conductive connection to the electrical potential of his/her surroundings can be electrostatically charged. The material with which this person comes into contact is of particular significance. The figure shows the maximum electrostatic voltages with which a person is charged, depending on humidity and material.
-
Page 90: List Of Abbreviations
Graphical User Interface HTTPS Hyper Text Transfer Protocol Secure Internet of things IoT2040 MindConnect IoT2040 Internet Protocol Local Area Network MindConnect Nano MindSphere Unit NAPT Network Address and Port Translation Original Equipment Manufacturer OPC UA Open Platform Communications Unified Architecture Personal Computer... - Page 91 Appendix A.6 List of abbreviations Getting Connected to MindSphere Getting Started, 05/2018...
-
Page 93: Glossary
Asset Identifier is an identifier assigned by the manufacturer of the device, to which MindConnect Nano will be connected. After the onboarding process, MindConnect Nano is connected to this device. The serial number identifies the asset to which the data belongs. - Page 94 Glossary Components Components represent built-in functionality in MindSphere. Components are: ● Asset Manager ● Fleet Manager ● User Management ● UTC Reporting For the complete list and description of Components, refer to the “MindSphere” documentation. Datapoint Datapoints refer to elements (variables), which allow values to be obtained from datasources (OPC UA or S7 etc.).
- Page 95 Online indicates internet connection, when the MindConnect Nano/IoT2040 sends the data to the server. Offline mode means the absence of the internet connection and the MindConnect Nano/IoT2040 is no longer able to send data to the server. Organization Organization is the part of hierarchical asset configuration in Asset Manager. Within organization, areas/assets are specified.
- Page 96 Glossary Rule With rules you can configure an automatic monitoring of datapoints on events. For example, a request will be created automatically by the system, if a value exceeds or falls below a threshold (edge trigger). See also “event", "request". Timeseries Timeseries is a sequence of measurements which are produced by datasources over time.
Need help?
Do you have a question about the MindConnect Nano and is the answer not in the manual?
Questions and answers