Table of Contents
Advertisement
• Read this manual thoroughly, and do not perform installation,
operation, maintenance, or inspection unless you fully
understand all of the contents.
• Keep this manual in a safe place where you can refer to it
easily while installing, operating, and carrying out
maintenance or inspections.
Bench Type
User's Manual
Elevated Type
IMPORTANT
Pole Type
Hanging Type
Ver. 0.00
RS-61004-11 1.02
Advertisement
Table of Contents

Subscribe to Our Youtube Channel
Related Manuals for ISHIDA UNI-3


Summary of Contents for ISHIDA UNI-3
- Page 1 Bench Type Pole Type User’s Manual Hanging Type Elevated Type Ver. 0.00 IMPORTANT • Read this manual thoroughly, and do not perform installation, operation, maintenance, or inspection unless you fully understand all of the contents. • Keep this manual in a safe place where you can refer to it easily while installing, operating, and carrying out maintenance or inspections.
- Page 2 © ISHIDA Co., Ltd. 2013 All rights are reserved. No part of this publication may be reproduced, stored in a retrieval system, or transmitted in any form or by any means mechanical, electronic, photocopying, recording, or otherwise without prior written permission of ISHIDA.
-
Page 3: Before Use
ϕ40 mm ±1 mm Paper core inside diameter Others Power supply 100 to 240 VAC, 50/60Hz Temperature: -5 to 40°C Use conditions Humidity: 20 to 85%, non-condensing. Input / Output LAN: 1 channel USB: 1 channel RS-232C: 1 channel Uni-3 User’s Manual... -
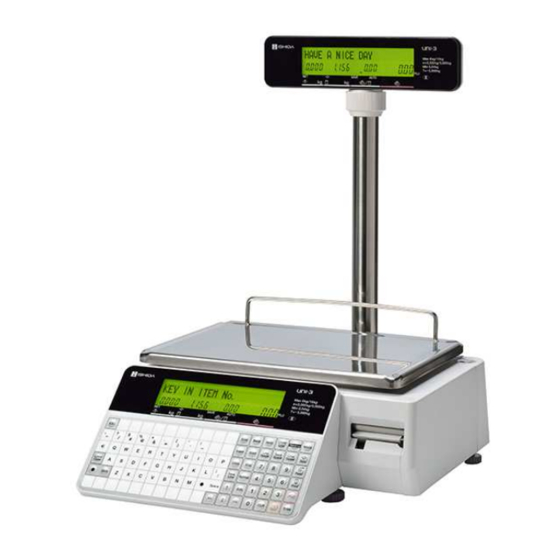
Page 4: Part Names
Chapter 1: BEFORE USE PART NAMES Bench Type Uni-3 User’s Manual... - Page 5 Used to move the cursor or turn Used to issue a label. pages. Used to move the cursor or turn Used to enter tare weight. pages. Used to escape from the current Used to reset a weigh to zero. mode. Uni-3 User’s Manual...
-
Page 6: Level Adjustment
Be sure to turn off the power switch before placing the machine on a stable platform, and adjust the machine inclination by turning the four level adjustment legs so that the bubble is located at the center of the level gauge. Accurate measurements cannot be performed if it is not installed horizontally. Uni-3 User’s Manual... -
Page 7: Label / Receipt Roll Loading
Ensure that nothing is placed on the weighing platter. Set a new roll around the roll holder and raise the roll stopper to fix the roll position. Twist the lever as shown in the figures below to unlock the thermal head. Uni-3 User’s Manual... - Page 8 Thread the paper as shown in the figures below. For labels, fix the paper end with the backing paper stopper, and gently turn the winding bobbin clockwise until the label becomes tight. Winding bobbin Push the lever to lock the thermal head. Uni-3 User’s Manual...
- Page 9 Press the [FEED] key to issue a label. At this time, confirm that the label is completely peeled off. Confirm that the backing paper is wound up smoothly. If the backing paper is wound up diagonally, check that the label is set correctly. Uni-3 User’s Manual...
- Page 10 When replacing the weighing platter onto the main body, engage the two hooks at the rear side of the platter and lower the platter so that the two pins on the bottom of the platter are inserted into holes of the rubber platter holders. Uni-3 User’s Manual...
-
Page 11: Precautions When Using Cleaning Fluids
Do not give the victim anything to drink, and do not rinse the mouth. If vomiting occurs naturally, have the victim lean forward to reduce risk of aspiration. Keep the victim warm and seek medical attention. 1-10 Uni-3 User’s Manual... -
Page 12: Starting Procedures
To get back to the initial screen from a Menu The initial screen is displayed. selection screen, press the [Mode] button” at Note: The contents of the initial screen may differ the key pad. depending on the settings on your machine. Uni-3 User’s Manual 1-11... -
Page 13: Operation Mode
Enter “2000” using the numerical keypad and press the [Mode]. Note: The contents of the initial display may differ depending on the settings on your machine. The “Adjustment Mode” display appears. Note: To exit the Adjustment Mode, just press the [Mode] key. UNI-3 User’s Manual... - Page 14 Chapter 2: OPERATION MODE SCREEN EXAMPLES FOR PRODUCT CATEGORIES Weighing Products Weighing Fixed Price Products Non-weighing Fixed Price Products UNI-3 User’s Manual...
- Page 15 EXAMPLE A product to which its unit price and tare weight were set beforehand. The product is weighed and its total price is calculated. Press the [PRINT] key to issue a label. Non-traceable products Traceable products UNI-3 User’s Manual...
- Page 16 Put the product on the weighing platter. displayed. EXAMPLE A product to which its tare weight and price were set beforehand. The product is weighed, but its price stays the same. Press the [PRINT] key to issue a label. Non-traceable products Traceable products UNI-3 User’s Manual...
- Page 17 Note: If “ZERO” is not indicated on the screen, press [ 0 ] on the keypad. EXAMPLE PLU No.1 The designated non-weighing PLU screen is Press the [PRINT] key to issue labels. displayed. Non-traceable products Traceable products Note: To stop printing, press the [PRINT] key again. UNI-3 User’s Manual...
- Page 18 Put the product on the weighing platter. EXAMPLE A product to which its unit price and tare weight were set beforehand. The product is weighed and its total price is calculated. Press an operator button to issue a label. Non-traceable products Traceable products UNI-3 User’s Manual...
-
Page 19: Issuing Receipts By The Same Operator
PLU No.1 (weighing product) The designated weighing PLU screen is Put the product on the weighing platter. displayed. Press the [RECEIPT SUB-TOTAL] key to The subtotal screen for the designated complete the registration. operator appears on the screen. UNI-3 User’s Manual... - Page 20 Press [Mode] key to return and enter the PLU The subtotal screen is displayed. number. EXAMPLE PLU No.101 (fixed price product) Press the [RECEIPT SUB-TOTAL] key to confirm the sales data. UNI-3 User’s Manual...
- Page 21 Chapter 2: OPERATION MODE Press the [PRINT] key to issue a receipt. UNI-3 User’s Manual...
-
Page 22: Issuing Receipts By Different Operators
Press [Mode] key to return and enter the The designated PLU screen is displayed. PLU number. EXAMPLE PLU No.101(fixed price product) Press an operator key. The subtotal screen for the designated operator is displayed. EXAMPLE Operator “BETTY” 2-10 UNI-3 User’s Manual... - Page 23 The subtotal screen for the designated operator is displayed. Now, “BETTY” is back again. The designated PLU screen is displayed. Press [Mode] key to return and enter the PLU number. EXAMPLE PLU No. 201(weighing fixed price product) UNI-3 User’s Manual 2-11...
- Page 24 Chapter 2: OPERATION MODE Put the product on the weighing platter. Press an operator button. EXAMPLE Operator “BETTY” Press an operator button. The subtotal screen for the designated operator is displayed. EXAMPLE Operator “BETTY” 2-12 UNI-3 User’s Manual...
- Page 25 Chapter 2: OPERATION MODE Press the [RECEIPT SUB-TOTAL] key to Press the [PRINT] key to issue a receipt. confirm the sales data. UNI-3 User’s Manual 2-13...
-
Page 26: Voiding Product Registrations
"Sub-Total" screen. The confirmation screen is displayed. The designated product registration has been Then, press [Enter] to continue, or [ESC] to voided. go back. Press the [PRINT] key to issue a receipt. 2-14 UNI-3 User’s Manual... - Page 27 Chapter 2: OPERATION MODE Deleted by a dashed line UNI-3 User’s Manual 2-15...
-
Page 28: Entering Or Overwriting Tare Weights
Enter a numerical value and press the displayed. [ T ] (Tare) key. EXAMPLE Tare weight “50 g” 2.3.10 CHANGING UNIT PRICES Ensure that the designated PLU screen is Enter the unit price and press the [UNIT displayed. PRICE] key. EXAMPLE “$1.56” 2-16 UNI-3 User’s Manual... - Page 29 PRICE] key. EXAMPLE “$10.00” Fixed Price Products 2.3.12 DISCOUNTING UNIT PRICES BY AMOUNT Ensure that the designated PLU screen is Enter the amount to be discounted, and displayed. press the [-$ (U/P)] key. EXAMPLE Discount amount “$0.50”. UNI-3 User’s Manual 2-17...
- Page 30 [-% (U/P)] key. EXAMPLE Discount percentage “10%”. 2.3.14 DISCOUNTING TOTAL PRICES BY AMOUNT Ensure that the designated PLU screen is Enter a discount amount using the numeric displayed. keys, and press the [-$] key. EXAMPLE Discount amount “$0.50”. 2-18 UNI-3 User’s Manual...
- Page 31 Enter the discount percentage, and press the displayed. [-%] key. EXAMPLE Discount percentage “10%”. 2.3.16 CHANGING QUANTITIES Ensure that the designated price PLU screen Enter the quantity and press the [MULTI] key. is displayed. EXAMPLE Quantity “3 pieces” UNI-3 User’s Manual 2-19...
-
Page 32: Specifying The Number Of Labels
Enter the number of labels to be printed and displayed. press the [PRINT] key to print labels. . EXAMPLE “3 labels” Note: To interrupt the issue of labels, press the [PRINT] key again. To restart the issue of labels, press the [PRINT] key again. 2-20 UNI-3 User’s Manual... -
Page 33: Total Mode
Enter “9000” using the numerical keypad and press the [MODE] key to call up the “Total” display. Note: The contents of the initial screen may differ depending on the settings on your machine. Note: To exit the Total Mode, press the [Menu] button. UNI-3 User’s Manual... -
Page 34: Daily Totals
To display the “Production Daily Total To display the “Production Daily Total (PLU)” (Group)” screen, press the [↑] or [↓] key to screen, press the [↑] or [↓] key to choose. choose. Then, press [Print] key to print the data. UNI-3 User’s Manual... - Page 35 To display the “Production Daily Total (Rewrap)” screen, press the [↑] or [↓] key (Promotion)” screen, press the [↑] or [↓] to choose. Then, press [Print] key to print key to choose. Then, press [Print] key to the data. print the data. UNI-3 User’s Manual...
- Page 36 Then, Press [Enter] key. Press [Print] key to print the data. To display the “Production Weekly Total” total for the day-of-the week, press the [↑] or [↓] key to choose. Then, press [Print] key to print the data. UNI-3 User’s Manual...
- Page 37 [↓] key to choose. Then, press [Print] key to key to print the data. print the data. To display total for operators, press the [↑] or [↓] key to choose. Then, press [Print] key to print the data. UNI-3 User’s Manual...
- Page 38 Then, press [Print] key to print key to choose. Then, press [Print] key to print the data. the data. To cumulative daily totals, press the [↑] or [↓] key to choose. Then, press [Print] key to print the data. UNI-3 User’s Manual...
-
Page 39: Total Clear
Then, press [→0←] key to clear the data. The confirmation screen is displayed. The confirmation screen is displayed. Press [Enter] to continue, or [Esc] to go back. Press [Enter] to continue, or [Esc] to go back. UNI-3 User’s Manual... -
Page 40: Program Mode
[Mode] key to call up the “Program Mode” display. Note: The contents of the initial display may differ depending on the settings on your machine. Note: To exit the Program Mode, press the [Mode] button. UNI-3 User’s Manual... - Page 41 PLU data. The “PLU Name Edit” screen is displayed. Press [Enter] to return. Edit text according to the procedure described in Appendix “Text Editing”. Press [Enter] to call up the lower level menu. UNI-3 User’s Manual...
- Page 42 Enter the mode number and Press [Enter] to select whether or not to use FORCED TARE the forced tare function. Enter the lower weight limit and press [Enter]. LOWER WEIGHT UPPER WEIGHT Enter the upper weight limit and press [Enter]. UNI-3 User’s Manual...
- Page 43 POINT FLAG 0: OFF 1: ON Enter the mode number and Press [Enter] to select a desired point type. POINT TYPE 0: Weight 1: Fixed weight POINTS Enter a desired number and press [Enter]. UNI-3 User’s Manual...
- Page 44 Chapter 4: PROGRAM MODE Press [Mode] to return. Press [→] twice to call up the “Message” display. Press [PLU] to call up the lower level menu. Press [Enter] to call up the lower level menu. UNI-3 User’s Manual...
- Page 45 Chapter 4: PROGRAM MODE Press [↑] or [↓] to select a desired menu. Enter a desired message number and press [Enter] to set. Press [Mode] to return. Press [PLU] to call up the lower level menu. UNI-3 User’s Manual...
- Page 46 Press [↑] or [↓] to select a desired menu. Enter a desired image number and press [Enter] to set. Enter the mode number and Press [Enter] to select whether or not to print the image in the “Safe Handling Image Print” display. UNI-3 User’s Manual...
- Page 47 Enter the mode number and Press [Enter] to select whether or not to print the first label. 1st LABEL PRINT 1: Yes 2: No Enter the mode number and Press [Enter] to select whether or not to print the second label. 2nd LABEL PRINT 1: Yes 2: No UNI-3 User’s Manual...
- Page 48 SB TIME PRINT 0: No print 1: Designated time 2: Relative time This field is available only when “Yes” is selected in “SB TIME PRINT”. SB TIME DATA and Press [Enter] Enter the number of hours UNI-3 User’s Manual...
- Page 49 Enter a barcode number and press [Enter]. Enter the mode number and Press [Enter] to select a desired reference method. POS REFERENCE 0: Refer 1: PLU file Enter a desired PLU type number and Press [Enter] BARCODE TYPE 4-10 UNI-3 User’s Manual...
- Page 50 F1C6W5d F1C4P7d F1C5I6d F1I6P5/10d F2C6P4d* F2I6P4/10d F2C6W4d* F1C6P5/10d F2C4wW5d F2C6P4/10d F2C5Q5d F2C5oP4d F2C5W5d F2S1R3pP5d F2C5P5/10d F2S1C3pP5d DEPARTMENT No. Enter a desired department number and Press [Enter] Enter a desired group number and Press [Enter] GROUP No. UNI-3 User’s Manual 4-11...
-
Page 51: Operator Data
The “Operator / Detail” screen is displayed. The Operator / Detail Edit screen is displayed To register the operator name, press [Edit]. for the designated operator number. Edit text according to the procedure described in Appendix “Text Editing”. 4-12 UNI-3 User’s Manual... - Page 52 Enter the 4-digit numerical value and press [Enter]. Press [Mode] to finish the editing. The confirmation screen is displayed. To confirm changes, press [Enter]. To undo changes, press [Esc]. The edited data has been registered. UNI-3 User’s Manual 4-13...
-
Page 53: Preset Key Registration
Press a desired key to register the function. If the function is including PLU data to select, Press the desired key again. Then, the preset enter the desired data number. Others, enter [0] key has been registered. 4-14 UNI-3 User’s Manual... -
Page 54: Store Data
Store data. The “Store / Name Edit” screen is displayed To finish the editing, press [Enter]. for the selected store number. Edit text according to the procedure described in Appendix “Text Editing”. UNI-3 User’s Manual 4-15... - Page 55 Edit text according to the procedure described in Appendix “Text Editing”. Then, press [Edit]. To finish the editing, press [Enter]. The confirmation screen is displayed. To confirm changes, press [Enter]. To undo changes, press [ESC]. 4-16 UNI-3 User’s Manual...
- Page 56 Store data. The “Store / Name Edit” screen is displayed for To finish the editing, press [Enter]. the selected store number. Edit text according to the procedure described in Appendix “Text Editing”. UNI-3 User’s Manual 4-17...
- Page 57 Chapter 4: PROGRAM MODE The confirmation screen is displayed. To confirm changes, press [Enter]. To undo changes, press [ESC]. 4-18 UNI-3 User’s Manual...
- Page 58 Store data. The “Store / Name Edit” screen is displayed for To finish the editing, press [Enter]. the selected store number. Edit text according to the procedure described in Appendix “Text Editing”. UNI-3 User’s Manual 4-19...
- Page 59 Chapter 4: PROGRAM MODE The confirmation screen is displayed. To confirm changes, press [Enter]. To undo changes, press [ESC]. 4-20 UNI-3 User’s Manual...
- Page 60 Store data. The “Store / Name Edit” screen is displayed for To finish the editing, press [Enter]. the selected store number. Edit text according to the procedure described in Appendix “Text Editing”. UNI-3 User’s Manual 4-21...
- Page 61 Chapter 4: PROGRAM MODE The confirmation screen is displayed. To confirm changes, press [Enter]. To undo changes, press [ESC]. 4-22 UNI-3 User’s Manual...
- Page 62 Store data. The “Store / Name Edit” screen is displayed for To finish the editing, press [Enter]. the selected store number. Edit text according to the procedure described in Appendix “Text Editing”. UNI-3 User’s Manual 4-23...
- Page 63 Chapter 4: PROGRAM MODE The confirmation screen is displayed. To confirm changes, press [Enter]. To undo changes, press [ESC]. 4-24 UNI-3 User’s Manual...
- Page 64 Store data. The “Store / Name Edit” screen is displayed for To finish the editing, press [Enter]. the selected store number. Edit text according to the procedure described in Appendix “Text Editing”. UNI-3 User’s Manual 4-25...
- Page 65 Chapter 4: PROGRAM MODE The confirmation screen is displayed. To confirm changes, press [Enter]. To undo changes, press [ESC]. 4-26 UNI-3 User’s Manual...
- Page 66 Store data. The “Store / Name Edit” screen is displayed To finish the editing, press [Enter]. for the selected store number. Edit text according to the procedure described in Appendix “Text Editing”. UNI-3 User’s Manual 4-27...
- Page 67 Chapter 4: PROGRAM MODE The confirmation screen is displayed. To confirm changes, press [Enter]. To undo changes, press [ESC]. 4-28 UNI-3 User’s Manual...
- Page 68 Store data. The “Store / Name Edit” screen is displayed To finish the editing, press [Enter]. for the selected store number. Edit text according to the procedure described in Appendix “Text Editing”. UNI-3 User’s Manual 4-29...
- Page 69 Chapter 4: PROGRAM MODE The confirmation screen is displayed. To confirm changes, press [Enter]. To undo changes, press [ESC]. 4-30 UNI-3 User’s Manual...
- Page 70 Press [ENTER] to call up the lower level menu. Press [↓] to call up the “Check Label Print” The “Start/End Number” display appears. display. ● ● ● Then, press [Print]. Enter a desired start/end number and press [Enter]. UNI-3 User’s Manual 4-31...
- Page 71 Press [↓] repeatedly to call up the “Stamp appearing. Price” display. ● ● ● Press [ENTER] to call up the lower level menu. The “Stamp/Reference Price” display appears. Enter a desired Stamp/Reference price and press [Enter]. 4-32 UNI-3 User’s Manual...
-
Page 72: Text Editing
Appendix: TEXT EDITING TEXT EDITING OPERATION PANEL UNI-3 User’s Manual... - Page 73 Used to insert a character, or select characters followed by Used to finalize editing a text. depressions of the [→] or [←] key. Used to copy the original data to the current data. UNI-3 User’s Manual...
- Page 74 Upper-case characters Lower-case characters To begin a new line, press the [New Line] key. Enter desired characters. The confirmation screen is displayed. To register the editing, press [Enter]. To confirm changes, press [Enter]. To undo changes, press [ESC]. UNI-3 User’s Manual...
-
Page 75: Font Style Selection
Note: The selected font style is displayed as the small triangle. Enter desired characters using alpha-numeric keys. The confirmation screen is displayed. Press [Enter] to register the editing. To confirm changes, press [Enter]. To undo changes, press [ESC]. UNI-3 User’s Manual... -
Page 76: Line Data Deletion
Press the [Line Delete] key to delete the line The line data has been deleted. data. Press the Return button to register the deletion. The confirmation screen is displayed. To confirm changes, press [Enter]. To undo changes, press [ESC]. UNI-3 User’s Manual... -
Page 77: Character Deletion
Note: See the right-bottom area of the display to check where the cursor is. Enter the correct character using the Press [Enter] to register the editing. alpha-numeric keys. The confirmation screen is displayed. To confirm changes, press [Enter]. To undo changes, press [ESC]. UNI-3 User’s Manual... -
Page 78: Character Backspacing
[Back Space] key on the key sheet to move the cursor back by one character. Complete the text. Press [Enter] to register the editing. The confirmation screen is displayed. To confirm changes, press [Enter]. To undo changes, press [ESC]. UNI-3 User’s Manual...
Need help?
Do you have a question about the UNI-3 and is the answer not in the manual?
Questions and answers