Table of Contents
Advertisement
Advertisement
Table of Contents
Troubleshooting

Related Manuals for FLIR Ariel CM-3304 Series


Summary of Contents for FLIR Ariel CM-3304 Series
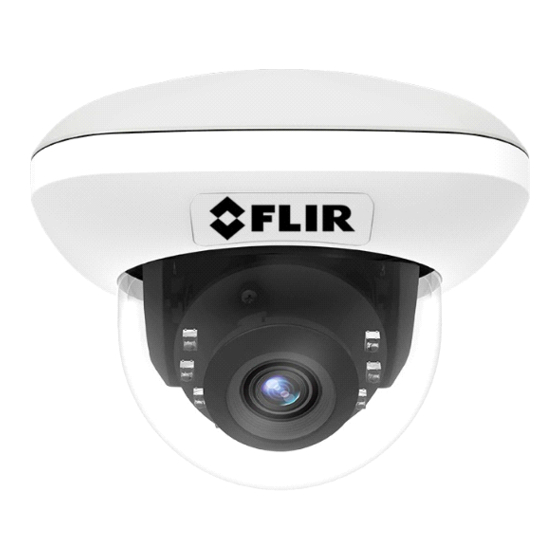
- Page 1 Ariel Gen III User and Installation Guide CM-3304/CM-3308 Ver. 5 March 10, 2019...
- Page 2 © 2019 FLIR Systems, Inc. All rights reserved worldwide. No parts of this manual, in whole or in part, may be copied, photocopied, translated, or transmitted to any electronic medium or machine readable form without the prior written permission of FLIR Systems, Inc.
- Page 3 Business users should contact their supplier or refer to their purchase contract. Document History Version Date Comment Ver 0.1 September 11, 2017 Initial FLIR Release Ver 0.3 Dec 2018 Firmware upgrade (Analytics) SD Card min/max Ver 0.4...
-
Page 4: Table Of Contents
Table of Contents Table of Contents 1. Document Scope and Purpose ..................1 Accessing General Camera Information ..............6 2. Introduction ........................7 Features ....................... 7 Package Contents ....................8 3. Hardware Description ....................9 Dimensions ......................9 3.1.1 CM-3304 Camera Dimensions ................9 3.1.2 CM-3308 Varifocal Camera Dimensions .............. - Page 5 Table of Contents Table of Contents 5.3.1.3 User Accounts ........................41 5.3.1.4 Network ............................ 43 5.3.1.4.1 General ..........................44 5.3.1.4.2 FTP Server ........................46 5.3.1.4.3 RTSP ..........................47 5.3.1.4.4 SNMP ..........................49 5.3.1.4.5 802.1X ..........................50 5.3.1.4.6 IP Filter ..........................52 5.3.1.4.7 DDNS ..........................
- Page 6 Table of Contents Table of Contents 5.3.1.6.6.2 Border Line ........................76 5.3.1.6.6.3 Loitering ........................80 5.3.1.6.6.4 Area Protection ......................81 5.3.1.6.6.5 Object Removal ......................82 5.3.1.6.6.6 Object Dropped ......................83 5.3.1.6.6.7 Advanced Options ....................... 85 5.3.1.6.6.8 Analytics Actions ......................87 5.3.1.6.6.9 Analytics Troubleshooting ..................
-
Page 7: Document Scope And Purpose
Document Scope and Purpose 1 Document Scope and Purpose The purpose of this document is to provide instructions and installation procedures for physically connecting the CM-330X unit. After completing the physical installation, additional setup and configurations are required before video analysis and detection can commence. Note: This document is intended for use by technical users who have a basic understanding of CCTV camera/video equipment and LAN/WAN network connections. - Page 8 Document Scope and Purpose Disclaimer Avis de non-responsabilité Users of FLIR products accept full responsibility for Il incombe aux utilisateurs des produits FLIR de ensuring the suitability and considering the role of vérifier que ces produits sont adaptés et d'étudier the product detection capabilities and their le rôle des capacités et limites de détection du...
- Page 9 A Tip is information and best practices that are useful or provide some benefit for installation and use of FLIR products. Un Conseil correspond à une information et aux bonnes pratiques utiles ou apportant un avantage supplémentaire pour l'installation et l'utilisation des produits FLIR. General Cautions and Warnings Précautions et avertissements d'ordre général...
- Page 10 Document Scope and Purpose Warning: · The unit’s cover is an essential part of the product. Do not open or remove it. · Never operate the unit without the cover in place. Operating the unit without the cover poses a risk of fire and shock hazards.
- Page 11 Document Scope and Purpose Caution: To avoid damage from overheating or unit failure, assure that there is sufficient temperature regulation to support the unit’s requirements (cooling/heating). Operating temperature should be kept in the range -40° to 50°C (-40° to 122°F), with no more than 90% non-condensing humidity. Attention: Afin d'éviter tout dommage dû...
-
Page 12: Accessing General Camera Information
Document Scope and Purpose Accessing General Camera Information Detailed Camera information is available on the FLIR website, accessible by navigating to /Products, /Security, /Visible Security Cameras, and selecting the required camera. CM-3304/CM-3308 User and Installation Guide March 10, 2019... -
Page 13: Introduction
Introduction 2 Introduction This User and Installation Guide is intended to help you physically install, configure settings for and operate the CM-330X indoor/outdoor mini-dome IP camera. The unit is a day/night camera with a 4MP (CM- 3304) or 8MP (CM-3308) sensor and includes an IR cut filte, audio line in and alarm in. It supports four streams: 4MP or 8MP, Full HD 1080p, HD 720p, and D1 with H.265, H.264 or MJPEG compression. -
Page 14: Package Contents
Introduction · · · ONVIF support Infrared LED illuminator 3DNR image noise reduction · · · IP67 enclosure with IK10 Built-in heater Low-lux mode without IR vandal-proof protection · Up to 9 users Package Contents The unit package contains the following items: Item CM-3304 CM-3308... -
Page 15: Hardware Description
Hardware Description 3 Hardware Description Dimensions · CM-3304 Camera Dimensions · CM-3308 Varifocal Camera Dimensions 3.1.1 CM-3304 Camera Dimensions Following are the CM-3304 camera dimensions: Figure 2: Fixed Focal Side Dimensions Figure 3: Base Dimensions The CM-3304 camera includes a network cable with an RJ45 Ethernet jack. The cable includes an LED that flashes green to indicate power on and network activity. -
Page 16: Cm-3308 Varifocal Camera Dimensions
Hardware Description 3.1.2 CM-3308 Varifocal Camera Dimensions Following are the CM-3308 motorized varifocal camera’s dimensions. Figure 4: Side Dimensions Figure 5: Varifocal Base Dimensions CM-3304/CM-3308 User and Installation Guide March 10, 2019... -
Page 17: System Requirements
Hardware Description The CM-3308 camera includes a built-in system cable that includes an RJ-45 Ethernet jack and two (2) two-wire leads that provide an audio-in connection and an alarm-in connection. The cable includes an LED that flashes green to indicate power on and network activity. The link is not illuminated if there is no network activity. -
Page 18: Installing And Connecting The Camera
Installing and Connecting the Camera 4 Installing and Connecting the Camera This section describes how to install and connect the unit. It includes the following topics: · Pre-Installation Checklist · Outdoor Mounting Recommendations · Mounting Instructions · Powering the Camera ·... -
Page 19: Mounting Instructions
Installing and Connecting the Camera · Plan ahead to determine where to install infrastructure weatherproof equipment. Whenever possible, ground components to an outdoor ground. Mounting Instructions Follow the instructions in Installation Guides listed in the Related Information section of the Package Contents section. - Page 20 Installing and Connecting the Camera 3. Fix the mounting base on the surface with screws. Figure 9: Dome Ceiling Installation CM-3304/CM-3308 User and Installation Guide March 10, 2019...
- Page 21 Installing and Connecting the Camera 4. If you are mounting the camera on a solid surface, attach the included spacer to the base of the camera. Figure 10: Spacer Attached to Camera Base 5. Align the holes of the spacer with the holes in the base of the camera. Use the appropriate mounting hardware for your surface.
-
Page 22: Powering The Camera
Installing and Connecting the Camera 6. Loosen the tilt lock screws, adjust the tilting position in a range of 65 degrees, and tighten the tilt lock screws. Rotate the black liner to adjust the panning position in a range of 360 degrees until getting the desired surveillance angle. -
Page 23: Connecting The Camera To The Network
4.4.2 Configuring the Unit’s Initial IP Address Use the FLIR DNA utility to discover the unit on the network and to set the unit’s initial IP address. · If the camera is managed by FLIR’s Horizon or Meridian VMS and is configured as a DHCP server, Horizon or Meridian automatically assigns the camera an IP address. - Page 24 Installing and Connecting the Camera 3. Click on the unit in DNA’s Discover List. The CM-330X Login window opens. Figure 14: Login Window 4. If the camera cannot connect to a DHCP server, enter the unit’s default IP address (192.168.0.250). 5.
- Page 25 Installing and Connecting the Camera Figure 17: Corrupt/Invalid Signature · Follow these steps in order to install the Player: a. Click View downloads. The View Downloads screen opens. Figure 18: View Downloads Screen b. Right-click on the ArielPlayer.msi file. Figure 19: Run Anyway Option CM-3304/CM-3308 User and Installation Guide March 10, 2019...
- Page 26 Installing and Connecting the Camera c. Select “Run anyway”. The normal installation process starts. 8. Click Run on the information bar to install the Ariel Player plug-in. The Windows Installer opens and the Ariel Player Wizard dialog box is displayed. Figure 20: Ariel Player Setup Wizard Screen 1 9.
- Page 27 Installing and Connecting the Camera Figure 22: Ariel Player Setup Wizard Screen 3 10. Click Close when the Installation Complete dialog box is displayed. Figure 23: Ariel Player Setup Wizard Screen 4 11. After the download has completed, a second information bar opens. Figure 24: Run Ariel Player Plug-in Information Bar CM-3304/CM-3308 User and Installation Guide March 10, 2019...
- Page 28 Installing and Connecting the Camera 12. Click Run. · If you promptly close your browser, the Live View screen is displayed. Figure 25: Live View Screen · If you do not promptly close your browser, a dialog box opens, prompting you to restart your computer, in order to save changes.
- Page 29 Installing and Connecting the Camera 5. Enter the unit’s default IP address (192.168.0.250), Subnet mask, and Gateway IP address in the respective field. 6. Click Update. The unit reboots with the new settings. 7. Click on the unit in DNA’s Discover List. The camera’s Login window opens. Figure 14: Login Window (page 21).
-
Page 30: Inserting And Configuring The Microsd Card
Installing and Connecting the Camera 4.4.3 Inserting and Configuring the microSD Card A microSD card (not supplied) (Min recommended 4GB, up to 128GB, Class 10) must be inserted in the camera in order to locally store a snapshot or recording triggered by an event. The microSD card slot is located on a printed circuit board inside the camera housing. -
Page 31: Resetting The Camera
Installing and Connecting the Camera 4.4.4 Resetting the Camera The camera includes a reset button, which is located on the camera’s printed circuit board (PCB), along with the camera’s microSD card slot. Figure 28: Camera Reset Button/MicroSD Slot To reboot the camera (Partial Reset) Press the Default button for approximately five seconds. -
Page 32: Accessing The Cm-330X Via A Web Browser
Accessing the CM-330X via a Web Browser 5 Accessing the CM-330X via a Web Browser The CM-330X includes a web interface that enables it to be configured and operated from a web browser (32-bit version of Internet Explorer 10 and above). To access the unit via the web browser 1. -
Page 33: Cm-330X Web Interface
Accessing the CM-330X via a Web Browser CM-330X Web Interface Figure 30: CM-330X-11-I Live View Screen with Callouts The following information is displayed in the upper right corner of the GUI: · Language Bar – Select the language for the web interface: English, Arabic, Czech, Simplified Chinese, Traditional Chinese, French, German, Hungarian, Italian, Japanese, Polish, Portuguese, Russian, or Spanish ·... -
Page 34: Live View
Accessing the CM-330X via a Web Browser Item Description Click the Mic button to enable the local site to talk to the remote site. This function is available only to an Operator or Administrator. Click the button to switch it on/off. The button Mic button allows the user to listen to audio streaming over the web if (a) audio is enabled and (b) if an audio event is enabled and... -
Page 35: Recording
Accessing the CM-330X via a Web Browser 5.2.1 Recording Manual recordings (which are triggered from the Live View screen) are stored on the PC. To start recording a Live View scene 1. Click the red Manual Recording icon on the toolbar. The camera starts recording. A red dot is displayed in the upper right corner of the Live View window, under the date and time display. -
Page 36: Viewing Live Video From A Media Player
Accessing the CM-330X via a Web Browser Snapshots that are triggered by events (such as motion detection) are stored on the camera’s microSD card, which can store up to 128GB of data. The card is not included. To view a triggered event snapshot 4. -
Page 37: Basic Video Analytics
Accessing the CM-330X via a Web Browser · The syntax for entering the URL in the media player for the third stream is: rtsp://(camera IP address)/(Unicast stream 3) or (Multicast stream 3). For example, rtsp:// 192.168.0.250/stream3m for a multicast stream. Note: 1. - Page 38 Accessing the CM-330X via a Web Browser Under the "Video Analytics" heading is the name of the current active analytic rule. The rule options are: Counting Border Line Loitering Area Protection Object Removal Object Dropped When "Draw Analytics Overlay" is checked, it will show the configured drawing for that rule. The rule cannot be edited from the Live page.
-
Page 39: Settings
Accessing the CM-330X via a Web Browser Clicking Reset Scene will relearn the scene and the background in case the scene has changed or the camera has been moved. Settings Device and client PC parameters are set from the Settings tab in the navigation bar. Upon clicking Settings, the Settings menu is displayed in the sidebar. -
Page 40: Lens Control
Accessing the CM-330X via a Web Browser 5.3.1.1 Lens Control The Lens Control screen enables control of the lens zoom and focus functions. Figure 36: CM-330X-11-I Lens Control Screen To set the zoom control 1. In the Zoom Control section, move the slider to the desired zoom between Wide (1.00) to Tele (3.00). -
Page 41: Basic Configuration
Accessing the CM-330X via a Web Browser To manually set the focus 3. In the Focus Control section, move the slider to the desired focus between Far (1) to Near (100). 4. From the Step drop-down list, select the number of steps to set the focus: 1, 2, 4, 8, 16, 32, 64, or 128. -
Page 42: Audio
Accessing the CM-330X via a Web Browser To change the date and time 1. Select one of the following options · Manual Settings – Enter the date and time in the respective field. · Synchronize with PC – Enter the date and time in the respective field. ·... -
Page 43: Firmware
Accessing the CM-330X via a Web Browser 5.3.1.2.3 Firmware The Firmware screen displays and is used to update the system firmware, and to display the hardware version, product name (model number), product serial number, and product MAC address. To access the Firmware screen, select Basic Configuration >... -
Page 44: Basic Operations
Accessing the CM-330X via a Web Browser 5.3.1.2.4 Basic Operations The Basic Operations screen is used for the following functions: · Setting the TV format · Importing settings from another unit · Exporting settings to another unit · Rebooting the camera ·... - Page 45 Accessing the CM-330X via a Web Browser 6. Click Save in the information bar to save the file. To reboot the camera 7. Click Reboot. The camera reboots. After the reboot finishes, a popup window opens with the message “Rebooting complete”. 8.
-
Page 46: Osd
Accessing the CM-330X via a Web Browser 5.3.1.2.5 OSD The OSD (On-Screen Display) screen is used for setting the background color, text color, and location for displaying the date or text in two configurable locations on the Live View window. It is also possible to set the background color and text color to display upon the occurrence of an event. -
Page 47: User Accounts
Accessing the CM-330X via a Web Browser 2. In the Basic Settings section, configure the following settings for OSD-1 and OSD-2: · Enable – From the drop-down list, select one of the following: · Date – Enables you to enter the date to display. ·... - Page 48 Accessing the CM-330X via a Web Browser The following privileges are assigned to each access level: · An Administrator has access to all screens. By default, the camera includes the Administrator access level. There can be more than one Administrator. The default Administrator cannot be deleted.
-
Page 49: Network
Accessing the CM-330X via a Web Browser 6. Select Operator or User, and enter the User Name and Password. Figure 49: Filled Access Level Dialog Box 7. Click Save. The new Operator or User name is displayed in the Account Setting list Figure 50: Updated Account Setting List To modify an operator or user 8. -
Page 50: General
Accessing the CM-330X via a Web Browser 5.3.1.4.1 General The General screen is used for configuring most network settings. Figure 51: Network > General Screen To configure basic settings 1. In the Basic Settings section, do the following: a. In the Device Name text box, enter a friendly name for the camera. b. - Page 51 Accessing the CM-330X via a Web Browser 2. Click View to view current network settings. The Internet Explorer Basic Settings dialog box opens, displaying network interface information, including Ethernet connection speed, Ethernet NIC MAC address, unit IP address, multicast address, and subnet mask. In the case of an IPv6 connection, the IPv6 address and IPv6 DNS address also are displayed.
-
Page 52: Ftp Server
Accessing the CM-330X via a Web Browser n. Subnet Prefix Length – If you are using IPv6, enter the subnet prefix length (1-128 digits) for the IPv6 Default Router Address. o. IPv6 DNS – If you are using IPv6, enter the IPv6 DNS address. To configure the Wire Setting 4. -
Page 53: Rtsp
Accessing the CM-330X via a Web Browser To access the FTP server 1. From the Enable drop-down list, select ON. The default is OFF. Figure 54: Network > FTP Screen 2. Click Save. Note: Even when set to Off, recordings and snapshots will still be stored in the camera’s microSD card. - Page 54 Accessing the CM-330X via a Web Browser Note: It is recommended, but not necessary, to enable authentication in order to use RTSP. 2. From the Authentication drop-down list, select ON to encrypt the transmission. The default is OFF. 3. In the Password text box, enter your password after selecting Authentication ON. 4.
-
Page 55: Snmp
Accessing the CM-330X via a Web Browser 5.3.1.4.4 SNMP The SNMP screen enables the network management system to use the Simple Network Management Protocol (SNMP) to remotely monitor and manage the camera. Select one of the following SNMP versions: SNMP v1, SNMP v2c, or SNMP v3. Figure 56: Network >... - Page 56 Accessing the CM-330X via a Web Browser To use traps 15. In the Trap section, from the Mode drop-down list, select V1, V2C, V3, or OFF, according to the SNMP version that you select above. The default is OFF. 16. From the Heartbeat drop-down list, select ON or OFF. The default is OFF. When selected, this enables you to ping the VMS.
- Page 57 Accessing the CM-330X via a Web Browser To enable EAP-TTLS 6. Select EAP-TTLS. The Basic Settings screen opens. Figure 59: EAP-TTLS Screen 7. From the Inner Authentication drop-down list, select one of the following protocols: CHAP, EAP-MSCHAPV2, MD5, MSCHAP, MSCHAPV2, or PAP. 8.
-
Page 58: Ip Filter
Accessing the CM-330X via a Web Browser 5.3.1.4.6 IP Filter The IP Filter screen is used for restricting access to the camera by allowing or denying specific IP addresses. It is possible to filter up to 10 IP addresses. The options are Allow, Deny, or NONE (default). Figure 61: Network >... -
Page 59: Ldap
Accessing the CM-330X via a Web Browser 4. If you are using FreeDNS, the Hash text box also is displayed. Enter the Hash value, which is a hash of your user name and password. It is available from http://freedns.afraid.org. 5. Click Save. 5.3.1.4.8 LDAP The LDAP screen is used for configuring use of the Lightweight Directory Access Protocol, an industry- standard protocol for accessing and maintaining distributed directory information services over an IP... -
Page 60: Ssl
Accessing the CM-330X via a Web Browser 5.3.1.4.9 SSL The SSL screen is used for configuring the Secure Socket Layer (SSL) or Transport Layer Security (TLS) protocol, which protects camera settings and username/password information. SSL/TLS is used, in turn, by the HTTPS protocol for allowing secure IP connections between the camera and a web browser over HTTP. - Page 61 Accessing the CM-330X via a Web Browser 3. Enter the following information in the appropriate field. A definition of each of the required fields follows. · Country Code – Enter a two-letter combination code to indicate the specific country in which the certificate will be used.
-
Page 62: Events Source
Accessing the CM-330X via a Web Browser 5.3.1.5 Events Source The Events Source tab is used for configuring general settings related to event notification. It includes the following screens: Defocus Alarm Audio Motion Network Schedule Tampering 5.3.1.5.1 Defocus The Events Source > Defocus screen is used for defining the actions to be taken when triggered by a defocus event: storing a snapshot;... - Page 63 Accessing the CM-330X via a Web Browser To define OSD text 9. In the OSD section, select the Enable checkbox. By default, Enable is not checked. 10. In the Text text box, enter the text to display in the on-screen display. 11.
-
Page 64: Alarm
Accessing the CM-330X via a Web Browser 17. Click Apply. The times for the schedule are displayed in orange in the Arming Schedule Setting section of the Defocus screen. Figure 70: Updated Arming Schedule Setting Section Note: 1. You can record up to three clips per day. 2. -
Page 65: Audio
Accessing the CM-330X via a Web Browser 2. From the Type drop-down list, select Normally Open or Normally Closed. To define the method to store a snapshot 3. See instructions in section .3.1.5.1. To record the event on the camera 4. - Page 66 Accessing the CM-330X via a Web Browser A graph displays audio when is detected. Audio that is below the Sound Intensity Threshold is displayed in green. When audio exceeds the defined threshold, it creates an audio event and is displayed in red. Figure 73: Sound Intensity Threshold A number of actions can be taken, including: ·...
-
Page 67: Motion
Accessing the CM-330X via a Web Browser To set the arming schedule 7. See instructions in section .3.1.5.1. 5.3.1.5.4 Motion The Events Source > Motion screen is used for defining the motion zone area settings; defining settings, including the method for storing a snapshot, recording on the edge, email headers, and text for the OSD; and for setting the arming schedule. -
Page 68: Network
Accessing the CM-330X via a Web Browser 4. See instructions in section .3.1.5.1. To record the event on the camera 5. See instructions in section 6 .3.1.5.1 To enable sending an email notification 6. See instructions in section .3.1.5.1. To define OSD text 7. -
Page 69: Schedule
Accessing the CM-330X via a Web Browser To activate the on-screen display in case of a network conflict 12. In the OSD section, select Enable. By default, Enable is not checked. 13. In the Text text box, enter the text to display in the on-screen display. 14. -
Page 70: Tampering
Accessing the CM-330X via a Web Browser 5.3.1.5.7 Tampering The Events Source > Tampering screen is used for setting the sensitivity of the camera in case of tampering. Figure 77: Events Source > Tampering Screen To enable tamper detection 1. Select Enable. By default, Enable is not checked. 2. -
Page 71: Email
Accessing the CM-330X via a Web Browser 5.3.1.6.1 Email It is possible to send notifications to up to 10 email addresses. Note: Before configuring email settings, check that: · There is an SMTP mail server on the local area network (LAN). ·... -
Page 72: Ftp
Accessing the CM-330X via a Web Browser b. Server Address – In the text box, enter the email server IP address. c. Port – In the text box, enter the email server port number. The default port is 25. d. User Name – In the text box, enter the email server user name. e. -
Page 73: Recording Settings
Accessing the CM-330X via a Web Browser 5.3.1.6.3 Recording Settings The Recording Settings screen is used to configure recording settings. Figure 80: Events Handler > Recording Settings Screen Note: In order to record, at least one stream must be set to H.264. To configure recording settings 1. -
Page 74: Sd Card
Accessing the CM-330X via a Web Browser 5.3.1.6.4 SD Card If the user wishes to store video clips and/or snapshots locally, an microSD card (Min 4GB, max 128GB, formatted as a single partition) must be provided. (Not supplied with the camera.) The SD Card screen is used for configuring the microSD card. - Page 75 Accessing the CM-330X via a Web Browser Note: Each camera being used with this feature must have its own Basic Video Analytics Camera License downloaded to it. Rule Purpose Usage Example Counting Count the number of Up to three separate Monitoring customers people crossing a line lines working in concert.
-
Page 76: Initial Settings
Accessing the CM-330X via a Web Browser 5.3.1.6.6.1 Initial Settings If setting up Basic Video Analytics for the first time, see Basic Video Analytics Camera License, Providing cameras with Basic Video Analytics Licenses The setup for the Analytics Rules follow the same general setup sequence for all Rules. Each Rule has specific configurations that are described in detail in each relevant section. -
Page 77: Basic Video Analytics Camera License
Accessing the CM-330X via a Web Browser Note: It's important to keep the shapes consistent between the min and max size for best results. Note: In general, the camera should be installed at a height of 2.5m - 4 m., and inclined at an appropriate angle. -
Page 78: Providing Cameras With Basic Video Analytics Licenses
For assistance in obtaining the licenses, please contact your Integrator or your FLIR representative. 1. For Cameras that the User already owns: a. User sends a Purchase Order for license activation to FLIR Operations with a spreadsheet listing Serial Number and MAC address of all units. -
Page 79: Camera Positioning
Accessing the CM-330X via a Web Browser 5.3.1.6.6.5 Camera Positioning When determining camera placement, there are several ways to achieve optimal area coverage and fence line protection. The specific perimeter layout, application requirements, and site topology must be considered. In most cases, optimal performance and efficiency for Border Line protection are achieved by placing cameras so that their fields of view run parallel to the fence line perpendicular to the movement of potential intruders approaching or crossing the perimeter. -
Page 80: Mounting And Lighting
Accessing the CM-330X via a Web Browser · Ability to understand the nature of the target (moving vehicle vs. crawling human) · Speed, and movement of the target object For a 'real' Object Size of width = 800mm ; height = 1800mm. (Typically the dimensions representing a person): Object Distance... -
Page 81: Counting
Accessing the CM-330X via a Web Browser Reset Object Size Brings the user back to the Initial Settings screen to reconfigured the object sizes when a scene changes or a different rule is activated. State The State will show as Active or Inactive. Only a single Analytic rule can be Active at one time. This will display Active for an already configured and active rule and will display Inactive for all other rules that are not currently in use. -
Page 82: Border Line
Accessing the CM-330X via a Web Browser Pressing the Add Line button the user can draw a line in the desired area of the camera view. Pressing the Remove Line button the user can remove the currently selected line. Pressing the Direction button the user can change the direction by which they want to count people moving. - Page 83 Accessing the CM-330X via a Web Browser Draw up to three lines on the screen. Each line should cover a potential point of transit, so be sure that the area is not obstructed or hidden by other objects in the scene and that the potential transit path goes through the line at a close to a 90deg angle.
- Page 84 Accessing the CM-330X via a Web Browser Advanced Options (Combine Rule): The Advanced option section of Border Line, includes the feature "Combine Rule" which does not exist in other rules. For additional information about the Advance options section, and an explanation of the other features on this page, see: Advanced Options Combine Rule...
- Page 85 Accessing the CM-330X via a Web Browser By combining rules, the system will trigger the chosen actions when all of the selected rules are activated. See the following sections for more information on Advanced options and Analytics actions (completion of rule configuration) CM-3304/CM-3308 User and Installation Guide March 10, 2019...
-
Page 86: Loitering
Accessing the CM-330X via a Web Browser Advanced Options Analytics Actions The Video Analytics > Loitering screen is used for configuring the loitering analytic capability. This page allows you to: · Configure a loitering detection area using 3 to 8 points ·... -
Page 87: Area Protection
Accessing the CM-330X via a Web Browser This section is used to configure the duration of a loitering event in order for a rule to be triggered. This can be changed from the default of 30 second by dragging the slider or typing a number into the text box. See the following sections for more information on Advanced options and Analytics actions (completion of rule configuration) Advanced Options... -
Page 88: Object Removal
Accessing the CM-330X via a Web Browser Pressing the Delete button clears the area entirely, starting the area configuration from nothing. Pressing the Direction button the user can change the direction by which they want to detect people moving. Basic Settings: For general "Basic Settings"... -
Page 89: Object Dropped
Accessing the CM-330X via a Web Browser Once the rule has been defined, do not disturb the scene for about 30 seconds to a minute. See the Initial Settings section for more information on the setup process: Zone Settings: This section allows the user to create 3 zones in order to configure the desired detection areas. Clicking and dragging on the video scene will produce a re-sizable box at can be moved and sized to mark the desired area for object removal detection Clicking on the... - Page 90 Accessing the CM-330X via a Web Browser · Reset Max and Min Object size · Define Object in region duration Time · Configure advanced settings, including sensitivity, area masking, reset scene and arming schedule · Analytics actions Use the Object Dropped rule to secure an area against suspicious objects and litter. For example, a bus station or a public square.
-
Page 91: Advanced Options
Accessing the CM-330X via a Web Browser See the following sections for more information on Advanced options and Analytics actions (completion of rule configuration) Advanced Options Analytics Actions Note: The Advanced options section for Border Line includes an extra feature called "Combine Rule". More more information, please navigate to: Combine Rule Advanced Control;... - Page 92 Accessing the CM-330X via a Web Browser Up to 3 masks can be configured, one is enabled by default. The user sets the mask by clicking on the camera view and making 3-8 points which can be moved and reshaped to mask the desired area. Clicking the button will clear the configured mask of the currently selected mask.
-
Page 93: Analytics Actions
Accessing the CM-330X via a Web Browser 6. Click Apply. The times for the schedule are displayed in orange in the Arming Schedule Setting section. To continue with the configuration of video analytics, click Next to arrive at the Analytics Actions page The Analytics Actions page is used to set event handlers to take place up an analytics alarm. -
Page 94: Analytics Troubleshooting
Accessing the CM-330X via a Web Browser To define the method to store a snapshot 1. In the Snapshot section, select the Store on Edge checkbox to store a snapshot on the camera’s microSD card. By default, it is not checked. 2. - Page 95 Accessing the CM-330X via a Web Browser Analytics Debug - Live View 2. Foreground – displays the raw motion data in the scene. This data is processed by the video analytics algorithms to identify and construct objects. By viewing the raw data, the user can visually compare what is going on with the scene and the motion that the camera is registering.
-
Page 96: Streaming Tab
Accessing the CM-330X via a Web Browser Analytics Debug - Foreground View 5.3.2 Streaming Tab The Streaming tab is used for configuring video streaming settings, privacy zones, and region of interest settings. CM-3304/CM-3308 User and Installation Guide March 10, 2019... -
Page 97: Video Settings
Accessing the CM-330X via a Web Browser 5.3.2.1 Video Settings The Video Settings screen is used for configuring video parameters such as resolution; video compression type and related settings; quality of service; and frame rate for the video streams. Additional settings are available when using H.264 compression. - Page 98 Accessing the CM-330X via a Web Browser 3. In the Stream1 section, configure the following settings: a. From Resolution drop-down list, select: For PAL systems: 1920x1080 (Full HD 1080p), 1280x720 (HD 720p), or 720 x 576 (D1). The default is 1920x1080. For NTSC systems: 1920x1080 (Full HD 1080p), 1280x720 (HD 720p), or 720 x 480 (D1).
- Page 99 Accessing the CM-330X via a Web Browser ii. If you select MJPEG, the following fields are displayed: Figure 87: MJPEG Settings c. From the Quality Level drop-down list, select High, Mid, or Low. The default is Mid. Low produces the highest image quality, but increases the file size. High produces the lowest image quality, but decreases the file size.
- Page 100 Accessing the CM-330X via a Web Browser g. Set the Encoding Priority. This function enables the user to adjust the quality of the picture along a single axis. The slider ranges from 1 (low bit rate) to 10 (high picture quality). The default setting is 7.
-
Page 101: Cm-3304 Video Resolutions
Accessing the CM-330X via a Web Browser Note: The video standard (PAL or NTSC) can be changed from the TV Format drop-down list on the Configuration > Basic Operations screen. See section ? 6 .3.1.2.4 (page 39). e. From the Compression drop-down list, select H.264 or MJPEG according to the required image quality and storage limitations. - Page 102 Accessing the CM-330X via a Web Browser 1280 x 720 (15 fps @ H.264/H.265/MJPEG) 720 x 480 (15 fps @ H.264/H.265/MJPEG) 2560 x 1440 (25 fps @ H.264/H.265) 720 x 480 (25 fps @ H.264/H.265/MJPEG) 1280 x 720 (30 fps @ H.264/H.265/MJPEG) 1920 x 1080 (30 fps @ H.264/H.265) 720 x 480 (30 fps @ H.264/H.265/MJPEG) 1280 x 720 (30 fps @ H.264/H.265/MJPEG)
- Page 103 Accessing the CM-330X via a Web Browser H.265/H.264 + H.265/H.264/MJPEG (PAL) Stream1 Stream2 1920 x 1080 (15 fps @ H.264/H.265/MJPEG) 2560 x 1440 (15 fps @ H.264/H.265) 1280 x 720 (15 fps @ H.264/H.265/MJPEG) 720 x 576 (15 fps @ H.264/H.265/MJPEG) 2560 x 1440 (25 fps @ H.264/H.265) 720 x 576 (25 fps @ H.264/H.265/MJPEG) 1280 x 720 (25 fps @ H.264/H.265/MJPEG)
- Page 104 Accessing the CM-330X via a Web Browser 720 x 480 720 x 480 (30 fps @ H.264/H.265/MJPEG) (30 fps @ H.264/H.265/MJPEG) 720 x 480 720 x 480 720 x 480 (30 fps @ H.264/H.265/MJPEG) (30 fps @ H.264/H.265/MJPEG) (30 fps @ H.264/H.265/MJPEG) CM-3304/CM-3308 User and Installation Guide March 10, 2019...
- Page 105 Accessing the CM-330X via a Web Browser H.265/H.264 + H.265/H.264/MJPEG + H.265/H.264/MJPEG (PAL) Stream1 Stream2 Stream3 1280 x 720 (15 fps @ H.264/H.265/MJPEG) 1920 x 1080 720 x 576 (15 fps @ H.264/H.265/MJPEG) (15 fps @ H.264/H.265/MJPEG) 2560 x 1440 1280 x 720 (15 fps @ H.264/H.265) (15 fps @ H.264/H.265/MJPEG)
-
Page 106: Cm-3308 Video Resolutions
Accessing the CM-330X via a Web Browser 5.3.2.1.2 CM-3308 Video Resolutions The CM-3308 camera supports up to three simultaneous streams, with up to 8MP on Stream1, Full HD 1080p on Stream2, and HD 720p on Stream3. Note: 1. Stream1 supports 3840 x 2160 @ 25 fps only when operating with D1. 2. - Page 107 Accessing the CM-330X via a Web Browser 720 x 480 (30 fps @ H.264/H.265/MJPEG) 720 x 480 (30 fps @ H.264/H.265/MJPEG) 720 x 480 (30 fps @ H.264/H.265/MJPEG) CM-3304/CM-3308 User and Installation Guide March 10, 2019...
- Page 108 Accessing the CM-330X via a Web Browser H.265/H.264/MJPEG + H.265/H.264/MJPEG (PAL) Stream1 Stream2 1920 x 1080 (15 fps @ H.264/H.265/MJPEG) 3840 x 2160 (15 fps @ H.264/H.265) 1280 x 720 (15 fps @ H.264/H.265/MJPEG) 720 x 576 (15 fps @ H.264/H.265/MJPEG) 3840 x 2160 (25 fps @ H.264/H.265) 720 x 576 (25 fps @ H.264/H.265/MJPEG) 1280 x 720 (25 fps @ H.264/H.265/MJPEG)
- Page 109 Accessing the CM-330X via a Web Browser H.265/H.264/MJPEG + H.265/H.264/MJPEG + H.265/H.264/MJPEG (NTSC) Stream1 Stream2 Stream3 1280 x 720 (15 fps @ H.264/H.265/MJPEG) 1920 x 1080 (15 fps @ H.264/H.265/MJPEG) 720 x 480 (15 fps @ H.264/H.265/MJPEG) 3840 x 2160 1280 x 720 (15 fps @ H.264/H.265) (15 fps @ H.264/H.265/MJPEG)
- Page 110 Accessing the CM-330X via a Web Browser H.265/H.264/MJPEG+ H.265/H.264/MJPEG + H.265/H.264/MJPEG (PAL) Stream1 Stream2 Stream3 1280 x 720 (15 fps @ H.264/H.265/MJPEG) 1920 x 1080 720 x 576 (15 fps @ H.264/H.265/MJPEG) (15 fps @ H.264/H.265/MJPEG) 3840 x 2160 1280 x 720 (15 fps @ H.264/H.265) (15 fps @ H.264/H.265/MJPEG) 1280 x 720...
-
Page 111: Privacy Zone
Accessing the CM-330X via a Web Browser 5.3.2.2 Privacy Zone A privacy zone enables users to cover a specific portion of the screen for privacy reasons. Users can define up to 8 privacy zones. After setting up a privacy zone, in the live view screen a frame is displayed whose color, size and position can be customized according to users’... -
Page 112: Camera Tab
Accessing the CM-330X via a Web Browser The image displayed within the ROI box can be displayed with higher quality than the image outside of the box. Overall bit rate is not affected by selecting regions of interest. Enhancing the video where the quality is very important consumes more bandwidth, but enables lowering image quality and bandwidth consumption on less important zones in the scene. - Page 113 Accessing the CM-330X via a Web Browser Figure 96: Auto Shutter Exposure Mode Settings Continue to configure the other settings in the Exposure section: · Max Shutter Speed – Select a suitable shutter speed according to the environmental luminance. The following table displays the options: Max Shutter Speed NTSC 1/6.25...
- Page 114 Accessing the CM-330X via a Web Browser · Exposure Value – This is a number that represents a combination of a camera's shutter speed and f-number, which brightens or darkens the scene accordingly. Select from the following options: -2, - 5/3, -4/3, -1, -2/3, -1/3, 0, 1/3, 2/3, 1, 4/3, 5/3, or 2.
- Page 115 Accessing the CM-330X via a Web Browser · Sensitivity – Use the slider to set the sensitivity between Low and High when switching from Day to Night mode or Night to Day mode. When set to High, the camera automatically switches between Day and Night modes upon minor changes in light intensity.
-
Page 116: Flickerless Mode
Accessing the CM-330X via a Web Browser 5.3.3.1.2 Flickerless Mode Flick erless mode eliminates flicker in indoor applications where fluorescent lighting is used. The darker the ambient lighting, the slower the shutter speed should be. Figure 98: Flickerless Exposure Mode Settings Continue to configure the other settings in the Exposure section: ·... - Page 117 Accessing the CM-330X via a Web Browser In the Day/Night Switch Control section, configure the following settings: · Mode – See the explanation in the Auto Mode section above. · Time – See the explanation in the Auto Mode section above. ·...
-
Page 118: Auto Iris Mode
Accessing the CM-330X via a Web Browser 5.3.3.1.3 Auto Iris Mode Auto Iris mode sets a fixed exposure while other parameters can change. Figure 99: Auto Iris Exposure Settings Continue to configure the other settings in the Exposure section: · Max Shutter Speed –... - Page 119 Accessing the CM-330X via a Web Browser · Exposure Value – See the explanation in the Auto Mode section above. · Highlight Compensation – See the explanation in the Auto Mode section above. · Digital WDR – See the explanation in the Auto Mode section above. In the Day/Night Switch Control section, configure the following settings: ·...
-
Page 120: Manual Mode
Accessing the CM-330X via a Web Browser 5.3.3.1.4 Manual Mode Manual mode opens the iris completely with a fixed gain. This mode should only be used in indoor scenes with consistent lighting. Manual mode requires the user to set fixed values for shutter and gain levels. Increasing the value of the fixed shutter increases the amount of light entering the sensor, which allows a brighter and more detailed image. - Page 121 Accessing the CM-330X via a Web Browser · Shutter Speed – Select the shutter speed from the following options: Manual Manual Shutter Speed Shutter Speed NTSC NTSC 1/25 1/30 1/1000 1/1000 1/50 1/60 1/2500 1/2500 1/100 1/120 1/5000 1/5000 1/250 1/250 1/10000 1/10000...
-
Page 122: Shutter Wdr Mode
Accessing the CM-330X via a Web Browser 5.3.3.1.5 Shutter WDR Mode Shutter WDR mode is used to set a fixed exposure while other parameters can change. In this mode, the camera’s shutter speed works automatically to achieve a consistent video output level in scenes with high contrast or changing light issues. -
Page 123: Picture Adjustment
Accessing the CM-330X via a Web Browser · Time – See the explanation in the Auto Shutter section above. · Sensitivity – See the explanation in the Auto Shutter section above. In the IR Control section, configure the following settings: ·... -
Page 124: White Balance
Accessing the CM-330X via a Web Browser · Contrast ? Set the image contrast between -100 to 100, which provides the highest contrast. The default is 0. · Saturation ? Set the image saturation -100 to 100. The lower the number, the closer the image is to a grayscale (i.e., monochrome or black-and-white) image. - Page 125 Accessing the CM-330X via a Web Browser a. To set the gain values, adjust the following settings: · R Gain: Adjusts the red color in the image from 0 to 511. The higher the number, the redder the image. The default setting is 64. ·...
-
Page 126: Appendix
Appendix 6 Appendix The Appendix includes the following sections: · Technical Specifications (page 94) · Network Settings (page 97) · Troubleshooting (page 98) · Acronyms and Abbreviations (page 100) · Accessories (page 101) Technical Specifications Network Settings The following are the network protocols and ports used by the camera: Protocol Port Usage... -
Page 127: Troubleshooting
Appendix Troubleshooting This section provides useful information and remedies for common situations where problems may be encountered. Problem Possible Solution No network connection Hardware issues: · Check that the network is working and the unit is powered on. · Check that the network (Ethernet) cable is properly attached to the unit. -
Page 128: Acronyms And Abbreviations
Appendix Problem Possible Solution · No video image Reset the browser security settings to the default value. displayed on the main · Check that the correct port was configured. The default port is menu or the view menu 554. of the web interface ·... -
Page 129: Accessories
UPnP Universal Plug and Play Accessories The following mounting accessories are available from FLIR for installation of your Ariel Gen II CM-330X Series Mini-Dome IP Camera. For more information on available options, contact your FLIR sales representative or visit www.FLIR.com/security to request details on where to get the accessories you need. - Page 130 Appendix Image Name Description CM-CAPX-31 Pendant Cap CM-4S-31 4S Mounting Adapter CM-BKBX-31 Back Box CM-3304/CM-3308 User and Installation Guide March 10, 2019...
- Page 131 FLIR Systems, Inc. 6769 Hollister Ave. Goleta, CA 93117 PH: +1 805.964.9797 PH: +1 877.773.3547 (Sales) PH: +1 888.747.3547 (Support) FX: +1 805.685.2711 www.flir.com/security Corporate Headquarters FLIR Systems, Inc. 27700 SW Parkway Ave. Wilsonville, OR 97070 PH: +1 503.498.3547 FX: +1 503.498.3153...
- Page 132 Index - F - Full Factory Reset - P - Partial Reset...
Need help?
Do you have a question about the Ariel CM-3304 Series and is the answer not in the manual?
Questions and answers