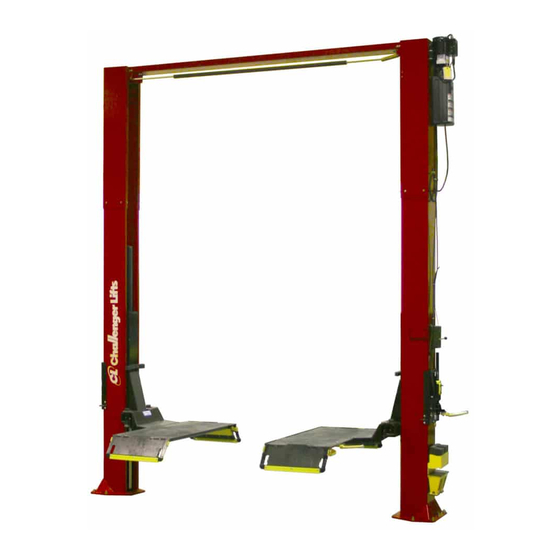
Challenger Lifts Versymmetric CL10 Series Installation, Operation & Maintenance Manual
Two post surface mounted lift with dual pendant control
Hide thumbs
Also See for Versymmetric CL10 Series:
- Installation, operation & maintenance manual (23 pages) ,
- Installation & operation manual supplement (7 pages) ,
- Installation, operation & maintenance manual (24 pages)
Table of Contents
Advertisement
Installation, Operation, & Maintenance Manual
V
WITH
200 Cabel Street, P.O. Box 3944 Louisville, Kentucky 40201-3944
Email:
Office 800-648-5438
IMPORTANT:
ersymmetric
Surface Mounted Lift
M
ODEL
D
P
UAL
ENDANT
10,000
2500
sales@challengerlifts.com
/
502-625-0700 Fax 502-587-1933
READ THIS MANUAL COMPLETELY BEFORE
INSTALLING or OPERATING LIFT
Two Post
TM
CL10
C
ONTROL
. C
LBS
APACITY
.
A
LBS
PER
RM
Web site:
www.challengerlifts.com
Rev.4/22/11
Advertisement
Table of Contents

Subscribe to Our Youtube Channel
Related Manuals for Challenger Lifts Versymmetric CL10 Series


Summary of Contents for Challenger Lifts Versymmetric CL10 Series
- Page 1 Installation, Operation, & Maintenance Manual ersymmetric Two Post Surface Mounted Lift CL10 ODEL WITH ENDANT ONTROL 10,000 APACITY 2500 200 Cabel Street, P.O. Box 3944 Louisville, Kentucky 40201-3944 Email: Web site: sales@challengerlifts.com www.challengerlifts.com Office 800-648-5438 502-625-0700 Fax 502-587-1933 IMPORTANT: READ THIS MANUAL COMPLETELY BEFORE INSTALLING or OPERATING LIFT Rev.4/22/11...
-
Page 2: Specifications
Model CL10 with Dual Pendant Control Installation, Operation, and Maintenance ENERAL PECIFICATIONS See Figure 1 CL10 CL10-2 CL10-3 11’- 8” 13’- 8” 14’- 8” Column Height 11’- 2 1/2 ” 13’- 2 1/2” 14’- 2 1/2” Floor to Overhead Switch 75 1/8”... - Page 3 Model CL10 with Dual Pendant Control Installation, Operation, and Maintenance Safety decals similar to those shown here are ERTICAL LEARANCE found on a properly installed lift. Be sure that all Check the height of the area where the lift is to safety decals have been correctly installed at be installed.
- Page 4 (2) 9/16”, (2) 11/16”, 3/4", 15/16” the shorted or damaged goods. Do this for your 5/16” allen wrench own protection. g. Needle nose pliers Challenger Lifts NOTIFY AT ONCE if any h. Hammer drill with 3/4” diameter carbide hidden loss or damage is discovered after tipped bits receipt.
- Page 5 Model CL10 with Dual Pendant Control Installation, Operation, and Maintenance OCKING NCHORING 4) Attach 1/2" O.D. Extension Spring to hole 5) The anchor bolts must be installed at least 8” located on bottom side of both supplied Lock from any crack, edge, or expansion joint. Pawls, Fig 2a.
- Page 6 Model CL10 with Dual Pendant Control Installation, Operation, and Maintenance YNCHRONIZER ABLES VERHEAD 15) Attach one end of synchronizing cable to 12) Before raising overhead into position install 4 carriage with the supplied nut and jam nut. each (2 per column) hex flange bolts and See Fig 6a &...
- Page 7 Model CL10 with Dual Pendant Control Installation, Operation, and Maintenance & H OWER YDRAULIC OSES Fig 7 – Power Unit Mounting IMPORTANT – To insure proper hose fitting seal without damage to the fitting follow this procedure for each hose connection: Screw flared fitting on finger tight.
- Page 8 Model CL10 with Dual Pendant Control Installation, Operation, and Maintenance NOTE: DO NOT kink cable assembly when routing. Tighten and trim wire ties after final cable adjustments have been made Fig 9b Power Unit Connection 24) B ERTAIN ITTINGS AND ONNECTIONS Fig 10 –...
-
Page 9: Arm Installation
Model CL10 with Dual Pendant Control Installation, Operation, and Maintenance to begin to pull tension on the ½” O.D. spring. LECTRICAL Snug jam nuts by hand. UNCTION 30) Repeat procedures 24 thru 28 with second 33) Install Junction Box Assembly to inside of Lock Release Cable routing from top of Idler Power Column with (2) #10-32 x 1/2"... - Page 10 Model CL10 with Dual Pendant Control Installation, Operation, and Maintenance VERHEAD IMIT WITCH ENDANT WITCHES IMPORTANT: There are two overall width 37) Locate the Pendant mounting hole on each settings. Insure to place the limit switch and column just below the lock cover on the left shutoff bar in the proper pivot holes as shown in side.
-
Page 11: Electrical Testing
Model CL10 with Dual Pendant Control Installation, Operation, and Maintenance 39) Attach both Pendant end connectors to receptacles on Junction Box, Fig 12. Both receptacles are identical. DO NOT PLUG EITHER PENDANT END DIRECTLY INTO POWER UNIT RECEPTACLE. This will cause a dead short and require replacing the 2 Amp x 15mm fuse located inside the motor wiring box. - Page 12 Model CL10 with Dual Pendant Control Installation, Operation, and Maintenance INAL DJUSTMENTS lock should just come to rest against the back of the column when engaged and fully YDRAULICS out against the tab when disengaged. 42) Lower the lift to the floor and raise the lift Tighten Power Column lower tab jam nuts.
-
Page 13: Owner /Operator Checklist
61) Complete the Installation Checklist/Warranty Validation questionnaire with the owner. Review the terms of the warranty registration card, and return the card and a copy of the questionnaires to: Challenger Lifts, Inc. 200 Cabel Street Louisville, KY. 40206 Page 13 Rev. 4/22/11... - Page 14 Model CL10 with Dual Pendant Control Installation, Operation, and Maintenance Fig 17 – Electrical Wiring Diagram Page 14 Rev. 4/22/11 CL10DPC-IOM-A.doc...
-
Page 15: Operation Procedure
Model CL10 with Dual Pendant Control Installation, Operation, and Maintenance The Owner/Employer shall display the lift PERATION ROCEDURE manufacturer’s operating instructions; ALI/SM AFETY OTICES AND ECALS 93 -1, ALI Lifting it Right safety manual; ALI/ST- 90 ALI Safety Tips card; ANSI/ALI ALOIM-2000, This product is furnished with graphic safety American National Standard for Automotive Lifts- warning labels, which are reproduced on... -
Page 16: Lifting A Vehicle
Replace as required with genuine above the desired working height. Challenger Lifts parts. 5) Lower the vehicle until the safety latches on Check lock release cable adjustment per both columns engage. -
Page 17: Parts Breakdown
Replace all worn or broken parts with genuine Challenger Lifts Inc. parts. Contact your local Challenger Lifts Parts Distributor for pricing and availability. (Call Challenger Lifts Inc. (502) 625-0700 for the Parts Distributor in your area) Page 17 Rev. 4/22/11... -
Page 18: Fig B. Lock
Replace all worn or broken parts with genuine Challenger Lifts Inc. parts. Contact your local Challenger Lifts Parts Distributor for pricing and availability. (Call Challenger Lifts Inc. (502) 625-0700 for the Parts Distributor in your area) Page 18 Rev. 4/22/11... -
Page 19: Fig C. Hydraulics
Replace all worn or broken parts with genuine Challenger Lifts Inc. parts. Contact your local Challenger Lifts Parts Distributor for pricing and availability. (Call Challenger Lifts Inc. (502) 625-0700 for the Parts Distributor in your area) Page 19 Rev. 4/22/11... -
Page 20: Fig D. Synchronizer
Replace all worn or broken parts with genuine Challenger Lifts Inc. parts. Contact your local Challenger Lifts Parts Distributor for pricing and availability. (Call Challenger Lifts Inc. (502) 625-0700 for the Parts Distributor in your area) Page 20 Rev. 4/22/11... - Page 21 Replace all worn or broken parts with genuine Challenger Lifts Inc. parts. Contact your local Challenger Lifts Parts Distributor for pricing and availability. (Call Challenger Lifts Inc. (502) 625-0700 for the Parts Distributor in your area) Page 21 Rev. 4/22/11...
- Page 22 Replace all worn or broken parts with genuine Challenger Lifts Inc. parts. Contact your local Challenger Lifts Parts Distributor for pricing and availability. (Call Challenger Lifts Inc. (502) 625-0700 for the Parts Distributor in your area) Page 22 Rev. 4/22/11...
- Page 23 Replace all worn or broken parts with genuine Challenger Lifts Inc. parts. Contact your local Challenger Lifts Parts Distributor for pricing and availability. (Call Challenger Lifts Inc. (502) 625-0700 for the Parts Distributor in your area) Page 23 Rev. 4/22/11...
Need help?
Do you have a question about the Versymmetric CL10 Series and is the answer not in the manual?
Questions and answers