
Related Manuals for ADTRAN SmartRG SR400ac


Summary of Contents for ADTRAN SmartRG SR400ac
- Page 1 501 SE Columbia Shores Boulevard, Suite 500 Vancouver, Washington 98661 USA +1 360 859 1780 / smartrg.com / Gateway User Manual Model: SR400ac Release: 4.0 (Software Version 10.7.1.1) June 2019...
-
Page 2: Table Of Contents
FCC Interference Statement DHCP FCC Radiation Exposure Statement DHCP Server 5GHz Defining a Static DHCP IP Address Revision History DHCP Clients Multicast Video Analyzer Routing Static Routes SmartRG Inc., an ADTRAN Compny Proprietary and Confidential. All Right Reserved. © 2019... -
Page 3: Welcome
This publication is subject to change without notice. Any trademarks mentioned in this publication are used for identification purposes only and may be properties of their respective owners. SmartRG Inc., an ADTRAN Compny Proprietary and Confidential. All Right Reserved. © 2019... -
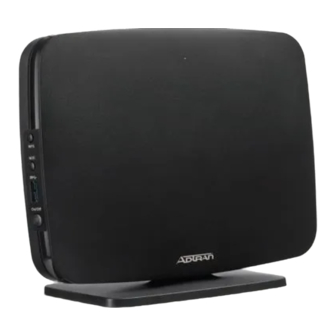
Page 4: Getting Familiar With Your Gateway
(locked wi-fi / WPS) LAN 1-4 LAN Ethernet connected (at 1000 BASE-T) Data being transferred (at 1000 BASE-T) LAN Ethernet connected (at 10/100BASE-T) Data being transferred (at 10/100BASE-T) SmartRG Inc., an ADTRAN Compny Proprietary and Confidential. All Right Reserved. © 2019... -
Page 5: Connections
Use ONLY the dedicated power supply for your device. Use only the power adapter provided with your gateway (3 amp 12 v). Intended for indoor use only. SmartRG Inc., an ADTRAN Compny Proprietary and Confidential. All Right Reserved. © 2019... -
Page 6: External Buttons
LEDs flash red and orange. The gateway reboots and returns to the default settings applied in the factory. This process may take a few minutes. SmartRG Inc., an ADTRAN Compny Proprietary and Confidential. All Right Reserved. © 2019... -
Page 7: Installing Your Sr400Ac Gateway
Internet applications (browser, email, etc.). If you are unable to connect to the Internet, verify that all cable connections are in place and the gateway’s power is turned on. SmartRG Inc., an ADTRAN Compny Proprietary and Confidential. All Right Reserved. © 2019... -
Page 8: Logging In To The Sr400Ac Interface
At the far right is the Logout button ( At the bottom of each page is the WAN IP address and firmware version. Mouse over the labels to view the information. SmartRG Inc., an ADTRAN Compny Proprietary and Confidential. All Right Reserved. © 2019... -
Page 9: Saving Your Changes
If you remove all of the changes from the change list, the Unsaved Changes message disappears. To apply unsaved changes (for any page), click APPLY on the current page. SmartRG Inc., an ADTRAN Compny Proprietary and Confidential. All Right Reserved. © 2019... -
Page 10: Dashboard
Top Talkers frame. You can select a different transmission rate. Options are None, 0.01M, 0.1M, 1M, 10M, and 100M. The default is 0.01M. SmartRG Inc., an ADTRAN Compny Proprietary and Confidential. All Right Reserved. © 2019... -
Page 11: Network
The netdata window opens in a new tab, showing information about the overall SR400ac system, memory, CPUs, firewall, IPv4 networking, etc. Click through the link-list at the right side of the page to view extensive details. SmartRG Inc., an ADTRAN Compny Proprietary and Confidential. All Right Reserved. © 2019... -
Page 12: Ethernet Wan
2. To work with settings on the INTERNET tab, continue with step 3. To work with the settings on the other tabs, follow the instructions in the topics listed below: "IPTV Settings" "Voice Settings" SmartRG Inc., an ADTRAN Compny Proprietary and Confidential. All Right Reserved. © 2019... -
Page 13: Dhcp For Ipv4 Wans
DHCP for IPv4 WANs The following fields appear when DHCP is selected as the configuration method. This method is the default for IPv4 WANs. SmartRG Inc., an ADTRAN Compny Proprietary and Confidential. All Right Reserved. © 2019... -
Page 14: Static Address For Ipv4 Wans
Enter the IP address for the subnet mask. Default Route Enter the IP address for the default IPv4 route. PPPoE for IPv4 WANs In the Configuration Method field, select PPPoE. The following fields appear. SmartRG Inc., an ADTRAN Compny Proprietary and Confidential. All Right Reserved. © 2019... -
Page 15: Dhcpv6 For Ipv6 Wans
Allow DNS Server List Override Override. DHCPv6 for IPv6 WANs The following fields appear when DHCPv6 is selected as the configuration method. This method is the default for IPv6 WANs. SmartRG Inc., an ADTRAN Compny Proprietary and Confidential. All Right Reserved. © 2019... -
Page 16: Static Address For Ipv6 Wans
Allow DNS Server Override List Override. Static Address for IPv6 WANs In the Configuration Method field, select Static Address. The following fields appear. SmartRG Inc., an ADTRAN Compny Proprietary and Confidential. All Right Reserved. © 2019... -
Page 17: Iptv Settings
Enter the static address for IPv6 communications (such as 2001:db8:a0b:12f0::1). Gateway Enter the IP address for the default IPv6 route. IPTV Settings On this tab you can configure the IPTV settings for your Ethernet WAN. SmartRG Inc., an ADTRAN Compny Proprietary and Confidential. All Right Reserved. © 2019... -
Page 18: Voice Settings
IPv4 WANs". 6. Click APPLY to save and apply your changes. Voice Settings On this tab you can configure the voice settings for your Ethernet WAN. SmartRG Inc., an ADTRAN Compny Proprietary and Confidential. All Right Reserved. © 2019... - Page 19 "DHCPv6 for IPv6 WANs" and "Static Address for IPv6 WANs". 5. Click APPLY to save and apply your changes. SmartRG Inc., an ADTRAN Compny Proprietary and Confidential. All Right Reserved. © 2019...
-
Page 20: Management Settings
3. Configure the tagging options: a. In the Tag Mode field, select the type of tagging that should be performed. Options are Untagged, Tagged, and DQTagged. The default is Tagged. SmartRG Inc., an ADTRAN Compny Proprietary and Confidential. All Right Reserved. © 2019... -
Page 21: Cross-Connect Settings
WAN. Valid values are 1 - 4062. The default is 0. 4. Click APPLY to save and apply your changes. SmartRG Inc., an ADTRAN Compny Proprietary and Confidential. All Right Reserved. © 2019... -
Page 22: Lan Network
(such as 192.168.1.44). The default is the address assigned to the gateway. Subnet Mask (Available when Static is selected in the field) Enter the IP subnet mask for this gateway. The Configuration Method default is 255.255.255.0. SmartRG Inc., an ADTRAN Compny Proprietary and Confidential. All Right Reserved. © 2019... -
Page 23: Dhcp Server
On this page, you can configure DHCP settings for the gateway. The Dynamic Host Control Protocol Server (DHCP) feature of your SmartRG gateway will automatically assign LAN IP addresses to host devices as they connect with the gateway. SmartRG Inc., an ADTRAN Compny Proprietary and Confidential. All Right Reserved. © 2019... - Page 24 Enter the size of the DHCP pool. The maximum size allowed is 252. The default is 150. DHCPv6 Server section Enabled This feature is enabled by default. To disable this feature, click the white circle. SmartRG Inc., an ADTRAN Compny Proprietary and Confidential. All Right Reserved. © 2019...
-
Page 25: Defining A Static Dhcp Ip Address
3. To remove a static DHCP IP address, click the Trashcan icon next to it. 4. Click APPLY to save your changes. The fields in this section are described in the following table. SmartRG Inc., an ADTRAN Compny Proprietary and Confidential. All Right Reserved. © 2019... -
Page 26: Dhcp Clients
On this page, you can view the IPv4 and IPv6 DHCP clients connected to your gateway. In the left menu, click Network > LAN Network > DHCP Clients. The following page appears. SmartRG Inc., an ADTRAN Compny Proprietary and Confidential. All Right Reserved. © 2019... -
Page 27: Ethernet Ports
3. For each port where you want to define a service, select an option. Options are LAN, Guest, Video, Voice, Cross-Connect, and None. The default is LAN. 4. Click APPLY to save your settings. SmartRG Inc., an ADTRAN Compny Proprietary and Confidential. All Right Reserved. © 2019... -
Page 28: Guest Network
Options are Static, DHCP, and None. The default is Static. Address Enter the IP address for IPv4 communications (such as 192.168.1.44). The default is the address assigned to the gateway. SmartRG Inc., an ADTRAN Compny Proprietary and Confidential. All Right Reserved. © 2019... -
Page 29: Dhcp Server
If you select Suffix Address, the Suffix Address field appears. Enter the address in format: "::a:b:c:d". DHCP Server On this page, you can configure DHCP settings for your guest network. SmartRG Inc., an ADTRAN Compny Proprietary and Confidential. All Right Reserved. © 2019... - Page 30 Enter the size of the DHCP pool. The maximum size allowed is 252. The default is 150. DHCPv6 Server section Enabled This feature is enabled by default. To disable this feature, click the white circle. SmartRG Inc., an ADTRAN Compny Proprietary and Confidential. All Right Reserved. © 2019...
-
Page 31: Defining A Static Dhcp Ip Address Association
7. To remove a static DHCP IP address, click the Trashcan icon next to it. 8. Click APPLY to save your changes. The fields in this section are described in the following table. SmartRG Inc., an ADTRAN Compny Proprietary and Confidential. All Right Reserved. © 2019... -
Page 32: Dhcp Clients
On this page, you can view the IPv4 and IPv6 DHCP clients connected to your gateway. In the left menu, click Network > Guest Network > DHCP Clients. The following page appears. SmartRG Inc., an ADTRAN Compny Proprietary and Confidential. All Right Reserved. © 2019... -
Page 33: Video Network
Create Default Route. This option is available only for the Static Address and DHCP V4 configuration methods. 6. Click APPLY to save and apply your changes. SmartRG Inc., an ADTRAN Compny Proprietary and Confidential. All Right Reserved. © 2019... -
Page 34: Static Address
DHCP requests. 3. Click APPLY. DHCP Server On this page, you can configure DHCP settings for your video network. SmartRG Inc., an ADTRAN Compny Proprietary and Confidential. All Right Reserved. © 2019... - Page 35 Enter the beginning of the class-C IP address range to be assigned by the DHCP server. The default is 100. Pool Size Enter the size of the DHCP pool. The maximum size allowed is 252. The default is 150. DHCPv6 Server section SmartRG Inc., an ADTRAN Compny Proprietary and Confidential. All Right Reserved. © 2019...
-
Page 36: Defining A Static Dhcp Ip Address
7. To remove a static DHCP IP address, click the Trashcan icon next to it. 8. Click APPLY to save your changes. The fields in this section are described in the following table. SmartRG Inc., an ADTRAN Compny Proprietary and Confidential. All Right Reserved. © 2019... -
Page 37: Dhcp Clients
In the left menu, click Network > Video Network > DHCP Clients. The following page appears. Multicast On this page, you can configure the IGMP settings such as enabling Fast-Leave. SmartRG Inc., an ADTRAN Compny Proprietary and Confidential. All Right Reserved. © 2019... - Page 38 (Untagged). The net result is same as above, meaning any wireless interface or LAN port can receive internet data and video; it doesn’t matter to which port the user connects an STB. SmartRG Inc., an ADTRAN Compny Proprietary and Confidential. All Right Reserved. © 2019...
-
Page 39: Video Analyzer
4. (Optional) In the IPv4 Multicast Address field, enter the IP address. Options range from 224.0.0.0 through 239.255.255.255. The default is 224.0.0.0. 5. Click APPLY to save your settings. SmartRG Inc., an ADTRAN Compny Proprietary and Confidential. All Right Reserved. © 2019... -
Page 40: Routing
On this page, you can view the static routes configured for your network (including tables for ARP, IPv4, IPv6, and IPv6 Neighbors). In the left menu, click Network > Routing. The following page appears. SmartRG Inc., an ADTRAN Compny Proprietary and Confidential. All Right Reserved. © 2019... -
Page 41: Static Routes
Complete the fields, using the information provided in the table below. c. Click ACCEPT to save your changes. You are returned to the Static Routes page. SmartRG Inc., an ADTRAN Compny Proprietary and Confidential. All Right Reserved. © 2019... -
Page 42: Dns
The Add/Edit DNS Server dialog box appears. b. Enter the IP address of the custom DNS server and click SAVE. If you do not enter an IP address, an error appears SmartRG Inc., an ADTRAN Compny Proprietary and Confidential. All Right Reserved. © 2019... -
Page 43: Firewall
3. To prevent malicious users from discovering information about your network and its devices and service, click the white circle next to Stealth Mode. 4. Click APPLY to save your changes. SmartRG Inc., an ADTRAN Compny Proprietary and Confidential. All Right Reserved. © 2019... -
Page 44: Router Access
New rules are enabled by default. To disable this rule but save the settings, click the white circle. 4. Click ACCEPT. The dialog box closes and the new mapping appears in the Router Access list. SmartRG Inc., an ADTRAN Compny Proprietary and Confidential. All Right Reserved. © 2019... -
Page 45: Firewall Rules
On this page, you can define firewall rules to filter traffic. 1. In the left menu, click Network > Routing > Firewall > Rules. The following page appears. SmartRG Inc., an ADTRAN Compny Proprietary and Confidential. All Right Reserved. © 2019... - Page 46 Zone Select the source zone. Options are Unspecified, Any, GUEST,VIDEO, MGMT, LAN and VOICE. The default is LAN. Enter the source IP address for this rule. SmartRG Inc., an ADTRAN Compny Proprietary and Confidential. All Right Reserved. © 2019...
-
Page 47: Dmz
IP address for which you want to allow unrestricted Internet access. Note: It is recommended that you create a static DHCP association to this host address. 4. Click APPLY to save your changes. SmartRG Inc., an ADTRAN Compny Proprietary and Confidential. All Right Reserved. © 2019... -
Page 48: Port Forwarding
Forwarding. The following page appears. 2. To add a mapping, click the plus sign (+) at the right side of the page. The Add/Edit Port Forwarding dialog box appears. SmartRG Inc., an ADTRAN Compny Proprietary and Confidential. All Right Reserved. © 2019... -
Page 49: Downstream Qos
8. Click APPLY to save your changes. Downstream QoS On this page, you can configure how traffic is prioritized over your wireless networks to improve quality of service. SmartRG Inc., an ADTRAN Compny Proprietary and Confidential. All Right Reserved. © 2019... -
Page 50: Advanced
Note: Before you can assign a device to a group, you must configure an access schedule, then configure a device group, and finally assign the schedule to the group. SmartRG Inc., an ADTRAN Compny Proprietary and Confidential. All Right Reserved. © 2019... -
Page 51: Intellifi Devices
If your device is connected via wireless, the wi-fi band appears as the name instead of LAN or WAN. The device colors identify the device mode: Blue = Hub Green = Satellite Orange = PLC SmartRG Inc., an ADTRAN Compny Proprietary and Confidential. All Right Reserved. © 2019... -
Page 52: Device Groups
Note: Before you can assign a device to a group, you must configure an access schedule, then a device group, and finally assign the schedule to the group. 1. In the left menu, click Network > Connected Devices > Device Groups. The following page appears. SmartRG Inc., an ADTRAN Compny Proprietary and Confidential. All Right Reserved. © 2019... - Page 53 ) icon in the group row. b. Select a time in the Timeout field. Options are None, 15 - 60 minutes, 2 - 8 hours, and 1 day. c. Click ACCEPT. SmartRG Inc., an ADTRAN Compny Proprietary and Confidential. All Right Reserved. © 2019...
-
Page 54: Access Schedule
Note: Before you can assign a device to a group, you must configure an access schedule, then a device group, and finally assign the schedule to the group. 1. In the left menu, click Network > Connected Devices > Access Schedule. The following page appears. SmartRG Inc., an ADTRAN Compny Proprietary and Confidential. All Right Reserved. © 2019... - Page 55 For example, to prevent access between 2 am and 3 am, enter "0200" in the first (start) field and "0259" in the second (end) field. The grid refreshes to show that access is blocked for the 2:00 hour. Example of a 1-hour block SmartRG Inc., an ADTRAN Compny Proprietary and Confidential. All Right Reserved. © 2019...
- Page 56 Note: If you delete a schedule that is assigned to a device group, it is removed from the device group configuration. 5. To save your changes, click APPLY. SmartRG Inc., an ADTRAN Compny Proprietary and Confidential. All Right Reserved. © 2019...
-
Page 57: Wifi
Scan On this page, you can scan for nearby wireless access points. The available data includes the channel number, SSID, BSSID, OUI, STA, usage, signal, and encryption. SmartRG Inc., an ADTRAN Compny Proprietary and Confidential. All Right Reserved. © 2019... -
Page 58: Radios
1. In the left menu, click WiFi > Radios. The following page appears, showing the fields for the 2.4 GHz radio. To view 5 GHz settings, click the 5GHZ tab. SmartRG Inc., an ADTRAN Compny Proprietary and Confidential. All Right Reserved. © 2019... - Page 59 5 GHz radio: Options include Channel 36 (5.18 GHz) - Channel 64 (5.32 GHz) and Channel 100 (5.5 GHz) - Channel 165 (5.825 GHz). The default is Channel 161 (5.805 GHz). SmartRG Inc., an ADTRAN Compny Proprietary and Confidential. All Right Reserved. © 2019...
-
Page 60: Networks
Enabled. c. Modify the fields as needed, using the information provided in the table below. 5. Click APPLY to save your changes. SmartRG Inc., an ADTRAN Compny Proprietary and Confidential. All Right Reserved. © 2019... -
Page 61: Clients
On this page, you can view performance information about the wireless networks connected to your system. 1. In the left menu, click WiFi > Performance. The following page appears, showing the information for the 2.4 GHz and 5 GHz wireless networks. SmartRG Inc., an ADTRAN Compny Proprietary and Confidential. All Right Reserved. © 2019... - Page 62 3. To view detailed transmission data for the individual interfaces, click the Show Graph icon ( ) at the right of each section. The details dialog box appears, showing airtime, efficiency and retry rate statistics for that section. SmartRG Inc., an ADTRAN Compny Proprietary and Confidential. All Right Reserved. © 2019...
-
Page 63: Client Performance
On this page, you can view information about the performance of clients connected to your network via wireless interfaces. 1. In the left menu, click WiFi > Client Performance. The following page appears, showing information for the connected clients. SmartRG Inc., an ADTRAN Compny Proprietary and Confidential. All Right Reserved. © 2019... - Page 64 2. To view details about a particular band, click its tab. SmartRG Inc., an ADTRAN Compny Proprietary and Confidential. All Right Reserved. © 2019...
-
Page 65: Advanced
3. (Optional) To include 5 GHz DFS channels in automatic channel selection, click the white circle to the right of Auto 5GHz Channels. 4. Click APPLY to save your changes. SmartRG Inc., an ADTRAN Compny Proprietary and Confidential. All Right Reserved. © 2019... -
Page 66: Services
3. To disable the automatic configuration of NAT settings, click the white circle to the right of Enable NAT-PMP. 4. When your settings are completed, click APPLY to save your changes. SmartRG Inc., an ADTRAN Compny Proprietary and Confidential. All Right Reserved. © 2019... -
Page 67: Dlna
On this page, you can configure the gateway with details about the management server to which this gateway will be linked. Note: You must reboot the gateway to implement any changes you make on this page. SmartRG Inc., an ADTRAN Compny Proprietary and Confidential. All Right Reserved. © 2019... - Page 68 4. This option is enabled by default. To disable this option, click the white circle to the right of Enable TR-069. 5. Click APPLY to save your settings. SmartRG Inc., an ADTRAN Compny Proprietary and Confidential. All Right Reserved. © 2019...
- Page 69 The port number associated with your STUN server infrastructure. Options are 0 - 64435. The default is 19302. Username The user name by which the gateway accesses the STUN infrastructure. Maximum length is 256 characters. Special characters are allowed. SmartRG Inc., an ADTRAN Compny Proprietary and Confidential. All Right Reserved. © 2019...
-
Page 70: Snmp
Enter the IP address of the server where the SNMP trap manager is located. Allow SNMP to This option is disabled by default. To enable this option, click the white circle. Contact Device SmartRG Inc., an ADTRAN Compny Proprietary and Confidential. All Right Reserved. © 2019... -
Page 71: Hosts
3. To delete a host, click the Trashcan icon next to it. The host entry is removed from the list. 4. Click APPLY to save your settings. SmartRG Inc., an ADTRAN Compny Proprietary and Confidential. All Right Reserved. © 2019... -
Page 72: Ddns
Click the plus sign (+) to the right of the table. The Add / Edit Item dialog box appears. b. Fill in the fields, using the information in the table below. c. Click ACCEPT. SmartRG Inc., an ADTRAN Compny Proprietary and Confidential. All Right Reserved. © 2019... -
Page 73: Cloud Storage
For connecting with box.com, make sure to enable the BOX share on the File Sharing page first and then enter the related credentials on this page. Making changes on this page before you enable the BOX share can require you to factory reset (FRESET) your gateway. SmartRG Inc., an ADTRAN Compny Proprietary and Confidential. All Right Reserved. © 2019... -
Page 74: File Sharing
Cloud Storage page. Making changes on the Cloud Storage page before you enable the BOX share on this page can require you to factory reset (FRESET) your gateway. SmartRG Inc., an ADTRAN Compny Proprietary and Confidential. All Right Reserved. © 2019... - Page 75 Network Name Enter the name of the network use for file sharing. Device Name Enter the device name. Description Enter a brief description of the device. SmartRG Inc., an ADTRAN Compny Proprietary and Confidential. All Right Reserved. © 2019...
-
Page 76: Content Filter
1. In the left menu, click Services > Content Filter. The following page appears. 2. To enable network protection, click the white circle to the right of Enabled. SmartRG Inc., an ADTRAN Compny Proprietary and Confidential. All Right Reserved. © 2019... - Page 77 IPv6 Drop Count The number of dropped packets on the IPv6 network. OpenDNS Family Shield section Enabled To enable the adult content blocking feature, click the white circle. SmartRG Inc., an ADTRAN Compny Proprietary and Confidential. All Right Reserved. © 2019...
-
Page 78: Admin
6 minutes to complete. Note: If the failed message appears, click the message to clear and try downloading the file again and repeating the above steps. SmartRG Inc., an ADTRAN Compny Proprietary and Confidential. All Right Reserved. © 2019... - Page 79 The CHECKING message appears, followed by the no- updates-available message or by a list of available updates. c. If updates are available, click INSTALL UPDATES. A confirming message appears. SmartRG Inc., an ADTRAN Compny Proprietary and Confidential. All Right Reserved. © 2019...
- Page 80 When the installation has finished, the gateway reboots. 4. To view the update history, click the HISTORY tab. The version number and build date for all updates made to this gateway are listed. SmartRG Inc., an ADTRAN Compny Proprietary and Confidential. All Right Reserved. © 2019...
-
Page 81: Configuration
Open. c. Click CONTINUE. A confirming message appears. Click OK. The backup configurations are applied and the gateway reboots. SmartRG Inc., an ADTRAN Compny Proprietary and Confidential. All Right Reserved. © 2019... -
Page 82: Router Management
This feature is disabled by default. To enable WAN HTTP, click the white circle. WAN HTTP Port (Optional) Enter a different port number for the WAN. The default is 80. SmartRG Inc., an ADTRAN Compny Proprietary and Confidential. All Right Reserved. © 2019... - Page 83 APPLY. The LEDs turn off. To turn the LEDs back on, click the white circle again and click APPLY. Enable Mobile To disable mobile management, click the white circle. Management SmartRG Inc., an ADTRAN Compny Proprietary and Confidential. All Right Reserved. © 2019...
-
Page 84: Passwords
4. In the New Password Re-enter Password fields, enter the new password. The Password Strength value refreshes as you type. SmartRG Inc., an ADTRAN Compny Proprietary and Confidential. All Right Reserved. © 2019... -
Page 85: Net Tools
2. To ping a server, enter an IP address or host name in the IP/Hostname field (such as 192.168.1.44) and then click START. PING RESULTS field appears showing detailed information. SmartRG Inc., an ADTRAN Compny Proprietary and Confidential. All Right Reserved. © 2019... -
Page 86: Event Log
2. To filter the displayed messages, enter a filter string in the Enter Search String field and click SEARCH. The list refreshes to show the matching entries. SmartRG Inc., an ADTRAN Compny Proprietary and Confidential. All Right Reserved. © 2019... -
Page 87: Configuring Log Settings
Options are 1 - 9999. 5. In the Log Protocol field, select the protocol. Options are TCP and UDP. The default is UDP. 6. Click APPLY to save your settings. SmartRG Inc., an ADTRAN Compny Proprietary and Confidential. All Right Reserved. © 2019... -
Page 88: Time
4. Click APPLY to save your settings. Operating Mode On this page, you can select whether your gateway operates as a router or a wireless access point. SmartRG Inc., an ADTRAN Compny Proprietary and Confidential. All Right Reserved. © 2019... - Page 89 INTELLIFI MODE section, click the green button and select the appropriate setting. Options are None and Hub. The default is Hub. 4. Click APPLY to save your changes. SmartRG Inc., an ADTRAN Compny Proprietary and Confidential. All Right Reserved. © 2019...
-
Page 90: Reboot
The restart confirmation dialog box appears, stating that rebooting takes approximately three minutes. 3. Click REBOOT. The Rebooting dialog box appears, showing the time remaining until completion. When your gateway is ready, the sign-in page appears. SmartRG Inc., an ADTRAN Compny Proprietary and Confidential. All Right Reserved. © 2019... -
Page 91: Logging Out
Logging Out To log out of the SR400ac GUI, click the Logout icon ( )at the top right corner of the page. The Login dialog box appears. SmartRG Inc., an ADTRAN Compny Proprietary and Confidential. All Right Reserved. © 2019... -
Page 92: Appendix: Compliance Statements
Any changes or modifications not expressly approved by the party responsible for compliance could void the user's authority to operate the equipment. 5GHz 5150-5250 MHz band is restricted to indoor operations only. SmartRG Inc., an ADTRAN Compny Proprietary and Confidential. All Right Reserved. © 2019... -
Page 93: Revision History
Updated to capture redesigned interface for Version 10.5.0.4. April 2018 Screen captures updated to match Version 10.5.0.2. April 2018 Initial document release for Versions 10.5 and later. SmartRG Inc., an ADTRAN Compny Proprietary and Confidential. All Right Reserved. © 2019...
Need help?
Do you have a question about the SmartRG SR400ac and is the answer not in the manual?
Questions and answers