VERITAS 5240 Hardware Service Procedure
Rail replacement: 2u12 storage shelf
Hide thumbs
Also See for 5240:
- Hardware installation manual (146 pages) ,
- Appliance product description (68 pages) ,
- Manual (38 pages)
Advertisement
Quick Links
Veritas Appliance
Hardware Service Procedure
Rail Replacement: 2U12 Storage Shelf
Document Number: 180
Version: 4.1 (05/04/2020)
Purpose
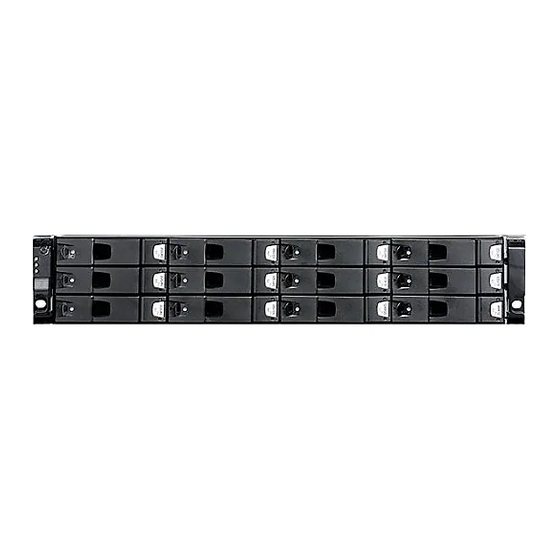
This document describes the process for replacing the rails for a 2U12 Storage Shelf
Affected appliance models
•
5240 2U12 Storage Shelf
•
5250 2U12 Storage Shelf
Electrical Safety
The static discharged by human bodies can damage static-sensitive components on the boards.
When installing and maintaining the equipment, observe appropriate electrostatic safety precautions
to prevent personnel injuries or device damage.
When operating a device in an electrostatic sensitive area, you must take electrostatic-discharge
(ESD)-preventive measures. These include wearing ESD-preventive gloves, an ESD-preventive wrist
strap, and ESD-preventive clothes to avoid personnel injury or device damage.
To prevent damage to the device, pay attention to the following during operations:
•
Do not touch devices with bare hands because ESD from the human body may damage the
electrostatically sensitive elements on a board.
•
When dealing with the server or any of the internal components, wear an ESD-preventive wrist
strap, ESD-preventive gloves, and ESD-preventive suit.
About replacing the 2U12 Storage Shelf rails
This document describes how to replace the rails that hold the 2U12 Storage Shelf in the rack.
You must remove the storage shelf from the rack to replace the rails. Before the storage shelf can
be removed from the rack, all running programs on the connected appliance must be stopped, and
the appliance and the storage shelf shut down. If there are other connected storage shelves, they
must be turned off as well.
1
Advertisement

Related Manuals for VERITAS 5240


Summary of Contents for VERITAS 5240
- Page 1 Purpose This document describes the process for replacing the rails for a 2U12 Storage Shelf Affected appliance models • 5240 2U12 Storage Shelf • 5250 2U12 Storage Shelf Electrical Safety The static discharged by human bodies can damage static-sensitive components on the boards.
- Page 2 Verify the serial number of the storage shelf or the appliance that the storage shelf is connected • On the 5240 and 5250 appliance, the serial number begins with the letters VTAS, and is located on a label on the rear panel of the appliance.
- Page 3 HSP #180 Rail Replacement: 2U12 Storage Shelf Before you perform service, the appliance that the storage shelf is attached to needs to be turned off with a soft shutdown. A soft shutdown informs the NetBackup Appliance operating system to stop and close all active processes. A soft shutdown also stops all communications to the attached storage shelf or shelves.
- Page 4 HSP #180 Rail Replacement: 2U12 Storage Shelf • The LED indicators for the disks on the front of the storage shelf are off. The LED indicators on the rear of the appliance are off. • There is no active disk or fan noise and no airflow coming out of the rear panel. The following determine if the appliance is shut down: •...
- Page 5 HSP #180 Rail Replacement: 2U12 Storage Shelf Warning: The storage shelf weighs in excess of 71 lbs (32 kg). Use appropriate tools and techniques to lift and move the storage shelf. Removing the faulty rails To remove the faulty rails Record the position of the rails within the rack so that you can install the new rails in the same space.
- Page 6 HSP #180 Rail Replacement: 2U12 Storage Shelf Collapse the rail to remove it from the rack. Installing the new rails To install the new rails Examine the rack and the storage shelf for any potential damage before you attempt to install the new rails.
- Page 7 HSP #180 Rail Replacement: 2U12 Storage Shelf Starting with one of the rails, align the pins on the front of the rail with the rack holes that the old rail was installed in. Extend the rail back and fit the pins on the back of the rail in the appropriate rack holes.
- Page 8 HSP #180 Rail Replacement: 2U12 Storage Shelf Secure the front and the back of the rail with the two screws. Repeat the process with the second rail. Verify that both rails are parallel and fastened securely. Reinstalling the storage shelf in the rack To reinstall the storage shelf in the rack Carefully set the rear of the storage shelf on the front ledge of the rails and push the shelf to the rear of the rack.
- Page 9 Press the Power button on the front panel of the appliance to start the appliance. After the appliance initializes, verify that the System Status LED on the front panel is off. If the System Status LED is blinking green or is amber, contact Veritas Support.
Need help?
Do you have a question about the 5240 and is the answer not in the manual?
Questions and answers