Table of Contents
Advertisement
Advertisement
Table of Contents

Related Manuals for Humminbird MEGA 360 IMAGING


Summary of Contents for Humminbird MEGA 360 IMAGING
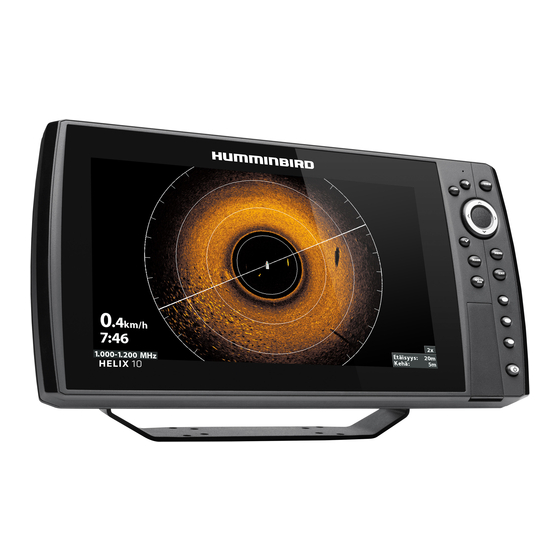
- Page 1 MEGA 360 IMAGING Operations Guide 532731-1EN_A...
- Page 2 Thank You! Thank you for choosing Humminbird®, the #1 name in marine electronics. Humminbird has built its reputation by designing and manufacturing top quality, thoroughly reliable marine equipment. Your Humminbird is designed for trouble-free use in even the harshest marine environment. In the unlikely event that your Humminbird does require repairs, we offer an exclusive Service Policy.
- Page 3 Directive 2002/95/EC of the European Parliament and of the Council of 27 January 2003 on the restriction of the use of certain hazardous substances in electrical and electronic equipment. 360 Imaging®, Cross Touch®, Down Imaging®, Fortrex™, HELIX®, Humminbird®, Maxxum®, MEGA 360 Imaging™, Minn Kota®, Side Imaging®, SOLIX®, Ultrex™, and X-Press™ Menu are trademarked by or registered trademarks of Johnson Outdoors Marine Electronics, Inc.
-
Page 4: Table Of Contents
Change the 360 Range ..........38 1. Power On the MEGA 360 Imaging Transducer and the Control Head ........ -
Page 5: Introduction
To download the manual from our Web site, go to humminbird.com. Compatibility MEGA 360 Imaging is compatible with all SOLIX models and HELIX G3N models with MEGA+ Imaging. MEGA 360 Imaging can be shared over Ethernet with all SOLIX models and HELIX G2N and G3N units. -
Page 6: Mega 360 Imaging Sonar
The MEGA 360 Imaging rotating beams can also be set to provide Side Imaging® views on the screen. See Set Up MEGA 360 on the Network and MEGA 360 Imaging Views for more information. - Page 7 The sweep line on the MEGA 360 Imaging display reveals detailed sonar returns in real time. The historical returns remain on the display until the beams sweep again. You can use the light and dark parts of the display to interpret the objects under your boat as follows: Δ...
-
Page 8: Power On And Confirm Connections
Power On and Confirm Connections All equipment should be connected and powered before you turn on the control head. See the MEGA 360 Imaging Installation Guide for more information. When the control head detects the MEGA 360 Imaging transducer, it will select it automatically as the 360 sonar source. The related views and menus will be added to the system. - Page 9 Unconnected: If the MEGA 360 icon is listed as Unconnected, check the cable and power connections to confirm they are secure and powered on. Review the installation guide that was included with your MEGA 360 Imaging Transducer to confirm it is installed correctly.
-
Page 10: Confirm Gps Reception
| Confirm GPS Reception Use the instructions in this section to confirm the control head has GPS reception. GPS and a compass (heading sensor) are required to enable the navigation features on the control head with the MEGA 360 Imaging transducer. SOLIX Series 1. - Page 11 GPS (1) Satellite Sky Chart GPS status icon selected GPS source fix type (detected and active) status bar satellites communicating to GPS (1) monitored satellite (teal) used satellite (yellow) digital readouts 4. Under GPS (1) or GPS (2), select Signal Strength. Signal Strength (bar graph) GPS status icon selected GPS source...
- Page 12 HELIX Series 1. Press and hold the VIEW key. 2. Select System > Accessory Test. Confirm that GPS + Heading Sensor (optional) are listed as Connected. See the illustration HELIX Accessory Test. 3. Press and hold the VIEW key. 4. Select System > GPS Diagnostic View. Confirm GPS Fix Type is shown as Enhanced or 3D.
-
Page 13: Update Software
Update Software Your control head model may need a software update to work with the MEGA 360 Imaging transducer. We recommend that you read the following section completely before starting any software updates. Control Head Required Software: The following control head software version is required to operate the MEGA 360 Imaging transducer: Δ... -
Page 14: Check The Current Software Version
4. Under Export, select Nav Data. 5. Follow the on-screen prompts. 6. Select a Save Location: Save to the SD Card. 7. Repeat steps 4 and 5 to export Menu Settings and Radar Installation settings (if applicable to your installation). 8. -
Page 15: Update Control Head Software With An Sd Card
1. Install a formatted SD or microSD card into the computer card slot. 2. Go to humminbird.com, and click Support > Software Updates. 3. Click on your control head model. The available software updates are listed as downloads under each product. Confirm the file name is for your control head model. -
Page 16: Update Software With Fishsmart
Update Software with FishSmart You can use the FishSmart App to download and push software updates directly to your Humminbird control head or accessory. NOTE: Your control head must already be running software release 1.610 or higher for HELIX Series or 3.110 or higher for SOLIX Series to support this feature. -
Page 17: Set Up Mega 360 On The Network
GPS). The control head selects the equipment connected to it as its primary source, but you can choose any compatible source on the network. Make sure to review the MEGA 360 Installation Guide to ensure MEGA 360 Imaging is set up as the sonar source. -
Page 18: Helix Series Networking
selected source turn on/off transducer turn on/off pinging setup menu transducer If you change settings here, it will change the settings across the network. HELIX Series Networking Open the Network Source Setup Dialog Box 1. Main Menu: Press the MENU key twice. NOTE: If a System View is displayed on the screen, you will only need to press the MENU key once to open the Main Menu. - Page 19 Select a Sonar Source In addition to the MEGA 360 Imaging transducer, you may have another Humminbird transducer connected directly to the control head and/or available in a Humminbird multiple-control head Ethernet network. The MEGA 360 Imaging transducer does not provide depth or temperature data, so they must be provided by another transducer.
- Page 20 Network Source Setup dialog box. NOTE: The availability of beams is determined by the type of transducer that is connected to the control head and your Humminbird model. If a connected transducer is not displayed in the Network Source Setup dialog box, select the Main Menu > Sonar tab >...
-
Page 21: Start/Stop Mega 360 Imaging Operation
The transducer pod deploys into the water with the trolling motor. You can then start pinging from the 360 View or from the Menu System. Start Pinging from a 360 View When a MEGA 360 Imaging transducer is connected to the control head, the 360 View will be automatically added to the view database. SOLIX Series HELIX Series 1. - Page 22 Start Pinging from the Status Bar (SOLIX only) 1. With a 360 View or 360 Imaging Combo View displayed on screen, tap PING ON on the MEGA 360 status bar. Pinging On/Off from the Status Bar (SOLIX) Start/Stop MEGA 360 Imaging...
-
Page 23: Stop Pinging
Pinging from the Power Submenu (SOLIX) Pinging from the Power Submenu (HELIX) Stop Pinging It is important to stop pinging the MEGA 360 Imaging transducer when it is not in use. Stop Pinging from the X-Press Menu SOLIX Series HELIX Series 1. -
Page 24: Wet Switch
The MEGA 360 wet switch automatically stops MEGA 360 pinging/rotation while the transducer is out of the water, in order to prevent wear and tear. Your control head will display the following message: MEGA 360 Disabled Out of the Water. Out of the Water Notification (SOLIX) Out of the Water Notification (HELIX) Start/Stop MEGA 360 Imaging... -
Page 25: What's On The Mega 360 Imaging Display
What’s on the MEGA 360 Imaging Display MEGA 360 Imaging uses its unique transducer to provide an unobstructed view of the water around and below your boat. The razor- thin, high-definition beams produce the detailed sonar data that you see on the display. MEGA 360 Imaging reveals a variety of recognizable features so that you can interpret the structure and bottom contour, and the following items in this illustration. -
Page 26: Mega 360 Imaging Views
MEGA 360 Imaging Views SOLIX Series Views When the MEGA 360 Imaging transducer is set up on the control head, the 360 View is added to the Favorite Views widget, and additional combo views are available from the Views tool. -
Page 27: Helix Series Views
The View Options menu provides options to edit the selected view. You can open the View Options menu from the on-screen view or from the Views tool on the Home screen. The View Options menu for MEGA 360 Imaging allows you to turn the side bar on or off, edit the view layout or name, and change the data overlays. -
Page 28: 360/Sonar Combo View
360 View (HELIX) 360/Sonar Combo View The 360/Sonar Combo View shows sonar information and MEGA 360 Imaging information in a combination split screen, where the Sonar View is displayed on the left and the 360 View is displayed on the right. -
Page 29: 360/Chart Combo View
NOTE: On SOLIX, you can also access the X-Press Menu by tapping the menu in the status bar. Use the Chart View with the 360 View to determine the position of structure and fish. To Navigation mark waypoints on the 360 View, see Mark and Display Waypoints. 360/Chart View (SOLIX) 360/Chart View (HELIX) MEGA 360 Imaging Views... -
Page 30: Side Imaging View
Side Imaging View If a MEGA 360 Imaging transducer or a Side Imaging transducer is connected to the control head, the Side Imaging View will be available in the database of available views. It is also important to understand the following: You may have different SI view options, depending on your setup and network. -
Page 31: Change The 360 View Display Settings
360 Orientation: If the position of objects on the display are slightly different than what you observe in the environment around you, use this menu option to rotate the display and correct the alignment. See the MEGA 360 Imaging Installation Guide for more Preferences information. - Page 32 MEGA 360 Sonar Options (SOLIX) Display Settings...
- Page 33 Sensor. Adjust the setting to match the distance between the 360 Imaging transducer 360 Offset and the GPS Receiver/Heading Sensor. See the MEGA 360 Imaging Installation Guide for more information. 4. Close: Press the EXIT key until the Menu System is closed.
-
Page 34: Change The View Color
Change the View Color The MEGA 360 Imaging X-Press Menu allows you to quickly change the display palette while you fish. NOTE: The palette you choose will be applied to all 360 Views in the View database. SOLIX Series HELIX Series 1. -
Page 35: Customize The View
Contrast When MEGA 360 Dynamic Contrast is turned on, the contrast will be automatically adjusted. Turn on Sharpness and select a filter level to sharpen the edges of the MEGA 360 Imaging Sharpness data. Increase or decrease the sensitivity of the sonar return that is in the water column. -
Page 36: Adjust 360 Enhance Settings On Helix Series
Sensitivity Decrease the sensitivity to eliminate the clutter from the display that is sometimes present in murky or muddy water. Accents the light and dark parts of the MEGA 360 Imaging data to provide greater definition. Contrast When MEGA 360 Dynamic Contrast is turned on, the contrast will be automatically adjusted. -
Page 37: Zoom In/Out
Zoom In/Out The ZOOM keys allow you to view the MEGA 360 display closer or farther away. You can also zoom in and out of a selected area based on the cursor position. Activate the Cursor SOLIX Series HELIX Series 1. -
Page 38: Change The Sweep Speed And Range
Change the 360 Range 360 Range controls how far the MEGA 360 Imaging beams will ping. Select a low range number to focus on a shorter distance of the water column and see greater detail on the screen. Select a higher range number to see farther into the water and see an overview of details on the screen. - Page 39 Adjusting the Range (SOLIX) Adjusting the Range (HELIX) Sweep Speed and Range...
-
Page 40: Isolate A Section Of The Sweep
Isolate a Section of the Sweep There are many options to focus on a section of the sweep. You can set the sweep angle and section yourself, from 360 degrees down to 10 degrees, or you can use a 45 degree preset section, like front, rear, left, and right. Activate Quick Sweep Use Quick Sweep to focus quickly on a section of the view. -
Page 41: Select A Preset Display
Isolating Sweep (HELIX) Select a Preset Display Use the Display menu option to choose a preset portion of the MEGA 360 Imaging sweep. The preset display modes include 360, Front, Left, Right, and Rear. NOTE: If you use Isolate Sweep Area in this mode, the view will switch to the full 360 View. -
Page 42: Change The Frequency
Change the Frequency You can display the MEGA 360 Imaging transducer in two beam frequencies: 455 kHz and MEGA. SOLIX Series HELIX Series 1. X-Press Menu: With a 360 View displayed on the screen, 1. Main Menu: Press the MENU key twice. -
Page 43: Mark And Display Waypoints
Mark and Display Waypoints You can mark a waypoint directly on your Humminbird screen, and let the range rings show you the distance from your boat to the target. To mark waypoints and start navigation, the control head must have a GPS fix and a heading sensor (compass). - Page 44 Marking a Waypoint - Cursor Position (SOLIX) Marking a Waypoint - Cursor Position (HELIX) Mark and Display Waypoints...
- Page 45 2. Power Off the Transducer Turn off power on the main switch, breaker, or battery switch. NOTE: Powering off the MEGA 360 Imaging transducer will be determined by the installation and power connection on your boat. 3. Check the MEGA 360 Trolling Motor Bracket Confirm the Depth Collar Knob is fully tightened (by hand).
- Page 46 Contact Humminbird Contact Humminbird Technical Support in any of the following ways: Web site: humminbird.com E-mail: service@humminbird.com Telephone: 1-800-633-1468 Direct Shipping: Humminbird Service Department 678 Humminbird Lane Eufaula, AL 36027 USA Hours of Operation: Monday - Friday 8:00 a.m. to 4:30 p.m. (Central Standard Time) Social Media Resources: Facebook.com/HumminbirdElectronics...
Need help?
Do you have a question about the MEGA 360 IMAGING and is the answer not in the manual?
Questions and answers