Table of Contents
Advertisement
Advertisement
Table of Contents

Subscribe to Our Youtube Channel
Related Manuals for Fuji Xerox Versant 3100 Press


Summary of Contents for Fuji Xerox Versant 3100 Press
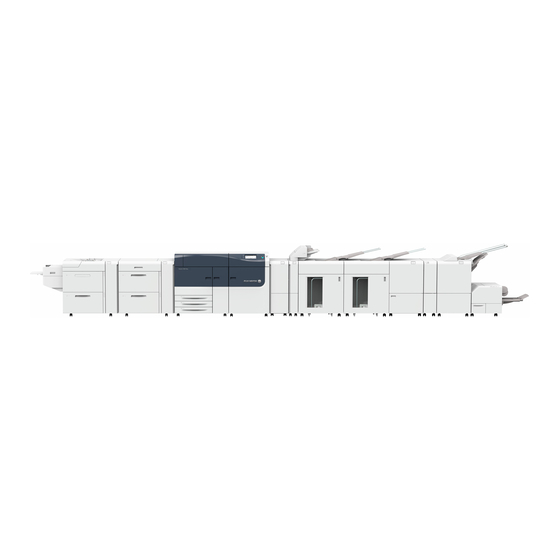
- Page 1 Versant 3100 Press Printer Unit Manual...
- Page 2 Fuji Xerox is not responsible for any direct or indirect damages arising from or caused by such data loss. Fuji Xerox is not responsible for any breakdown of machines due to infection of computer virus or computer hack- ing.
-
Page 3: Preface
Thank you for selecting the Versant 3100 Press. The Versant 3100 Press is a color printing system that quickly processes data from client computers and delivers high-quality outputs. The Versant 3100 Press consists of the printer unit and a variety of optional units as well as a Print Server. -
Page 4: Table Of Contents
Table of Contents Preface..............................................3 Table of Contents..........................................4 Types of Manuals..........................................6 Using This Manual..........................................7 Features of Versant 3100 Press......................................8 Chapter 1 Before Using the Machine..................9 1.1 Machine Components ...............................9 1.2 Power On/Off ................................12 1.2.1 Powering On...................................12 1.2.2 Powering Off..................................13 1.2.3 Main Power Switch..............................14... - Page 5 Chapter 3 Problem Solving ......................33 3.1 Troubleshooting................................ 33 3.1.1 Printing Troubles ................................34 3.1.2 Image Quality Trouble ..............................37 3.2 Paper Jams in the Printer Unit ..........................41 3.2.1 Paper Jams in the Transfer Module........................41 3.2.2 Paper Jams in Tray ..............................44 3.2.3 Paper Jams in the Paper Feeding Unit .......................45 3.2.4 Long Paper Jam ................................47 3.3 Paper Jams in the Printer Output Unit ......................
-
Page 6: Types Of Manuals
supplied with the device. PDF Manual The Manuals are stored as PDF files on the Versant 3100 Press Instruction Manuals CD. Double-click "index.html" and select the language of the manual you wish to display. Versant 3100 Press Printer Unit Manual (this manual) Describes how to load paper, how to replace consumables, how to clear paper jams, and the daily mainte- nance procedures for the printer unit. -
Page 7: Using This Manual
Using This Manual This manual is intended to provide first-time users of the Versant 3100 Press with necessary information such as operating procedures, daily maintenance, and precautions on using the printer unit. Organization of This Manual This manual consists of the following chapters: ... -
Page 8: Features Of Versant 3100 Press
Features of Versant 3100 Press The Versant 3100 Press is a color printing system that quickly processes data from client computers and delivers high-quality outputs. The standard configuration consists of the Versant 3100 Press printer unit and a Print Server. -
Page 9: Chapter 1 Before Using The Machine
Chapter 1 Before Using the Machine Machine Components................9 Power On/Off .....................12 1.2.1 Powering On ......................12 1.2.2 Powering Off ......................13 1.2.3 Main Power Switch ..................... 14 1.2.4 Circuit Breaker Switch..................14 Image Printable Area and Assured Image Area......15 1.1 Machine Components Front of the Machine Component... - Page 10 Inside of the Machine The back side Component Description Main power switch Switches the main power of the machine on and off. Always follow the instructions by the system administrator. Always switch the power off before switching the main power off. Important Refer For detailed information, refer to "1.2 Power On/Off"...
- Page 11 High Capacity Feeder C3-DS Component Description Error lamp Illuminates when a paper jam occurs. Paper level indicator lamp The top active indicator lamp lights when the corresponding Tray is active. The four center lamps (1=25%) indicate the amount of remaining paper. When all of the four lamps turn off, Tray becomes empty and paper empty indicator lamp lights.
-
Page 12: Power On/Off
1.2 Power On/Off The printer warms up and becomes ready to print within about 5 minutes after powered on. Switch the power off at the end of a day or if the machine is not used for a long time. Note The warm-up time may vary with an initial temperature of the printer. -
Page 13: Powering Off
On Print Server, make sure the Stock Library Manager is activated. 1.2.2 Powering Off Make sure all the printing is finished and the <Data> lamp is not blinking. Shut down the Print Server. Stock Library Manager will be closed as the Print Server is shut down. Refer For information on functions and operations of the Print Server, refer to customer documentation supplied with Print Servers. -
Page 14: Main Power Switch
1.2.3 Main Power Switch If you turn off the main power, the power consumption can be reduced. (but cannot be reduced to zero.) Note that the machine needs more time to warm up if switched on after the main power is off. The printer may be damaged if you switch the main power off immediately after switching the power off. -
Page 15: Image Printable Area And Assured Image Area
Assured Image Area Assured Image Area is the area where Fuji Xerox assures image quality. Note When an image with high area coverage is placed in the area described above, Fusing Unit jam may be ... - Page 16 The lead edge A is set to 4 mm as the factory default value. If you change this default setting, contact your local Fuji Xerox representative. For detailed information about the Register Paper Feeding Positions, refer to "4.1.8 Maintenance" in the User Refer Interface Manual.
-
Page 17: Chapter 2 Load And Output Paper
Chapter 2 Load and Output Paper Paper Types ....................17 2.1.1 Recommended Paper..................17 2.1.2 Supported Paper....................18 2.1.3 Storing and Handling Paper................23 Output Paper....................24 Loading Paper....................25 2.3.1 Loading Paper in Trays..................25 2.3.2 Loading paper in High Capacity Trays............27 2.3.3 Loading paper in Bypass Tray................ -
Page 18: Supported Paper
The printed image may fade or damaged due to moisture caused by water, rain, or vapor. For information, contact your local Fuji Xerox representative. Important Note Even if you use recommended paper types, however, please note that they do not necessarily yield the ... - Page 19 Paper Size Standard size Printer Unit Bypass High Capacity Inserter Tray Size (short edge x long edge) Trays (1 - 3) Tray (5) Trays (6 - 9) (T1) SRA3 (320 x 450mm) ...
- Page 20 Custom size When you use non-standard size paper and long paper, from one of the Stock Library, select [Custom] for [Size] to specify the paper size using [Width] and [Height]. Printer Unit Trays (1 - 3) LEF: 139.7 - 330.2 mm SEF: 182.0 - 488.0 mm Bypass Tray (5) LEF: 98.0 - 330.2 mm...
- Page 21 Note Paper weight means the weight of a paper in gram per 1 square meter (g/m For information on supported transparency, contact your local Fuji Xerox representative. Transparency having a white strip on the edge is not supported.
- Page 22 Damp or wavy damp paper 12 mm or more curled paper Thermal paper, Heat-transfer paper Window envelope There are some unsupported papers other than the one listed above. For more information, contact your local Fuji Xerox representative. Printer Unit Manual...
-
Page 23: Storing And Handling Paper
2.1.3 Storing and Handling Paper Storing Paper Paper is easy to get moist by the open air and to be deformed by the impact. Therefore, be sure to note the following: Store paper inside a cabinet or other dry places. Paper that has absorbed moisture can cause paper ... -
Page 24: Output Paper
2.2 Output Paper Offsetting When offsetting is enabled, each set of printed paper is staggered in the output tray so that you can separate the stack easily. Enable offsetting on Print Server. Offsetting is disabled when: Sheets 297.1 mm portrait or larger and 181.9 mm portrait or smaller. ... -
Page 25: Loading Paper
2.3 Loading Paper After loading the paper, be sure to set the information of the loaded paper in [Tray Stock Properties] win- dow on Stock Library Manager. Refer For detailed information on how to regard Tray settings, refer to "Tray Status Confirmation / Setting Area" in the Stock Library Manager Manual. - Page 26 Pull out the Tray toward you until it stops. Remove any paper remaining in the Tray. Hold the long-side paper guide by its grip and move it to lightly contact the paper edges ( Hold the short-side paper guide by its grip and move it to lightly contact the paper edges ( Fan the paper well and load it with the printed side facing down, with the edges aligned in the direction...
-
Page 27: Loading Paper In High Capacity Trays
2.3.2 Loading paper in High Capacity Trays The Trays 6 and 7 are refilled in the same way. Note The 2nd High Capacity Feeder C1-DS (Trays 8 and 9) is also refilled in the same way. Images are printed on the face side of the loaded paper. Up to 2,000 sheets (Colotech+90) can be loaded to each Tray. - Page 28 Loading Paper in a Tray Note The number of sheets is the value when Colotech+90 is used. Adjust the number according to the type or the weight of the paper. Pull out the Tray toward you until it stops. Remove any paper remaining in the Tray. Fan the paper well and load about 100 to 500 sheets with the printed side facing up, and the paper edges aligned in the direction of the arrow (...
- Page 29 Pull out the Tray toward you until it stops. Remove any paper remaining in the Tray. If the Postcard Kit is supplied with the Tray, loosen the screw ( ) on the left side of the Tray to remove the Kit ( Insert the small protrusion of the Kit into the notch to the right side of the bottom of the Tray ( ).
- Page 30 Push the Tray into the machine. The [Tray Stock Properties] window appears on the Stock Library Manager. In the event power is disconnected while the Tray's bottom plate is rising, the plate may not move up when the power is recovered. In this case, pull out the Tray, make sure the plate is lowered, and Important then push the Tray into the machine slowly and firmly.
-
Page 31: Loading Paper In Bypass Tray
Pull out the Tray toward you until it stops. Slide the switch on top of the long-side paper guide to the right side until it stops. Note To return the switch to its original position, slide it to the left side until it stops. If the paper feeding does not improve after Step slide the switch on the front right side toward the rear side until it stops. - Page 32 Hold the center of the paper guides and slide them to the desired paper size. If the distance between the guides is too long or short relative to the paper, paper jams may occur. Important Fan the paper well and insert it along the paper guide all the way until it touches the back, with the printed side facing up.
-
Page 33: Chapter 3 Problem Solving
"3.1.2 Image Quality Trouble" (p.37) "8.1 IPv4 and IPv6 Connection Problems" Having network troubles. in the User Interface Manual. If the error is not resolved even after following the above procedure, contact your local Fuji Xerox representative. Chapter 3 Problem Solving... -
Page 34: Printing Troubles
3.1.1 Printing Troubles When paper jams or any other troubles with the printer unit occurs, follow the procedures shown in the touch screen. If the machine does not work properly after taking the procedure, contact your local Fuji Xerox representative. Troubles with the Printer Unit Symptom Cause... - Page 35 Symptom Cause Remedy Unable to print Is the message "Machine Cooling in The printer is in cooling mode. Please wait. Progress" displayed on the touch "1.2.1 Services Home" in the User Refer screen? Interface Manual. Is any of below happening? It may take time to start printing as image quality adjustment is in progress.
- Page 36 Symptom Cause Remedy Tray 5 - 9 are not Are the main unit and the High Make sure the devices are securely connected. displayed on the Capacity Feeder C3-DS touch screen connected? Indicated paper level Is the Tray inserted correctly? Pull out the Tray, make sure the plate is lowered, and is wrong (High then push the Tray into the machine slowly and firmly.
-
Page 37: Image Quality Trouble
If the image quality of a printed document is poor, identify the symptom in the following table to perform the remedy. If image quality does not improve even after performing the remedy, contact your local Fuji Xerox repre- sentative. Symptom... - Page 38 Refer "3.3.1 Clean Fusing Unit" in the User Interface Manual. The drum cartridge has Contact your local Fuji Xerox representative deteriorated or is damaged. to replace the Drum Cartridge. Feed Direction White dots appear in black filled areas. The paper is unsuitable.
- Page 39 Refer "3.3.1 Clean Fusing Unit" in the User Interface Manual. The drum cartridge has Contact your local Fuji Xerox representative deteriorated or is damaged. to replace the Drum Cartridge. No toner remains in the Replace the toner cartridge with a new one.
- Page 40 Symptom Cause Remedy Text or images are printed at an angle. Paper guides in the Trays Place the long-side and short-side paper are not in the right position. guides in the right position. Prints on the front and back side of the Alignment (registration Create an alignment profile to correct the paper are off-center.
-
Page 41: Paper Jams In The Printer Unit
Fusing Unit or a heat roller. Otherwise, it may cause injuries or burns. Switch off the product promptly immediately and contact your local Fuji Xerox representative. Always follow all warning instructions marked on or supplied with this printer. ... - Page 42 Open the left side and center covers of the printer unit. Turn lever "2" in the unlocking direction (toward the opened-lock mark). Grip lever "2" and gently pull out the Transfer Module toward you until it stops. If the paper is curled and caught in the Transfer Module, stop pulling when the jammed paper is visible, and then continue to pull it out while holding down the paper with a hand.
- Page 43 Paper Jams at Lever "2b" (1) Open lever "2b" upward ( ) and remove jammed papers ( Note Remove the paper while holding lever "2b" with the other hand. (2) Return lever "2b" to its original position. Note If you cannot see any jammed paper, check levers "2d"...
-
Page 44: Paper Jams In Tray
Paper Jams at Lever "2f" (1) Open lever "2f" downward ( ) and remove jammed papers ( (2) Return lever "2f" to its original position. Push the Transfer Module gently into the machine until it stops ( Turn lever "2" in the locking direction (toward the closed-lock mark) ( Close the covers. -
Page 45: Paper Jams In The Paper Feeding Unit
Pull out the Tray where the paper jam occurred toward you until it stops. Remove jammed papers. Make sure the long-side and short-side paper guides are positioned to just touch the paper, and then push the Tray into the machine. 3.2.3 Paper Jams in the Paper Feeding Unit Follow the steps below to clear paper jams in the paper feeding unit, from the High Capacity Feeder C3-... - Page 46 Open lever "1d" upward ( ) and remove jammed papers ( Return lever "1d" to its original position. If you cannot see any jammed paper, open the cover on the lower right (the cover on the left side of the printer unit).
-
Page 47: Long Paper Jam
3.2.4 Long Paper Jam If you open the cover of printer unit while printing a long paper, the paper is remained in the paper feed- ing unit and you cannot remove the paper. In this case, remove the paper with the following steps. Close the cover of printer unit. -
Page 48: Paper Jams In The Printer Output Unit
Fusing Unit or a heat roller. Otherwise, it may cause injuries or burns. Switch off the product promptly immediately and contact your local Fuji Xerox representative. Always follow all warning instructions marked on or supplied with this printer. ... - Page 49 Open the right side cover of the printer unit. Turn lever "4" in the unlocking direction (toward the opened-lock mark). Grip lever "4" and gently pull out the Cooling Unit toward you until it stops. Remove jammed papers. Paper Jams at Knob "4a" ..............................p.49 ...
- Page 50 (2) If you have difficulty in removing jammed papers, turn knob "4a" clockwise ( ), and remove jammed papers ( Note If you cannot see any jammed paper, check levers "4b" / "4d" as well. Paper Jams at Lever "4b" / "4d" (1) Open lever "4b"...
-
Page 51: Paper Jams Inside The Cover
(2) Return lever "4c" to its original position. Note If you cannot see any jammed paper, check lever "4d" as well. Push the Cooling Unit gently into the machine until it stops ( Turn lever "4" in the locking direction (toward the closed-lock mark) ( Close the cover. - Page 52 Paper Jams at Lever "3a" / Knob "3b" (1) Open lever "3a" to the upper ( ) and remove jammed papers ( (2) If you have difficulty in removing jammed papers, turn knob "3b" clockwise ( ), and remove jammed papers rightward ( There may be extra sheets remaining in the printer unit.
- Page 53 (3) Return lever "5a" to its original position. (4) Remove the fallen paper inside the printer if there is any. Note If you cannot see any jammed paper, check lever "5c" as well. Paper Jams at Lever "5c" / Knob "5d" (1) Open lever "5c"...
-
Page 54: Paper Jams In The Output Area
3.3.3 Paper Jams in the Output Area Follow the steps below to clear paper jams in the output area. Remove the paper stuck at the exit. Printer Unit Manual... -
Page 55: Paper Jams In The High Capacity Feeder C3-Ds
3.4 Paper Jams in the High Capacity Feeder C3-DS If there is a paper jam, the printing will be canceled. The Error Message area of the touch screen will show the affected area in red, along with the message. Also, the error lamp on the top of the machine will illuminate. If there is a paper jam in the following area, tap the [Faults] and the [Faults] screen will appear, explaining how to remove jammed papers. - Page 56 Remove jammed papers. When Lamp E5 is Lit................................p.56 When Lamp E6 is Lit................................p.56 When Lamp E7 is Lit................................p.57 Note Solutions differ depending on where the paper jam occurs. Confirm the jammed area in the Error Message area. The code (E) on the upper-left part of the message indicates which error lamp on the top of the machine is illuminating.
-
Page 57: Paper Jams Inside The Right Side Cover
When Lamp E7 is Lit (1) Pull out the Tray 7 toward you until it stops. Before pulling out the Tray, make sure no paper is jammed inside the right side cover. Important (2) Remove jammed papers. (3) Make sure the long-side and short-side paper guides are positioned to just touch the paper, and then push the Tray into the machine. - Page 58 When Lamp E1 is Lit (1) Open lever "1d" upward ( ) and turn knob "1c" clockwise ( ). Remove jammed papers ( (2) Return lever "1d" to its original position. When Lamp E2/E4 is Lit (1) Open lever "1a" to the right ( ) and turn knob "1c"...
- Page 59 When Lamp E3 is Lit (1) Open lever "1b" to the right ( ) and turn knob "1c" clockwise ( ). Remove jammed papers ( (2) Return lever "1b" to its original position. Close the cover. Chapter 3 Problem Solving...
-
Page 60: Chapter 4 Maintenance
Before using consumables, read instructions and precautions on the packages carefully. It is recommended to have spare consumables ready. To place orders for consumables, take a note of the part number and contact your local Fuji Xerox repre- sentative. Printer Unit Manual... -
Page 61: Replacing The Toner Cartridge
Never throw a Toner Cartridge into an open flame. Remaining toner in the cartridge may catch fire and cause burn injuries or explosion. If you have a used Toner Cartridge no longer needed, contact your local Fuji Xerox representative for its disposal. CAUTION Keep Toner Cartridges out of the reach of children. - Page 62 Open the Toner cover. Gently open / close the Toner covers when replacing a toner while printing. Important Shakes by opening / closing the cover may cause image defect. Gently pull out the Toner Cartridge of the color dis- played in the message, holding the bottom of the cartridge.
-
Page 63: Replacing The Waste Toner Bottle
Never throw a Waste Toner Bottle into an open flame. Toner may catch fire and cause burn injuries or explosion. If you have a used Waste Toner Bottle no longer needed, contact your local Fuji Xerox representative for its disposal. - Page 64 Hold the center part on the top of a new Waste Toner Bottle and insert it until it stops. Close the cover. Printer Unit Manual...
-
Page 65: Full Width Array
4.2 Full Width Array By utilizing the Full Width Array, image quality adjustments (Calibration, Density Uniformity Adjustment) and Alignment adjustment can be performed automatically. Perform the image quality adjustments when replacing the Drum Cartridge or switching papers. Thirty to sixty minutes after the power is on (as the printer is unstable immediately after turned on) ... -
Page 66: Cleaning The Printer
4.3 Cleaning the Printer When you clean printer products, use the cleaning materials designated in every step. To wipe with a wet cloth, use the soft cloth tightly wrung out of water. If the parts are not completely dry, the printer may malfunction. - Page 67 Cleaning the Touch Screen Wipe the touch screen with a firmly wrung soft cloth moistened with neutral detergent or alcohol. When you moisten the cloth with neutral detergent or alcohol, do not allow the excess liquid to drip down from the cloth.
-
Page 68: Cleaning Chute
4.3.1 Cleaning Chute Clean the exit and inlet chutes of the Transfer Module. CAUTION When pulling out the Transfer Module, do it gently. If pulled out with too much force, the module can hit and injure your knees. Open the left side and center covers of the printer unit. - Page 69 Cleaning Exit Chute Clean gently. If you perform with too much force, the ribs or the metal fingers for releasing paper might be broken. Important Do not give damage on the roll near by. (1) Use a soft and dry cloth to wipe the surface of the ribs (gray) from the bottom to top.
-
Page 70: Cleaning High Capacity Trays
4.3.2 Cleaning High Capacity Trays Clean the roller in the feeder cover. CAUTION When pulling out the Tray, do it gently. If pulled out with too much force, the Tray can hit and injure your knees. Pull out the Tray toward you until it stops. Clean the roller in the feeder cover located on the right side of the paper Tray. - Page 71 (3) Reinstall roller 1. Note Make sure that roller 1 is installed in the holder com- pletely. (4) Remove roller 2 by picking up the both ends of its pin. (5) Wipe the surface of roller 2. (6) Rotate the shaft of roller 3 with one hand, and wipe the surface of roller 3 with the other hand.
-
Page 72: Cleaning The Paper Feeding Unit In The High Capacity Tray
4.3.3 Cleaning the Paper Feeding Unit in the High Capacity Tray Clean the roller and the surface of paper path behind the right side cover. Do not press a roller during the cleaning, otherwise the roller may drop off. Important Note Non-woven dry type fabric can be used effectively for cleaning paper dust. - Page 73 Open lever "1b" to the right. Clean behind lever "1b" . (1) Wipe the roller surface with the soft cloth tightly wrung out of water. Roller (2) Lightly wipe paper dust off on the surface of the Roller paper path. Paper path surface Return lever "1b"...
- Page 74 Return lever "1d" to its original position. Close the cover. Printer Unit Manual...
-
Page 75: Chapter 5 Appendix
We are unable to guarantee the image quality or feedability of the following papers. Regarding we recom- mend Fuji Xerox paper. Please contact your local Fuji Xerox representative concerning our paper. Important For specifications of the optional units, refer to Optional Units Manual. - Page 76 Item Specification Paper size Paper size Standard Maximum A3, 13 x 19" Paper weight size Minimum JIS B5 (Printer Unit Trays) Custom size Height 139.7 - 330.2 mm Width 182.0 - 488.0 mm Paper weight 64 - 256 g/m Refer For detailed information about the supported paper size and weight, refer to "2.1.2 Supported Paper"...
- Page 77 High Capacity Feeder C3-DS Item Specification Paper size Paper size Standard size Maximum A3, 13 x 19" Paper weight Minimum Post Card (100 x 148 mm) Custom size Bypass Tray Height 98.0 - 330.2 mm Width 148.0 - 660.4 mm High Capacity Tray Height 98.0 - 330.2 mm...
-
Page 78: Optional Components
Plate reinforcements to be used on the floors with low load bearing or uneven floors when installing the machine. Note The optional components are subject to change without notice. For the latest information, contact your local Fuji Xerox representative. Printer Unit Manual... - Page 79 Chapter 5 Appendix...
-
Page 80: Index
Image Printable Area..............Toner Cartridge ................Loading Paper................... Waste Toner Bottle................. Main Power Switch................Offsetting.................... Output Paper ..................Versant 3100 Press Printer Unit Manual Author - Fuji Xerox Co., Ltd. Edition 1 - August 2016 Publisher - Fuji Xerox Co., Ltd. ME6851E2-3...
Need help?
Do you have a question about the Versant 3100 Press and is the answer not in the manual?
Questions and answers