Advertisement
Quick Links
OFF/ON
YURAGI
2
3
1
4
5
SPEED
1
3
6h
CANCEL
OFF
TIMER
SLEEP MODE
Thank you for purchasing this KDK product.
Cảm ơn Quý khách hàng đã mua sản phẩm của KDK.
Before operating this product, please read the instructions carefully, and save this manual
for future use.
Trước khi sử dụng sản phẩm này, xin vui lòng đọc kỹ các hướng dẫn và cất giữ sách
hướng dẫn sử dụng này để tham khảo trong tương lai.
Contents / Nội Dung
Safety Precautions / Chú Ý Về An Toàn
Supplied Parts / Các Bộ Phận Được Cung Cấp
How To Install / Cách lắp đặt
How to Use / Cách Sử Dụng
Maintenance / Bảo Dưỡng
Product Specification / Thông Số Kỹ Thuật Của Sản Phẩm
Operating And Installation Instructions
Hướng dẫn sử dụng và lắp đặt
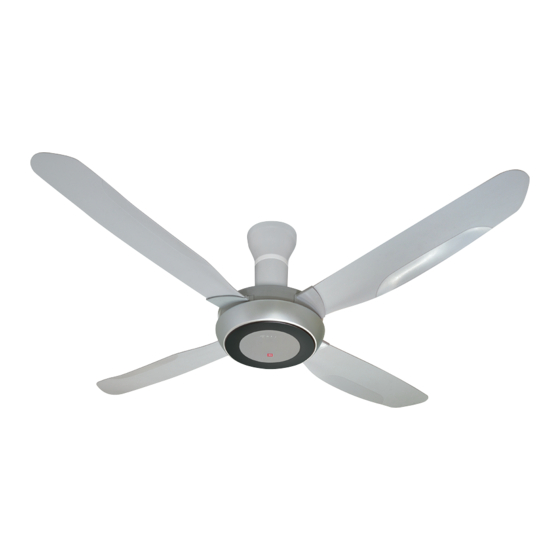
Ceiling Fan
Quạt trần
Model Number
Tên Model
S56XV
Page / Trang
2
5
5
12
16
16
Advertisement

Related Manuals for KDK S56XV


Summary of Contents for KDK S56XV
- Page 1 S56XV SLEEP MODE Thank you for purchasing this KDK product. Cảm ơn Quý khách hàng đã mua sản phẩm của KDK. Before operating this product, please read the instructions carefully, and save this manual for future use. Trước khi sử dụng sản phẩm này, xin vui lòng đọc kỹ các hướng dẫn và cất giữ sách hướng dẫn sử...
- Page 2 Safety Precautions / Chú Ý Về An Toàn To avoid the possibility of causing injury to users or damage to properties, please follow all the explanations written below. Để tránh nguy cơ gây thương thích cá nhân hoặc hỏng hóc sản phẩm, xin vui lòng làm theo hướng dẫn bên dưới đây. A state that, if not avoided, may lead to the possibility of death or serious injury of users.
- Page 3 WARNING / CẢNH BÁO Switch off power supply and wait until Do not dismantle the Ceiling Fan unless Avoid damage wire during installation the Blade is fully static, before cleaning stated by this manual. eg. Deform due to heat, twist, bend, etc. Tránh làm hỏng dây trong quá...
- Page 4 CAUTION / LƯU Ý This appliance is not intended for use by persons (including children) with reduced physical, sensory or mental capabilities, or lack of experience and knowledge, unless they have been given supervision or instruction concerning use of the appliance by a person responsible for their safety. Children should be supervised to ensure that they do not play with the appliance.
- Page 5 Supplied Parts / Các Bộ Phận Được Cung Cấp Pcs / Parts / Các bộ phận Chiếc 1. Motor Assembly / Động cơ 2. Canopy / Nắp bảo vệ 3. Canopy Plate / Đai gài chụp bảo vệ 4. Blade Assembly Set / Bộ cánh quạt 5.
- Page 6 ATTENTION / CHÚ Ý In case “U” hook is being used, installation method is the same. Trong trường hợp sử dụng móc “U”, việc lắp đặt được tiến hành tương tự. “U” hook / Móc “U” Fix and fi rmly tighten Bolt, Nut and Cotter Pin. Cotter Pin (bent) / Cố...
- Page 7 ATTENTION / CHÚ Ý In case “U” hook is being used, installation method is the same. Trong trường hợp sử dụng móc “U”, việc lắp đặt được tiến hành tương tự. “U” hook / Móc “U” Check Point After Installation / Kiểm tra sau khi lắp đặt Check / Kiểm tra 1.
- Page 8 WIRING DIAGRAM / SƠ ĐỒ MẮC DÂY Motor / Động cơ Thermal Fuse / Red / Đỏ Cầu chì nhiệt Black / Đen White / Trắng MAIN PCB Blue (Neutral) / Xanh dương (Dây trung tính) PCB CHÍNH Brown (Live) / Nâu (Dây nóng) Green / Yellow (Earth) / Xanh lá/Vàng (Dây nối đất)
- Page 9 Should there be a regulator or dimmer switch, disconnect it and reconnect the wiring as below. Nếu có hộp số hoặc chiếc áp, thoát nó ra trước và nối lại dây như hình vẽ. Power Supply / Nguồn Ðiện Power Supply / Nguồn Ðiện Connect Directly / Connect Directly / Nối trực tiếp...
- Page 10 Check Point After Assembly / Kiểm tra sau khi lắp đặt Check / Kiểm tra 1. The Canopy is securely screwed. / Vỏ động cơ được vít chắc chắn. Installing the Blades / Lắp đặt cánh quạt (i) Step 1: Assemble the Blade towards the Blade Support Plate slot as shown in fi...
- Page 11 After 4 Blades have been fi xed, fi x the Decoration Cap. Make sure guide at Motor Assembly and Decoration Cap are aligned ( ). Turn Clockwise until a click sound is heard. Sau khi lắp xong 4 cánh quạt, gắn nắp chụp động cơ. Phải đảm bảo chỉ dẫn trên bộ động cơ và nắp chụp động cơ thẳng hàng ( ).
- Page 12 How to Use / Cách Sử Dụng A) Before Use / Trước khi sử dụng Step 1 / Bước 1 Step 2 / Bước 2 Step 3 / Bước 3 Flap / Nắp gập Cover / Phạm vi Protruding part (2 positions) / Lẫy (2 vị...
- Page 13 ATTENTION / CHÚ Ý The power consumption when the fan is turned off by the Remote Control is about 0.3 W. It is recommended to switch off wall switch or breaker if Ceiling Fan is not in use for long period. This is for zero power consumption purpose.
- Page 14 OFF TIMER / HẸN GIỜ TẮT For OFF TIMER function, the timer will gradually count down hourly until off. During this timer count down, speed will remain the same until the Ceiling Fan is off. Khi cài chức năng HẸN GIỜ TẮT, thiết bị hẹn giờ sẽ dần dần đếm ngược từng tiếng cho tới khi tắt. Trong khi thiết bị...
- Page 15 1/f YURAGI / 1/f YURAGI What is 1/f YURAGI? / 1/f YURAGI là gì? ▪ It is studied that people eventually get tired of some constant stimulations. ▪ But feel uncomfortable it stimulations change too suddenly. ▪ Yuragi is a right proportion between the above 2 extremes. ▪...
- Page 16 TỊNH HIGH m/ min / min THẤP m/ phút / phút 241.3 KDK Company, Division of PES Made in Malaysia Head Offi ce: 4017, Takaki-cho, Kasugai, Aichi, Japan. Sản xuất tại Malaysia © KDK Company, Division of PES 2011 S56XV8001ZM...