Advertisement
Quick Links
Operating And Installation Instructions
Petunjuk Pemasangan dan Pemakaian
OFF/ON
SPEED
1
2
3
1
3
6h
CANCEL
OFF TIMER
OFF/ON
SLEEP MODE
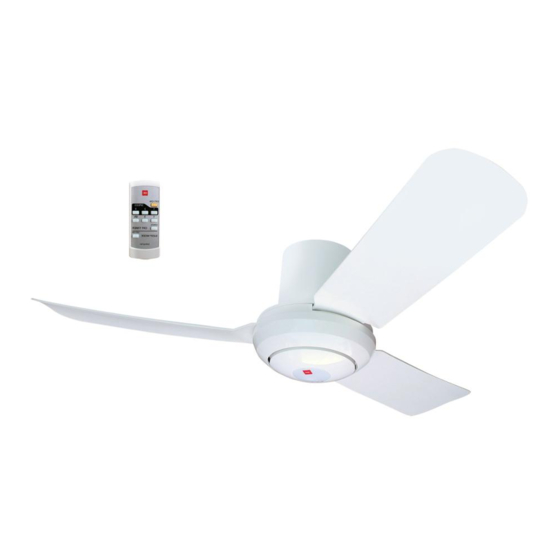
Ceiling Fan
Thank you for purchasing this KDK product.
Terima kasih telah membeli produk KDK ini.
Before operating this product, please read the instructions carefully, and save this manual
for future reference.
Sebelum mengoperasikan produk ini, harap baca petunjuk dengan saksama, dan rawat
buku panduan ini sebagai acuan mendatang.
Contents / Daftar Isi
Safety Precautions / Tindakan Pencegahan untuk Keselamatan
Supplied Parts / Suku cadang yang disediakan
How To Install / Cara memasang
How to Use / Cara Penggunaan
Maintenance / Perawatan
Product Specification / Spesifikasi Produk
Kipas Angin Gantung
Ceiling Fan
Model No.
Nomor Model
S44XU
Page / Halaman
2
5
6
16
19
19
Advertisement

Related Manuals for KDK S44XU


Summary of Contents for KDK S44XU
- Page 1 OFF/ON SLEEP MODE S44XU Ceiling Fan Thank you for purchasing this KDK product. Terima kasih telah membeli produk KDK ini. Before operating this product, please read the instructions carefully, and save this manual for future reference. Sebelum mengoperasikan produk ini, harap baca petunjuk dengan saksama, dan rawat buku panduan ini sebagai acuan mendatang.
- Page 2 Safety Precautions / Tindakan Pencegahan untuk Keselamatan To avoid the possibility of causing injury to users or damage to properties, please follow all the explanations written below. Untuk menghindari kecelakaan kepada pengguna atau kerusakan pada unit, ikuti petunjuk yang tertulis di bawah. A state that may be caused by the mishandling of products, which, if not avoided, may lead to WARNING the possibility of death or serious injury of users.
- Page 3 WARNING / PERINGATAN Switch off power supply and wait until Avoid installing at oily and dusty places. Avoid damage wire during installation the Blade is fully stop, before cleaning Hindari pemasangan di tempat yang eg. Deform due to heat, twist, bend, etc. or doing any maintenance jobs.
- Page 4 CAUTION / PERHATIAN This appliance is not intended for use by persons (including children) with reduced physical, sensory or mental capabilities, or lack of experience and knowledge, unless they have been given supervision or instruction concerning use of the appliance by a person responsible for their safety. Children should be supervised to ensure that they do not play with the appliance.
- Page 5 Supplied Parts / Suku cadang yang disediakan Piece(s) / Parts / Suku cadang Buah 1. Motor Assembly / Unit Motor 2. Blade / Daun Kipas 3. Hanger Plate Assembly / Pemasangan Gantungan 4. Canopy / Kanopi 5. Remote Control / Remote 6.
- Page 6 How To Install / Cara memasang Install Blade Assembly To Motor Assembly Memasang Rangka Daun Kipas ke Rangka Motor Take out Hanger Plate Assembly from the Upper Pack. Put the Motor Assembly on the round portion of the Upper Pack to assemble Ceiling Fan as shown. Keluarkan Rangka Pelat Gantungan dari Kemasan Atas.
- Page 7 Install Hanger Plate Assembly to Concrete Ceiling Memasang Rangka Pelat Gantungan ke Plafon Beton Make 5 holes on the concrete ceiling. 4 holes (no. 2, 3, 4, 5) with diameter 8.5mm (depth 45mm) and hole no. 1 with diameter 6.5mm (depth 30mm). (Hole no.
- Page 8 Fix the Hanger Plate Assembly to the concrete ceiling and tighten the Plain Washer, Spring Washer and Hexa Nut onto the Carl Bolt refering to the numbers given. No.1 Carl Bolt is used for Safety Wire. Pasang Rangka Pelat Gantungan ke plafon beton dan kencangkan Gelang Biasa, Gelang Pegas, dan Mur Segi Enam ke Baut Carl sesuai dengan nomor yang diberikan.
- Page 9 Install Hanger Plate Assembly on Plaster Ceiling Memasang Rangka Pelat Gantungan di Plafon Plester For Plaster Ceiling, static metal structure (welded) must be prefix on the concrete ceiling via anchor bolt before installing the Ceiling Fan Gap between Lower Plate & Plaster Ceiling Untuk Plafon Plester, struktur logam statis (yang dilas) Static Metal Structure / 10mm / Jarak antara...
- Page 10 Install Motor Assembly to Hanger Plate Assembly Memasang Rangka Motor ke Rangka Pelat Gantungan Insert Ball Joint into the Hanger Plate Assembly. Masukkan Sambungan Bulat ke Rangka Pelat Gantungan. Concrete Ceiling / Plafon Beton Hanger Plate Assembly / Pemasangan Gantungan Ball Joint / Sambungan Bulat...
- Page 11 Remove Hexa Nut, Spring Washer, and Plain Washer from Carl Bolt at hole no. 1. Pass Safety Wire through Safety Wire Outlet. Fix Safety Wire to No. 1 Carl Bolt as shown. Tighten the removed Plain Washer, Spring Washer and Hexa Nut onto the Carl Bolt.
- Page 12 Check Point After Installation / Titik Pemeriksaan Setelah Perakitan Check / Centang 1. Ensure the position of Ball Joint Holder is pressing on the top of the Switch Cover as shown. (If the Ceiling Fan is unable to operate due to misalignment of the Ball Joint Holder, adjust the Ball Joint position until the holder is placed right on the top of the Switch Cover).
- Page 13 WIRING DIAGRAM / DIAGRAM PERKABELAN Motor / Motor Thermal Fuse / Fuse Termal Red / Merah Black / Hitam White / Putih MAIN PCB / Blue (Neutral) / Biru (Netral) PCB UTAMA Brown (Live) / Coklat (Hidup) Green/Yellow (Earth) / Brown / Switch / Brown /...
- Page 14 ATTENTION / PERHATIAN It is recommended to user, to install an OFF/ON switch on the wall for the Ceiling Fan, replacing existing regulator or new regulator point. If your Remote Control missing or misplaced, the Ceiling Fan can be switched on at pre-set speed 2. Disarankan untuk menggunakan sakelar OFF/ON pada dinding untuk produk ini, menggantikan alat pengatur yang ada atau yang baru.
- Page 15 Concrete Ceiling / Plafon Beton Fix the Screws into the Canopy and tighten it firmly. Pasangkan Sekrup ke Kanopi dan kencangkan erat. Screw / Sekrup CAUTION / PERHATIAN Concrete Ceiling / Plafon Beton Do not clamp the wire after Canopy fixing. Can cause fire, electric shock, Ceiling Fan drop and injury.
- Page 16 How to Use / Cara Penggunaan Remote Control / Remote • Insert 2 pieces AA, R6P, R6, LR6 size Batteries and make sure the polarity direction is as shown. • Please remove all Batteries before disposing the Remote Control. • The life of Battery is about one year for a normal usage. •...
- Page 17 • Obstacles such as walls or glass between the product receiver and Remote Control can cause signal transmission failure. Obstacles / • Penghalang seperti dinding atau kaca yang berada di antara Penghalang penerima produk dan Remote dapat menyebabkan kegagalan Signal Receiver / transmisi sinyal.
- Page 18 SLEEP MODE / MOD TIDUR “1” light blinking “6h” light blinking “3” light blinking All lights off Lampu “1” berkedip “1”, “3” lights on “1”, lights on Semua lampu mati Lampu “6” berkedip Lampu “3” berkedip Lampu “1”, “3” menyala Lampu “1”...
- Page 19 GUIDE TO BETTER MAINTENANCE / PANDUAN UNTUK PEMELIHARAAN YANG LEBIH BAIK 1. Check the fan condition . If a problem occurs, stop using the fan. Then refer to KDK service, sales or maintenance shop. Check points : Loosened Screws, Hexa Nut and Carl Bolt, Safety Wire condition, Motor Shaft damage, Hanger Plate Assembly etc.
- Page 20 Di Impor Oleh: PT. KDK Indonesia Gd. Cosa Lt. IV JL.Tomang Raya No. 70, Jakarta 11430, Indonesia xxxxxxxxxxx xxxxxxxxxxxx xxxxxxxxxxx KDK Company, Division of PES Head Office: 4017, Takaki-cho, Kasugai, Aichi, Japan. S44XU8001ZM Produksi Malaysia © KDK Company, Division of PES 2011...
Need help?
Do you have a question about the S44XU and is the answer not in the manual?
Questions and answers