Keysight CXA N9000A Installation Note
Signal analyzer option pc3 single core high performance processor
Hide thumbs
Also See for CXA N9000A:
- User reference manual (1138 pages) ,
- Manual (119 pages) ,
- Measurement manual (73 pages)
Advertisement
Quick Links
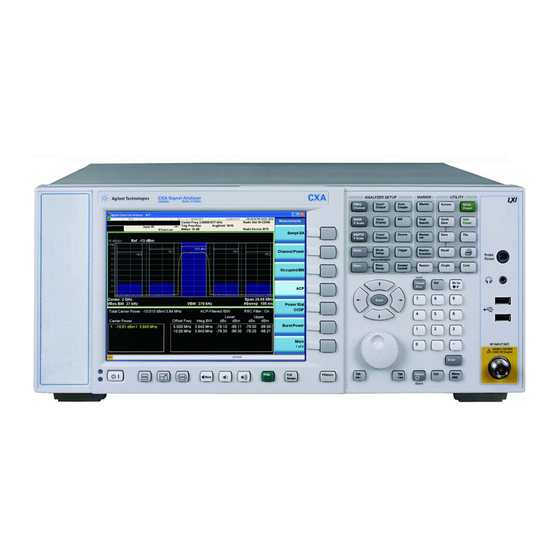
Keysight N9000A CXA Signal Analyzer
Option PC3
Single Core High Performance Processor
Notice: This document contains references to Agilent.
Please note that Agilent's Test and Measurement
business has become Keysight Technologies. For
more information, go to www.keysight.com.
Installation Note
Part Number: N9000-90030
Printed in USA
July 2014
*N9000-90030*
N9000-90030
Advertisement

Related Manuals for Keysight CXA N9000A


Summary of Contents for Keysight CXA N9000A
- Page 1 Option PC3 Single Core High Performance Processor Notice: This document contains references to Agilent. Please note that Agilent’s Test and Measurement business has become Keysight Technologies. For more information, go to www.keysight.com. Installation Note Part Number: N9000-90030 Printed in USA...
- Page 2 The information contained in this document is subject to change without notice. Keysight Technologies makes no warranty of any kind with regard to this material, including but not limited to, the implied warranties of merchantability and fitness for a particular purpose. Keysight Technologies shall not be liable for errors contained herein or for incidental or consequential damages in connection with the furnishing, performance, or use of this material.
- Page 3 Products Affected: CXA N9000A CXA - < MY49370546 Serial Numbers: (X) Keysight Service Center To Be Performed By: (X) Personnel Qualified by Keysight (X) Customer Estimated Installation Time: 1.5 Hours Estimated Adjustment and Verification Time: 1 Hour Single Core High Performance Processor Upgrade Procedure...
- Page 4 Option PC3 - Single Core High Performance Processor Upgrade Kit Overview This upgrade will not only upgrade the instrument central processing unit (CPU) to a single core high performance processor, it will also upgrade the instrument disk drive to a rear panel removable solid state drive.
- Page 5 Option PC3 - Single Core High Performance Processor Upgrade Kit 1. Pre-Upgrade Status Check Before performing this upgrade you will need to know the status of the instrument being upgraded in a couple of areas. Pre-Existing Issues and Error Messages Power the instrument on and verify that the instrument will not only boot up, but that the signal analyzer application software will load properly.
- Page 6 Option PC3 - Single Core High Performance Processor Upgrade Kit 2. Calibration Data Backup In order for the instrument being upgraded to not need all of the instrument adjustments and performance verification tests to be run after this upgrade is completed the calibration data will need to be backed up onto an external drive prior to removing the existing processor / disk drive assembly.
-
Page 7: Hardware Installation
Option PC3 - Single Core High Performance Processor Upgrade Kit 3. Hardware Installation CAUTION Electrostatic discharge (ESD) can damage or destroy electronic components. All work on electronic assemblies should be performed at a static-safe workstation. Refer to the documentation that pertains to your instrument for information about static-safe workstations and ordering static-safe accessories. - Page 8 Option PC3 - Single Core High Performance Processor Upgrade Kit Replacement 1. Refer to Figure 3. With the ejectors pulled out, slide the new CPU assembly into the slot at the rear of the instrument and push on the assembly to mate the connectors to the midplane assembly. Secure the board with the ejectors.
- Page 9 Option PC3 - Single Core High Performance Processor Upgrade Kit 3. Locate the Windows Vista License Sticker from the kit and apply it to the rear of the instrument as shown in Figure 4 covering the existing license sticker. Figure 4 Windows License Sticker Rear Panel Location Installation Note N9000-90030...
- Page 10 Option PC3 - Single Core High Performance Processor Upgrade Kit 4. BIOS Setting Verification There is one setting in the CPU BIOS that must be verified and may require changing when the CPU assembly is replaced. This setting needs to be correct in order for the analyzer to always boot up correctly.
- Page 11 Option PC3 - Single Core High Performance Processor Upgrade Kit Figure 6 CPU BIOS Setup Utility Installation Note N9000-90030...
- Page 12 Option PC3 - Single Core High Performance Processor Upgrade Kit 5. Press the Right Arrow on the external keyboard two times to highlight the Boot tab. 6. If IDE 2 is not listed first in the boot priority, press the Down Arrow on the external keyboard to highlight IDE 2 as shown in Figure Figure 7...
- Page 13 Option PC3 - Single Core High Performance Processor Upgrade Kit 7. Press the “+” key on the external keyboard to bring IDE 2 to the top of the list as shown in Figure Figure 8 IDE 2 at Top of List Installation Note N9000-90030...
- Page 14 Option PC3 - Single Core High Performance Processor Upgrade Kit Save Changes 1. Press “F10” on the keyboard to save changes. 2. Press the key on the external keyboard to confirm the BIOS configuration changes as per Enter Figure Figure 9 Confirm BIOS Configuration 3.
-
Page 15: End User License Agreement (Eula)
Option PC3 - Single Core High Performance Processor Upgrade Kit 5. End User License Agreement (EULA) After the BIOS settings have been verified, the analyzer will continue to configure the operating system to recognize the new CPU hardware. During this time, the analyzer will automatically re-boot twice. - Page 16 Option PC3 - Single Core High Performance Processor Upgrade Kit 6. Signal Analyzer Application Pre-Run Configuration In order for the signal analyzer application to startup and run properly there are two instrument configuration tasks that need to be performed before you initially run the application. These steps include: •...
- Page 17 Option PC3 - Single Core High Performance Processor Upgrade Kit 2. When the Task Manager appears select the Processes tab and highlight the LaunchXSA.exe as show in Figure Figure 12 Task Manager 3. Once you have highlighted the LaunchXSA.exe process select End Process 4.
- Page 18 Option PC3 - Single Core High Performance Processor Upgrade Kit License Key Installation 1. Locate the Option Upgrade Entitlement Certificate. 2. Redeem the Option Upgrade Entitlement Certificate by following the instructions on the Certificate. 3. After redeeming your Option Upgrade Entitlement Certificate you will receive an email with an attached License File.
- Page 19 Option PC3 - Single Core High Performance Processor Upgrade Kit FPGA Code Update There is FPGA program code on many different assemblies inside of the instrument, and all of these must be a compatible version with the instrument software revision. In order to ensure that this requirement is met you need to run an FGPA update program.
- Page 20 Option PC3 - Single Core High Performance Processor Upgrade Kit 7. Calibration Data Restoring (SQL Database) 1. After the previous step of this upgrade procedure the instrument should have just rebooted and once again have the Anti-Virus message window as shown in Figure 11 displayed.
-
Page 21: Installation Verification
Option PC3 - Single Core High Performance Processor Upgrade Kit 8. Installation Verification Power the instrument on and verify that the instrument will not only boot up, but that the signal analyzer application software will load properly. This would include verifying that there are no error messages displayed in the Status Bar of the application window. - Page 22 Option PC3 - Single Core High Performance Processor Upgrade Kit Installation Note N9000-90030...
Need help?
Do you have a question about the CXA N9000A and is the answer not in the manual?
Questions and answers