
Subscribe to Our Youtube Channel
Related Manuals for Saladax MyCare Insite


Summary of Contents for Saladax MyCare Insite
- Page 1 User Manual Saladax Biomedical, Inc. 116 Research Dr. Bethlehem, PA 18015 USA Tel: +1 610 419-6731 Fax: +1 484 547-0590 MyCareInsite.com PI MCI-EUR Rev 01 1 / 46 PI MCI-EUR Rev 02...
-
Page 2: Symbols & Abbreviations
Symbols & Abbreviations The following symbols and abbreviations are used in the product labeling and instructions for the MyCare Insite laboratory photometer. Table 1: Product Labelling and User Manual Symbols Symbols Explanation Conformity marking according to the directive 2014/30/EU of the European... - Page 3 Table 1 continued: Product Labelling and User Manual Symbols Symbols Explanation Production date Mark of electrical and electronic equipment in accordance with Article 14(4) of Directive 2012/19/EU (WEEE) Bluetooth Connection Power Supply / Device Readiness Electrical Symbol Table 2: Abbreviations and Definitions in the User Manual Abbreviations and Definitions Explanation Operator's action...
-
Page 4: Table Of Contents
Getting Started ........................13 Inspecting the Package Contents ......................13 MyCare Insite Packaging ........................13 The Proper Placement of the MyCare Insite Analyser Laboratory Photometer ......... 14 Transport lock ............................14 Connecting the Power Supply ....................... 14 Proper Grounding ........................... 15 The Touch Screen .......................... - Page 5 Changing the Language of the MyCare Insite Application ..............17 How to Switch the MyCare Insite Laboatory Photometer ON ............. 17 The Automatic Start-Up and Warm-Up Processes ................18 Configuring the MyCare Insite ....................19 Setting Normal Values/Range and Limits .................... 19 Setting units ............................
- Page 6 Error Information and Troubleshooting ................42 Error Messages and Possible Causes ....................42 Service information ..........................43 Technical Specifications ....................... 44 MyCare Insite Analyser ......................... 44 Power supply ............................44 Options ..............................44 Shutdown and Waste Management ..................45 Manufacturer Information ....................46...
-
Page 7: Introduction
Congratulations on the purchase of your MyCare Insite. Upon arrival of your MyCare Insite Analyser, we recommend that the serial number along with the firmware version be recorded in the table provided below. The additional rows in the table are for any firmware upgrades performed on your Analyzer. -
Page 8: Intended Use Of The Mycare Insite
Insite Touch Screen, is intended as a general purpose laboratory instrument for the quantitative determination of clinical wet chemistry parameters. The Insite is highly compact and is designed as a point of care measuring device for the MyCare Insite Tests. -
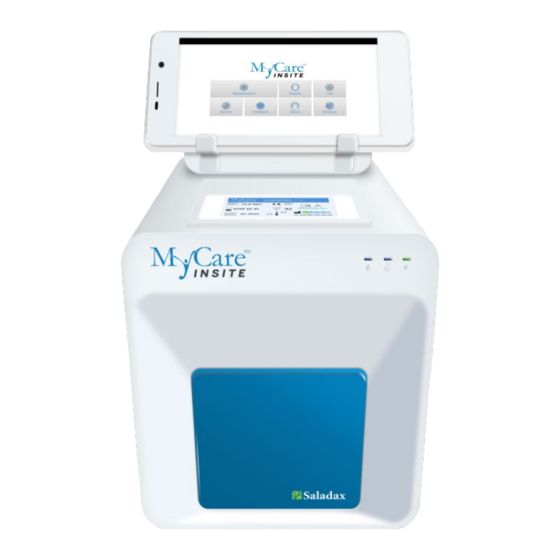
Page 9: System Description
System Description Description of the MyCare Insite This section introduces the general characteristics of the MyCare Insite Analyser and Touch Screen. RFID Card Well The RFID card is placed here Indicator Lights There are 3 LEDs on the front of the Analyser. -
Page 10: Indicator Lights
Please make sure the door is closed whenever the Analyser is not in use. How the MyCare Insite Analyser Laboratory Photometer Works The MyCare Insite Analyser laboratory photometer is a measuring device. To perform a test, the MyCare Insite Analyser is loaded with a test cartridge (Cuvette with Sample Collector containing a sample). -
Page 11: Manufacturer's Calibration
The Analyser is equipped with an RFID card-reader module. RFID cards are necessary for performing all testing; they are included in the MyCare Insite Test kits and are specific to the kit. The Cuvette, Sample Collector and RFID card are color coded. Check that the RFID card, Cuvette, and Sample Collector are of the same color. -
Page 12: Pictograms / Button Symbols
Pictograms / Button Symbols Touch Screen Symbols and Their Functions Table 3: MyCare Insite Touch Screen symbols Tap a symbol on the Touch Screen to activate the described function. Symbol Name Function MyCare Insite App Starts the MyCare Insite app... -
Page 13: Getting Started
Test Rack Touch Screen Stand Touch Screen Mounting Directions If any part of the package is missing or damaged, please report this immediately to your Official Saladax Distriubtor. Keep the original packaging for transport and shipping. MyCare Insite Packaging If the Analyzer must be returned to the manufacturer or before transport, please repack the Analyser contents in the original packaging according to the following illustration: 1. -
Page 14: The Proper Placement Of The Mycare Insite Analyser Laboratory Photometer
The Proper Placement of the MyCare Insite Analyser Laboratory Photometer Place the Analyser on a dry, clean, stable, and level surface. Make sure the Analyser has at least 10 cm of table surface and clearance on each side, and that the Analyser can be easily disconnected from the power source. -
Page 15: Proper Grounding
To ensure that the Analyser is properly grounded, use a 3-pole power outlet that includes neutral, hot and ground sockets. The MyCare Insite must be connected to a power outlet with a 3-pole plug. Illustration of different power outlets with grounding A certified electrician can confirm that the grounding meets requirements. -
Page 16: The Touch Screen
The Touch Screen The MyCare Insite Analyser is operated with a Touch Screen. Insure the Analyser is plugged in. Connect the Touch Screen to the USB port (see page 9) of the Analyser and then turn on the Touch Screen. -
Page 17: Changing The Language Of The Mycare Insite Application
Note: the MyCare Insite application supports several languages. If you choose a language in the system settings that is not supported by the MyCare Insite application, English will be used. How to Switch the MyCare Insite Laboatory Photometer ON The analyser is switched on by plugging the power cable into the socket. -
Page 18: The Automatic Start-Up And Warm-Up Processes
The Automatic Start-Up and Warm-Up Processes 1. Warm-up menu 2. Main Menu The automatic start-up procedure (indicated by the flashing green LED) starts as soon as the Analyser is connected to the power supply. Izt takes approximately 10 minutes for the Analyser to warm up to its proper working temperature. -
Page 19: Configuring The Mycare Insite
Configuring the MyCare Insite You can configure your MyCare Insite laboratory photometer according to your needs before using it. To access the settings menu follow these steps: 1. Start-up menu 2. Settings menu Tap the setting you want to to open the Settings configure. -
Page 20: Setting Units
Setting Units 1. Settings menu 2. Unit selection menu Units to open the Unit If alternate units are available, selection menu. and select a unit in the drop-down menu. Confirm the change(s) with Configuring Inputs (Sex, Sample Type, Operator) 1. Settings menu 2. -
Page 21: Configuring Interfaces
Automatic If you do not know the Service added transmission Password, please contact your or standard manual Official Saladax Distributor. transmission format. Note: the screenshot above is for demonstration purposes only. By default, all boxes are unchecked. PI MCI-EUR Rev 02... -
Page 22: Optional Equipment
(e.g. a printer) can increase the amount of leakage current. To ensure safe operation, always use the MyCare Insite according to the instructions in the User Manual. To install a printer or barcode reader (see “Technical specifications” section on page 44) please connect the RS232 cable to the RS232 port on the Analyser (see illustration below). -
Page 23: Using A Barcode Scanner To Scan Patient Id And/Or Operator Information
Using a Barcode Scanner to Scan Patient ID and/or Operator Information 1. Main menu 2.Test screen 3. Select operator screen* The MyCare Insite displays the On this screen an operator can Start a test by tapping type of test and number of tests... -
Page 24: Test Procedures
(see page 21) or send it via email (see page 28) Be sure to follow the detailed instructions for the test that are provided in the following sections and to comply with the information provided in the package insert enclosed with each MyCare Insite Test kit. PI MCI-EUR Rev 02... -
Page 25: Operating Safety Precautions
Use gloves when handling and disposing of Cuvettes, patient samples and sample collection equipment that pose a potential biohazard risk Please refer to package insert provided with the MyCare Insite Test and follow all instructions including: o The proper temperature of a test before it can be used... -
Page 26: Testing A Patient Sample
2. Main menu 3. Test screen Take the provided RFID card out in the main menu The MyCare Insite displays the of the test kit package and place to start a measurement. test name and number of tests it on the RFID card well on top of remaining on the RFID card. - Page 27 The Touch Screen displays the following information during the testing process (varies by test): Mixing Incubating Measuring Be sure to handle the tests according to the instructions in the package insert. Be sure the test cartridge (Cuvette with Sample Collector) is properly sealed before inserting into the Analyser.
-
Page 28: Viewing And Processing Test Results
Viewing and Processing Test Results After processing a test, the result screen appears on the Touch Screen: 1. Result Screen The test result is displayed on the Touch Screen. Use scroll back and forth within the results. Tap to export to a HIS/LIS or PC or send as Email. -
Page 29: Mycare Online Services (Mycos)
MyCare Online Services (MyCOS) The MyCare Insite offers the possibilty to store test results on the encrypted MyCare Online Services (MyCOS) servers. No test results are stored until the MyCOS registration is completed. MyCare Online Services (MyCOS) Synchronisation Web Access... -
Page 30: Mycos Synchronization
MyCOS Synchronization Once registered and logged in with a MyCOS account Insite result synchronization is enabled There are three ways to synchronize data: • Synchronize all currently stored measurement results at once • Synchronize a single measurement result • Synchronize a filtered measurement result list Synchronize all Test Results 1. - Page 31 Synchronizing a filtered result list 1. Main Menu 2. Login Screen 3. Filter Options Set a filter according to 2.1 Filter in the main menu to to open the filter options. Options on page 28. open the Result List. 4. Filtered Result List (e.g. CLZ) in the upper right corner to synchronize the filtered test results.
-
Page 32: Mycare Online Services Registration
MyCare Online Services Registration The MyCare Insite application asks the user to register or login to the MyCOS once before synchronizing. The following steps describe the registration process. 1. MyCOS Registration & Login Screen 2. Terms of Services 3. Registration... -
Page 33: Mycos Web Access
MyCare Online Service Login 1. MyCOS Registration & Login Screen 2. Login Screen Provide your MyCOS account Press to open the login screen. information and tap to log in. MyCOS Web Access Once results have been synchronized with the user's MyCOS account they can be viewed independently with a web-browser using a personal computer, tablet or smartphone. -
Page 34: Login Sceen
Login Sceen (1) Email address which has been used for registration on the App (2) Password which has been used for registration on the App (3) Button to perform login after entering email address and password (4) Change Language Result List Filtering: Test: Choose which test should be displayed Analyser: Choose an Analyser that is connected to the MyCOS account... -
Page 35: Export Of Measurement Result List
Button to apply the chosen filter(s) Button to reset the filter Result list: Displays the number results in the current view and the total number of results connected to the MyCOS account The MyCOS result list in the current view can be sorted by pressing the titles in the table (10) Measurement result list (filtered). -
Page 36: Printing Of Measurement Result List
Printing of Measurement Result List The measurement results can be printed out through the browser (depending on the type of browser) usually through the browser’s menu, or by pushing CTRL+P simultaneously. Only the results currently shown on the screen are printed (including details for a single measurement, if shown). Header User Interface Elements This shows the currently logged in user as well a language option. -
Page 37: Quality Control (Qc)
Quality Control (QC) A quality control program should be performed on a regular basis to verify the MyCare Insite Analyser is working properly and providing reliable results. Data integrity can only be assured when controls and Good Clinical Laboratory Practice are used routinely. The frequency of performing QC differs from laboratory to laboratory;... -
Page 38: Frequency Of Qc Testing
Perform a test using a new lot of control. If all instructions have been followed but control results are still not within range, please contact your Official Saladax Distributor for assistance before testing any patient samples. Frequency of QC Testing... -
Page 39: Correlation
Correlation Performing a Parameter Correlation Adjustment 1. Start-up Menu 2. Settings menu 3.1 Password screen Settings Correlation to open the settings open Enter the password. The default menu. correlation menu. setting is 3010. 4. Correlation menu 5. Test Screen to open a drop-down An active correlation adjustment menu. -
Page 40: Cleaning Instructions
The cartridge area may be cleaned with a cotton swab moistened with isopropyl alcohol. Cleaning the Exterior The surface of the MyCare Insite Analyser should be cleaned with a clean, lint-free cloth only moistened with isopropyl alcohol. Wipe down the exposed surfaces. -
Page 41: External Interface Description
External Interface Description Serial Interface Interface signals Interface parameters Signal Parameter Value Baud rate 9600 Data bits Parity None Stop bits Data format Data is transmitted in blocks of data sets. One data set contains the data from one analysis. Data sets consist of data fields. -
Page 42: Error Information And Troubleshooting
The wrong sample type has possibly been Wrong sampletype? Select the correct sample type. selected. Analyser fails to perform test due to Please contact your Official Saladax Mix error possible hardware error. Distributor. Repeat the test using a new Cuvette... -
Page 43: Service Information
Service Information If a problem persists after the corrective actions are taken, contact your Official Saladax Distributor for technical assistance. Before requesting assistance, please have the following information ready: • the serial number of your Insite Analyser • the test •... -
Page 44: Technical Specifications
Technical Specifications MyCare Insite Analyser Photometer resolution 0.0001 ABS Reproducibility < 1.5% CV at 1 OD Linearity 0.1000 – 3.0000 OD better than ± 1.5% and ± 0.01 OD Temperature control Electrical temperature control of the photometer unit to 37°C ± 2°C Fuse 2.5 A, self-healing... -
Page 45: Shutdown And Waste Management
Shutdown and Waste Management Before shutting down the MyCare Insite for repair or disposal ensure that there is no Cuvette left within the Analyser Chamber. To protect the Analyser in shipping the original packaging must be used. For proper waste management according to the Directive 2012/19/EU please contact your Official Saladax Distributor. -
Page 46: Manufacturer Information
Manufacturer Information Saladax Biomedical, Inc. 116 Research Dr. Bethlehem, PA 18015 USA Tel: +1 610 419-6731 Fax: +1 484 547-0590 MyCareInsite.com PI MCI-EUR Rev 02 46 / 46...
Need help?
Do you have a question about the MyCare Insite and is the answer not in the manual?
Questions and answers