GILES WOG-MP-VH Operation & Service Manual
Hide thumbs
Also See for WOG-MP-VH:
- Operation & service manual (98 pages) ,
- Operation & service manual (118 pages)
Table of Contents
Advertisement
Quick Links
Operations & Service Manual
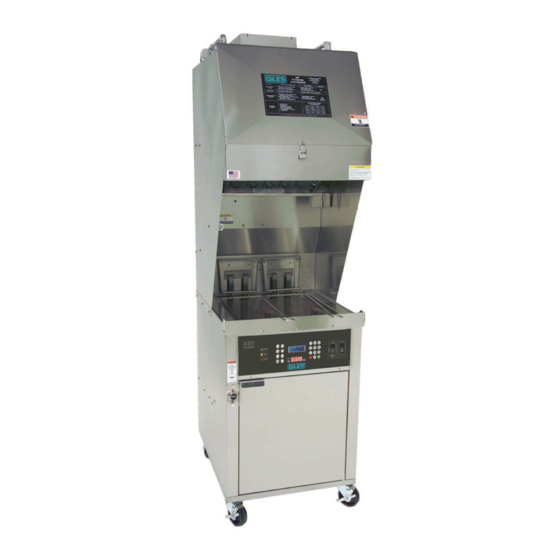
WOG-MP-VH
ISO 9001-2015 Registered • Committed to Quality
2750 Gunter Park Drive West • Montgomery, AL 36109 USA
Toll Free: 800.554.4537
Other: 334.272.1457
(USA & Canada Only)
Fax: 334.239.4117 • Website: www.gfse.com • Email: services@gfse.com
Printed in USA, Form 63501 (Rel. Date: Apr.1999, Rev. Date: Nov.2018. Rev. F)
Advertisement
Table of Contents

Subscribe to Our Youtube Channel
Related Manuals for GILES WOG-MP-VH


Summary of Contents for GILES WOG-MP-VH
- Page 1 Operations & Service Manual WOG-MP-VH ISO 9001-2015 Registered • Committed to Quality 2750 Gunter Park Drive West • Montgomery, AL 36109 USA Toll Free: 800.554.4537 Other: 334.272.1457 (USA & Canada Only) Fax: 334.239.4117 • Website: www.gfse.com • Email: services@gfse.com Printed in USA, Form 63501 (Rel. Date: Apr.1999, Rev. Date: Nov.2018. Rev. F)
- Page 2 • During the Limited Warranty period, Giles will replace or recondition, at its factory, any part or parts of this unit which Giles inspectors judge defective, provided the unit has been properly installed, subjected to nor- mal usage, and operated and maintained in accordance with specified procedures.
-
Page 4: Table Of Contents
Overall Dimensions for WOG-MP-VH ........ - Page 5 Model: WOG-MP-VH Table Of Contents 4.06 Initial Cleaning - Fryer, Filter Pan & Accessories ......... . . 33 Fryer Operation .
- Page 6 Table Of Contents Model: WOG-MP-VH 5.07.4.3 Semi-Annual Fire Suppression System Inspection & Service ....... . . 85 5.07.4.4...
- Page 7 Model: WOG-MP-VH Table Of Contents...
-
Page 8: Safety
The instructions contained in this manual have been prepared to aid in learning the proper procedures for installing, operating and servicing the Giles Model WOG-MP-VH Electric Fryer. Throughout the manual, safety precautions are identified by a hazard alert symbol and key words such as DANGER, WARNING or CAUTION. -
Page 9: Specific Safety Precautions
Model: WOG-MP-VH Safety Specific Safety Precautions: For your safety, please observe the following precautions when operating or servicing the WOG-MP-VH Electric Fryer. Adhering to the following important safety precautions will help Users avoid personal injury and/or damage to the equipment. - Page 10 Safety Model: WOG-MP-VH • The appliance must remain in an upright position. • Exercise care when removing the unit from shipping pallet. • DO NOT operate the appliance, unless its components and their intended functions are fully understood (see Section 3). After reading and fully understanding Section 3, closely follow the presented procedures and instructions in order to avoid equipment damage or malfunction.
- Page 11 Model: WOG-MP-VH Safety NOTE: • Users must comply with all appropriate state and/or local heath regulations regarding food service operations, and cleaning and sanitization of food service equipment. • The appliance and plenum discharge nozzles for the fire suppression system have been factory installed and positioned in the proper alignment.
-
Page 12: Introduction
Model: WOG-MP-VH Introduction THANK YOU for purchasing the Giles Model WOG-MP-VH Electric Fryer, manufactured by GILES Food Service Equipment; Montgomery, Alabama (USA), hereafter referred to as "Giles". Every unit is thoroughly inspected and tested prior to shipment in efforts to ensure that it will operate flawlessly when received. With proper care and maintenance the appliance will provide years of trouble-free service. -
Page 13: Specifications
Model: WOG-MP-VH Introduction 1.04 Specifications 1.04.1 Overall Dimensions: WOG-MP-VH Inches [mm]... -
Page 14: Agency Certifications
Introduction Model: WOG-MP-VH 1.04.2 Agency Certifications 1.04.3 Baskets (2 included) Basket Size Volume Length Width Height Cubic in Cubic m 15-3/8 390.5 7-1/4 184.1 152.4 668.8 0.011 1.04.4 Cooking Capacity Liquid Shortening Capacity Liter 31.7 34.4 1.04.5 Unit Weight Crated Uncrated 265.8... - Page 15 Model: WOG-MP-VH Introduction...
-
Page 16: Installation
Installation Model: WOG-MP-VH Installation The following describes procedures necessary for proper installation of the Giles WOG-MP-VH Electric Fryer. To prevent personal injury or equipment damage, please ensure these steps and procedures as presented in this section are followed. 2.01 Appliance Location NOTE The sound level of the Hood when operating is approximately 65 dB. -
Page 17: Unpacking
IMPORTANT! Giles shall not be liable for damages caused to the unit by improper use of material handling equipment or poor work practices, nor for personal injuries or property damage which may be incurred during installation of this equipment. Installation is the sole responsibility of the purchaser, unless written and approved... -
Page 18: Electrical Requirements
• WOG-MP-VH Fryers are manufactured for the various Voltage/Hz/Phase shown on Table 2.04 below. Check the Serial/Data Label inside the Cabinet or attached to the Rear Panel to determine the proper electrical service required for the Unit. -
Page 19: Routing Conduit
Model: WOG-MP-VH Installation 2.05 Electrical Connections - continued Fire Alarm Connection: This connection will tie the Fryer fire suppression system into the building Fire Alarm System to provide an indication of fire extinguisher activation. Remove Cover on Fire Alarm Tie-In Box located atop the Hood Section. -
Page 20: Ventless Hood Clearance
Ventless Hood Clearance The WOG-MP-VH is equipped with a 3-way Diverter Stack, which deflects exhaust air to the sides and rear, thus it requires 0” [0 mm] clearance from the top of the diverter stack to the ceiling. Some clearance. 3 to 6” [76 to 152 mm], is recommended to allow for ease of movement for cleaning or service. -
Page 21: Fire Suppression Discharge Nozzle And Tank Locations
Model: WOG-MP-VH Installation 2.09 Fire Suppression Discharge Nozzle & Tank Locations Nozzles have been factory installed and aligned in the proper operating position. DO NOT MOVE OR ADJUST. Plenum Nozzle Giles P/N 46426 Plenum Nozzle Giles P/N 46426 Appliance Nozzle... -
Page 22: Overview
Overview Model: WOG-MP-VH Overview The following section provides a brief overview of the components, functions, and accessories of the Giles Electric Fryer WOG-MP-VH. Please review this section carefully before attempting to operate the new appliance. Ventless Hood Section 3.05 Cooking Vat Section 3.01... -
Page 23: Cooking Vat
Model: WOG-MP-VH Overview 3.01 Cooking Vat * Hidden... - Page 24 Overview Model: WOG-MP-VH 3.01 Cooking Vat Item Description Function Heating Element Heats cooking oil to the set cooking temperature. Connects to the Safety Thermostat. If probe detects that the cooking oil has Hi-Limit Temperature reached 425°F, or higher, the Safety Thermostat will turn OFF power to the...
-
Page 25: Control Panel - Computer Controller
Model: WOG-MP-VH Overview 3.02 Control Panel - Computer Controller... - Page 26 Overview Model: WOG-MP-VH 3.02 Control Panel - Computer Controller Item Description Function Pulling this handle activates the fire extinguishing system. In the event of accidental Fire Extinguisher fire, the fire suppression system is automatically activated; the Manual Pull is a only Manual Activation Pull back-up alternative.
-
Page 27: Control Panel - Manual Controls
Model: WOG-MP-VH Overview 3.02.1 Control Panel - Manual Controls... - Page 28 Overview Model: WOG-MP-VH 3.02.1 Control Panel - Manual Controls Item Description Function Fire Extinguisher Not shown ... see Section 3.01. Manual Activation Pull The [ON] light is ON to indicate that the Electronic Air Cleaner (E.A.C.) is powered E.A.C. Status and functioning normally.
-
Page 29: Lower Cabinet, Inside
Model: WOG-MP-VH Overview 3.03 Lower Cabinet, Inside * Hidden... - Page 30 Overview Model: WOG-MP-VH 3.03 Lower Cabinet, Inside Item Description Function Quick-Disconnect, Filter Connects the Filter Pan hose into the Fryer oil filtration system. Pan Hose Opening this Valve drains the cooking vat. Always ensure the valve is closed prior to adding cooking oil or starting a boil-out procedure. IMPORTANT! The...
-
Page 31: Filter Pan Assembly
Model: WOG-MP-VH Overview 3.04 Filter Pan Assembly... - Page 32 Overview Model: WOG-MP-VH 3.04 Filter Pan Assembly Never remove the Filter Pan while it contains liquid shortening. Oil spillage and/or burn injury are possible. Please see Section 5.04, Removal of Liquid Shortening. • Always wear thermal protection, such as oven mitts, when handling these parts. They can become very HOT during normal operations! •...
-
Page 33: Ventless Hood
Model: WOG-MP-VH Overview 3.05 Ventless Hood * Not Shown... - Page 34 Charcoal Filter attempt to clean and reuse the Charcoal Filter; it is a consumable item and must be replaced. Giles recommends keeping a spare filter on-hand for quick exchange when needed! Giles Part #30248 The E.A.C. System is an electronic air cleaner which removes grease-laden vapor and smoke generated during cooking.
-
Page 35: Accessories Items Included
Model: WOG-MP-VH Overview 3.06 Accessory Items Included Part Description/Part Number Function Kettle Drain Brush Used for cleaning the Fry Pot. P/N 71025 Stir Paddle Used for stirring hot oil and for P/N 77775 agitating product as it cooks. Pot Brush... - Page 36 Overview Model: WOG-MP-VH 3.06 Accessory Items Included Part Description/Part Number Function Used for cleaning between L- Shaped Brush and underneath the heating P/N 73233 elements. Used for removing old liquid shortening from unit for disposal. Oil Discharge Hose P/N 30051...
-
Page 37: Accessories Items Not Included, Sold Separately
Model: WOG-MP-VH Overview 3.07 Accessory Items Not Included, Sold Separately Part Description/Part Number Function Filter Paper Used to filter the cooking oil P/N 60819 Filter Powder Used to help clean and P/N 72004 recondition the cooking oil Fryer Boil-Out Used to clean the cook vat. - Page 38 Overview Model: WOG-MP-VH 3.07 Accessory Items Not Included, Sold Separately Part Description/Part Number Function A portable oil disposal container with a capacity of 80 lbs of liquid shortening. Giles Oil Caddy P/N 79187 Note: For use with filtered, warm oil only. No Crumbs or...
- Page 39 Model: WOG-MP-VH Overview...
-
Page 40: Pre-Operation Procedure
4. Pre-Operation Procedure Giles takes pride in the quality of our workmanship. Every effort has been made to ensure that a new unit is in perfect operating condition when received; each unit must pass rigorous quality control testing prior to shipment. To further ensure that the unit operates to expectations, it is recommended that, after installation is complete, a brief functionality checkout be performed prior to using it for the first time. -
Page 41: Power Test
Model: WOG-MP-VH Pre-Operation 4.02 Power Test The following test will confirm that the unit is powered. Test is same for Computer Controller and Manual Controls (computer panel is shown). ALARM RESET 1. Perform steps previously described in Section 4.01. 2. Confirm that the main circuit breaker supplying power the unit is ON. If a disconnect Switch Box is installed between the breaker panel and Fryer, be sure that it is in the ON position. -
Page 42: Heating Element Test, Manual Controls
Pre-Operation Model: WOG-MP-VH 4.03.1 Heating Element Test, Computer Controller - continued 4. Wait for the Controller to power up. Alarm sounds and message “POWER FAILURE PRESS [START] TO PREHEAT” is displayed on the Upper Display and “HOLD” on the Lower Display ③. -
Page 43: Filter Pump Test
Model: WOG-MP-VH Pre-Operation 4.03.2 Heating Element Test, Manual Controls - continued 7. Return Selector Switch ④ to the [OFF] position. 8. Moisture on the elements should quickly dry and heat should be felt rising from the vat. DO NOT TOUCH THE ELEMENTS DURING THIS CHECK! Proceed to Section 4.04. -
Page 44: Boil Out Procedure
Pre-Operation Model: WOG-MP-VH 4.05 Boil-Out Procedure Perform a Boil-Out Procedure to remove dirt/debris that may have accumulated during shipment, or residue remaining from manufacturing processes. See Section 6.01, Boil-Out Procedure. After the Boil Out procedure has been completed, proceed to Section 4.06. - Page 45 Model: WOG-MP-VH Pre-Operation...
-
Page 46: Fryer Operation
Model: WOG-MP-VH 5. Fryer Operation The WOG-MP-VH Fryer is available with either Computer Controller or Manual Controls (mech. timers/digital thermostat). Differences in procedures are noted where needed and, in some cases, separate sections are used to describe appropriate operational procedures. When becoming familiar the Fryer operations described in this section, be certain you are referencing information or instructions pertaining to the specific Fryer configuration you have purchased. -
Page 47: Computer Controller Unit
Model: WOG-MP-VH Fryer Operation 5.01 Computer Controller Unit The following sections explain the functions, features, programming, and operational procedures for the Dual-Timer Computer Cooking Controller. 5.01.1 Keys and Functions Numeric Keypad: Used for entering Fryer settings and to edit preset Menu Item cooking parameters. - Page 48 ALARM Reset Key: Pressing this key silences the Controller alarm and acknowledges certain status messages. BASKET Key: This key is inactive for the WOG-MP-VH Model Fryer. Upper OLED Display: Displays menu preset information, Fryer status information, and operational prompts and instructions.
-
Page 49: Computer Controller, General Operation
Model: WOG-MP-VH Fryer Operation 5.01.2 Computer Controller, General Operation The following is general operational information only. Detailed procedures and instructions are covered in subsequent sections. During operation, certain instructions and prompts will be shown on the Upper OLED Display to step Users through processes. Some Controller keys and indicator lights will illuminate to further guide the User. -
Page 50: Setting The Cooking Temperature
Fryer Operation Model: WOG-MP-VH 5.01.3 Setting the Cooking Temperature Cooking Temperature setpoint must be input manually as shown below. Menu Item cooking presets do not include a temperature setting. Instructions are shown on the Upper OLED Display to help guide User through the process. -
Page 51: Manually Setting The Cook Time
Model: WOG-MP-VH Fryer Operation 5.01.4 Manually Setting the Cook Time If not using a Menu Item Preset, Cooking Time is manually set as follows.. IMPORTANT! If PASSCODE is enabled, Cooking Time cannot be manually input without the required password. User can only choose Menu Item Preset from available selections, see Section 5.01.5, Working with Menus. -
Page 52: Working With Menu Item Presets
Fryer Operation Model: WOG-MP-VH 5.01.5 Working with Menu Item Presets NOTE: The Menu Item Presets stored in the Controller do not include a Cooking Temperature setting. Desired cooking temperature must always be manually input, see Section 5.01.3, Setting the Cooking Temperature. -
Page 53: Editing A Menu Item Preset
Model: WOG-MP-VH Fryer Operation 5.01.5.1 Editing a Menu Item Preset Editing [NAME] - Method 1: Enter NAME letter by letter. Select edit NAME as shown on left. Flashing cursor is positioned at 1st letter. Use keypad [2] - [8] Use numeric keypad [2] - [8]... - Page 54 Fryer Operation Model: WOG-MP-VH 5.01.5.1 Editing a Menu Item Preset - Continued Edit COOKING TIME: Scroll to and select edit TIME as shown on previous page. Current time setting will be displayed. Use numeric keypad to enter a new TIME (mm:ss) NOTE: All digits must be entered, ex: 500 = 5:00.
- Page 55 Model: WOG-MP-VH Fryer Operation 5.01.5.1 Editing a Menu Item Preset - Continued Edit STIR OVERRIDE Setting: Certain food products may, or may not, require stirring during the cook cycle, regardless of how the global STIR ALARM setting in USER SETTINGS (Section 5.01.8) is specified. STIR OVERRIDE is provided so that the global setting can be overridden for particular menu items.
-
Page 56: Selecting A Menu Item Preset For Cooking
Fryer Operation Model: WOG-MP-VH 5.01.5.2 Selecting a Menu Item Preset for Cooking Direct Entry: The two (2) methods described below can be used when the desired Menu No. is known. Method (B) Method (A) Enter a desired Menu no. [1-50]. - Page 57 Model: WOG-MP-VH Fryer Operation 5.01.5.2 Selecting a Menu Preset for Cooking - continued Scroll Method: If the Menu No. is not known, User can scroll through the list of Menu Item Presets to select the desired item ... settings for each preset will appear on the Upper Display.
-
Page 58: Computer Control Cooking Cycle - General Overview
Fryer Operation Model: WOG-MP-VH 5.01.6 Computer Control Cooking Cycle - General Overview Temperature SETPOINT, MENU NAME, and COOKING TIME currently assigned for each Basket side are shown on the Upper Display. When in READY state, Temperature setpoint is shown on Lower Display. The READY message indicates that the cooking oil is at temperature and the Fryer is ready for cooking. -
Page 59: Other Controller Features
Model: WOG-MP-VH Fryer Operation 5.01.6 The Computer Control Cooking Cycle - General, Continued STIR ALARM: Sounds an audible alarm at a specific time during the cook cycle, signaling operator it is time to stir the cooking product to help promote even cooking and prevent sticking. The feature must be enabled in USER SETTINGS, Section 5-01.8 and the point in the cycle when alarm is to sound (STIR ALARM %) must be set. -
Page 60: Auto-Cool Feature
Fryer Operation Model: WOG-MP-VH 5.01.7.2 AUTO-COOL Feature When the AUTO-COOL feature is turned [ON], the Fryer automatically enters COOL Mode after no cook cycles are started within the amount of time specified by the AUTOCOOL TIME setting in USER SETTINGS, see Section 5-01.8, Edit User Settings. -
Page 61: User Settings - Accessing & Editing
Model: WOG-MP-VH Fryer Operation 5.01.8 User Settings - Accessing & Editing NOTE: The message TOO LOW or TOO HIGH will be displayed if a value Press the Press the being entered is outside the TIME key START key allowable range and would cause... -
Page 62: Password Protection
Fryer Operation Model: WOG-MP-VH 5.01.9 PASSWORD Protection 5.01.10 Power Up Procedure - Computer Controller... -
Page 63: Manual Control Unit
Model: WOG-MP-VH Fryer Operation 5.02 Manual Control Unit The following sections explain operation of Fryer with Manual Cooking Controls, which feature two (2) mechanical cooking timers (1 ea. Basket) coupled with digital thermostat for controlling cooking oil temperature. 5.02.1 Digital Thermostat - Overview Digital Temperature Controller (Thermostat) ①... -
Page 64: Setting The Temperature Unit Of Measure
Fryer Operation Model: WOG-MP-VH 5.02.2 Setting the Temperature Unit of Measure Ensure Selector Switch is in the [OFF] position Set Power Switch to [ON] ⑤ 1. Set the temperature measurement unit (Fahrenheit or Celsius). Press and hold both Arrow Keys ①... -
Page 65: Setting The Cooking Temperature
Model: WOG-MP-VH Fryer Operation 5.02.3 Setting the Cooking Temperature Ensure Selector Switch is in the [OFF] position Set Power Switch to [ON] ⑤ 1. To set, or change, a cooking temperature setpoint value, simply press the Up/Down Arrow Keys until the ①... -
Page 66: Setting A Cooking Time - Manual Timer
Fryer Operation Model: WOG-MP-VH 5.02.4 Setting a Cooking Time - Manual Timer ⑥ 1. Mechanical analog timers control cooking time for each basket. Timer range = 0 to 30 minutes. 2. To set a cooking time, simply rotate Timer knob until the indicator is aligned with the desired cook time. Time ⑦... -
Page 67: Power-Up Procedure - Manual Controls
Model: WOG-MP-VH Fryer Operation 5.02.5 Power Up Procedure - Manual Controls ① 1. Be sure that the Selector Switch is in the centered [OFF] position. 2. Standard Unit: ② ③ • Place the Power Switch in the [ON] position; the green Power Light will turn ON. -
Page 68: Fryer Alarms & Errors
Fryer Alarms and Errors 5.03.1 High-Limit Temperature Safety Shutdown All Giles Fryers, whether Computer Control or Manual Control, feature a high-temperature fire safety protection completely independent of the Fryer’s oil temperature regulating controller. Should uncontrolled heating of the oil occur due... -
Page 69: Computer Control Fryer - Alarms & Errors
An error occurred while saving settings to the EEPROM. Contact ER37 EEPROM Error Giles Tech Service (800.554.4537). The ADC (Analog-to-Digital Converter) chip that reads output ER38 Internal ADC Error from thermocouples is not working. MCB1 board must be replaced. Contact Giles Tech Service (800.554.4537). -
Page 70: Computer Control Fryer - Alarm Resolution
Clean/check the EAC Cell; the error will clear when the condition is resolved. See Section 7.1.6 through 7.1.9, E.A.C. Filter Operation & Cleaning for additional information. NOTE: If an error condition cannot be resolved, please contact a factory-authorized service agent, or call 800.554.4537 for Giles Technical Support. -
Page 71: Manual Control Fryer - Alarms & Resolution
7.01.7 & 7.01.8 turns OFF after 2 mins. System Call for service. ● Blower shuts down (ILS only) malfunction. NOTE: If an error condition cannot be resolved, please contact a factory-authorized service agent, or call 800.554.4537 for Giles Technical Support. -
Page 72: Cooking Procedures
Cooking Procedures 5.04.1 Cooking Procedures - Computer Controller This section describes procedures for cooking product on the WOG-MP-VH Fryer equipped with a Computer Controller. The following procedure assumes starting with an empty Fryer that has been properly prepared for use. ①... - Page 73 Model: WOG-MP-VH Fryer Operation 5.04.1 Cooking Procedures - Computer Controller - continued ② ⑤ 6. Place Selector Switch in the [COOK] position; the Heat Light will turn ON and oil should begin heating. ⑥ ⑦ Upper Display will indicate PREHEAT and the Lower Display shows the real-time oil temperature as heating occurs.
- Page 74 Fryer Operation Model: WOG-MP-VH 5.04.1 Cooking Procedures - Computer Controller - continued During cooking operations, oil level MUST be maintained above the indicated minimum (ADD) level. If not maintained above that level the heating elements may shutdown. ⑪ ⑩ 10. Place the Cooking Baskets onto the Basket Hanger on the Fryer header.
- Page 75 Model: WOG-MP-VH Fryer Operation 5.04.1 Cooking Procedures - Computer Controller - continued NOTE: Step #15 applies only when USER SETTINGS are as follows: STIR ALARM setting = [ON] & STIR OVERRIDE setting for Menu Item Preset selected = [NORMAL] - OR - STIR ALARM = [OFF] &...
-
Page 76: Cooking Procedures - Manual Controls
Model: WOG-MP-VH 5.04.2 Cooking Procedures - Manual Controls This section describes procedures for cooking product on the WOG-MP-VH Fryer equipped with Manual Controls. The following procedure assumes starting with an empty Fryer that has been properly prepared for use. ①... - Page 77 Model: WOG-MP-VH Fryer Operation 5.04.2 Cooking Procedures - Manual Controls - continued 7. It is recommended that oil be stirred occasionally while heating to prevent occurrence of false HI-LIMIT alarms and to promote thorough and even heating. This is especially important during the initial heat-up of the day, when shortening may be cool and thick.
- Page 78 Fryer Operation Model: WOG-MP-VH 5.04.2 Cooking Procedures - Manual Controls - continued ⑧ ⑦ 10. Place the Cooking Baskets onto the Basket Hanger on the Fryer header. 11. It is recommended that uncooked product be first placed into the Cook Basket before being placed into the hot oil, however product may also be dropped into Basket after it has been placed into the oil.
- Page 79 Model: WOG-MP-VH Fryer Operation 5.04.2 Cooking Procedures - Manual Controls - continued NOTE: Manual Control fryers do not have the a STIR alarm feature. 13. After about 60% of the set cooking time has elapsed, use the provided Stirring ⑩, Utensil or suitable alternative, to stir the product as it continues to cook.
-
Page 80: Filtering Used Cooking Oil
NOTE: The Computer Controller Panel is used as illustration in this Section. The actual filter process is the same for units with Manual Controls. 1. As a minimum, Giles recommends that oil be filtered after every fourth (4th) load has been cooked in a Fryer. - Page 81 Model: WOG-MP-VH Fryer Operation 5.05 Filtering Used Cooking Oil - continued During the next steps cooking oil is drained from the vat, exposing the heating elements. Even though safety interlocks are in place, failure to place the Selector Switch in the [OFF] position before draining could result in fire.
- Page 82 Fryer Operation Model: WOG-MP-VH 5.05 Filtering Used Cooking Oil - continued 13. Ensure the cooking vat contains the proper amount cooking oil (FULL level), add if needed. ⑦ 14. USING OVEN MITTS or GLOVES, unscrew the Drain Extension and remove from the Drain Coupling, then disconnect the Filter ⑧...
-
Page 83: Removing Waste Cooking Oil From Fryer
This section describes the procedure for removing waste cooking oil from Fryer for disposal. Oil must be removed before performing a Boil-Out procedure to clean the Fryer vat. In this section a Giles Oil Caddy (not included) is depicted for oil disposal; any suitable disposal system can be used. - Page 84 7. Connect the Oil Discharge Hose to the Discharge Hose Coupling ⑧ 8. Place the Discharge Wand end into a Hot Oil Disposal Container (Giles Oil Caddy shown). ⑨ 9. Turn the Oil Diverter Valve to the [DISCHARGE] position, parallel to pipe (in-line with).
- Page 85 Model: WOG-MP-VH Fryer Operation 5.06 Removing Waste Cooking Oil from Fryer - continued 11. After all waste cooking oil has been pumped out of the Filter Pan, place the Selector Switch and the Power Switch in the [OFF] (centered) position.
-
Page 86: Ventless Hood
The following sections describe operation, maintenance and service procedures for the Integral Ventless Hood System of the WOG-MP-VH Fryer. Ensure that all Filters are properly installed, and that the Filter Access Cover is in place and securely latched before attempting to operate the Fryer. -
Page 87: Removing & Installing Hood Filters
Model: WOG-MP-VH Fryer Operation 5.07.1.2 Removing and Installing Hood Filters A. Removing Baffle Filter: 1. Lift rear edge of Filter enough to clear the support channel. 2. Slide Filter toward the rear of the appliance. 3. Drop the front edge down to clear the front panel. - Page 88 Fryer Operation Model: WOG-MP-VH 5.07.1.2 Removing and Installing Hood Filters - continued B. Installing Baffle Filter: Switch arm must be actuated by the Baffle Filter when installed, as shown 1. Insert back edge of Filter into Hood to the back wall.
- Page 89 Model: WOG-MP-VH Fryer Operation 5.07.1.2 Removing and Installing Hood Filters - continued C. Removing E.A.C. Filter Cell: 1. Unlatch Filter Access Cover and lift off. 2. Grasp the handle on front of Cell and pull it straight out, on a slight upward angle.
-
Page 90: Ventless Hood Operation
Fryer Operation Model: WOG-MP-VH 5.07.1.2 Removing and Installing Hood Filters - continued E. Removing and Installing Charcoal Filter: Switch at back of Hood must be actuated by Filter when installed. Note airflow arrow on label; blue fiber-fill side UP. 1. Install with blue fiber-fill side facing UP. -
Page 91: Ventless Hood Filter Alarms
Model: WOG-MP-VH Fryer Operation 5.07.3 Ventless Hood Filter Alarms 5.07.3.1 Baffle or Charcoal Filter Missing A. Computer Controller: If either, or both, the Baffle Filter and Charcoal Filter are not installed in the Hood (missing) or have become mis-aligned, the Computer Controller enters an Error/Alarm condition, sounding an alarm tone and displaying messages as described below. -
Page 92: Filter Status & Alarm
Fryer Operation Model: WOG-MP-VH 5.07.3.2 E.A.C. Filter Status & Alarm Three LED indicator lights on the Control Panel display the operational status of the Electronic Air Cleaner (E.A.C.) Filter system. [ON] This light turns ON to indicate that the E.A.C. Filter Cell is installed and powered. This is the only indicator light illuminated when the system is operating properly. -
Page 93: Filter Clogged
• Check the Hood exhaust outlet diverter and be sure that nothing is obstructing it or the surrounding area. • Service technician may be required to diagnose problem and repair. IMPORTANT: Failure to use Giles OEM parts and OEM replacement filters may void the factory warranty. -
Page 94: Ventless Hood Maintenance
Inspection and testing of the interlocks should be performed MONTHLY as described below. Check the appropriate box in the Service Log to indicate completion of a test. If problems are detected, contact a Giles authorize service company to have the problem evaluated and repaired. Unit with a Computer Controller will respond differently than unit with Manual Controls. - Page 95 Model: WOG-MP-VH Fryer Operation 5.07.4.2 Monthly Hood Interlock Testing - continued EAC Filter Check • Remove the EAC Cell (Section 5.07.1.2 [C]) and replace the Access Cover. Turn ON power; confirm that Selector Switch is in the [OFF] position. • Computer Controller: All 3 LED lights will turn ON. A constant tone alarm will begin to sound; the Upper Display should read “ERROR ALARM - CLEAN THE EAC”.
-
Page 96: Semi-Annual Fire Suppression System Inspection & Service
Fryer Operation Model: WOG-MP-VH 5.07.4.3 Semi-Annual Fire System Inspection & Service Inspection, service and maintenance of the Fire Suppression System must be conducted by a qualified fire protection equipment service company, having credentials acceptable local authorities having jurisdiction (AHJ). As a minimum, field inspection of the system shall be performed semi-annually, every six (6) months. -
Page 97: Maintenance & Service Log
Model: WOG-MP-VH Fryer Operation 5.07.4.6 Maintenance & Service Log Check Initial/Date 1/15/10 Check Initial/Date 5 6* 5 6* 5 6* 7* 5 6* 7* 5 6* 5 6* 5 6* 7* 5 6* 7* 5 6* 5 6* 5 6* 7*... -
Page 98: Normal Shutdown
Model: WOG-MP-VH Model: WOG-MP-VH 5.08 Normal Shutdown ② 1. Place the Selector Switch and the Power Switch ① in the [OFF] position. ③ turns OFF. 2. Verify that the Power Light 3. If required by local practices to remove all power to the unit, turn OFF the circuit breaker in the electrical panel supplying power to the Fryer. - Page 99 Model: WOG-MP-VH Fryer Operation...
-
Page 100: Cleaning
Cleaning Model: WOG-MP-VH 6. Cleaning This section explains cleaning procedures for the WOG-MP-VH Fryer. As a minimum, Giles recommends that Filter Pan cleaning, as well as general Fryer cleaning, be performed daily. • DO NOT wash down the unit interior or exterior with water from a spray hose or any pressure-type washer. - Page 101 Model: WOG-MP-VH Cleaning 6.01 Boil-Out Procedure - Cleaning the Fry Vat - continued A. COMPUTER CONTROLLER: ③ 5. Place the Power Switch a in the [ON] position. ④ 6. Place the Selector Switch the [COOK] position. 7. After Controller powers up,...
- Page 102 Cleaning Model: WOG-MP-VH 6.01 Boil-Out Procedure - Cleaning the Fry Vat - continued NEVER drain boil-out solution into the Filter Pan or run it through the filter system with the Pump. The solution is caustic and will damage the pump and other components, such damage will not be covered by the factory warranty! 12.
-
Page 103: Cleaning The Filter Pan & Refreshing Filter Media After Boil-Out
Model: WOG-MP-VH Cleaning 6.02 Cleaning Filter Pan & Refreshing Filter Media after Boil-Out This section describes cleaning the Filter Pan and refreshing the paper filter media after the Boil-Out Procedure has been completed. Wear thermal protection to protect hands from potentially hot parts. -
Page 104: Cleaning The Filter Pan & Refreshing Filter Media D Ily
Cleaning Model: WOG-MP-VH 6.03 Cleaning Filter Pan & Refreshing Filter Media DAILY This section describes D ILY cleaning of the Filter Pan and refreshing the paper filter media. This is considered a minimum to keep the filtration system operating at optimum performance. -
Page 105: Cleaning The E.a.c. Filter Cell
Model: WOG-MP-VH Cleaning 6.04 Cleaning the E.A.C. Filter Cell The E.A.C. Filter Cell must be cleaned DAILY to maintain peak hood performance. Take care to avoid bending the collection fins or breaking the fine ionizer wires when handling and cleaning the Cell. Bent fins and broken/missing wires can prevent the system from working properly and cause the Fryer heating elements to shutdown. -
Page 106: Cleaning The Baffle Filter
Cleaning Model: WOG-MP-VH 6.05 Cleaning the Baffle Filter The Baffle Filter has sharp exposed edges, which may cause cuts; use due caution when handling and cleaning. Use of heavy duty rubber gloves is advised. Typically, the Baffle Filter needs to be cleaned daily. Wash the Filter in sink with a mild degreaser and warm water. - Page 107 Model: WOG-MP-VH Cleaning...
-
Page 108: Troubleshooting
Model: WOG-MP-VH 7. Troubleshooting IMPORTANT! This section describes basic troubleshooting procedures for the model WOG-MP-VH Electric Fryer. Some simple operational issues may be corrected by the User, however most troubleshooting diagnostics and repairs should be performed only by qualified service technicians. - Page 109 Model: WOG-MP-VH Troubleshooting 7.01 Temperature Control System - continued Problem Probable Cause Corrective Action FRYER WILL NOT HEAT: A. Baffle Filter missing Check, install Baffle Filter Power Light is ON Selector Switch is in [COOK] Check, reinstall, or properly align position B.
- Page 110 Troubleshooting Model: WOG-MP-VH 7.01 Temperature Control System - continued Problem Probable Cause Corrective Action FRYER HEATS SLOWLY: Consult Operations Manual for proper A. Improper cooking procedures Slow heat recovery procedures Heat Light remains ON constantly B. One or more heating elements...
-
Page 111: Oil Filtration System
Model: WOG-MP-VH Troubleshooting 7.02 Oil Filtration System Problem Probable Cause Corrective Action OIL NOT PUMPING BACK TO FRY A. Selector Switch not in [PUMP] posi- Place Switch in proper position POT: tion B. Air leak in the system (hoses, fit- Check &... -
Page 112: Parts List
Website: Email: Our goal at Giles is to provide the highest possible quality of service and assistance. To help us accomplish this, please have the following information readily available when calling, along with a brief description of the problem being experienced. Please record the unit information in the table below for quick reference. -
Page 113: Control Panel & Front Cabinet Header
Model: WOG-MP-VH Parts List 8.02 Control Panel & Front Cabinet Header Computer Controller Manual Controls... - Page 114 Parts List Model: WOG-MP-VH 8.02 List of Parts: Control Panel & Front Cabinet Header ITEM PART NO. DESCRIPTION COM. MAN. 23751 TERMINAL BLOCK 20366 TRANSFORMER, 9VA/18VA, 115/230 V, 50/60 Hz (COMPUTER CONTROL ONLY) 23782 SONALERT, 250V, CONTINUOUS TONE (2 MANUAL CONTROLS)
-
Page 115: Front Lower Cabinet
Model: WOG-MP-VH Parts List 8.03 Front Lower Cabinet * Not shown... - Page 116 Parts List Model: WOG-MP-VH 8.03 List of Parts: Front Lower Cabinet ITEM PART NO. DESCRIPTION 40650 CASTER, 5”, RIGID, PLATE MOUNT 40700 CASTER, 5”, SWIVEL, w/BRAKE, PLATE MOUNT 41699 COUPLING, QUICK-DISCONNECT, FEMALE, DISCHARGE 41900 COUPLING, QUICK-DISCONNECT, FEMALE, FILTER PAN 45755...
-
Page 117: Rear Lower Cabinet
Model: WOG-MP-VH Parts List 8.04 Rear Lower Cabinet * Not shown... - Page 118 Parts List Model: WOG-MP-VH 8.04 List of Parts: Rear Lower Cabinet ITEM PART NO. DESCRIPTION 40958 HOSE, 1/2NPT X 18, SCT, SWIVEL FITTING [1] END 71754 PUMP & MOTOR ASSY, 5-GPM, 1/2-HP (COMPLETE ASSEMBLY) 71824 MOTOR, 1/2-HP, MOTOR ONLY W/O PUMP...
-
Page 119: Cooking Vat
Model: WOG-MP-VH Parts List 8.05 Cooking Vat * Not shown... - Page 120 Parts List Model: WOG-MP-VH 8.05 List of Parts: Cooking Vat ITEM PART NO. DESCRIPTION 30815 BASKET SUPPORT RACK 23760 ELEMENT, 10-KW, 208V, FIREBAR 23761 ELEMENT, 10-KW, 240V, FIREBAR 21154 THERMOCOUPLE, J-TYPE, 9", BENT, GROUNDED 30828 BASKET HANGER RACK 70178 FRY BASKET NOTE: One (1) Thermocouple [Item #3] connects to the Hi-Limit Safety Control and one (1) connects to the cooking oil temperature control.
-
Page 121: Filter Pan Assembly
Model: WOG-MP-VH Parts List 8.06 Filter Pan Assembly... - Page 122 Parts List Model: WOG-MP-VH 8.06 List of Parts: Filter Pan Assembly ITEM PART NO. DESCRIPTION 54526 LEVER, HOLD-DOWN FRAME, FILTER PAN 30040-5 HOLD-DOWN FRAME (W/O LEVERS) 30040-4 STUD, HOLD-DOWN FRAME 30040 COMPLETE HOLE-DOWN FRAME (W/LEVERS) 60819 FILTER PAPER, 16-1/4” x 24-1/4”...
-
Page 123: Ventless Hood - Front
Model: WOG-MP-VH Parts List 8.07 Ventless Hood - Front * Not shown... - Page 124 Parts List Model: WOG-MP-VH 8.07 List of Parts: Ventless Hood - Front ITEM PART NO. DESCRIPTION 90254 FILTER ACCESS PANEL ASSEMBLY 20520 E.A.C. FILTER COLLECTOR CELL, 20” 30248 CHARCOAL FILTER, 12-3/8” x 20” x 2” 91072 FIRE DAMPER COVER / EXHAUST DIVERTER...
-
Page 125: Ventless Hood - Rear
Parts List Model: WOG-MP-VH 8.08 Ventless Hood - Rear 11 + 12 + Not shown + Not shown, Only for Manual Control, ILS Version... - Page 126 Parts List Model: WOG-MP-VH 8.08 List of Parts: Ventless Hood - Rear ITEM PART NO. DESCRIPTION 40811 TANK, 1.5-GAL, SS, WET CHEM. FIRE SUPPRESSION 31139 BAFFLE FILTER SWITCH ASSY. (BODY #21183 ... HEAD #21184) 95418 ACTUATOR ARM, BAFFLE FILTER SWITCH 21296 E.A.C.
- Page 127 Model: WOG-MP-VH Parts List...
- Page 129 Giles Enterprises, Inc. P.O. Box 210247 • 2750 Gunter Park Drive West • Montgomery, Al 36121-0247 USA Phone: 334.272.1457 • Toll Free: 800.554.4537 (USA & Canada Only) • Fax: 334.239.4117 • www.gfse.com E-mail: services@gfse.com Printed in USA, Form No. 63501 (Rel. Date: Apr.1999; Rev. Date: Nov.2018, Rev. F)
Need help?
Do you have a question about the WOG-MP-VH and is the answer not in the manual?
Questions and answers