Table of Contents
Advertisement
Quick Links
WOG-MP &
Operations & Service Manual
WOG-MP-VH
(Mechanical Controls)
Model: WOG-MP Mechanical Controls
Models: WOG-MP-VH Mechanical Controls
Giles Enterprises, Inc.
An ISO9001 Registered Company
2750 Gunter Park Drive West • Montgomery, AL 36109 USA
Fax: (334) 272-3561 • Internet: www.gilesent.com
Service Hotline (Toll Free): 1-800-554-4537 (USA & Canada Only)
FOODSERVICE EQUIPMENT
Form No. 60198 (Release date: 4/98)(Revision date: 07/31/09)(Rev D)
Advertisement
Table of Contents

Related Manuals for GILES WOG-MP


Summary of Contents for GILES WOG-MP
- Page 1 WOG-MP & Operations & Service Manual WOG-MP-VH (Mechanical Controls) Model: WOG-MP Mechanical Controls Models: WOG-MP-VH Mechanical Controls Giles Enterprises, Inc. An ISO9001 Registered Company 2750 Gunter Park Drive West • Montgomery, AL 36109 USA Fax: (334) 272-3561 • Internet: www.gilesent.com Service Hotline (Toll Free): 1-800-554-4537 (USA &...
- Page 3 Giles Enterprises, Inc., represen- tative. • Giles Enterprises, Inc. reserves the right to change or improve its equipment and parts in any way without obligation to alter such equipment or parts previously manufactured. •...
-
Page 5: Table Of Contents
Overall Dimensions for WOG-MP-VH ........ - Page 6 Model: WOG-MP & WOG-MP-VH Table Of Contents Fryer Operation ......... . 33 5-01.
- Page 7 Table Of Contents Model: WOG-MP & WOG-MP-VH Parts List ..........69 9-01.
- Page 8 Model: WOG-MP & WOG-MP-VH Table Of Contents Notes:...
-
Page 9: Safety
Safety Model: WOG-MP & WOG-MP-VH Safety Safety Overview The instructions contained in this manual have been prepared to aid you in learning the proper procedures for installing and servicing your unit. Throughout this manual, safety precautions are identified through the use of the safety alert symbol and three signal words: DANGER, WARNING, and CAUTION. -
Page 10: Specific Safety Precautions
Safety Specific Safety Precautions For your safety, please observe the following precautions when operating or servicing your Giles equip- ment, Model WOG-MP and WOG-MP-VH. Read the following important safety information to avoid per- sonal injury and/or damage to the equipment. - Page 11 Safety Model: WOG-MP & WOG-MP-VH CAUTION WOG-MP and WOG-MP-VH • The must remain in the upright (vertical) position. • Exercise care when removing the wooden crate from around the unit. WOG-MP or WOG-MP-VH • DO NOT operate the unless you fully understand the components and their intend- ed function (see Section 3).
- Page 12 • Comply with all appropriate state and/or local heath regulations regarding the cleaning and sanitation of equip- ment. • The decibel level of the hood on the WOG-MP-VH when operating, is approximately 65 dB’s. • Never attempt to clean the Charcoal Filter.
-
Page 13: Introduction
Model: WOG-MP & WOG-MP-VH 1. Introduction Congratulations on the purchase of your new Giles equipment, Model WOG-MP or WOG-MP-VH, manufac- tured by Giles Enterprises, Inc., Montgomery, Alabama (USA), hereafter referred to as "Giles". Every unit is thoroughly inspected and tested prior to shipment. Proper care and maintenance will ensure years of trouble-free service. -
Page 14: Specifications
Model: WOG-MP & WOG-MP-VH Introduction 1-04. Specifications 1-04.01. Overall Dimensions for WOG-MP Inches [Millimeters]... -
Page 15: 1-04.02. Overall Dimensions For Wog-Mp-Vh
Introduction Model: WOG-MP & WOG-MP-VH 1-04.02. Overall Dimensions for WOG-MP-VH Inches [Millimeters]... -
Page 16: 1-04.03. Regulatory Listings
Model: WOG-MP & WOG-MP-VH Introduction 1-04.03. Regulatory Listings UL (US and Canada) 1-04.04. Basket Size (2 Baskets included) Model Basket Size Volume cubic cubic Length Width Height inch meter WOG-MP 15.375 390.5 7 .25 184.1 152.4 668.81 0.0109 WOG-MP-VH 15.375 390.5... -
Page 17: Installation
Based on local codes, room size and appliances in use, exhaust ventilation may be required for the WOG-MP-VH. This often can be accomplished by the installation of an exhaust fan in the room in which the hood is installed. To determine the requirements for your installation, supply the HVAC dealer the following information. -
Page 18: Unpacking
Model: WOG-MP & WOG-MP-VH Installation 2-02. Unpacking Your Giles Fryer may arrive enclosed by a wooden crate. The Fryer is secured to a wooden platform by means of high-tensile strength strapping. CAUTION • The Ventless Hood must remain in the upright (vertical) position. -
Page 19: Electrical Requirements
• Giles Electric Fryers are available from the factory in the voltage and phase listed below. Check the rating plate on the front of the fryer to determine the correct power supply. -
Page 20: Electrical Connections
Model: WOG-MP & WOG-MP-VH Installation 2-04. Electrical Connections Fryer Power Connection Install appropriate Circuit Breaker in Main Breaker Box. See Table 2-03. Connect Flexible Conduit from Main Breaker Box to Fryer. Allow enough Conduit so Fryer can be moved from the wall for cleaning and servicing.See Figure 2-04.1. -
Page 21: 2-04.01. Routing Conduit
Installation Model: WOG-MP & WOG-MP-VH 2-04.01. Routing conduit *Fire Alarm Tie-In Box *Facility Fire Alarm *Flexible Conduit Service Box Main Circuit Breaker Box Flexible Conduit Conduit Connector * - Ventless Hood Model Only 2-05. Ventilation of Non-Ventless Fryer NOTE: •... -
Page 22: Ventless Hood Clearances
2-06. Ventless Hood Clearances The WOG-MP-VH requires a minimum 12 inches [305 mm] clearance from the top of the exhaust stack to the ceiling, however 18 inches [457 mm] is recommended. This is required to allow the proper air flow through the unit. -
Page 23: Fire Extinguisher Nozzle And Tank Locations
Installation Model: WOG-MP & WOG-MP-VH 2-09. Fire Extinguisher Nozzle and Tank Locations All nozzles have been factory installed in the proper operating position. DO NOT MOVE OR ADJUST. Plenum Nozzle Giles P/N 46426 Plenum Nozzle Giles P/N 46426 Appliance Nozzle... - Page 24 Model: WOG-MP & WOG-MP-VH Installation Notes:...
-
Page 25: Overview
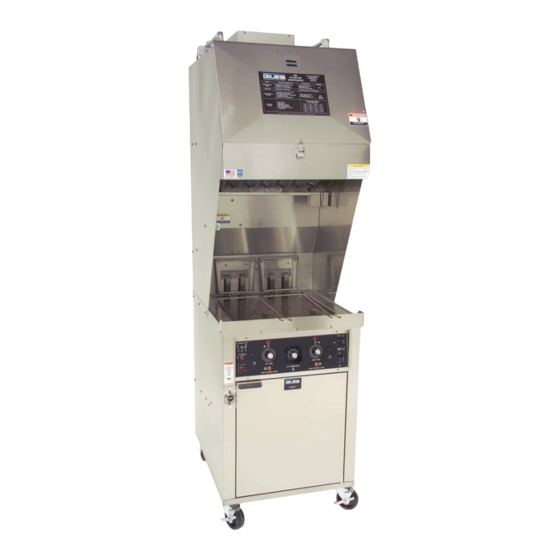
Model: WOG-MP & WOG-MP-VH 3. Overview The following section provides a brief overview of the components, functions, and accessories of the Giles Electric Fryer, Model WOG-MP and WOG-MP-VH. Please review this section carefully before pro- ceeding any further. UV Sight Window... -
Page 26: Cooking Vat
Model: WOG-MP & WOG-MP-VH Overview 3-01. Cooking Vat * -Not Shown... - Page 27 Overview Model: WOG-MP & WOG-MP-VH 3-01. Cooking Vat Item Description Function Heating Element Used to heat the Cooking Oil. Used to prevent the Cooking Oil from overheating. If this probe detects Hi-Limit Temperature the Cooking Oil at or above 425ºF , the Heating Element will shut off and Probe the Hi-Limit Indicator Light will come on.
-
Page 28: Control Panel (Manual Controls)
Model: WOG-MP & WOG-MP-VH Overview 3-02. Control Panel (Manual Controls) 15** * -Used on Ventless Hood (VH) Models Only ** -Used on ILS Models Only, not shown... - Page 29 Overview Model: WOG-MP & WOG-MP-VH 3-02 Control Panel (Manual Controls) Item Description Function Fire Extinguisher Pull this handle if an accidental fire should occur in the cooking vat. This Pull Handle will actuate the fire suppression system. Illuminates as a result of power being shut off to the unit’s heating ele-...
-
Page 30: Lower Cabinet Area
Model: WOG-MP & WOG-MP-VH Overview 3-03. Lower Cabinet Area * -Not Shown... - Page 31 Overview Model: WOG-MP & WOG-MP-VH 3-03. Lower Cabinet Area Item Description Function Quick Disconnect for Used to connect the Filter Pan Quick Disconnect hose to the unit’s oil Filter Pan Hose filtration system. Used to drain the cooking vat. Always ensure the valve is closed prior to Drain Valve Handle adding cooking oil or boil out solution.
-
Page 32: Filter Pan Assembly
Model: WOG-MP & WOG-MP-VH Overview 3-04. Filter Pan Assembly... - Page 33 Overview Model: WOG-MP & WOG-MP-VH WARNING • Never disconnect the Filter Pan from unit with Liquid Shortening in the Filter Pan. CAUTION • Always use Oven Mitts when working with the Filter Pan. Filter Pan parts will become very hot.
-
Page 34: Ventless Hood (Wog-Mp-Vh)
Model: WOG-MP & WOG-MP-VH Overview 3-05. Ventless Hood (WOG-MP-VH) * -Not Shown... - Page 35 Charcoal Filter be replaced monthly. NEVER attempt to clean a Charcoal Filter. Keep a spare filter on hand (Giles 30248) for quick change-out when needed! The EAC Filter is an electrical device which removes grease vapor and smoke generated by the fryer during cooking. Power must be turned OFF to the EAC Filter fryer before removing the EAC for cleaning.The EAC should be cleaned...
-
Page 36: Accessories (Included)
Model: WOG-MP & WOG-MP-VH Overview 3-06. Accessories (Included) Description/ Part Function Part Number Kettle Drain Brush Used for cleaning the Fry Pot. 71025 Stir Paddle Used for stirring Hot Oil and 77775 Product being cooked. Pot Brush Used for cleaning Fry Pot and 71100 Elements. - Page 37 Overview Model: WOG-MP & WOG-MP-VH 3-06. Accessories (Included) Description/ Part Function Part Number L- Shaped Brush Used for cleaning between 73233 elements. Used for removing liquid shortening from unit. Wand Hose WARNING 30051 : DO NOT USE TO WASH DOWN THE...
-
Page 38: Accessories (Not Included)
Model: WOG-MP & WOG-MP-VH Overview 3-07. Accessories (Not Included) Description/ Part Function Part Number Filter Paper Used to filter the cooking oil 60819 Filter Powder Used to help clean the cook- 72004 ing oil Fryer Boil-Out Used to help clean the fry 72003 pot. - Page 39 Overview Model: WOG-MP & WOG-MP-VH 3-07. Accessories (Not Included) Description/ Part Function Part Number A portable oil disposal con- tainer with a capacity of 80lbs of Giles Oil Caddy liquid shortening. P/N 79187 Note: For use with filtered, warm oil only. No Crumbs or...
- Page 40 Model: WOG-MP & WOG-MP-VH Overview Notes:...
-
Page 41: Unit Preparation
4. Unit Preparation We at Giles Enterprises, Inc. take pride in the quality of our workmanship. Every effort has been made to ensure that your unit is in good operating condition when you receive it. Each unit must pass a rigorous quality control test prior to shipment. -
Page 42: Power Test
Model: WOG-MP &WOG-MP-VH Unit Preparation 4-02. Power Test The following test will ensure the unit has power. 1. Follow steps shown in Section 4-01. 2. Ensure the main circuit breaker powering the unit is ON. 3. Press the Power Switch to the ON posi- tion. -
Page 43: Filter Pump Test
Unit Preparation Model: WOG-MP & WOG-MP-VH 4-04. Filter Pump Test The following test will ensure the Filter Pump is operatng correctly. CAUTION • Ensure the Quick Disconnect is cool before proceeding with this test. 1. Follow steps shown in Section 4-01. - Page 44 Model: WOG-MP &WOG-MP-VH Unit Preparation Notes:...
-
Page 45: Fryer Operation
Model: WOG-20MP & WOG-20MP-VH 5. Fryer Operation This section describes how to operate the Giles Electric Fryer, Model WOG-20MP and WOG-20MP-VH. CAUTION • Ensure the fry kettle is positioned in a secure, safe location with the casters in the locked position. -
Page 46: Cooking Procedure
Model: WOG-20MP & WOG-20MP-VH Fryer Operation 5-01. Cooking Procedure This section describes the cooking process for the unit. 1. Remove the Cooking Baskets from the unit. 2. Ensure the Power Switch is in the OFF position. 3. Ensure the Selector Switch is in the OFF position. - Page 47 Fryer Operation Model: WOG-20MP & WOG-20MP-VH 5-01. Cooking Procedure (continued from previous page) 9. Using the supplied Stir Paddle, occasionally stir the Liquid Shortening while it is preheating. This will remove cold areas in the Liquid Shortening and allow for more even cooking of the product.
- Page 48 Model: WOG-20MP & WOG-20MP-VH Fryer Operation 5-01. Cooking Procedure (continued from previous page) NOTE: • Uncooked product may be placed in the basket before or after the Cooking Basket has been placed in the Liquid Shortening. WARNING • Use extreme caution when placing product in the HOT liquid shortening, as the HOT liquid shortening could cause severe burns.
- Page 49 Fryer Operation Model: WOG-20MP & WOG-20MP-VH 5-01. Cooking Procedure (continued from previous page) 16. At the end of the cooking time an alarm will sound. Press the appropriate (left or right) Push to Silence Alarm Button 17 . Using Oven Mitts, lift the Cooking Baskets from the Liquid Shortening and place on the Basket Hanger 18.
-
Page 50: Filtering Liquid Shortening
4. Ensure the Filter Pan has (2) sheets of Filter Paper installed correctly. 5. Add one package (4.8 ounces) of Giles Filter Powder (Part No. 72004) into the Filter Pan. 6. Reposition the Filter Pan in the unit and reconnect the Filter Pan Quick Disconnect Hose 7 . - Page 51 Fryer Operation Model: WOG-20MP & WOG-20MP-VH 5-02. Filtering Liquid Shortening (continued from previous page) NOTE: • If the Cooking Vat does not drain use the supplied Kettle Drain Brush to break up the crumbs in the Cooking Vat Drain. Be careful to not puncture the filter paper in the filter pan, this could cause the filter pump to clog and damage the unit.
-
Page 52: Removal Of Liquid Shortening
This section describes how to remove Liquid Shortening from the unit. Liquid Shortening must be removed from the fryer before a Boil Out is performed. In this section a Giles Oil Caddy (not included) is used to transport the Liquid Shortening to a disposal location. - Page 53 7 . Connect the Discharge Hose to the Discharge Hose Coupling 8. Place the discharge end into a Hot Oil Disposal Container (Giles Oil Caddy shown). 9. Turn the Oil Diverter Valve to the TO DISCHARGE HOSE vertical position. 10. Be sure to wear Oven Mitts if holding the Discharge Hose, as the hose will become very hot,...
- Page 54 Model: WOG-20MP & WOG-20MP-VH Fryer Operation 5-03. Removal of Liquid Shortening (continued from previous page) 11. After the Liquid Shortening is removed from the Filter Pan, move the Selector Switch to the OFF position. 12. Move the Power Switch to the OFF position.
-
Page 55: Normal Shut-Down
Fryer Operation Model: WOG-20MP & WOG-20MP-VH 5-04. Normal Shut-Down This section explains the process of shutting the unit down. 1. Place the Selector Switch in the OFF posi- tion. 2. Rotate the Thermostat Knob to 0ºF . 3. Place the Power Switch in the OFF posi- tion, the Power Light will go off. - Page 56 Model: WOG-20MP & WOG-20MP-VH Fryer Operation Notes:...
-
Page 57: Cleaning
Cleaning Model: WOG-MP & WOG-MP-VH 6. Cleaning This section describes the procedures to be followed in cleaning the WOG-MP and WOG-MP-VH. The unit should be cleaned on a daily basis. DANGER WOG-MP and WOG-MP-VH • DO NOT hose down the interior or exterior with water. -
Page 58: Place The Power Switch In The On
Model: WOG-MP & WOG-MP-VH Cleaning 6-01. Boil Out Procedure (continued from previous page) 5. Place the Power Switch in the ON position. 6. Place the Selector Switch in the COOK position. 7 . Rotate the Thermostat Knob to 200ºF . Allow the Boil Out Solution to heat to 200ºF . - Page 59 Cleaning Model: WOG-MP & WOG-MP-VH 6-01. Boil Out Procedure (continued from previous page) 13. Rinse and flush the Cooking Vat thoroughly with tap water. CAUTION • When rinsing and flushing with tap water and the drain open be careful to not cause the Heat Resisant container to overflow.
-
Page 60: Cleaning The Filter Pan And Replacing Filter Paper After Boil Out
Model: WOG-MP & WOG-MP-VH Cleaning 6-02. Cleaning the Filter Pan and replacing Filter Paper after Boil Out This section explains the process for cleaning the Filter Pan and the replacement of the Filter Paper. This process should be carried out each time you perform a Boil Out Procedure (Section 5-05). -
Page 61: Cleaning The Filter Pan And Replacing Filter Paper Daily
Cleaning Model: WOG-MP & WOG-MP-VH 6-03. Cleaning the Filter Pan and replacing Filter Paper daily This section explains the process for cleaning the Filter Pan and the replacement of the Filter Paper daily. This process should be carried out daily. - Page 62 Model: WOG-MP & WOG-MP-VH Cleaning Notes:...
-
Page 63: Ventless Hood
Ventless Hood Model: WOG-MP & WOG-MP-VH 7. Ventless Hood This section applies to the Ventless Hood (WOG-MP-VH) models only. It describes the operation and main- tenance of the Ventless Hood and the Filters contained in the hood. 7-01. Hood Operation This section describes how to start the Ventless Hood. -
Page 64: 7-02.02. Baffle Filter Removal
Model: WOG-MP & WOG-MP-VH Ventless Hood 7-02.02. Baffle Filter Removal... -
Page 65: 7-02.03. Baffle Filter Installation
Ventless Hood Model: WOG-MP & WOG-MP-VH 7-02.03. Baffle Filter Installation Switch arm must be actuated by the Baffle Filter as shown... -
Page 66: Baffle Filter Missing
Model: WOG-MP & WOG-MP-VH Ventless Hood 7-02.04. Baffle Filter Missing If the Baffle Filter is missing or not in place correctly the Filter Missing Light will come on. See Section 7-2.03 Baffle Filter Installation. 7-02.05. Baffle Filter Cleaning The Baffle Filter should be cleaned daily. Place the Baffle Filter in a sink and clean with a mild degreaser. -
Page 67: 7-02.07. Eac Filter Installation
Ventless Hood Model: WOG-MP & WOG-MP-VH 7-02.07. EAC Filter Installation Filter must align with this pin Hood Filter Cover The EAC Air Flow Arrow, locat- ed on the left or right of the EAC Handle, must point up. See Section 3.05. -
Page 68: 7-02.09. Eac Filter Cleaning
Model: WOG-MP & WOG-MP-VH Ventless Hood 7-02.09. EAC Filter Cleaning CAUTION • Do not bend the fins or break the ionizer wires on the EAC as this will prevent the EAC from working properly and potentially void the warranty. Ionizer Wires... -
Page 69: 7-02.10. Charcoal Filter Removal
Ventless Hood Model: WOG-MP & WOG-MP-VH 7-02.10. Charcoal Filter Removal Hood Filter Cover 7-02.11. Charcoal Filter Installation Hood Filter Cover Switch must be actuated by the filter... -
Page 70: 7-02.12. Charcoal Filter Missing
Model: WOG-MP & WOG-MP-VH Ventless Hood 7-02.12. Charcoal Filter Missing If the Charcoal Filter is missing or not in place cor- rectly and the unit is on, the Filter Missing Light will come on. See Section 7--02.11 Charcoal Filter Installation. -
Page 71: Ultra Violet Lamp Removal
Ventless Hood Model: WOG-MP & WOG-MP-VH 7-02.15. Ultra Violet Lamp Removal 1. Place power switch to the OFF position. 2. Remove filter access cover 3. Disconnect UV Lamp wiring harness from power supply wiring harness 4. Loosen and remove thumb screws and UV lamp guard 5. -
Page 72: Hood Filter Alarm Chart
Model: WOG-MP & WOG-MP-VH Ventless Hood 7-02.14. Hood Filter Alarm Chart Filter Alarm Sound What will happen Cause Solution See Section effected Alarm will sound and the power to the Fryer Heating Elements will shut off. 7-02.10. and Continuous beep... -
Page 73: Maintenance
7-03.01. Monthly Interlock Check Your Giles Ventless Hood System incorporates an Interlock System to ensure the unit is operated in a safe and effective manner. Testing of the Interlock System should be conducted MONTHLY in the following man- ner. Using the Maintenance and Service Log, see Table 7--3.6., place a check in the box that corresponds with the test being performed. -
Page 74: 7-03.03. Semi-Annual Fire Suppression System Service
Service of the Fire Suppression System is to be conducted by qualified fire equipment personnel. As a minimum, field inspection of the Fire Suppression System is to be accomplished semi-annually by qualified fire equipment service personnel. Such maintenance shall consist of the following (Consult the Giles Enterprises Design Installation, Recharge and Maintenance Manual for complete servicing guidelines). -
Page 75: Maintenance And Service Log
Ventless Hood Model: WOG-MP & WOG-MP-VH 7-03.06. Maintenance and Service Log Check Initial/Date Check Initial/Date ABC 1/2/03 Baffle Filter Check EAC Filter Check Charcoal Filter Check Filter Clogged Quarterly Cleaning Fire Suppression System Fire Suppression System replace Fusible Links * Inspection performed by a qualified fire equipment company. - Page 76 Model: WOG-MP & WOG-MP-VH Ventless Hood Notes:...
-
Page 77: Troubleshooting
Troubleshooting Model: WOG-MP & WOG-MP-VH 8. Troubleshooting This section describes troubleshooting procedures for the Giles Electric Fryer, Model WOG-MP and WOG- MP-VH. Refer to the wiring diagram in for more detailed analysis. 8-01. Temperature Control System Problem Probable Cause Repair Procedure FRYER WILL NOT TURN ON: A. - Page 78 Model: WOG-MP & WOG-MP-VH Troubleshooting 8-01. Temperature Control System (Continued) Problem Probable Cause Repair Procedure FRYER WILL NOT HEAT: A. Baffle Filter missing. A. Install Baffle Filter. Power light on. Selector B. Baffle Filter not installed B. Reinstall Baffle Filter.
- Page 79 Troubleshooting Model: WOG-MP & WOG-MP-VH 8-01. Temperature Control System (Continued) Problem Probable Cause Repair Procedure FRYER HEATS SLOW: (slow A. Incorrect Cooking procedures. A. Consult Operations Manual for recovery) Heat light stays on. proper Cooking procedure. B. Replace bad Element.
-
Page 80: Oil Filtration System
Model: WOG-MP & WOG-MP-VH Troubleshooting 8-02. Oil Filtration System Problem Probable Cause Repair Procedure OIL NOT RETURNING TO FRY A. Cook/Filter Switch not in A. Place Selector Switch in POT: “Filter” position. “Filter” position. B. Air Leak (hose, fittings, filter B. -
Page 81: Parts List
Please visit our website on the world wide web at: www.gilesent.com. The goal of the Giles team of professionals is to provide you with the highest quality of service and assis- tance. You can help us accomplish this by obtaining the following information and having it readily avail- able when calling. -
Page 82: Control Panel & Front Header
Model: WOG-MP & WOG-MP-VH Parts List 9-02. Control Panel & Front Header 12** * -Ventless Hood Model only, not shown * -Ventless Hood Model only... - Page 83 Parts List Model: WOG-MP & WOG-MP-VH 9-02. Parts List for Control Panel & Front Header Item Part No. Qty. Description 38217 ASSY, INDICATOR LIGHTS,208-240V 23751 TERMINAL BLOCK, MA106,6 POLE 21101 SOCKET, RELAY, 8 PIN, 300V, 10A, CR-5 20109 SWITCH, PUSH BUTTON, 250V, 10A, N.C.,RED...
-
Page 84: Front Lower Cabinet
Model: WOG-MP & WOG-MP-VH Parts List 9-03. Front Lower Cabinet * -Not shown... - Page 85 Parts List Model: WOG-MP & WOG-MP-VH 9-03. Parts List for Front Lower Cabinet Item Part No. Qty. Description 40650 CASTER, RIGID, 5.0 IN, PLATE MNT 41900 COUPLING, QUICK DICONNECT, FEMALE 45755 VALVE, 3-WAY, 1/2NPT, NICKEL PLATED 45850 VALVE, BALL, 1NPT, NICKEL PLATED,DRAIN...
-
Page 86: Rear Lower Cabinet
Model: WOG-MP & WOG-MP-VH Parts List 9-04. Rear Lower Cabinet * -Not shown... - Page 87 Parts List Model: WOG-MP & WOG-MP-VH 9-04. Parts List for Rear Lower Cabinet Item Part No. Qty. Description 43302 HOSE, 1/2NPT X 18.000, STEEL BRAIDED 70912 PUMP/MOTOR ASSY, VIKING 30013 CAB BACK PANEL, WELD ASSY REF: 60198-03...
-
Page 88: Cooking Vat
Model: WOG-MP & WOG-MP-VH Parts List 9-05. Cooking Vat * -Not shown... - Page 89 Model: WOG-MP & WOG-MP-VH 9-05. Parts List for Cooking Vat Item Part No. Qty. Description 30815 BASKET RACK, WELD ASSY, WOG-MP ,GRATE 23761 ELEMENT, FIREBAR, 10000W, 240V, WOG-MP 23760 ELEMENT, FIREBAR, 10000W, 208V, WOG-MP 21154 THERMOCOUPLE, 9IN., SINGLE, TYPE-J, (SAFETY) 30828...
-
Page 90: Filter Pan
Model: WOG-MP & WOG-MP-VH Parts List 9-06. Filter Pan * -Complete Filter Pan includes all parts shown... - Page 91 STUD, FILTER PAN HOLD DOWN FRAME 60819 PAPER, FILTER, GFS, 16-1/4 X 24-1/4 30041 FILTER PAN SCREEN, WELD ASSY 32075 FILTER PAN, WELD ASSY, WOG-MP 30039-8 STUD, FILTER PAN SUPPORT FRAME 32075 FILTER PAN, WELD ASSY, WOG-MP 43302 HOSE, 1/2NPT X 18.000, STEEL BRAIDED...
-
Page 92: Front Ventless Hood
Model: WOG-MP & WOG-MP-VH Parts List 9-07. Front Ventless Hood * -Not shown... - Page 93 Parts List Model: WOG-MP & WOG-MP-VH 9-07. Parts List for Front Ventless Hood Item Part No. Qty. Description 30205 FILTER ACCESS PANEL, WELD ASSY 20520 FILTER, EAC, 20 IN 21153 WIRE, IONIZER, 20IN EAC LARGE 30248 CHARCOAL FILTER, ASSY, 20 X 12.375 X 2...
-
Page 94: Rear Ventless Hood
Model: WOG-MP & WOG-MP-VH Parts List 9-08. Rear Ventless Hood 11** * -Not shown ** -Not shown, ILS only... - Page 95 Parts List Model: WOG-MP & WOG-MP-VH 9-08. Part List for Rear Ventless Hood Item Part No. Qty. Description 40811 TANK, 1.5 GAL STAINLESS STEEL 31139 BAFFLE FILTER SWITCH, ASSY 24208 POWER SUPPLY, W/DRIVER BRD, 208-240V,EAC 33589 BLOWER,ASSY,CF-400VH/WOG-MP-VH 46125 DAMPER, FIRE, 10 X 10, 285 DEG LINK...
- Page 96 Model: WOG-MP & WOG-MP-VH Parts List Notes:...
- Page 98 FOODSERVICE EQUIPMENT Giles Enterprises, Inc. 2750 Gunter Park Drive West • Montgomery, Al 36121-0247 USA (334) 272-1457 • Service Hotline 1-800-554-4537 (USA & Canada Only) • FAX (334) 272-3518 • www.gilesent.com Form No. 60198 (Release date: 4/98)(Revision Date: 07/31/09)(Rev D)
Need help?
Do you have a question about the WOG-MP and is the answer not in the manual?
Questions and answers