
Subscribe to Our Youtube Channel
Related Manuals for IBM FAStT200


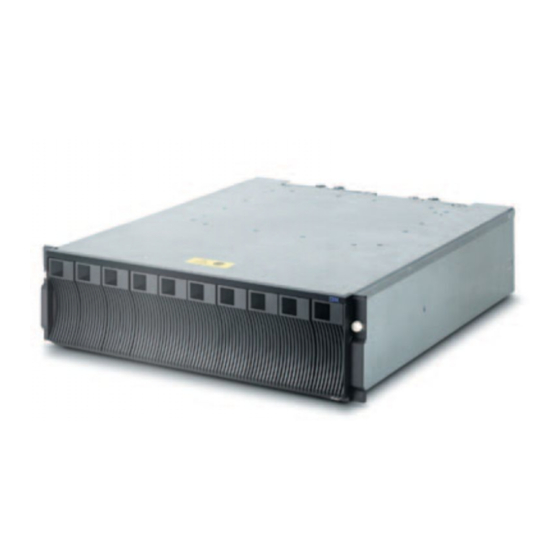
Summary of Contents for IBM FAStT200
- Page 1 IBM FAStT200 and FAStT200 HA Storage Servers Installation and User’s Guide SC21-P877-50...
- Page 3 IBM FAStT200 and FAStT200 HA Storage Servers Installation and User’s Guide SC21-P877-50...
- Page 4 © COPYRIGHT INTERNATIONAL BUSINESS MACHINES CORPORATION, 2000. All rights reserved. Note to U.S. Government Users — Documentation related to restricted rights — Use, duplication or disclosure is subject to restrictions set forth in GSA ADP Schedule Contract with IBM Corp.
-
Page 5: Safety
Avant de procéder à l'installation de ce produit, lisez le manuel Safety Information. Vor Beginn der Installation die Broschüre mit Sicherheitshinweisen lesen. Przed zainstalowaniem tego produktu należy przeczytać broszurę Informacje Dotyczące Bezpieczeństwa. Prima di installare questo prodotto, leggere l'opuscolo contenente le informazioni sulla sicurezza. © Copyright IBM Corp. 2000... - Page 6 Antes de instalar este producto, lea la Información de Seguridad. Läs säkerhetsinformationen innan du installerar den här produkten. Installálás el tt olvassa el a Biztonsági el írások kézikönyvét ! IBM FAStT200 and FAStT200 HA Storage Servers Installation and User’s Guide...
- Page 7 Statement 1 Danger Electrical current from power, telephone, and communication cables is hazardous. To avoid a shock hazard: • Do not connect or disconnect any cables or perform installation, maintenance, or reconfiguration of this product during an electrical storm. • Connect all power cords to a properly wired and grounded electrical outlet. •...
- Page 8 Class 1 laser statement Class 1 Laser Product Laser Klasse 1 Laser Klass 1 Luokan 1 Laserlaite Appareil A Laser de Classe 1 IEC 825-1:1993 CENELEC EN 60 825 IBM FAStT200 and FAStT200 HA Storage Servers Installation and User’s Guide...
- Page 9 Statement 4 ≥18 kg (37 lbs) ≥32 kg (70.5 lbs) ≥55 kg (121.2 lbs) CAUTION: Use safe practices when lifting. Statement 5 CAUTION: The power control button on the device and the power supply do not turn off the electrical current supplied to the device. The device also might have more than one power cord.
- Page 10 IBM FAStT200 and FAStT200 HA Storage Servers Installation and User’s Guide...
-
Page 11: Table Of Contents
RAID controller cache battery........35 © Copyright IBM Corp. 2000... - Page 12 Warranty statements ..........77 IBM Statement of Limited Warranty for United States, Puerto Rico, and Canada (Part 1 - General Terms) .
-
Page 13: Figures
4. Partially-redundant host Fibre Channel loop, and redundant drive Fibre Channel loop configurations13 5. Non-redundant host and drive Fibre Channel loop configurations ......14 6. Storage server LEDs (front) ................30 7. RAID controller LEDs ..................31 8. Fan and power supply LEDs ................32 © Copyright IBM Corp. 2000... - Page 14 IBM FAStT200 Storage Server and IBM FAStT200 HA Storage Server Installation and User’s Guide...
-
Page 15: Tables
1. Features at a glance....................2 2. Model 3542-2RU storage server operating specifications........7 3. Storage server LEDs (front) ................30 4. RAID Controller LEDs ..................31 5. Fan LED ......................32 6. Power supply LEDs .....................33 7. Storage server troubleshooting ................65 xiii © Copyright IBM Corp. 2000... - Page 16 IBM FAStT200 Storage Server and IBM FAStT200 HA Storage Server Installation and User’s Guide...
-
Page 17: About This Book
About this book This book provides instructions for installing the IBM FAStT200 and FAStT200 HA Storage Servers. How this book is organized Chapter 1, “Introduction,” on page 1 describes the storage server. This chapter includes an overview of the storage server features and components. - Page 18 Related publications The following publications are available in Adobe Acrobat Portable Document Format (PDF) on the IBM Netfinity FAStT Storage Manager Version 7.02 CD and on the World Wide Web at http://www.ibm.com/pc/support/ Note: The items denoted by an asterisk (*) in the list indicate publications that are printed and come with the IBM FAStT200 and FAStT200 HA Storage Servers.
-
Page 19: Chapter 1. Introduction
The IBM FAStT Storage Server is available in two models. The IBM FAStT200 High Availability (HA) Storage Server (Model 3542-2RU) comes with two RAID controllers,... -
Page 20: Features At A Glance
Getting help on the World Wide Web You can obtain up-to-date information about your storage server, a complete listing of the options that are supported on your model, and information about other IBM server products by accessing the IBM Web page at the following address: http://www.ibm.com/pc/us/netfinity... -
Page 21: Inventory Checklist
— White tape dots for marking the holes in the rack • Fibre Channel cabling instructions If an item is missing or damaged, contact your IBM reseller or your IBM marketing representative. If you have not already done so, record your storage-server serial number in the table in Appendix A, “Records,”... -
Page 22: Storage Server Components
Each drive CRU has an amber Drive fault LED. When on, this amber LED indicates a drive failure. When flashing, this amber LED indicates that a drive identify or rebuild process is in progress. IBM FAStT200 and FAStT200 HA Storage Servers Installation and User’s Guide... -
Page 23: Back View
37. For more information about the LEDs, see “Checking the LEDs” on page 29. Back view The following illustration shows the components at the back of the IBM FAStT200 HA Storage Server. Note: If your storage server is a Model 1RU, there is only one RAID controller. There is a blank panel in the second RAID controller opening. -
Page 24: Interface Ports And Switches
The RS-232 port is a TJ-6 modular jack and is used for an RS-232 serial connection. The RS-232 port is used by service personnel to perform diagnostic operations on the RAID controllers. An RS-232 cable comes with the storage server. IBM FAStT200 and FAStT200 HA Storage Servers Installation and User’s Guide... -
Page 25: Operating Specifications
Operating specifications The following table summarizes the operating specifications of the storage server. Table 2. Model 3542-2RU storage server operating specifications Size (with front panel and without Environment Acoustical noise emissions values mounting rails) For open bay (0 drives installed) and •... - Page 26 IBM FAStT200 and FAStT200 HA Storage Servers Installation and User’s Guide...
-
Page 27: Chapter 2. Installing The Storage Server
Management station (one or more) Fibre Channel I/O path Controller Note: The client software is installed on one or more Controller management systems, or on the host computer. Figure 1. Host-agent managed storage subsystems © Copyright IBM Corp. 2000... - Page 28 Note: The client software is Controller installed on one or more management systems, Controller or on the host computer. Storage subsystems Ethernet Management station Figure 2. Directly managed storage subsystems IBM FAStT200 and FAStT200 HA Storage Servers Installation and User’s Guide...
-
Page 29: Fibre Channel Connections
Fibre Channel connections The storage server Fibre Channel consists of a host Fibre Channel loop and a drive Fibre Channel loop. The host Fibre Channel loop provides the fibre path for host attachment. It can consist of Fibre Channel cables, GBICs, host bus adapters, Fibre Channel switches, Fibre Channel managed hubs, and RAID controllers. -
Page 30: Redundant Host And Drive Loops
Managed hub Managed hub or switch or switch 3542-2RU 3542-2RU 3560 (Expansion unit) Figure 3. Redundant host and drive Fibre Channel loop configurations IBM FAStT200 and FAStT200 HA Storage Servers Installation and User’s Guide... -
Page 31: Partially-Redundant Host And Redundant Drive Loops
Partially-redundant host and redundant drive loops The following illustration shows examples of configurations that have partially- redundant host loops. Partially-redundant host loops have a single link or device in the path between the host and the RAID controller. The single links and devices on the host Fibre Channel loop are single points of failure. -
Page 32: Non-Redundant Host And Drive Loops
Single path for multiple hosts 3542-1RU 3542-1RU Host system Host system with one host with one host adapter adapter 3542-2RU Figure 5. Non-redundant host and drive Fibre Channel loop configurations IBM FAStT200 and FAStT200 HA Storage Servers Installation and User’s Guide... -
Page 33: Installing The Storage Subsystem Configuration
2. Use the correct host adapter driver. For the latest supported host adapters and drivers, go to the following Web site: http://www.ibm.com/pc/support Attach fiber-optic interface cables to each host adapter. You will connect the other end of the cables to the controller later in the installation process. For more information about handling fiber-optic cables, see “Installing fiber-optic cables”... - Page 34 IBM FAStT200 and FAStT200 HA Storage Servers Installation and User’s Guide...
-
Page 35: Chapter 3. Cabling The Storage Server
• The operational loop performance is not affected when you install or remove a GBIC. • You must connect the fiber-optic interface cable to the GBIC module after you insert the GBIC into the port. © Copyright IBM Corp. 2000... - Page 36 1. Remove the protective cap from the GBIC, as shown in the following illustration. GBIC Protective cap 2. If the GBIC that you are installing has a metal latch, move the latch to the unlocked (center) position. IBM FAStT200 and FAStT200 HA Storage Servers Installation and User’s Guide...
-
Page 37: Installing Fiber-Optic Cables
3. Insert the GBIC into the host or expansion port on the RAID controller, as shown in the following illustration. GBIC Raid controller 4. After the GBIC is inserted into the port completely, rotate the GBIC latch outward to the locked position (flush with the rear of the GBIC). Installing fiber-optic cables Attention: To avoid damage to your fiber-optic cables, follow these guidelines: •... -
Page 38: Connecting Hosts To The Raid Controllers
(or from managed hub (or from managed hub or switch) or switch) For examples of redundant, partially-redundant, and non-redundant host and drive loop configurations, see “Fibre Channel loop configurations” on page 11. IBM FAStT200 and FAStT200 HA Storage Servers Installation and User’s Guide... -
Page 39: Connecting Secondary Interface Cables
Connecting secondary interface cables Use the Ethernet interface ports on the back of the storage server to connect the controllers for direct management of the storage subsystems. Connect a pair of Ethernet cables from the storage-management station to the Ethernet ports for Controller A (located on the left) and Controller B (located on the right) on the back of the storage server. -
Page 40: Connecting Additional Expansion Units
After you complete all connections, the storage server locates the new drives. 3. Use the storage-management software to check the status of the new drives, correct any errors found, and configure the new drives. IBM FAStT200 and FAStT200 HA Storage Servers Installation and User’s Guide... - Page 41 For more detailed information about cabling the storage server and expansion units, refer to the IBM FAStT200 Fibre Channel Cabling Instructions that come with the storage server. Chapter 3. Cabling the storage server...
- Page 42 IBM FAStT200 and FAStT200 HA Storage Servers Installation and User’s Guide...
-
Page 43: Chapter 4. Operating The Storage Server
Fault LEDs are on. Correct the fault before you turn off the power, using the proper troubleshooting or servicing procedure. This ensures that the storage server will power up correctly later. For more information, see “Troubleshooting” on page 65. © Copyright IBM Corp. 2000... - Page 44 IBM FAStT200 and FAStT200 HA Storage Servers Installation and User’s Guide...
-
Page 45: Restoring Power After An Unexpected Shutdown
b. Turn off power to the storage server before you turn off power to the expansion units. Turn off both power supply switches on the back of the storage server. c. Turn off power to other supporting devices (for example, management stations, Fibre Channel switches, Fibre Channel managed hubs, or Ethernet switches. -
Page 46: Restoring Power After An Emergency Shutdown
• Determine the recovery procedures to repair the failure Although the storage server has fault LEDs, these lights do not necessarily indicate which component has failed or needs to be replaced, or which type of recovery IBM FAStT200 and FAStT200 HA Storage Servers Installation and User’s Guide... -
Page 47: Checking The Leds
procedure that you must perform. In some cases (such as loss of redundancy in various components), the fault LED does not turn on. Only the storage-management software can detect the failure. ® For example, the recovery procedure for a Predictive Failure Analysis (PFA) flag (impending drive failure) on a drive varies depending on the drive status (hot spare, unassigned, RAID level, current logical drive status, and so on). -
Page 48: Storage Server Leds (Front)
• On - A storage server component has failed Always use the storage-management software to identify the failure. Not all component failures turn on this LED. For more information, see “Monitoring status through software” on page 28. IBM FAStT200 and FAStT200 HA Storage Servers Installation and User’s Guide... -
Page 49: Raid Controller Leds
Expansion port bypass Fault Cache active Controller Fault FC-Expansion FC-Host 10BT 100BT Host loop 10BT 100BT Battery Expansion loop Figure 7. RAID controller LEDs Table 4. RAID Controller LEDs Icon Color Operating states Fault Amber • Off - Normal operation. •... -
Page 50: Fan Led
Table 5. Fan LED Color Operating states Fault Amber • Off - Normal operation. • On - The fan CRU has failed. Always use the storage-management software to identify the failure. IBM FAStT200 and FAStT200 HA Storage Servers Installation and User’s Guide... - Page 51 Table 6. Power supply LEDs Color Operating states Fault Amber • Off - Normal operation. • On - One of the following situations has occurred: — The power supply has failed. — An overtemperature condition has occurred. — The power supply is turned off. Power Green •...
-
Page 52: Cache Memory And Raid Controller Battery
Note: Always use the storage-management software to check your cache memory settings before assuming a hardware failure. The following illustration shows the location of the Cache active LED on the front of the RAID controller. Cache active LED IBM FAStT200 and FAStT200 HA Storage Servers Installation and User’s Guide... -
Page 53: Raid Controller Cache Battery
RAID controller cache battery Each RAID controller contains a sealed, rechargeable 4-volt lead-acid battery. This battery provides cache backup for up to three days in the event of a power loss. The service life of the battery is three years, after which time the battery must be replaced. - Page 54 IBM FAStT200 and FAStT200 HA Storage Servers Installation and User’s Guide...
-
Page 55: Chapter 5. Installing And Replacing Components
CRUs and four bays contain filler panels. To maintain proper cooling within the storage server, always keep a filler panel in each drive bay that does not contain a drive CRU. Filler panel Hot-swap drive bays © Copyright IBM Corp. 2000... -
Page 56: Installing Hot-Swap Drives
2. Check for Fault LEDs. If any amber LEDs are lit, see “Checking the LEDs” on page 29 and “Troubleshooting” on page 65. 3. Determine the bay into which you want to install the drive. IBM FAStT200 and FAStT200 HA Storage Servers Installation and User’s Guide... - Page 57 4. Remove the filler panel. a. Insert a finger into the square hole at the top of the filler panel to grip and pull the tray out of the drive bay. b. Save the filler panel for later use. 5. Install the drive CRU: Note: The hard disk drive comes with a tray already attached.
- Page 58 10 seconds; then, reinstall the drive. 8. Use the storage-management software to configure the drive. 9. Update the information in Appendix A, “Records,” on page 69. IBM FAStT200 and FAStT200 HA Storage Servers Installation and User’s Guide...
-
Page 59: Replacing Hot-Swap Drives
Replacing hot-swap drives Drive problems include any malfunctions that delay, interrupt, or prevent successful I/O activity between the hosts and the hard disk drives. This includes transmission problems between the host controllers, the RAID controllers, and the drives. This section explains how to replace a failed drive. Attention: Failure to replace the drives in their correct bays might result in loss of data. -
Page 60: Upgrading Drives
(RAID 1, 3, or 5). You cannot use this method with any drives containing RAID 0 logical drives. Consider backing up your data if you use this method. This safeguards your data if the restoration and reconfiguration process fails or the new drive malfunctions. IBM FAStT200 and FAStT200 HA Storage Servers Installation and User’s Guide... -
Page 61: Replacing All Drives At The Same Time
The method you use depends on the following considerations: • Which method most closely matches the recommended drive upgrade procedure that is provided in the operating system or the storage-management software documentation • Which RAID level is used on the affected drives (RAID 0 requires you to replace all the drives at the same time) •... -
Page 62: Replacing The Drives One At A Time
Use this procedure to replace all the drives one at a time. You cannot use this procedure on RAID 0 logical drives (use the procedure in “Replacing all drives at the same time” on page 43). IBM FAStT200 and FAStT200 HA Storage Servers Installation and User’s Guide... - Page 63 Note: If your storage subsystem has hot spares assigned, you might want to unassign the hot spares while you perform this procedure. If you do not, reconstruction might start on the hot spare before you insert the new drive. The data on the new drive is still rebuilt, but the process takes longer for each drive.
-
Page 64: Working With Hot-Swap Cooling Fans
CRU, be sure to install the second fan CRU within 10 minutes to prevent any overheating due to the lack of the additional fan CRU. Fan CRU Latch Handle Fault LED Fault LED Latch Handle Fan CRU IBM FAStT200 and FAStT200 HA Storage Servers Installation and User’s Guide... -
Page 65: Working With Hot-Swap Power Supplies
Fan CRUs The two fan CRUs are hot-swappable and redundant. Fault LEDs These amber LEDs light when a fan failure occurs. Latches and handles Use the latches and handles to remove or install the fan CRUs. Attention: Do not run the storage server without adequate ventilation and cooling, because it might cause damage to the internal components and circuitry. - Page 66 AC power connectors This is the connection for the ac power cord. Strain-relief clamp Use this clamp to provide strain relief on the power cord. IBM FAStT200 and FAStT200 HA Storage Servers Installation and User’s Guide...
-
Page 67: Removing A Hot-Swap Power Supply
Removing a hot-swap power supply Statement 8 CAUTION: Never remove the cover on a power supply or any part that has the following label attached. Hazardous voltage, current, and energy levels are present inside any component that has this label attached. There are no serviceable parts inside these components. -
Page 68: Installing A Hot-Swap Power Supply
If you suspect a problem with one of these parts, contact a service technician. 1. Ensure that the ac power switch is off on the power supply that you are installing. IBM FAStT200 and FAStT200 HA Storage Servers Installation and User’s Guide... -
Page 69: Working With Hot-Swap Raid Controllers
2. Install the power supply in the storage server, as follows: a. Slide the power supply into the storage server. Make sure that the lever is pulled straight out as you slide the power supply into the storage server. b. Close the lever until the pull-ring latch locks in place. Make sure that the lever locks into place in the storage-server chassis. -
Page 70: Adding A Second Raid Controller
3542-1RU storage server and have purchased the FAStT200 Redundant RAID Controller option. Note: The FAStT200 Redundant RAID Controller option comes with a RAID controller cache battery installed. 1. To remove the RAID controller bay cover, use the following illustration and... - Page 71 Attention: When you handle electrostatic discharge (ESD) sensitive devices, take precautions to avoid damage from static electricity. For details about handling ESD-sensitive devices, see “Handling static-sensitive devices” on page 2. Unpack the new RAID controller. Set the RAID controller on a dry, level surface away from magnetic fields. Save the packing material and documentation in case you need to return the RAID Controller CRU.
-
Page 72: Replacing A Raid Controller
Do not overtighten the cable straps or bend the cables to a radius smaller than 76 mm (3 in.). IBM FAStT200 and FAStT200 HA Storage Servers Installation and User’s Guide... - Page 73 4. From the RAID controller that has failed, remove the Fibre Channel cables from the GBICs. The location of these components is shown in the following illustration. GBIC Raid controller Fiber-optic cable After removing the Fibre Channel cables, insert the protective caps. 5.
- Page 74 Note: If you cannot lift out the battery, turn over the RAID controller and hold it upside-down so that the battery is close above a flat surface and let it fall out. Do not let the battery pull on the battery harness. IBM FAStT200 and FAStT200 HA Storage Servers Installation and User’s Guide...
- Page 75 9. Disconnect the battery harness on the battery from the two-pin connector on the controller board, and remove the battery, as shown in the following illustration. Battery Battery harness Two-pin connector Set the battery on a dry, level surface. Attention: When you handle electrostatic discharge (ESD) sensitive devices, take precautions to avoid damage from static electricity.
-
Page 76: Replacing The Battery In The Raid Controller
Fibre Channel cables and then the GBICs. For more information, see “Working with GBICs and fiber-optic cables” on page 17. 8. Remove the RAID controller as described in “Replacing a RAID controller” on page 54. IBM FAStT200 and FAStT200 HA Storage Servers Installation and User’s Guide... - Page 77 9. Using a Phillips head screwdriver, remove the eight screws from the battery access panel on the bottom of the RAID controller CRU, as shown in the following illustration. Battery-access panel 10. Lift the old battery out of the RAID controller CRU. Note: If you cannot lift out the battery, turn over the RAID controller and hold it upside-down so that the battery is close above a flat surface and let it fall out.
- Page 78 You must handle this unit in accordance with all applicable local and federal regulations. 16. Dispose of the used battery CRU according to local and federal regulations, which might include hazardous material handling procedures. IBM FAStT200 and FAStT200 HA Storage Servers Installation and User’s Guide...
- Page 79 17. Install the RAID controller, as shown in the following illustration. a. Slide the RAID controller all the way into the empty slot. b. Close both levers until the latch locks into place. 18. Install the GBICs and then connect the Fibre Channel cables to their original locations.
-
Page 80: Installing Gbics And Fiber-Optic Cables
1. Remove the protective cap from the GBIC, as shown in the following illustration. GBIC Protective cap 2. If the GBIC that you are installing has a metal latch, move the latch to the unlocked (center) position. IBM FAStT200 and FAStT200 HA Storage Servers Installation and User’s Guide... - Page 81 3. Insert the GBIC into the host or expansion port on the RAID controller, as shown in the following illustration. GBIC Raid controller 4. After the GBIC is inserted all the way into the port, rotate the GBIC latch outward to the locked position (flush with the rear of the GBIC).
- Page 82 9. Connect the fiber-optic cable to the installed GBIC, as shown in the following illustration. GBIC Raid controller Fiber-optic cable Note: The fiber-optic cable connection is keyed for proper insertion. IBM FAStT200 and FAStT200 HA Storage Servers Installation and User’s Guide...
-
Page 83: Chapter 6. Solving Problems
This chapter also provides instructions on how to obtain service and technical assistance for your storage server and other IBM products that you might plan to use. Troubleshooting Always use the storage-management software to diagnose storage server problems and component failures. - Page 84 Ensure that the Fibre Channel cables are drives Channel loop cabling has failed. undamaged and properly connected. RAID controller has Replace the RAID controller. failed GBIC has failed Ensure GBIC is seated properly; replace GBIC IBM FAStT200 and FAStT200 HA Storage Servers Installation and User’s Guide...
-
Page 85: Getting Help, Service, And Information
If you need help, service, technical assistance, or just want more information about IBM products, you will find a wide variety of sources available from IBM to assist you. With the original purchase of an IBM hardware product, you have access to extensive support coverage. - Page 86 In addition, you can choose to receive e-mail notifications whenever new information becomes available about your registered products. You can also access online support forums, which are community sites monitored by IBM support staff. IBM FAStT200 and FAStT200 HA Storage Servers Installation and User’s Guide...
-
Page 87: Appendix A. Records
Accurate, up-to-date records make it easier to add other options and provide needed data whenever you contact technical support. Identification numbers Record and retain the following information. Product name: IBM FAStT200 Storage Server and IBM FAStT200 HA Storage Server Machine: 3542 Model number: _______________________________________________________... - Page 88 IBM FAStT200 and FAStT200 HA Storage Servers Installation and User’s Guide...
-
Page 89: Appendix B. Rack Mounting Template And Instructions
A rack mounting template and instructions come with the storage server. If you have misplaced these items, use the following template and instructions. FRONT Rack Mounting Template Bezel Bezel Front Left Front Right Rail assembly Rail assembly Front Left Front Right © Copyright IBM Corp. 2000... - Page 90 REAR Rack Mounting Template Rail assembly Rail assembly Rear Left Rear Right ® P/N 06P4631 Printed in the U.S.A. IBM FAStT200 and FAStT200 HA Storage Servers Installation and User’s Guide...
- Page 91 Rack Mounting Instructions Review the documentation that comes with your rack cabinet for safety and cabling information. When installing your storage server in a rack, consider the following: Ensure the room air temperature is below 35°C (95°F). Do not block any air vents, usually 15 cm (6 in.) of air space provides proper airflow. Plan the device installation starting from the bottom of the rack.
- Page 92 Repeat this step for all hard disk drives. IBM FAStT200 and FAStT200 HA Storage Servers Installation and User’s Guide...
- Page 93 Cage nuts Clip nuts Cage nuts On the rail marked R, remove the 6-32 in. Use the attached template and stickers to screw 3 and loosen the four screws 2 ; mark the appropriate holes on your rack; then, then, hold the front of the rail against the install clip nuts or cage nuts as required for outside of the right rack-mounting-flange and your rack cabinet.
- Page 94 IBM FAStT200 and FAStT200 HA Storage Servers Installation and User’s Guide...
-
Page 95: Appendix C. Product Warranties And Notices
The warranties provided by IBM in this Statement of Limited Warranty apply only to Machines you purchase for your use, and not for resale, from IBM or your reseller. The term "Machine" means an IBM machine, its features, conversions, upgrades, elements, or accessories, or any combination of them. - Page 96 If a Machine does not function as warranted during the warranty period, and IBM or your reseller are unable to either 1) make it do so or 2) replace it with one that is at least functionally equivalent, you may return it to your place of purchase and your money will be refunded.
- Page 97 IBM or your reseller of changes in a Machine’s location. IBM is responsible for loss of, or damage to, your Machine while it is 1) in IBM’s possession or 2) in transit in those cases where IBM is responsible for the transportation charges.
-
Page 98: Ibm Statement Of Warranty Worldwide Except Canada, Puerto Rico, Turkey, United States (Part 1 - General Terms)
IBM in this Statement of Warranty apply only to Machines you purchase for your use, and not for resale, from IBM or your reseller. The term "Machine" means an IBM machine, its features, conversions, upgrades, elements, or accessories, or any combination of them. - Page 99 IBM or your reseller of changes in a Machine’s location. IBM is responsible for loss of, or damage to, your Machine while it is 1) in IBM’s possession or 2) in transit in those cases where IBM is responsible for the transportation charges.
-
Page 100: Part 2 - Worldwide Country-Unique Terms
Where IBM is in breach of a condition or warranty implied by the Trade Practices Act 1974, IBM’s liability is limited to the repair or replacement of the goods or the supply of equivalent goods. Where that condition or warranty relates to right to sell, quiet... - Page 101 2. as to any other actual damage arising in any situation involving nonperformance by IBM pursuant to, or in any way related to the subject of this Statement of Warranty, IBM’s liability will be limited to the charge paid by you for the individual Machine that is the subject of the claim.
- Page 102 EGYPT: Limitation of Liability: The following replaces item 2 in this Section: 2. as to any other actual direct damages, IBM’s liability will be limited to the total amount you paid for the Machine that is the subject of the claim.
- Page 103 The following item is added to this paragraph: 3. breach of IBM’s obligations implied by Section 12 of the Sale of Goods Act 1979 or Section 2 of the Supply of Goods and Services Act 1982.
-
Page 104: Notices
Web sites. The materials at those Web sites are not part of the materials for this IBM product and use of those Web sites is at your own risk. -
Page 105: Processing Date Data
Contract with IBM Corp. Processing date data This IBM hardware product and IBM software products that might be packaged with it have been designed, when used in accordance with their associated documentation, to process date data correctly within and between the 20th and 21st centuries, provided all other products (for example, software, hardware, and firmware) used with these products properly exchange accurate date data with them. -
Page 106: Electronic Emission Notices
IBM. Unless otherwise stated, IBM makes no representations or warranties with respect to non-IBM products. Support (if any) for the non-IBM products is provided by the third party, not IBM. Electronic emission notices... -
Page 107: European Union Emc Directive Conformance Statement
Japanese Voluntary Control Council for Interference (VCCI) statement Power cords For your safety, IBM provides a power cord with a grounded attachment plug to use with this IBM product. To avoid electrical shock, always use the power cord and plug with a properly grounded outlet. - Page 108 The cord set should have the appropriate safety approvals for the country in which the equipment will be installed. IBM power cords for a specific country or region are usually available only in that country or region.
-
Page 109: Index
GBIC non-redundant 14 installation tips 17 partially-redundant 13 installing 17 redundant 12 removing 20 drive, hard disk adding larger-capacity 42 filler panel 38 filler piece 39 installing hot-swap 38 © Copyright IBM Corp. 2000... - Page 110 71 non-redundant 14 RAID controller overview 11 adding second 52 partially-redundant 13 cache battery 35 redundant 12 connecting Ethernet cable to 21 connecting host to 20 IBM FAStT200 and FAStT200 HA Storage Servers Installation and User’s Guide...
- Page 111 7 electrical v World Wide Web helpful addresses 67 laser cautions vi, 18 service information, getting from IBM 67 shutdown sequence, storage server 25 slim drive 38 specifications for operating storage server 7 static-sensitive devices, handling 37...
- Page 112 IBM FAStT200 and FAStT200 HA Storage Servers Installation and User’s Guide...
- Page 114 Part Number: 21P8775 Printed in the United States of America on recycled paper containing 10& recovered post-consumer fiber. SC21-P877-50 *07SC21P87750*...
Need help?
Do you have a question about the FAStT200 and is the answer not in the manual?
Questions and answers