Table of Contents
Advertisement
Quick Links
Redpaper
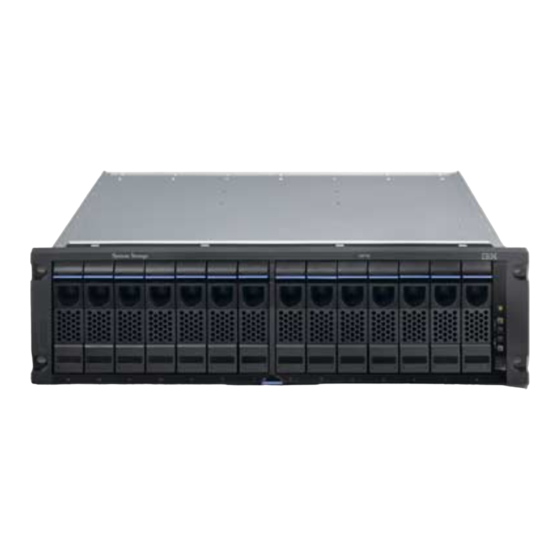
IBM System Storage N3700 A20
Setup
In this IBM Redpaper, we discuss how to set up clustered systems, using IBM®
System Storage™ N3700 Model 2863-A20 as an example. This paper covers:
Hardware setup, such as cabling and connecting to local area networks
(LANs) and expansion shelves such as the System Storage EXN2000
expansion unit
Initial setup of the cluster nodes and cluster configuration
Disk ownership in a clustered environment
We start our planning and installation procedure after unpacking and mounting
the systems in the 19" rack.
© Copyright IBM Corp. 2007. All rights reserved.
Alex Osuna
Dirk Peitzmann
ibm.com/redbooks
1
Advertisement
Table of Contents

Subscribe to Our Youtube Channel
Related Manuals for IBM N3700 A20


Summary of Contents for IBM N3700 A20
- Page 1 IBM System Storage N3700 A20 Setup In this IBM Redpaper, we discuss how to set up clustered systems, using IBM® System Storage™ N3700 Model 2863-A20 as an example. This paper covers: Hardware setup, such as cabling and connecting to local area networks...
-
Page 2: Planning The Implementation
Gather information and plan before the systems are installed. Remember, we do not discuss the physical planning and mounting the appliances and expansions into racks in this IBM Redpaper. You can obtain more information about those subjects in IBM System Storage N series N3700 Hardware and Service Guide, GA32-0515. - Page 3 Note: Disk ownership is changed after the initial setup, or after adding additional disks. Use the disk assign command to change ownership, and the storage disk show command to determine which node owns which disk. IBM System Storage N3700 A20 Setup...
-
Page 4: Setting Up The Hardware
Now, we describe the installation and setup of the System Storage N3700 Model A20, the clustered storage system, and the attachment of the System Storage EXN2000 expansion unit. Tip: Check the interoperability matrix for supported configurations. IBM System Storage N3700 A20 Setup... -
Page 5: Tools And Equipment
Fibre channel cables for EXN2000 or tape connection (cables to EXN2000 included) Note: The N3700 A20 provides two DB-9 to RJ-45 console adapters, one for each CPU module. You can use this connection to connect a console to the Filer. Remember to use a null modem cable. - Page 6 Two fibre channel ports: – Fibre channel port 1 (optical, orange) is used for third-party devices (such as tape for backup). – Fibre channel port 2 (copper, blue) is used for connections to EXN2000 expansion modules. IBM System Storage N3700 A20 Setup...
-
Page 7: Connections And Cabling
2. Set the shelf ID of the N3700 base unit to 1 (Figure 5). Important: The power to N3700 must be turned off before changing the shelf ID. Figure 5 Setting the shelf ID IBM System Storage N3700 A20 Setup... - Page 8 9). If you are attaching a third-party device, such as a tape backup or a fibre channel switch, leave the fibre channel ports (orange ports) un-terminated. Refer to “Connecting to third-party devices” in IBM System Storage N series N3700 Hardware and Service Guide, GA32-0515, for details.
- Page 9 Fasten the power cords with the hold-down clamps. c. Plug the other ends of the power cords into the grounded ac power source. d. Proceed with the initial setup in “Initial configuration” on page 13. IBM System Storage N3700 A20 Setup...
- Page 10 9. Proceed if you are connecting additional EXN2000 disk shelves. Otherwise, go to “Initial configuration” on page 13. Note: The N3700 supports hot plugging a disk shelf. Refer to IBM System Storage N series N3700 Hardware and Service Guide, GA32-0515, for details and restrictions.
- Page 11 If you are adding additional EXN2000 shelves, cable the EXN2000 (ID 2) ESH2 Mod. B (Out port) to EXN2000 (ID 3) ESH2 Mod. B (In port) and EXN2000 (ID 2) ESH2 Mod. A (Out port) to EXN2000 (ID 3) ESH2 Mod. A (In port). IBM System Storage N3700 A20 Setup...
- Page 12 Plug in the power cord to the left and right power supplies, fasten the power cords with the hold-down clamps, and plug the other ends of the power cords into grounded ac power source. IBM System Storage N3700 A20 Setup...
-
Page 13: Initial Configuration
(purple) of the CPU module of the filer (Figure 4 on page 7). Note the following console settings: Baud: 9600 Data bit: 8 Parity: None Stop Bits: 1 IBM System Storage N3700 A20 Setup... -
Page 14: Setup And Configuration
Data ONTAP® software level, and the hardware you are using. For example, if you did not obtain a CIFS license, the CIFS setup does not appear during the initial configuration. IBM System Storage N3700 A20 Setup... - Page 15 Figure 12 Initial setup: Host and network definitions IBM System Storage N3700 A20 Setup...
- Page 16 Figure 13 Initial setup: WINS, CIFS, and user authentication settings Figure 14 Initial setup: Joining a Workgroup IBM System Storage N3700 A20 Setup...
- Page 17 0b.NN 5. After assigning the disks to the nodes, verify that all disks are assigned to the correct node with the sysconfig -r command (Figure 15). Figure 15 Command line output: sysconfig -r IBM System Storage N3700 A20 Setup...
- Page 18 10.Issue the takeover test through the takeover option: cf takeover If the takeover was not successful, run the Cluster Configuration Checker for N series NAS and iSCSI products at the following Web site and proceed as directed: http://www.ibm.com/storage/support/nas IBM System Storage N3700 A20 Setup...
-
Page 19: Using A Web Browser To Complete The Configuration
Microsoft® Internet Explorer® 4.0 or later. Java and JavaScript™ must be enabled. Other browsers with Java/JavaScript might also work. In addition to Microsoft Internet Explorer 6.0, we used the Mozilla Firefox browser (Version 1.0.1). IBM System Storage N3700 A20 Setup... - Page 20 1. First, log on to the filer using the host name or IP address, as shown in Figure 12 on page 15. Use the user “root” and password. Use the information from your worksheets. Use the following URL: http://your_filername/na_admin/ Figure 21 System Storage N series Web logon process IBM System Storage N3700 A20 Setup...
- Page 21 Figure 22 shows the System Storage N series Web interface. Figure 22 System Storage N series Web interface IBM System Storage N3700 A20 Setup...
- Page 22 2. Select Wizards (bottom left of FilerView) and then Setup Wizard (Figure 23). Figure 23 Starting the Setup Wizard IBM System Storage N3700 A20 Setup...
- Page 23 3. The following figure contains settings from the initial setup. Verify these settings and make changes when needed (Figure 24). Tip: You can use the shortcut: http://vour_filername/api Figure 24 Setup Wizard: Basic settings IBM System Storage N3700 A20 Setup...
- Page 24 4. Provide an Email Address, Location of the filer (data center, branch office, and so on), and the Administrative Host name (Figure 25). Figure 25 Setup Wizard: Email Address, Location, and Administrative Host IBM System Storage N3700 A20 Setup...
- Page 25 5. The Filer Setup Wizard - Network Services window enables DNS and NIS services and gateway settings (Figure 26). Figure 26 Setup Wizard: DNS, NIS, Gateway settings IBM System Storage N3700 A20 Setup...
- Page 26 6. The Filer Setup Wizard - Network Addresses window provides information about the network configuration, such as IP addresses, network masks, network type, and WINS settings (Figure 27). Figure 27 Setup Wizard: IP configuration, MAC addresses IBM System Storage N3700 A20 Setup...
- Page 27 7. Use the Protocol Configuration window to change the Microsoft Windows® domain, Windows administrator, Windows password, WINS servers, and NFS settings (Figure 28). Figure 28 Setup Wizard: Protocol Configuration (Microsoft Windows 2000) IBM System Storage N3700 A20 Setup...
- Page 28 8. Verify the settings in the Confirmation window and proceed with the Setup Wizard by clicking Finish (Figure 29). Figure 29 Setup Wizard: Confirmation IBM System Storage N3700 A20 Setup...
- Page 29 The Setup Wizard finishes and you receive a “successfully submitted” message stating that the configuration settings are complete (Figure 30). Wait a couple of minutes while the filer is updated with the new settings. Figure 30 Setup Wizard: Status message IBM System Storage N3700 A20 Setup...
-
Page 30: The Team That Wrote This Redpaper
Alex Osuna is a Project Leader at the International Technical Support Organization in Tucson, AZ. He has been with IBM 25 years and has 26 years in the I/T industry. Of those 26 years, Alex has worked extensively in software and... - Page 31 IBM representative for information on the products and services currently available in your area. Any reference to an IBM product, program, or service is not intended to state or imply that only that IBM product, program, or service may be used. Any functionally equivalent product, program, or service that does not infringe any IBM intellectual property right may be used instead.
- Page 32 Internet Explorer, Microsoft, Windows, and the Windows logo are trademarks of Microsoft Corporation in the United States, other countries, or both. Other company, product, or service names may be trademarks or service marks of others. IBM System Storage N3700 A20 Setup...
Need help?
Do you have a question about the N3700 A20 and is the answer not in the manual?
Questions and answers