
Related Manuals for Mitsubishi Electric E Series


Summary of Contents for Mitsubishi Electric E Series
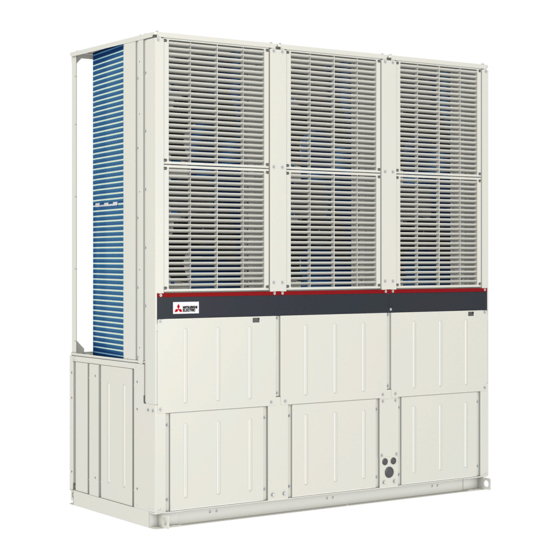
- Page 1 MODEL EAHV-P1500YBL(-H)(-N)(-BS) EAHV-P1800YBL(-H)(-N)(-BS) EACV-P1500YBL(-N)(-BS) EACV-P1800YBL(-N)(-BS)
-
Page 2: Table Of Contents
CONTENTS EAHV-P-YBL(-H)(-N), EACV-P-YBL(-N) 1. Product Specifications ..........................2 1-1. Specifications........................... 2 1-2. External Dimensions ........................8 1-3. Center of Gravity..........................15 1-4. Electrical Wiring Diagrams....................... 16 1-5. Optional parts ..........................21 2. Product Data ............................. 26 2-1. Capacity tables ..........................26 2-2. -
Page 3: Product Specifications
Heat exchanger Water side Stainless steel plate and copper brazing Air side Plate fin and copper tube Compressor Type Inverter scroll hermetic compressor Maker MITSUBISHI ELECTRIC CORPORATION Starting method Inverter Quantity Motor output 11.7 × 4 Lubricant MEL32 Air flow rate /min 265 ×... - Page 4 Heat exchanger Water side Stainless steel plate and copper brazing Air side Plate fin and copper tube Compressor Type Inverter scroll hermetic compressor Maker MITSUBISHI ELECTRIC CORPORATION Starting method Inverter Quantity Motor output 11.7 × 4 Lubricant MEL32 Air flow rate /min 265 ×...
- Page 5 Heat exchanger Water side Stainless steel plate and copper brazing Air side Plate fin and copper tube Compressor Type Inverter scroll hermetic compressor Maker MITSUBISHI ELECTRIC CORPORATION Starting method Inverter Quantity Motor output 11.7 × 4 Lubricant MEL32 Air flow rate /min 265 ×...
- Page 6 Heat exchanger Water side Stainless steel plate and copper brazing Air side Plate fin and copper tube Compressor Type Inverter scroll hermetic compressor Maker MITSUBISHI ELECTRIC CORPORATION Starting method Inverter Quantity Motor output 11.7 × 4 Lubricant MEL32 Air flow rate /min 265 ×...
- Page 7 Heat exchanger Water side Stainless steel plate and copper brazing Air side Plate fin and copper tube Compressor Type Inverter scroll hermetic compressor Maker MITSUBISHI ELECTRIC CORPORATION Starting method Inverter Quantity Motor output 11.7 × 4 Lubricant MEL32 Air flow rate /min 265 ×...
- Page 8 Heat exchanger Water side Stainless steel plate and copper brazing Air side Plate fin and copper tube Compressor Type Inverter scroll hermetic compressor Maker MITSUBISHI ELECTRIC CORPORATION Starting method Inverter Quantity Motor output 11.7 × 4 Lubricant MEL32 Air flow rate /min 265 ×...
-
Page 9: External Dimensions
1. Product Specifications 1-2. External Dimensions EAHV-P1500, 1800YBL(-H)(-BS) Unit: mm EACV-P1500, 1800YBL(-BS) MEES19K040... - Page 10 1. Product Specifications EAHV-P1500, 1800YBL(-H)(-BS) Unit: mm EACV-P1500, 1800YBL(-BS) MEES19K040...
- Page 11 1. Product Specifications EAHV-P1500, 1800YBL(-H)(-BS) Unit: mm EACV-P1500, 1800YBL(-BS) MEES19K040...
- Page 12 1. Product Specifications EAHV-P1500, 1800YBL(-H)-N(-BS) Unit: mm EACV-P1500, 1800YBL-N(-BS) MEES19K040...
- Page 13 1. Product Specifications EAHV-P1500, 1800YBL(-H)-N(-BS) Unit: mm EACV-P1500, 1800YBL-N(-BS) MEES19K040...
- Page 14 1. Product Specifications EAHV-P1500, 1800YBL(-H)-N(-BS) Unit: mm EACV-P1500, 1800YBL-N(-BS) MEES19K040...
- Page 15 1. Product Specifications EAHV-P1500, 1800YBL(-H)-N(-BS) Unit: mm EACV-P1500, 1800YBL-N(-BS) MEES19K040...
-
Page 16: Center Of Gravity
1. Product Specifications 1-3. Center of Gravity Standard piping type Unit: mm 1080 1655 (60) (100) 3280 <Service side> <Right side> Inside header piping type 1080 1680 (100) (60) 3280 <Service side> <Right side> MEES19K040... -
Page 17: Electrical Wiring Diagrams
1. Product Specifications 1-4. Electrical Wiring Diagrams EAHV-P1500, 1800YB EACV-P1500, 1800YB MEES19K040... - Page 18 1. Product Specifications EAHV-P1500, 1800YB EACV-P1500, 1800YB MEES19K040...
- Page 19 1. Product Specifications When using a local controller, refer to the table below for the types of input/output signals that are available and the operations that correspond to the signals. External Input/Output Input Dry contact ON (Close) OFF (Open) Terminal block type (a)UNIT OPERATION Run/Stop...
- Page 20 1. Product Specifications Input and output correspondence table Terminal block System leader unit Group leader unit SUB unit ○ K95-K96 Stop − − ○ Fan mode K91-K92 Forced Normal − − Cooling/Heating ○ K93-K94 Heating Cooling − − switching ○ ○...
- Page 21 1. Product Specifications External signal interface Centralized controller Optional remote controller (AE-200) (PAR-W31MAA) ON/OFF M-NET (Run/Stop) Transmission line Fan mode (Forced/Normal) Supplementary heater signal output Cooling/Heating (Heating/Cooling) switching Pump interlock (Normal/Error) Defrost signal output Anti freeze (ON/OFF) (Heating ECO/ Mode change Heating operation Heating) display output...
-
Page 22: Optional Parts
1. Product Specifications 1-5. Optional parts 1-5-1. Piping Kit DT-01HK (Only for Inside header (-N)) Refer to Installation/Instructions Manual. Parts name Size and shape Quantity Parts name Size and shape Quantity SIDE PANEL VICTAULIC JOINT PANEL BL PIPE CAP PANEL BR SADDLE STRAUB JOINT BOLT M5... - Page 23 1. Product Specifications 1-5-3. Fin Guard DT-150FG Parts list FIN GUARD PLATE SCREWS 1536 4 pcs. 28 pcs. 32 pcs. FRAME 1 FRAME 2 FRAME 3 FRAME 4 2 pcs. 2 pcs. 2 pcs. 2 pcs. MEES19K040...
- Page 24 1. Product Specifications Installing the fin guard (1) Attach four types of frames to each position. Frame 4 Panel Frame 2 Frame 1 Panel Frame 3 Screw down Frames 1 and 2 on the panel with M5 screws at Screw down Frames 3 and 4 on the panel with M5 screws at the four positions indicated with arrows in the figure.
- Page 25 1. Product Specifications 1-5-4. Remote controller PAR-W31MAA Refer to 6-1. PAR-W31MAA specifications. MEES19K040...
- Page 26 1. Product Specifications 1-5-5. External water temperature sensor TW-TH16 1. Required parts for installing a external water temperature sensor Cable specifications A) External water temperature sensor Size 2-core, 1.25 mm or larger B) Cable for connecting between the sensor and the unit* Type CVVS or CPEVS C) Cable terminal for connecting to the sensor and the unit terminal block*...
-
Page 27: Product Data
2. Product Data 2-1. Capacity tables 2. Product Data 2-1-1. Correction by temperature [Cold/hot water outlet/inlet temperature difference 5°C] EAHV-P1500YB EACV-P1500YB ■Cooling Capacity [Water] <Outdoor air temperature °CDB> 5,10,15°C 20°C 25°C 30°C 35°C 40°C 43°C Cold water outlet temperature (°C) <Outdoor air temperature °CDB>... - Page 28 2. Product Data [Cold/hot water outlet/inlet temperature difference 5°C] EAHV-P1500YB ■Heating Capacity <Hot water outlet temperature °C> 30°C 35°C 40°C 45°C 50°C 55°C Outdoor air temperature (°C) <Hot water outlet temperature °C> 55°C 50°C 45°C 40°C 35°C 30°C Outdoor air temperature (°C) MEES19K040...
- Page 29 2. Product Data [Cold/hot water outlet/inlet temperature difference 5°C] EAHV-P1800YB EACV-P1800YB ■Cooling Capacity [Water] <Outdoor air temperature °CDB> 5,10,15°C 20°C 25°C 30°C 35°C 40°C 43°C Cold water outlet temperature (°C) <Outdoor air temperature °CDB> 43°C 40°C 35°C 30°C 25°C 20°C 5,10,15°C Cold water outlet temperature (°C) MEES19K040...
- Page 30 2. Product Data [Cold/hot water outlet/inlet temperature difference 5°C] EAHV-P1800YB ■Heating Capacity <Hot water outlet temperature °C> 30°C 35°C 40°C 45°C 50°C 55°C Outdoor air temperature (°C) <Hot water outlet temperature °C> 55°C 50°C 45°C 40°C 35°C 30°C Outdoor air temperature (°C) MEES19K040...
- Page 31 2. Product Data [Cold/hot water outlet/inlet temperature difference 7°C] EAHV-P1500YB EACV-P1500YB ■Cooling Capacity [Water] <Outdoor air temperature °CDB> 5,10,15°C 20°C 25°C 30°C 35°C 40°C 43°C Cold water outlet temperature (°C) <Outdoor air temperature °CDB> 43°C 40°C 35°C 30°C 25°C 20°C 5,10,15°C Cold water outlet temperature (°C) MEES19K040...
- Page 32 2. Product Data [Cold/hot water outlet/inlet temperature difference 7°C] EAHV-P1500YB ■Heating Capacity <Hot water outlet temperature °C> 30°C 35°C 40°C 45°C 50°C 55°C Outdoor air temperature (°C) <Hot water outlet temperature °C> 55°C 50°C 45°C 40°C 35°C 30°C Outdoor air temperature (°C) MEES19K040...
- Page 33 2. Product Data [Cold/hot water outlet/inlet temperature difference 7°C] EAHV-P1800YB EACV-P1800YB ■Cooling Capacity [Water] <Outdoor air temperature °CDB> 5,10,15°C 20°C 25°C 30°C 35°C 40°C 43°C Cold water outlet temperature (°C) <Outdoor air temperature °CDB> 43°C 40°C 35°C 30°C 25°C 20°C 5,10,15°C Cold water outlet temperature (°C) MEES19K040...
- Page 34 2. Product Data [Cold/hot water outlet/inlet temperature difference 7°C] EAHV-P1800YB ■Heating Capacity <Hot water outlet temperature °C> 30°C 35°C 40°C 45°C 50°C 55°C Outdoor air temperature (°C) <Hot water outlet temperature °C> 55°C 50°C 45°C 40°C 35°C 30°C Outdoor air temperature (°C) MEES19K040...
- Page 35 2. Product Data Cooling capacity: Cold water outlet/inlet temperature difference 5°C Capacity change mode: Capacity priority MODEL EAHV-P1500YB, EACV-P1500YB Cold water Outdoor air temperature outlet °CDB temperature Cooling capacity 169.3 169.3 169.3 169.3 169.3 169.3 169.3 162.2 154.9 147.5 139.9 132.1 127.4 Power consumption...
- Page 36 2. Product Data Cooling capacity: Cold water outlet/inlet temperature difference 7°C Capacity change mode: Capacity priority MODEL EAHV-P1500YB, EACV-P1500YB Cold water Outdoor air temperature outlet °CDB temperature Cooling capacity 169.3 169.3 169.3 169.3 169.3 169.3 169.3 162.2 154.9 147.5 139.9 132.1 127.4 Power consumption...
- Page 37 2. Product Data Heating capacity: Hot water outlet/inlet temperature difference 5°C Capacity change mode: Capacity priority MODEL EAHV-P1500YB Hot water Outdoor air temperature outlet °CDB temperature Heating capacity 102.9 120.1 138.6 150.0 150.0 162.6 162.6 162.6 162.6 Power consumption 39.80 40.82 41.60 39.56...
- Page 38 2. Product Data Heating capacity: Hot water outlet/inlet temperature difference 7°C Capacity change mode: Capacity priority MODEL EAHV-P1500YB Hot water Outdoor air temperature outlet °CDB temperature Heating capacity 102.9 120.1 138.6 150.0 150.0 162.6 162.6 162.6 162.6 Power consumption 38.98 39.91 40.68 38.68...
- Page 39 2. Product Data 2-1-2. Capacity table EER for cooling [Water] EAHV-P1500YB, EACV-P1500YB Water flow rate 25.8 m Outlet water temp (°C) Air temp Capacity (°CD.B) 6.41 7.68 6.41 7.68 9.31 9.31 9.31 9.31 6.41 7.68 9.31 9.31 9.31 9.31 6.41 7.68 9.31 9.31...
- Page 40 2. Product Data EER for cooling [Water] EAHV-P1800YB, EACV-P1800YB Water flow rate 31.0 m Air temp Outlet water temp (°C) Capacity (°CD.B) 5.43 6.37 5.43 6.37 7.83 7.83 7.83 7.83 5.43 6.37 7.83 7.83 7.83 7.83 5.43 6.37 7.83 7.83 7.83 7.83 5.43...
- Page 41 2. Product Data COP for heating EAHV-P1500YB Water flow rate 25.8 m Air temp Outlet water temp (°C) Capacity (°CD.B) 175kW (117%) 3.79 3.45 3.14 2.86 4.34 3.91 3.54 3.20 2.91 2.64 4.59 4.12 3.71 3.36 3.03 2.75 150kW 5.03 4.49 4.01 3.60...
- Page 42 2. Product Data COP for heating EAHV-P1800YB Water flow rate 31.0 m Air temp Outlet water temp (°C) Capacity (°CD.B) 210kW (117%) 4.05 4.25 3.88 3.54 3.23 180kW 4.58 4.16 3.78 3.44 3.12 2.83 (100%) 5.24 4.71 4.23 3.80 3.41 3.06 5.95 5.29...
- Page 43 2. Product Data 2-1-3. Correction by relative humidity [EAHV] ■Heating capacity correction diagram (relative humidity correction diagram) The heating capacity changes depending on the relative humidity. When the relative humidity is other than RH=85%, correct the capacity based on the following graph. [Example] When the outdoor air temperature = 0°C and relative humidity RH=50% Heating capacity in performance diagram ×...
- Page 44 2. Product Data 2-1-4. Correction by water flow rate EAHV-P1500YB EACV-P1500YB ■ Cooling 1.10 1.10 1.05 1.05 1.00 1.00 0.95 0.95 0.90 0.90 12 14 16 18 20 22 24 26 28 30 32 34 36 12 14 16 18 20 22 24 26 28 30 32 34 36 Water flow rate [m Water flow rate [m *Conditions...
- Page 45 2. Product Data EAHV-P1800YB EACV-P1800YB ■ Cooling 1.10 1.10 1.05 1.05 1.00 1.00 0.95 0.95 0.90 0.90 12 14 16 18 20 22 24 26 28 30 32 34 36 12 14 16 18 20 22 24 26 28 30 32 34 36 Water flow rate [m Water flow rate [m *Conditions...
- Page 46 2. Product Data 2-1-5. Water pressure drop EAHV-P1500, 1800YB EACV-P1500, 1800YB [Water] Water side heat exchanger head loss Flow rate [m MEES19K040...
- Page 47 2. Product Data 2-1-6. Operation temperature range EAHV-P1500, 1800YBL(-N)(-BS) Hot water range Cold water range 15, 55 -5, 55 -10, 30 43, 30 15, 50 43, 50 -15, 45 -15, 15 -10, 15 25, 35 43, 35 -15, 30 25, 30 -15, 5 43, 5 Outdoor temp (ºC)
-
Page 48: Sound Pressure Levels
2. Product Data 2-2. Sound pressure levels Measurement condition EAHV-P1500, 1800YB EACV-P1500, 1800YB Unit operating condition: Full load operation (Around the unit must be completely free) Sound pressure level The following values are the planned value. Sound pressure level dB <A> (anechoic room level) EAHV-P1500YB EAHV-P1800YB Measurement location... - Page 49 2. Product Data EAHV-P1500YB EACV-P1500YB Service surface Left surface NC−70 NC−70 NC−60 NC−60 NC−50 NC−50 NC−40 NC−40 NC−30 NC−30 NC−20 NC−20 Approximate minimum Approximate minimum audible limit on audible limit on continuous noise continuous noise Octave band central frequency (Hz) Octave band central frequency (Hz) Counter service surface Right surface...
- Page 50 2. Product Data EAHV-P1800YB EACV-P1800YB Service surface Left surface NC−70 NC−70 NC−60 NC−60 NC−50 NC−50 NC−40 NC−40 NC−30 NC−30 NC−20 NC−20 Approximate minimum Approximate minimum audible limit on audible limit on continuous noise continuous noise Octave band central frequency (Hz) Octave band central frequency (Hz) Counter service surface Right surface...
-
Page 51: Vibration Levels
2. Product Data 2-3. Vibration levels EAHV-P1500, 1800YB EACV-P1500, 1800YB Counter service surface unit: μm (one side amplitude effective value) Left side surface Right side surface * The above values are the planned value. Front (service surface) Note Note 1. Unit operation condition ·... -
Page 52: Salt Protection Specifications
2. Product Data 2-4. Salt Protection Specifications EAHV/EACV Treatment thickness salt Name Base material Surface treatment standard damage External Internal protection Fan guard ● ● Polypropylene resin Bell mouth ● Polyester resin coating 30 μm or more 30 μm or more Panel Alloyed galvanized sheet ●... -
Page 53: Installation
3. Installation 3-1. Selecting the Installation Site 3. Installation 3-1-1. Installation Conditions Select the installation site in consultation with the client. Select a site to install the unit that meets the following conditions: The unit will not be subject to heat from other heat sources. The noise from the unit will not be a problem. - Page 54 3. Installation 3-1-2. Installation Space Requirement 1. Single unit installation (1) Required space [Opposite service side] [Left side] 0.9 m (Service space) 0.9 m (Service space) [Right side] [Service side] 0.9 m (Service space) 0.9 m (Service space) (2) If entire surrounding area enclosed by walls (but vent holes installed at bottom of wall) 0.5 m Wall [Left side]...
- Page 55 3. Installation 2. Multiple unit installation (1) Required space [Left side] 0.9 m [Opposite service side] (Service space) 0.9 m (Service space) [Service side] 0.9 m [Right side] (Service space) 0.9 m (Service space) (2) If entire surrounding area enclosed by walls (but vent holes installed at bottom of wall) [Opposite service side] 1.5 m or more 0.5 m...
-
Page 56: Unit Installation
3. Installation 3-2. Unit Installation Units should be installed only by personnel certified by Mitsubishi Electric. 3-2-1. Product suspension method If transporting the product suspended, use the two suspension sections at the front and rear. Always feed rope through the four suspension sections so that the unit is not subjected to shocks. - Page 57 3. Installation 3-2-2. Installation on foundation Securely fix the unit with bolts to keep the unit from falling down during earthquakes. Install the unit on a foundation made of concrete or iron. Noise and vibrations from the unit may be transmitted through the floor and walls. Provide adequate protection against noise and vibration.
-
Page 58: System Design
4. System Design 4-1. Water Pipe Installation 4. System Design 4-1-1. Schematic Piping Diagram and Piping System Components Water circuit Please build the water circuit so that it is a closed system. Do not use water directly for showers or other applications. Do not allow other heat source water to mix with the water circuit. - Page 59 4. System Design 4-1-2. Standard piping type 65A housing type joint Water outlet Water inlet Connection detail Groove pipes at chiller side The dimension of the groove pipe at the chiller side Victaulic standard groove specifications (Unit: mm) Pipe size 2-1/2B (65A) ø76.1 ø72.2...
- Page 60 4. System Design 4-1-3. Inside header piping type Water outlet 150A housing type joint Water inlet Straub joint Connection detail The dimension of the groove pipe Groove pipes at chiller side at the chiller side (Unit: mm) Pipe size 6B (150A) ø165.1 ø160.8 + 0.7...
- Page 61 4. System Design 4-1-4. Notes on pipe corrosion Water processing and water quality control Poor-quality circulating water can cause the water-side heat exchanger to scale up or corrode, reducing heat-exchange per- formance. Properly control the quality of the circulating water. Removing foreign objects and impurities in the pipes During installation, keep foreign objects, such as welding and sealant fragments and rust, out of the pipes.
- Page 62 4. System Design (6) Connecting pipes made from different materials If different types of metals are placed in direct contact with each other, the contact surface will corrode. Install an insulating material between pipes that are made of different materials to keep them out of direct contact with each other.
- Page 63 4. System Design 4-1-6. Ensuring enough water in the water circuit 1. Required amount of water If the amount of water in the water circuit (circulating water circuit) is insufficient, the unit operation hours may become shorter or the amount of water temperature change to be controlled may become extremely large. Also, the defrost operation during the heating mode may not function properly.
- Page 64 4. System Design 4-1-7. Water Piping Size and Location 1. Standard piping type Unit: mm Drain R1 1/2 Water outlet 65A housing type joint Water inlet 65A housing type joint 2. Inside header piping type Unit: mm Drain Water outlet R1 1/2 150A housing type joint Water inlet...
-
Page 65: Wiring Design
5. Wiring Design 5-1. System Configurations 5. Wiring Design The system must be configured only by personnel certified by Mitsubishi Electric. 5-1-1. Schematic Diagrams of Individual and Multiple Module Connection Systems (1) Individual system External temperature sensor 2 (option) Flow switch... - Page 66 5. Wiring Design 5-1-2. Switch Types and the Factory Settings (1) Switch names and functions Terminal box Terminal box Control box for SUB circuit Control box for MAIN circuit There are three main ways to set the settings as follows: 1) Dip switches (SW1 - SW3, SW421) 2) Dip switches used in combination with the push switches 3) Rotary switches...
- Page 67 5. Wiring Design Different types of switches on the PCB [Control board] [Enlarged the operation area 1] LED display Rotary switch (SWU3) (0-F) Operation area 1 Rotary switch (SWU2) (0-9) Rotary switch (SWU1) (0-9) Push switch (SWP1) Push switch (SWP2) Operation area 2 Push switch (SWP3) Dip switch (SW3)
- Page 68 "-" in the table indicates that the function in the corresponding row will be disabled regardless of the actual switch setting. The factory setting for these items is OFF. * Connection to a BMS requires an installation of Procon A1M (Modbus interface), which is available from MITSUBISHI ELECTRIC UK. Use a BMS with insulation...
- Page 69 5. Wiring Design 5-1-3. Configuring the Settings The settings must be set only by a qualified personnel. 1. System configuration (1) Set the dip switches. MAIN circuit board SUB circuit board Switch settings on the MAIN circuit Set the dip switches (labeled A in the figure at right) that correspond to the items below, according to the local system.
- Page 70 5. Wiring Design Setting the switches on the system leader unit Make sure the address of the MAIN circuit on the MAIN circuit board SUB circuit board main module is set to "1" (labeled A in the figure LED1 LED1 at right) and that the address of the SUB circuit on the main module is set to "51"...
- Page 71 5. Wiring Design Selector switch settings [ON] Unit operation [Remote] Controller operation [OFF] Unit stop [Local] Local operation Remote Heating Forced Local Normal Cooling [Cooling] Cooling operation [Forced] When the unit stops, fan operates. [Heating] Heating operation [Normal] When the unit stops, fan does not operate. CAUTION •...
- Page 72 5. Wiring Design Priority order of the water-temperature-setting-input-signal sources Water temperature can be controlled by using the signals from the four types of input sources listed below. The setting for the item with higher priority will override the settings for the items with lower priorities. The water temperature will be controlled according to the temperature setting in the "Target water temperature"...
- Page 73 5. Wiring Design 2. Making the settings Use the LED display and the three push switches (SWP1 (↑), SWP2 (↓), and SWP3 (Enter)) to change the current settings on the circuit board and to monitor various monitored values. (1) Setting procedures Take the following steps to set the push switches SWP1 through SWP3.
- Page 74 5. Wiring Design (2) Table of settings items Set the dip switch SW1 as shown in the table below to set the value for the items in the "Setting item" column. Need or non-need to set the setting *4 Rotary switch Dip switch setting (SW1) *1 Setting Item...
- Page 75 5. Wiring Design Need or non-need to set Rotary the setting *4 switch Dip switch setting (SW1) *1 Setting Item Default System Group Notes (SWU3) M S M S M S Supplementary heater operation outdoor temp *3 -10ºC Range -30-50ºC 9 10 Drain pan heater operation outdoor temp 0ºC...
- Page 76 5. Wiring Design 3. Setting procedures (1) System setting <1>Making the settings for the initial start-up process (A) Single unit Setting address 1 1) Turn off the power. Address [1/51] 2) System leader unit (Address 1 SW2-2, 2-3: ON) 3) Turn the power back on. System leader unit Address 1 →...
- Page 77 5. Wiring Design (C) System leader unit and group leader unit (3 groups, 1 unit in each group) Address [1/51] System leader unit Remote controller Address [2/52] Group leader unit Address [3/53] Group leader unit (1) Setting address 1 (2) Setting address 2 1) Turn off the power.
- Page 78 5. Wiring Design (D) System leader unit, Group leader unit and Sub unit (2 groups, 3 units in each group) Address [1/51] Address [2/52] Address [3/53] System leader unit Sub unit Sub unit Remote controller Address [4/54] Address [5/55] Address [6/56] Group leader unit Sub unit Sub unit...
- Page 79 5. Wiring Design <2>Multiple unit control By setting SW2-6 to ON for address 1, optimum control of number of operating units will be performed. All units will simultaneously operate when SW2-6 is set to OFF. (A) System leader unit, group leader unit, and sub unit Address [1/51] Address [2/52] Address [3/53]...
- Page 80 5. Wiring Design <3>Example of system configuration Optimum control of number of operating units Address [1/51] Address [2/52] Address [3/53] Address [4/54] Address [5/55] Address [6/56] Group leader Group leader Group leader Group leader Group leader System leader unit unit unit unit unit...
- Page 81 5. Wiring Design (2) Water-temperature setting Different water temperature settings can be set for different modes. Set the dip switches on the circuit board as follows to make the settings for the items described in this section. Press the push switch SWP3 to enable the configuration changes. Press the push switches SWP1 (↑) or SWP2 (↓) to increase or decrease the value.
- Page 82 5. Wiring Design Heating ECO (2-point system) When the outdoor temp A and B are set to the same value. Water temp. Water temp. Setting water temp A Setting water temp A Setting water temp B Setting water temp B Setting outdoor Setting outdoor Outdoor temp.
- Page 83 5. Wiring Design (3) Peak-demand control operation Peak-demand control is a function used to control the power consumptions of the units. The compressor's maximum operating frequency will be controlled according to the peak-demand control signal. Set the dip switches on the circuit board as follows to make the settings for the items described in this section. Press the push switch SWP3 to enable the configuration changes.
- Page 84 5. Wiring Design (5) Setting the water temperature using analog signal input When dip switch SW2-7 is set to ON (Enable external input), SW2-8 is set to OFF and SW2-9 is set to OFF, the target water temperature varies with the preset temperatures A and B and the type of analog input signal. Set the dip switches on the circuit board as follows to make the settings for the items described in this section.
- Page 85 5. Wiring Design When the water temperature setting input signal type is 0-10 V • External analog input signal of 1 V: Preset temp. A • External analog input signal of 9 V: Preset temp. B • External analog input signal of between 1 and 9 V: the preset temperature will be linearly interpolated. Preset temp B Preset temp A 0 V 1 V...
- Page 86 5. Wiring Design When the water temperature setting input signal type is 0-10 V • External analog input signal of 1 V: 0% • External analog input signal of 9 V: 100% • External analog input signal of between 1 and 9 V: the percent will be linearly interpolated. Load ratio 100% 9 V 10 V...
- Page 87 5. Wiring Design (7) Setting the supplementary heater signal output conditions A temperature at which the signal output to operate supplementary heaters can be selected. Supplementary heater signal output conditions The operation command signal is ON and at least one of the following two conditions is met. [1] Water-temperature control option (SW2-4) is set to OFF, the inlet water temperature drops below a set water temperature, and the outdoor temperature drops below a set outdoor temperature.
- Page 88 5. Wiring Design (9) External temperature sensor control An optional External temperature sensor (TW-TH16) is required. Outlet water System Sub unit Sub unit Simultaneous leader unit operating group External SW2-5 ON temperature SW2-4 ON SW2-4 ON SW2-4 ON sensor 2 (SW2-5 ON) Group Sub unit...
-
Page 89: Electrical Wiring Installation
5. Wiring Design 5-2. Electrical Wiring Installation 5-2-1. Main Power Supply Wiring and Switch Capacity Schematic Drawing of Wiring (Example) <A> Switch (with current breaking capability) <B> Current leakage breaker <C> unit <B> <A> 3N~380–415V <C> Main power supply wire size, switch capacities, and system impedance Minimum wire thickness (mm²) Local switch (A) No-fuse breaker... - Page 90 5. Wiring Design 5-2-2. Cable Connections 1. Schematic Diagram of a Unit and Terminal Block Arrangement (Unit: mm) Power supply wiring (from the side) Terminal box Power supply wiring Terminal box (from the bottom) See “Detailed drawing” <Unit bottom> <Service side> Detailed drawing Power supply terminal box (terminal size: M10)
- Page 91 5. Wiring Design 2. Precautions when fastening screws * Faulty contacts due to loose screws may cause overheating and fire. * Using the circuit board while it is damaged may cause overheating and fire. <1> Screw fastening torque Power supply terminal block, M8 screw: 10 to 13.5 N·m Use the following methods to check that the screws have been fastened.
-
Page 92: Controller
6. Controller 6-1. PAR-W31MAA specifications 6. Controller Item Description Operations Display Runs and stops the operation of a group of units ON/OFF Switches between Heating/Heating ECO/Anti-freeze/Cooling Operation mode switching * Available operation modes vary depending on the unit to be connected. * Switching limit setting can be made via a remote controller. - Page 93 MEES19K040...
- Page 94 - Doing so may cause the unit or pipes to burst, or result in explosion or fire during use, repair, or at the time of disposal of the unit. - It may also be in violation of applicable laws. - MITSUBISHI ELECTRIC CORPORATION cannot be held responsible for malfunctions or accidents resulting from the use of the wrong type of refrigerant.
Need help?
Do you have a question about the E Series and is the answer not in the manual?
Questions and answers