
Related Manuals for SMA SUNNY HOME MANAGER


Summary of Contents for SMA SUNNY HOME MANAGER
- Page 1 Device for PV Plant Monitoring and Load Control SUNNY HOME MANAGER Installation Manual HoMan-IA-en-13 | Version 1.3...
-
Page 3: Table Of Contents
4.1 Sunny Home Manager ........16... - Page 4 9 Troubleshooting ........47 9.1 Error in the Sunny Home Manager ......47 9.1.1 States of all LEDs .
- Page 5 11.1 Sunny Home Manager ........62...
-
Page 6: Information On This Document
This document is intended for skilled persons. Only persons with the appropriate skills are allowed to perform the tasks described in this manual.(see Section 2.2 "Skills of Skilled Persons", page 12) Additional Information Links to additional information can be found at www.SMA-Solar.com: Document title Document type ®... - Page 7 SMA Bluetooth Repeater, SMA Bluetooth Bluetooth Repeater Repeater Outdoor ® Sunny WebBox, Sunny WebBox with Bluetooth Wireless Sunny WebBox Technology ® SMA Bluetooth Bluetooth Wireless Technology ® SMA radio-controlled socket with Bluetooth Wireless SMA radio-controlled socket Technology Installation Manual HoMan-IA-en-13...
- Page 8 ‒ Identification number for SMA Bluetooth NetID Network Identification network Mean Sea Level ‒ Photovoltaics ‒ WLAN Wireless Local Area Network ‒ Personal Unlocking Key Code number which enables access to SMA devices after loss of password HoMan-IA-en-13 Installation Manual...
-
Page 9: Safety
2.1 Intended Use Sunny Home Manager The Sunny Home Manager is a device for monitoring PV plants and for controlling loads in households with PV plants. The Sunny Home Manager carries out the following tasks: • Read-out of energy meter data and data from SMA inverters with Bluetooth communication interface •... - Page 10 SMA Solar Technology AG Supported Devices The Sunny Home Manager supports no more than 16 Bluetooth devices. Of the 16 devices, the Sunny Home Manager supports no more than 12 SMA inverters or no more than 10 SMA radio-controlled sockets.
- Page 11 The Sunny Home Manager supports the following energy meter types: • Energy meter with D0 interface:* A list of the supported energy meters with D0 interface can be found at www.SMA-Solar.com. Recommended resolution: at least 10 Wh Information: for the "limiting of the active power feed-in" function, the energy meter with D0 interface must have a resolution of at least 1 Wh.
-
Page 12: Skills Of Skilled Persons
• Do not connect any loads to the SMA radio-controlled socket that require a continuous supply of current (e. g. refrigerator, freezer). • Do not connect any loads to the SMA radio-controlled socket that can cause injuries or fires if unintentionally switched on (e.g. iron). -
Page 13: Safety Precautions
Lethal voltages are present at the conductive parts inside the plug-in power supply and at the conductive parts of the top-hat rail power supply. • Only use the Sunny Home Manager indoors and in a dry environment; keep it away from liquids. -
Page 14: Scope Of Delivery
SMA Solar Technology AG 3 Scope of Delivery 3.1 Scope of Delivery of the Sunny Home Manager Check the scope of delivery for completeness and any visible external damage. Contact your specialist dealer if the scope of delivery is incomplete or you find any damage. -
Page 15: Scope Of Delivery Of Sma Radio-Controlled Socket
SMA Solar Technology AG 3 Scope of Delivery 3.2 Scope of Delivery of SMA Radio-Controlled Socket Figure 2: Components included in scope of delivery Item Quantity Description SMA radio-controlled socket Installation manual and supplementary sheet Installation Manual HoMan-IA-en-13... -
Page 16: Product Description
The Sunny Home Manager is connected to the energy meters via cables. Transmission of data to Sunny Portal Sunny Portal is the user interface of the Sunny Home Manager. The Sunny Home Manager sends the data read-out to the Sunny Portal. The Sunny Home Manager establishes the connection to the Sunny Portal via a router. - Page 17 A higher self-consumption rate can be achieved if electrical loads are specifically switched on when residual PV power is available. The following functions of the Sunny Home Manager make it possible to increase the self-consumption rate: Function...
- Page 18 If necessary, contact your network operator. The Sunny Home Manager monitors the active power being fed into the electricity grid via a feed-in meter. If the active power feed-in exceeds the prescribed limit, the Sunny Home Manager limits inverter PV generation via Bluetooth.
- Page 19 SMA Solar Technology AG 4 Product Description Figure 4: PV plant with Sunny Home Manager (example with Sunny Backup) Item Description PV modules Sunny Portal PV inverter Sunny Home Manager Router PV production meter Automatic Switch Box Installation Manual HoMan-IA-en-13...
- Page 20 Recommended screen resolution: • Minimum 1,024 pixels x 768 pixels Energy meters: SMA Solar Technology AG recommends connecting at least the following energy meter types to the Sunny Home Manager: • One feed-in meter and one consumption meter • Bidirectional meter for feed-in and purchased electricity At least one feed-in meter is required for the "limiting of the active power feed-in"...
-
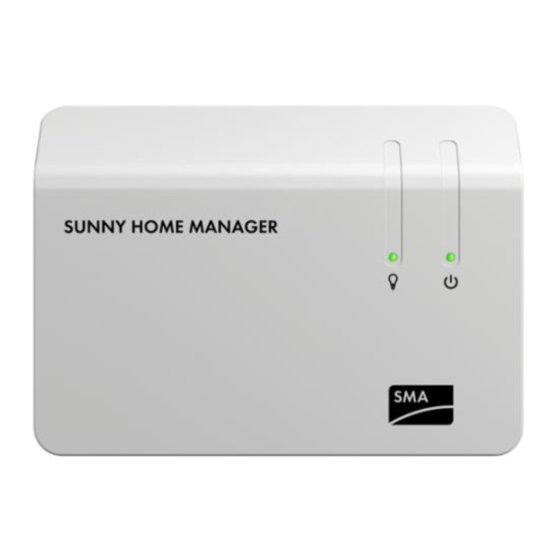
Page 21: Leds Of The Sunny Home Manager
4 Product Description Type Label You can identify the Sunny Home Manager by the type label. The type label can be found on the rear of the Sunny Home Manager. You will find the following information on the type label: •... -
Page 22: Sma Radio-Controlled Socket
Converting control commands of the Sunny Home Manager The Sunny Home Manager can switch the SMA radio-controlled socket on and off. As a result, specific electrical devices can be switched on if e. g. a lot of PV power is available. - Page 23 • Operation of the SMA radio-controlled socket Type label You can identify the SMA radio-controlled socket by the type label. The type label can be found on the rear of the SMA radio-controlled socket. You will find the following information on the type label: •...
-
Page 24: Led Display Of The Sma Radio-Controlled Socket
"Automatically switched off". SMA radio-controlled socket controlled by the Sunny Home Manager. Glowing red System is starting. Update process is running. In this status, do not unplug the SMA radio-controlled socket from the socket-outlet. Otherwise, the SMA radio-controlled socket could be damaged. Lower horizontal LED Figure 8:... - Page 25 Operating mode/status of the SMA radio-controlled socket Glowing green The touch key is ready for operation. In this status, the SMA radio-controlled socket can be reset to the default settings (see Section 9.8 "Resetting the SMA Radio-Controlled Socket to Default Setting", page 59).
-
Page 26: Preparation For Mounting And Commissioning The Sunny Home Manager
Sunny Home Manager, configure a different NetID as NetID 1. 4. Note down the serial numbers of the Sunny Home Manager and all other Bluetooth devices. For the SMA radio-controlled sockets, also note the load to be allocated to the respective SMA radio-controlled socket. -
Page 27: Installation
☐ The cable route from the mounting location to the router is no more than 100 m in length. ☐ The cable route from the mounting location of the Sunny Home Manager to the energy meters with D0 interface is no more than 15 m in length. -
Page 28: Checking The Bluetooth Connection At The Designated Mounting
Bluetooth PV plant is commissioned (see Section 8.1 "Preparing Bluetooth Communication", page 39). 1. Configure the NetID of the PV plant on the Sunny Home Manager (see Section 8.1.1 "Configuring the NetID on the Sunny Home Manager", page 39). 2. Supply the Sunny Home Manager with voltage via the plug-in power supply (see Section 7.4.1). -
Page 29: Mounting The Sunny Home Manager On The Top-Hat Rail
6. Hook the Sunny Home Manager onto the screws. Ensure that the heads of the screws are engaged in the holes on the rear of the Sunny Home Manager. 6.4.2 Mounting the Sunny Home Manager on the Top-Hat Rail Requirement: ☐... -
Page 30: Connection
7 Connection SMA Solar Technology AG 7 Connection 7.1 Connection Area Bottom of enclosure Figure 12: Connections on the bottom of the enclosure Item Description Explanation "Power" Connection socket for plug-in power supply "NetID" Rotary switch for configuring the NetID Bluetooth LED Status display of Bluetooth connection "Meter 1"... - Page 31 SMA Solar Technology AG 7 Connection Right side of enclosure Figure 13: Terminal on the right side of the enclosure Item Description Explanation USB port Currently without function Left side of enclosure Figure 14: Terminal on the left side of the enclosure...
- Page 32 7 Connection SMA Solar Technology AG Pin assignment of the connection sockets Figure 15: Pin assignment of the connection sockets on the bottom of the enclosure of the Sunny Home Manager Upper pin row for D0: Signal Specification Description Voltage supply...
-
Page 33: Connecting Sunny Home Manager To Energy Meter
List of recommended energy meters You can find a list of recommended energy meters with D0 interfaces in the planning guidelines "Increased self-consumption – Sunny Backup / Sunny Home Manager" at www.SMA-Solar.com. Disconnecting the D0 interface via the network operator It is possible that the D0 interface must be disconnected by the network operator. -
Page 34: Connecting Sunny Home Manager To Energy Meter With
3. Use the labels provided to mark each cable with the connection socket and energy meter to which it is assigned. 7.2.2 Connecting Sunny Home Manager to Energy Meter with S0 Interface Additional required material (not included in scope of delivery): ☐... - Page 35 SMA Solar Technology AG 7 Connection 3. Shorten unused insulated wires flush with the cable sheath. 4. Strip approximately 6 mm of insulation off the insulated wires. 5. Release the sockets of the four-pole plug with a screwdriver and insert the insulated conductors into pins 1 and 2 of the four-pole plug.
-
Page 36: Connecting Sunny Home Manager To The Router
Sunny Home Manager. 2. Plug the plug-in power supply into the socket-outlet. ☑ The status LED of the Sunny Home Manager first glows red, and then flashes red. After approximately two minutes, the status LED switches to flashing green/orange intermittently. - Page 37 1. Mount the top-hat rail power supply on the top-hat rail (see manual of the top-hat rail power supply). 2. Connect the cable for the Sunny Home Manager to the top-hat rail power supply (see manual of the top-hat rail power supply). For this purpose, trim the unused insulated conductors flush with the cable shield.
- Page 38 LED switches to flashing green/orange intermittently. ✖ Is the status LED not intermittently flashing green and orange? It is possible that the Sunny Home Manager is not correctly connected to the router. • Ensure that the Sunny Home Manager is correctly connected to the router (see Section 7.3).
-
Page 39: Commissioning
Sunny Home Manager. • If the PV plant consists of more Bluetooth devices than one inverter and one Sunny Home Manager, configure a different NetID as NetID 1. • Use a screwdriver to turn the arrow of the rotary switch to the NetID of the PV plant (blade width of the screwdriver: 2.5 mm). -
Page 40: Configuring The Netid On The Sma Radio-Controlled Socket
☐ The Sunny Home Manager is supplied with voltage (see Section 7.4 "Supplying the Sunny Home Manager with Voltage", page 36). The Sunny Home Manager automatically establishes a connection to the Sunny Portal. As soon as the status LED intermittently flashes green and orange after approximately two minutes, you can register the Sunny Home Manager in the Sunny Portal (see Section 8.3 "Registering in Sunny Portal",... -
Page 41: Registering In Sunny Portal
SMA Solar Technology AG 8 Commissioning 8.3 Registering in Sunny Portal Sunny Portal is the user interface of the Sunny Home Manager. Therefore, you must register the Sunny Home Manager in Sunny Portal. Requirements: ☐ The status LED of the Sunny Home Manager is flashing intermittently green and orange (see Section 8.2 "Establishing Connection to the Sunny Portal", page 40). - Page 42 3. Select [Next]. ☑ The "Select plant" page opens. Registering a Sunny Home Manager plant in Sunny Portal All devices with identical password and NetID form a plant. For this reason, a password used for all devices in a plant is called a plant password.
- Page 43 3. Enter the plant password again in the "Repeat password" field. 4. Select [Next]. ☑ The "Select devices" page opens. 5. Enter the serial number of the Sunny Home Manager in the "PIC" field. Enter the registration ID of the Sunny Home Manager in the "RID" field. 6. Select [Identify].
- Page 44 8 Commissioning SMA Solar Technology AG 8. Activate the checkbox of the devices you would like to add to the Sunny Home Manager plant. Tip: you can identify devices using the previously noted serial numbers. 9. Select [Add] to add Bluetooth devices to the Sunny Home Manager plant immediately.
-
Page 45: Configuring The Operating Mode Of The Sma Radio-Controlled Socket
☐ The upper horizontal LED is glowing orange or green. You can configure the operating mode of the SMA radio-controlled socket via the touch key of the SMA radio-controlled socket or via the Sunny Portal (see user manual "Sunny Home Manager in the Sunny Portal"). - Page 46 • If the SMA radio-controlled socket was not registered together with the Sunny Home Manager in the Sunny Portal, add the SMA radio-controlled socket to the plant as a new device (see user manual "Sunny Home Manager in the Sunny Portal").
-
Page 47: Troubleshooting
Corrective measures: • Use the Sunny Home Manager Assistant (see Section 9.4). The Sunny Home Manager cannot establish a connection to Sunny Portal. It is possible that the Sunny Home Manager is not correctly connected to the router. Corrective measures: •... - Page 48 SMA Solar Technology AG LED status Cause and corrective measures Flashing green and The Sunny Home Manager is connected to the Sunny Portal, but is not yet orange intermittently registered in Sunny Portal. Corrective measures: • Register the Sunny Home Manager in Sunny Portal (see Section 8.3).
-
Page 49: States Of The The Bluetooth Led
LED status Cause and corrective measures Flashing red and The Sunny Home Manager has not been connected to Sunny Portal for at orange intermittently least ten minutes. There is an "Error" type event present in at least one device or at least one device is not connected to the Sunny Home Manager. -
Page 50: Errors In The Sma Radio-Controlled Socket
• Commission the SMA Bluetooth devices. • For inverters with Bluetooth Piggy-Back: wait until the inverters switch It is possible that NetID configured on the Sunny Home Manager is not the same as that configured on the devices of the PV plant. -
Page 51: Errors During Registration In Sunny Portal
Sunny Home Manager. It is possible that there is no voltage supply to the Sunny Home Manager. If this is the case, all LEDs on the Sunny Home Manager will be off. Corrective measures: • Ensure that the Sunny Home Manager is correctly connected to the router (see Section 7.3). - Page 52 This allows you to extend the radio range of your Bluetooth network. Inverters with Bluetooth Piggy-Back switch off during the night. For this reason, the Sunny Home Manager cannot establish a connection to these inverters during this time. Corrective measures: •...
- Page 53 Corrective measures: • Use "ANTEXTKIT25-10" antenna extension add-on kit. Sunny Home Manager is too far from your plant or the Bluetooth connection is interrupted. The cause of the disturbance could be walls or ceilings that absorb the waves used for wireless transmission.
- Page 54 9 Troubleshooting SMA Solar Technology AG Problem Cause and corrective measures It is possible that the Sunny Home Manager is not properly connected to the router. Corrective measures: • Ensure that the Sunny Home Manager is correctly connected to the router (see Section 7.3).
- Page 55 Plant Piggy-Back. These inverters switch off in darkness. For this reason, Setup Assistant after having Sunny Home Manager cannot access the inverters at this time. entered the plant password. Corrective measures: 1. Select [Skip forward] in the Plant Setup Assistant and finish registration without selecting inverters.
-
Page 56: Using The Sunny Home Manager Assistant
In addition, you can use the Sunny Home Manager Assistant to display the latest connection status to the Sunny Portal, the network settings and the connected Bluetooth devices, and save these as a log file. If a service assignment should be necessary, the SMA Service Line can use this log file to analyse the problem. -
Page 57: Resetting The Sunny Home Manager
9.6 Resetting the Sunny Home Manager The reset button is positioned in a small hole on the bottom of the Sunny Home Manager. Depending on how long you hold down the reset button, the Sunny Home Manager is partially or completely reset. -
Page 58: Reassigning The Sunny Home Manager After Resetting The Sunny Home Manager Plant
5. Select [Next]. ☑ The "Select plant" page opens. 6. Activate the "Add or replace devices" field. 7. Select the line of the Sunny Home Manager plant that you would like to reassign to the Sunny Home Manager 8. Select [Next]. -
Page 59: Resetting The Sma Radio-Controlled Socket To Default Setting
SMA Solar Technology AG 9 Troubleshooting 9. Enter the serial number of the Sunny Home Manager in the "PIC" field. Enter the registration ID of the Sunny Home Manager in the "RID" field. Reading out the serial number and registration ID You can read out the serial number and the registration ID at the following locations: •... -
Page 60: Decommissioning
Sunny Home Manager upward and remove it from the wall. 7. If the Sunny Home Manager is mounted on a top-hat rail, remove the Sunny Home Manager from the top-hat rail: • Press the Sunny Home Manager down. -
Page 61: Packing The Sunny Home Manager/Sma Radio-Controlled
• Dispose of the device in accordance with the disposal regulations for electronic waste applicable at the installation site. • Send the device back to SMA Solar Technology AG with shipping paid by sender (see Section 13 "Contact", page 68). Label the packaging "ZUR ENTSORGUNG"... -
Page 62: Technical Data
11 Technical Data SMA Solar Technology AG 11 Technical Data 11.1 Sunny Home Manager General Data Status display LEDs Maximum length of the cable to energy meters 30 m with S0 interface Maximum length of the cable to energy meters... - Page 63 Maximum height above MSL 2,000 m * When using the Sunny Home Manager at temperatures below 0°C and exceeding 40°C: do not use the provided plug-in power supply (see Section 11.3 "Plug-In Power Supplies", page 65). Requirements of the plug-in power supply: 12 V DC, nominal current: 1.5 A.
-
Page 64: Sma Radio-Controlled Socket
11 Technical Data SMA Solar Technology AG 11.2 SMA Radio-Controlled Socket General Data Status display LEDs Certified countries Belgium, Germany, France, Greece, Great Britain, Italy, Luxembourg, Austria, Portugal, Spain, Czech Republic, Switzerland Minimum service life* 20,000 switching cycles * When switching at full load (16 A) -
Page 65: Plug-In Power Supplies
SMA Solar Technology AG 11 Technical Data Ambient Conditions for Transport/Storage Ambient temperature − 25°C … +80°C Relative humidity* 5% … 95% Maximum height above MSL 3,000 m * non-condensing Communication Interface to Other Devices Bluetooth Sunny Home Manager Maximum Radio Range... -
Page 66: Taiytech, Tyt251200200Eu/3000M
11 Technical Data SMA Solar Technology AG 11.3.2 TaiyTech, TYT251200200EU/3000M Mechanical Data Width x height x depth 92.0 mm x 90.6 mm x 36.0 mm Weight 190 g Voltage Supply Voltage 100 V AC … 240 V AC Frequency 50/60 Hz Maximum current 0.85 A... -
Page 67: Accessories
SMA Solar Technology AG 12 Accessories 12 Accessories Description Brief description SMA order number Reading head Cable with optical reading HM-D0-METERADAPTER head and four-pole plug for energy meters with D0 interface SMA radio-controlled socket SMA radio-controlled socket BT-SOCKET-10 with SMA Bluetooth Wireless... -
Page 68: Contact
SMA Solar Technology AG 13 Contact If you have technical problems concerning our products, contact the SMA Service Line. We require the following information in order to provide you with the necessary assistance: • Serial number and software package of the Sunny Home Manager •... - Page 69 Legal Provisions The information contained in this document is the property of SMA Solar Technology AG. Publishing its content, either partially or in full, requires the written permission of SMA Solar Technology AG. Any internal company copying of the document for the purposes of evaluating the product or its correct implementation is allowed and does not require permission.
- Page 70 SMA Central & Eastern Europe s.r.o. SMA Middle East LLC www.SMA-Czech.com www.SMA-Me.com SMA France S.A.S. SMA Portugal - Niestetal Services Unipessoal Lda www.SMA-France.com www.SMA-Portugal.com SMA Hellas AE SMA Solar (Thailand) Co., Ltd. www.SMA-Hellas.com www.SMA-Thailand.com SMA Ibérica Tecnología Solar, S.L.U.
Need help?
Do you have a question about the SUNNY HOME MANAGER and is the answer not in the manual?
Questions and answers