Advertisement
Quick Links
ENIGMA
S
D
I
I
HOWER
OOR
NSTALLATION
NSTRUCTIONS
IMPORTANT
DreamLine® reserves the right to alter, modify or redesign products at any time without prior
notice. For the latest up-to-date technical drawings, manuals, warranty information or additional
details please refer to your model's web page on DreamLine.com
60" model#:
SHDR-60607912
72"model#:
SHDR-60727912
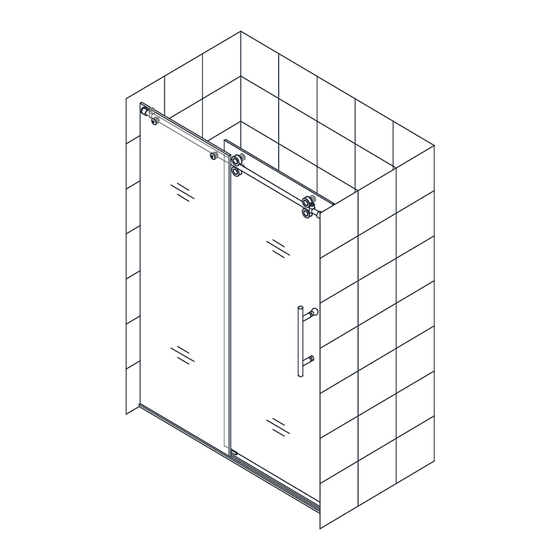
Right hand door installation shown
Please read these instructions carefully before installing. If you have any questions
regarding installation, please contact our technical support specialists Monday through
Friday 8:00 AM – 7:00 PM EST at Phone: 1-866-731-2244, Fax: 1-866-857-3638 or e-mail our
technical support group at Support@DreamLine.com
®
For more information about DreamLine
products please visit
DreamLine.com
Advertisement

Related Manuals for Dreamline ENIGMA SHDR-6060791272


Summary of Contents for Dreamline ENIGMA SHDR-6060791272
- Page 1 NSTALLATION NSTRUCTIONS IMPORTANT DreamLine® reserves the right to alter, modify or redesign products at any time without prior notice. For the latest up-to-date technical drawings, manuals, warranty information or additional details please refer to your model’s web page on DreamLine.com 60”...
- Page 2 DreamLine will not replace any damaged products or missing parts free of charge after ® 3 business days or if the product has been installed. Feel free to contact DreamLine if you ® have any questions and please provide an order number, job name or other proof of purchase to help us identify your original order.
-
Page 3: Tools Required
NOTE: DO NOT install the handle on the glass until instructed to do so. DO NOT attempt to lift the glass using the handle. This could result in damage to the glass and /or serious personal injury. Always use an assistant or a professional grade glass suction cup when handling heavy glass. - Page 4 Detailed Diagram of the Shower Door Components Diagram A Diagram B Packing List A Description Description Part# Part# Door Stopper 2pcs 10 Large Truss head screw ST6×55 2pcs Stationary glass Hex wrenches: 3mm, 4mm, 5mm 1set Upper guide rail Guide block Roller 4pcs 13 Bumper strip...
- Page 5 NOTE: Unpack your unit carefully and inspect it. Lay it out and identify all parts using the detailed diagram in this manual as a reference. Before discarding the carton, check for small hardware bags that may have fallen to the bottom of the box. If any parts are damaged or missing, please contact DreamLine for replacement. ®...
- Page 6 3. Your Threshold (#15) has been precut for your Shower model width of: 60”or 72”. If W-width of your finished wall-to-wall opening is less than the size of your Shower model, you will need to cut the Threshold to the size of “W”. See Fig.
- Page 7 5. Mark the drilling holes on the sill through the predrilled holes in the Threshold (#15). Remove the Threshold (#15) and drill holes into the sill using Ø 5/16” drill bit and insert the Small anchors Ø5/16” (#18). Apply silicone on the bottom of the Threshold (#15) along the center line and around the holes, place it back to the designated position and fasten it to the Silicone...
- Page 8 7. If the width of your model is 72” and you are installing the door with the Small Stationary glass (#24), attach the Small Stationary glass bracket (#23) to the Upper guide rail (#03) between the Door stopper (#01) and the Guide Rail brackets (#08) as shown in Fig.
- Page 9 9. Once leveled, outline the Guide rail brackets’ (#08) position on the wall. Carefully set the Stationary glass (#02) and Upper Guide rail (#03) aside. Remove the Guide rail brackets (#08) from the Upper guide rail (#03), place the male part of the Upper guide rail (#03) to the outlined positions on the wall and mark the drilling holes.
- Page 10 Fig. 11 ATTENTION: This Step shows the Small Stationary Glass (#24) installation for 72” door only (not included with the 60” model). 11. Screw off the female part from the Small stationary glass bracket (#23). Apply a small amount of silicone into the Threshold (#15) channel.
- Page 11 Fig. 13 12. A. Measure the distance between the Stationary glass (#02) and the wall for the 60” model. B. Measure the distance between the Stationary glass (#02) and the Small Stationary glass (#24) for the 72” model. Cut the Threshold cover (#14) to the size of your measurement.
- Page 12 13. Place the Guide block (#12) on the floor and parallel it to the Stationary glass (#02). It should not pass beyond the vertical edge of the glass. Ø 5/16” Take a measurement to ensure the 2 3/16” distance between the front line of the glass and the center line of the Guide block (#12) is 2-3/16”.
- Page 13 15. Adjust the disks on both top Rollers (#04) to ensure that the bottom edge of the Glass door (#05) does not touch the bottom of the Guide block (#12). Tighten the fasteners. See Fig. 17 for details. Note: The adjustment TIP: 1/4”...
- Page 14 17. Position both Door Stoppers (#01) to ensure that they are positioned upright and the Glass door (#05) is in its maximum opening and closing range. Tighten the set screws to fasten them in place. Mount the Handle (#06) to the Glass door (#05). See Fig.
- Page 15 Enigma Roller adjustment procedure for Enigma and Enigma-X To achieve minimal clearance beneath the door glass without making contact with the bottom guide block and creating a good seal with the wall. Have at least two 1/4” shims or wedge shims (to maintain space beneath the door glass) and an assistant available to help with this procedure.
-
Page 16: Product Maintenance
Product Maintenance BASES and BACKWALLS: To ensure long lasting life for your acrylic back walls: wipe them off after each use with a soft cloth. To clean the acrylic back walls use non-abrasive sprays or cream based cleaners. Never use abrasive cleansers, metal brushes or scrapers that could scratch or dull the surface. - Page 17 TEL: 866-731-2244 FAX: 866-857-3638 REAM INE.COM For more information on DreamLine Shower Doors Enclosures please visit DreamLine.com ® “Enigma” Ver.4 Rev.5 02/2016...
Need help?
Do you have a question about the ENIGMA SHDR-6060791272 and is the answer not in the manual?
Questions and answers