Advertisement
Quick Links
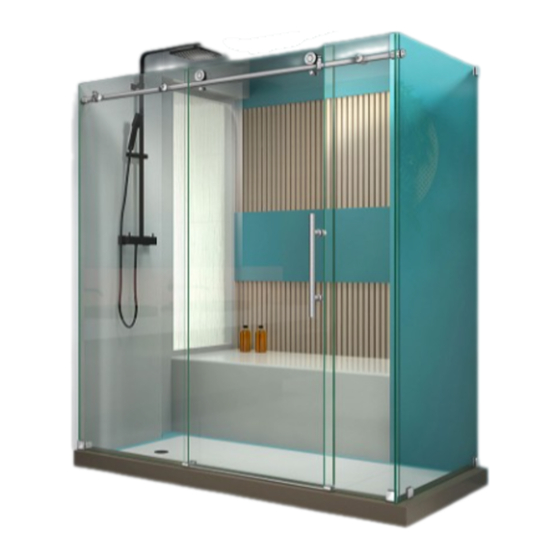
ENIGMA-X / SPARKLE
S
HOWER
IMPORTANT
DreamLine
reserves the right to alter, modify or redesign products at any time without prior notice.
®
For the latest up-to-date technical drawings, manuals, warranty information or additional details please refer
to your model's web page on DreamLine.com
MODEL #s
SHEN-6134480-##
SHEN-6134600-##
*The SPARKLE model name designates an option with MirrorMax patterned glass.
The installation is identical to the Enigma-X.
Right Hand Return panel installation shown
For more information about DreamLine
ENIGMA-X / SPARKLE Enclosure manual Ver 7 01/2017
E
NCLOSURE INSTALLATION INSTRUCTIONS
Shower Doors & Tub Doors please visit DreamLine.com
®
ENCLOSURE
*
MODEL #s
SHEN-6134720-##
##=finish
07- Brushed Stainless Steel
08- Polished Stainless Steel
18- Tuxedo
Advertisement

Related Manuals for Dreamline ENIGMA-X


Summary of Contents for Dreamline ENIGMA-X
- Page 1 The installation is identical to the Enigma-X. 08- Polished Stainless Steel Right Hand Return panel installation shown 18- Tuxedo For more information about DreamLine Shower Doors & Tub Doors please visit DreamLine.com ® ENIGMA-X / SPARKLE Enclosure manual Ver 7 01/2017...
- Page 2 Please note that depending on the model, the glass may be coated on either one or both surfaces. For best results, squeegee the glass after each use and dry with a soft cloth. ENIGMA-X / SPARKLE Enclosure manual Ver 7 01/2017...
- Page 3 MANUAL FOR DETAILS REGARDING PROPER INSTALLATION. Roller Wheel Safety Set Screws must THE LATEST VERSION OF THE INSTALLATION be re-tightened after installation. MANUAL IS AVAILABLE TO VIEW OR PRINT Apply Thread lock. ON DREAMLINE.COM ENIGMA-X / SPARKLE Enclosure manual Ver 7 01/2017...
- Page 4 Enigma Air = 73” for shower ht / 59” for tub ht Enigma X = 72-1/2“ for shower ht / 58-1/2” for tub ht Enigma Z = 73-1/2” for shower ht / 59-1/2“ for tub ht Enigma = 75-1/2” for shower ht only ENIGMA-X / SPARKLE Enclosure manual Ver 7 01/2017...
- Page 5 Door Components”. Examine boxes and packages for shipping damage. If the unit has been damaged, has a finishing defect, or has missing parts, please contact our customer support department within 3 business days of the delivery date. Please note that DreamLine will not replace any damaged ®...
- Page 6 If any parts are damaged or missing, please contact DreamLine for replacement. The shipping boxes may contain extra parts not used in ® your model configuration. NOTE: Retain these installation instructions for future reference. ENIGMA-X / SPARKLE Enclosure manual Ver 7 01/2017...
-
Page 7: Parts List
2PCS Thread Lock adhesive Wall anchor Ø5/16"(8mm) 3PCS Return panel glass Large Truss Head Screw ST6×65 1PCS 1set Allen Wrench 3, 4, 5mm Glass connector ** not used with the 72” configuration ENIGMA-X / SPARKLE Enclosure manual Ver 7 01/2017... - Page 8 1PCS Thread Lock Adhesive Return panel glass Allen Wrench 3, 4, 5mm 1set Glass Connector Guide block(with caps) Bumper strip* (not used with 72” model) ** not used with the 72” configuration ENIGMA-X / SPARKLE Enclosure manual Ver 7 01/2017...
- Page 9 SHOWER ENCLOSURE PLAN 34 1/2" 2-3/4” minimum threshold required 34 1/2" 2-3/4” minimum threshold required 56-3/8” min to 60-3/8” max ENIGMA-X / SPARKLE Enclosure manual Ver 7 01/2017...
- Page 10 Compare the overall outside dimensions of the shower enclosure model size as shown on the “Shower Enclosure Plan” with the finished threshold. Note: The minimum threshold requirement for the ENIGMA-X is 2-3/4” of flat threshold space. 2-3/4” minimum 2-3/4” minimum threshold required...
-
Page 11: Installation Steps
<48” (SHEN-6134480) or <60” (SHEN-6134600) or <72” (SHEN-6134720) See the “Shower Enclosure Plan” on pages 9 & 10 for dimensions. (Fig. 2) < 48”, < 60”, < 72” Fig. 2 ENIGMA-X / SPARKLE Enclosure manual Ver 7 01/2017... - Page 12 *Drill a hole into the threshold using an Ø 1/8” drill bit for an acrylic base (or Ø5/16” and an anchor for tile) and mount the remaining Wall Bracket (#19) to the threshold using the Round Head Screw ST4.2×25 (#17). (Fig. 4) Ø 1/8” Ø 5/16” Ø 5/16” Fig. 4 ENIGMA-X / SPARKLE Enclosure manual Ver 7 01/2017...
- Page 13 Guide Rail. Example: 60” – 58” = 2” cut off door end *Note that this is only an example and the actual cut-off length will vary based on the actual finished opening dimension. Fig. 7 ENIGMA-X / SPARKLE Enclosure manual Ver 7 01/2017...
- Page 14 Next, assemble the Wall Bracket (#19) onto the bottom corner of the Stationary Glass (#02) with the bolt facing into the shower as shown in Fig. 8.5. Use the supplied gaskets to protect the glass. (Use one gasket per surface). (Fig. 8) ENIGMA-X / SPARKLE Enclosure manual Ver 7 01/2017...
- Page 15 If installing the 48” or 60” model, skip to Step #15 to continue the installation. Glass Bracket adjustment rotate disk(s) to level rail rotate disk to level rail Lower guide rail Raise guide rail Glass Bracket adjustments Fig 9b ENIGMA-X / SPARKLE Enclosure manual Ver 7 01/2017...
- Page 16 (#23), assemble the Wall Bracket (#19) onto the larger notch at the bottom corner of the Small Stationary Glass (#23). Use the provided gaskets to protect the glass. (Fig. 11) note outside outside Fig. 11 ENIGMA-X / SPARKLE Enclosure manual Ver 7 01/2017...
- Page 17 *NOTE: If installing the 72” model, also mark the position of the Wall Bracket (#19) on the threshold for the Small Stationary Panel Glass (#23). (Fig. 13b.3*) rotate disk(s) to level rail for 72” model inside inside Fig. 13a Fig. 13b ENIGMA-X / SPARKLE Enclosure manual Ver 7 01/2017...
- Page 18 (Fig 15) sleeve for 72” model Separate the Guide Rail Bracket (#08) base from the sleeve by loosening the set screws. Leave the sleeves on both ends of the upper guide rail. base ENIGMA-X / SPARKLE Enclosure manual Ver 7 01/2017...
- Page 19 (#03) to the Return Panel (#22), connecting the sleeve of the Guide Rail Bracket (#08) to the Glass Connector (#28) (Fig. 17.3 and 17.4). Align the set screws vertically and tighten. (Fig. 17) for 72” model Fig. 17 ENIGMA-X / SPARKLE Enclosure manual Ver 7 01/2017...
- Page 20 Part#12 - Guide Block (with caps) only use anchor use a pencil or with tile threshold a center-punch to mark the hole *see note Fig. 18 ENIGMA-X / SPARKLE Enclosure manual Ver 7 01/2017...
- Page 21 DO NOT attempt to lift the door glass with the handle as this may result in damage to the glass and/or serious personal injury. Use a professional grade glass suction cup and an assistant. protective padding ENIGMA-X / SPARKLE Enclosure manual Ver 7 01/2017...
- Page 22 Loosen the top set screw and Loosen the bolt and rotate tighten the bottom set screw. the disk then tighten the bolt. To raise the rail: Loosen the bottom set screw and tighten the top set screw. ENIGMA-X / SPARKLE Enclosure manual Ver 7 01/2017...
- Page 23 Insert the Anti-Splash Guard (#15) into the Small Stationary Glass Bottom Bracket (#22). (Fig 24.5*) only use cap when installing up to a wall for 48” & 60” model for 72” model Fig. 24 ENIGMA-X / SPARKLE Enclosure manual Ver 7 01/2017...
- Page 24 Attach the Guide block face plate to the installed Guide Block (#12) and tighten the set screw with the supplied allen wrench. Use the supplied Decorative caps to cover the screw holes. (Fig. 26) face plate Fig. 26 ENIGMA-X / SPARKLE Enclosure manual Ver 7 01/2017...
- Page 25 Make sure that the clear gaskets are in place to protect the glass. Use the supplied Decorative caps to cover the screw holes. (Fig. 28) clear gasket face plate Fig. 28 ENIGMA-X / SPARKLE Enclosure manual Ver 7 01/2017...
- Page 26 (#26) to the bolts. Leave no more than a 1/16” gap between the Roller Guards (#20) and the Upper Guide Rail (#03). (Fig. 30) Upper Guide Rail Roller Guard Roller Guard 1/16” 1/16” Fig. 30 ENIGMA-X / SPARKLE Enclosure manual Ver 7 01/2017...
- Page 27 (Right hand door installation shown as an example) Fig. 32 Anti-Water Strip (#14) at the Note: Use a razor knife to trim the top to avoid interfering with the Roller Guards (#20). ENIGMA-X / SPARKLE Enclosure manual Ver 7 01/2017...
- Page 28 (ENIGMA-X Right hand door 72” model with Right hand Fig 33b installation shown as an example) door installation ENIGMA-X / SPARKLE Enclosure manual Ver 7 01/2017...
- Page 29 Do Not hang or drape a towel or wash cloth over the Enigma guide rail as this may cause the roller wheels to get stuck and possibly cause serious damage or injury. ENIGMA-X / SPARKLE Enclosure manual Ver 7 01/2017...
- Page 30 Caution: The door glass is heavy and may require two people to safely accomplish these steps. 1. First, loosen and lower either the Roller Guards (Enigma-X) or Bottom Rollers (Enigma) to allow you enough room to adjust the upper rollers. (If you have not installed these yet, you will be instructed to in step #7 after these adjustments are made) 2.
-
Page 31: Product Maintenance
NOTE: To maximize the life of your door, it is important to regularly inspect the glass and other hardware for misalignment, proper attachment, and/or damage. Contact DreamLine with any questions or concerns. ® ENIGMA-X / SPARKLE Enclosure manual Ver 7 01/2017... - Page 32 TEL: 866-731-2244 FAX: 866-857-3638 DREAMLINE.COM For more information on DreamLine Shower Doors and Enclosures please visit DreamLine.com ®...
Need help?
Do you have a question about the ENIGMA-X and is the answer not in the manual?
Questions and answers