turck TBPN-L5-4FDI-4FDX Instructions For Use Manual
Safety block i/o module
Hide thumbs
Also See for TBPN-L5-4FDI-4FDX:
- Manual (44 pages) ,
- Instructions for use manual (85 pages)

Related Manuals for turck TBPN-L5-4FDI-4FDX


Summary of Contents for turck TBPN-L5-4FDI-4FDX
- Page 1 Your Global Automation Partner TBPN-L5-4FDI-4FDX Safety Block I/O Module Instructions for Use...
- Page 2 Hans Turck GmbH & Co. KG | T +49 208 4952-0 | F +49 208 4952-264 | more@turck.com | www.turck.com...
-
Page 3: Table Of Contents
Table of Contents About These Instructions ........................ 7 Target groups........................ 7 Explanation of symbols used .................. 7 Additional documents.................... 7 Feedback about these instructions................ 7 Notes on the Product ......................... 8 Product identification..................... 8 Scope of delivery ...................... 8 Manufacturer and service .................... 8 For Your Safety............................ - Page 4 Changing a device...................... 72 10.1.1 Prerequisites for device replacement.................. 72 10.1.2 Procedure for device replacement .................. 72 11 Maintenance............................ 73 12 Decommissioning.......................... 74 13 Disposal .............................. 74 Hans Turck GmbH & Co. KG | T +49 208 4952-0 | F +49 208 4952-264 | more@turck.com | www.turck.com...
- Page 5 14 Technical Data........................... 75 14.1 General technical data.................... 75 14.2 Technical data – safety inputs.................. 76 14.3 Technical data – safety outputs.................. 77 V01.00 | 2020/07...
- Page 6 Table of Contents Hans Turck GmbH & Co. KG | T +49 208 4952-0 | F +49 208 4952-264 | more@turck.com | www.turck.com...
-
Page 7: About These Instructions
This symbol denotes actions that the user must carry out. RESULTS OF ACTION This symbol denotes relevant results of actions. Additional documents The following additional documents are available online at www.turck.com: Data sheet EU Declaration of Conformity Feedback about these instructions We make every effort to ensure that these instructions are as informative and as clear as pos- sible. -
Page 8: Notes On The Product
For further inquiries in Germany contact the Sales and Service Team on: Sales: +49 208 4952-380 Technology: +49 208 4952-390 Outside Germany, please contact your local Turck representative. Hans Turck GmbH & Co. KG | T +49 208 4952-0 | F +49 208 4952-264 | more@turck.com | www.turck.com... -
Page 9: For Your Safety
The product is designed according to state-of-the-art technology. However, residual risks still exist. Observe the following warnings and safety notices to prevent damage to persons and property. Turck accepts no liability for damage caused by failure to observe these warning and safety notices. -
Page 10: General Safety Notes
Hans Turck GmbH & Co. KG | T +49 208 4952-0 | F +49 208 4952-264 | more@turck.com | www.turck.com... -
Page 11: Directives And Standards
Directives and standards Manufacturers and operators of machines and plants in which the device is used are respons- ible for observing all relevant directives and standards. 3.5.1 National and international directives and standards The following guidelines and regulations must be observed: 2006/42/EG (machine directive ) 2014/30/EU (electromagnetic compatibility) 2011/65/EU (RoHS Directive) -
Page 12: Product Description
Transmission rate 10 Mbps and 100 Mbps Fiberglass reinforced housing Shock and vibration tested Fully potted module electronics Protection class IP65/IP67/IP69K Hans Turck GmbH & Co. KG | T +49 208 4952-0 | F +49 208 4952-264 | more@turck.com | www.turck.com... -
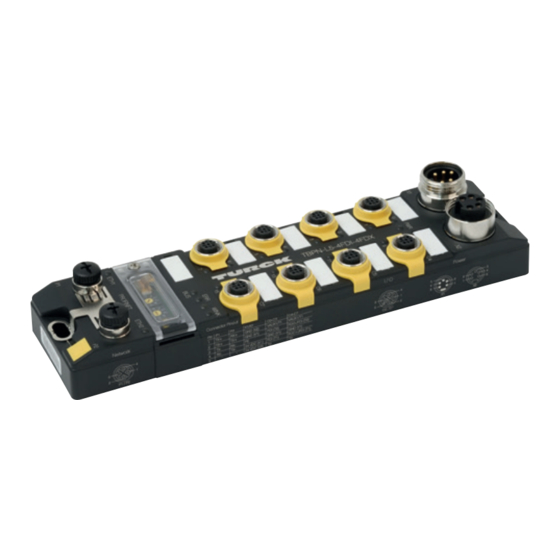
Page 13: Switches And Connectors
FDX14/15, safety-related in-/output F-Address F-Address Rotary coding switch for address setting for PROFIsafe (F-address setting) Ethernet 1 Ethernet 2 Functional earth 4.2.2 Block diagram Safety Safety Safety Safety 10/11 Safety Safety 12/13 Safety Safety 14/15 Fig. 3: Block diagram TBPN-L5-4FDI-4FDX V01.00 | 2020/07... -
Page 14: Functions And Operating Modes
Safe input for potential free contacts (NC/NC) Safe antivalent input for potential free contacts (NC/NO) Safe electronic input at OSSD-output with test pulses Hans Turck GmbH & Co. KG | T +49 208 4952-0 | F +49 208 4952-264 | more@turck.com | www.turck.com... -
Page 15: Safety Outputs (Fdo)
4.3.4 Configuration memory A pluggable memory stick is included in the scope of delivery of TBPN-L5-4FDI-4FDX. It serves for storing the safety function configured via Turck Safety Configurator. It allows to transfer the configuration of one device to another device, e. g. for device exchange. -
Page 16: Mounting
Equivalent wiring diagram and shielding concept 4 x 15 nF 1 nF 2,2 MΩ Fig. 5: Equivalent wiring diagram and shielding concept Hans Turck GmbH & Co. KG | T +49 208 4952-0 | F +49 208 4952-264 | more@turck.com | www.turck.com... -
Page 17: Shielding Of The Fieldbus And I/O Level
5.1.2 Shielding of the fieldbus and I/O level The fieldbus and the I/O level of the modules can be grounded separately. Fig. 6: Grounding clip (1), grounding ring (2) and metal screw (3) The grounding ring (2) is the module grounding. The shielding of the I/O level is permanently connected to the module grounding. - Page 18 With mounted grounding clip: The shielding of the fieldbus is connected to the reference potential of the installation via the module grounding of the I/O level. Hans Turck GmbH & Co. KG | T +49 208 4952-0 | F +49 208 4952-264 | more@turck.com | www.turck.com...
-
Page 19: Connecting
When connecting the cables to the M12-connectors, use the torque screwdriver men- tioned below. Fig. 9: Torque screwdriver Description Type Ident no. Torque screwdriver, Torque-Wrench-Set 6936171 torque range 0.4…1.0 Nm Turck Line + BUS M8 (SW9) M12 for bus cables (SW13) M12 for sensor cables (SW14) V01.00 | 2020/07... -
Page 20: Connecting The Device To Ethernet
Continuation of the power to the next node System voltage: Supply voltage 1 (incl. supply of electronics) Load voltage: Power supply 2 Hans Turck GmbH & Co. KG | T +49 208 4952-0 | F +49 208 4952-264 | more@turck.com | www.turck.com... -
Page 21: Supply (Selv/Pelv)
6.3.1 24 V Supply (SELV/PELV) WARNING Incorrect or defective power supply unit Danger to life due to dangerous voltages on touchable parts „ Only use SELV or PELV power supplies in accordance with EN ISO 13849-2, which allow a maximum of 60 VDC or 25 VAC in the event of a fault. External supply of sensors and actuators Sensors and actuators with external power supply can also be connected to TBPN- L5-4FDI-4FDX. -
Page 22: Connecting Safe Sensors And Actuators
Ground V1 FDI (T1) Digital input 2 Test pulse 2 FE is connected to the thread of the M12 connector. Hans Turck GmbH & Co. KG | T +49 208 4952-0 | F +49 208 4952-264 | more@turck.com | www.turck.com... - Page 23 Safety outputs (FDX) Fig. 16: M12 connector, safety in-/outputs (FDx) „ Connect the sensors and actuators to the device according to the pin assignment. 1 = V 1/T1 2 = FDO-/FDI (T2) 3 = GND (V1) 4 = FDO+/FDI (T1) 5 = T2 Fig. 17: Pin assignment C4…C7, FDX Signal Meaning...
-
Page 24: Switching Examples
Connection example: Banner STB Touch „ To avoid errors, do not use 5-pole cables to the sensor. Hans Turck GmbH & Co. KG | T +49 208 4952-0 | F +49 208 4952-264 | more@turck.com | www.turck.com... -
Page 25: Outputs
NOTE: Changes to the preset properties of the inputs directly affect the performance level to be achieved. For more information, see the online help of the Turck Safety Configurator. 6.5.2 Outputs NOTE Any change in the test pulse interval of the outputs will change the performance level. -
Page 26: Commissioning
Execute a functional test. „ Check if the device works according to the configuration and if all safety functions react as expected. Hans Turck GmbH & Co. KG | T +49 208 4952-0 | F +49 208 4952-264 | more@turck.com | www.turck.com... -
Page 27: Safety Planning
In addition to the reaction time in the device, reaction times of the further Safety components have to be system considered eventually. Please find the respective information in the tech- nical data of the respective devices. Further information about the reaction time can be found in the online help for the Turck Safety Configurator. 7.2.3... -
Page 28: Addressing The Device
F address, accept setting by restarting the device Factory Reset: resets the device to factory settings Erase Memory: deletes the content of the memory chip. Hans Turck GmbH & Co. KG | T +49 208 4952-0 | F +49 208 4952-264 | more@turck.com | www.turck.com... -
Page 29: Addressing The Device At Profinet
7.3.2 Addressing the device at PROFINET In the delivery state or after a device reset to factory settings, neither a device name nor an IP address is set in the device . PROFINET name In PROFINET, the connected device is not identified by it’s IP address, but recognized and ad- dressed by it’s device name. -
Page 30: Configuring
Select the Register in TIA/Step7 option in the installation step Custom Setup in order to be able to start Turck Safety Configurator directly from TIA portal. Fig. 19: Register the TSC in TIA/Step7 Hans Turck GmbH & Co. KG | T +49 208 4952-0 | F +49 208 4952-264 | more@turck.com | www.turck.com... -
Page 31: Licensing Turck Safety Configurator
Start the Turck Safety Configurator from TIA/Step 7 „ Right click the TBPN-L5-4FDI-4FDX and open Turck Safety Configurator via Start device tool in TIA-Portal. Fig. 20: Start the Turck Safety Configurator from TIA/Step7 Licensing Turck Safety Configurator The licensing is done via coupon code. -
Page 32: Creating A Configuration With The Tsc Commissioning Wizard
In the start assistant, select option New workspace, enter a name and a storage location and create the new workspace with Create. Fig. 21: Start assistant – new workspace The new workspace is created. Hans Turck GmbH & Co. KG | T +49 208 4952-0 | F +49 208 4952-264 | more@turck.com | www.turck.com... -
Page 33: Selecting A Master And Creating A Basic Configuration
8.4.2 Selecting a master and creating a basic configuration „ Select the TBPN-L5-4FDI-4FDX in the Select master dialog and confirm with OK. Fig. 22: TSC – Selecting a master The dialog box Properties – TB… is opened. Fig. 23: TSC – Hardware configuration... - Page 34 Complete the configuration with OK. The basic configuration is applied. The release circuits of the basic configuration are automatically created. Hans Turck GmbH & Co. KG | T +49 208 4952-0 | F +49 208 4952-264 | more@turck.com | www.turck.com...
- Page 35 Release circuits (OSSDs) of the basic configuration In the basic configuration, the release circuits OSSD1…OSSD4 and OSSD61…OSSD64 are pre- defined as follows: Release circuit (OSSD) Channels OSSD 1 FDX8/9 OSSD 2 FDX10/11 OSSD 3 FDX12/13 OSSD 4 FDX14/15 OSSD 5 unused …...
-
Page 36: Adapting The Configuration Of The Safe Channels
The channels of TBPN-L5-4FDI-4FDX are adapted to requirements of the respective application Ò in the register tab Local I/Os Expert. Configuration options Fig. 25: TSC – Configuration of I/Os Hans Turck GmbH & Co. KG | T +49 208 4952-0 | F +49 208 4952-264 | more@turck.com | www.turck.com... - Page 37 Clicking Expert opens the expert settings for In- and outputs. Fig. 26: TSC – Expert settings NOTE The description of the functions is part of the online help of the Turck Safety Config- urator. V01.00 | 2020/07...
- Page 38 Setting Creating a configuration with the TSC commissioning wizard Example configuration Fig. 27: TSC – Expert settings (example configuration) Hans Turck GmbH & Co. KG | T +49 208 4952-0 | F +49 208 4952-264 | more@turck.com | www.turck.com...
- Page 39 Con- Channels Type I/O type Later function (see application example nector (Expert setting) [} 48]) at device FDI0/1 E-stop Safe input (dry contact), double Safely switches off output at FDX8/9. channel forced FDI2/3 Light grid (AOPD) Safe input (OSSD), double chan- Safely switches off output at FDX8/9.
- Page 40 The global error unlock can also be executed via the process data bit “UNLK” in the module’s process output data [} 67]. Hans Turck GmbH & Co. KG | T +49 208 4952-0 | F +49 208 4952-264 | more@turck.com | www.turck.com...
- Page 41 Complete the hardware configuration in the start assistant „ Close the dialog box hardware configuration with OK. The release circuits for the hardware configuration (example configuration) are created. Fig. 29: TSC – release circuits (example configuration) Channels Type OSSD Adaptation FDI0/1 E-stop 64.
-
Page 42: Loading The Configuration With The Tsc Commissioning Wizard
In the dialog Commissioning wizard settings, enter the Name of the validator and the Password for safety monitors (release password) and confirm with OK. Hans Turck GmbH & Co. KG | T +49 208 4952-0 | F +49 208 4952-264 | more@turck.com | www.turck.com... - Page 43 Fig. 31: TSC – commissioning wizard, assigning a password The connected TBPN-L5-4FDI-4FDX is prepared for the configuration download. Fig. 32: TSC – commissioning wizard, preparing the device V01.00 | 2020/07...
- Page 44 The configuration is sent to the TBPN-L5-4FDI-4FDX. This process may take a few seconds. The configuration protocol is created. Fig. 34: TSC – commissioning wizard, configuration protocol Hans Turck GmbH & Co. KG | T +49 208 4952-0 | F +49 208 4952-264 | more@turck.com | www.turck.com...
- Page 45 „ Check the configuration using the configuration protocol and confirm the check. Fig. 35: TSC – confirming the configuration protocol check „ Release the configuration in the Validate configuration dialog box with the data entered before (Name of the validator, password). Fig. 36: TSC –...
- Page 46 Loading the configuration with the TSC commissioning wizard The configuration has been released. Fig. 37: TSC – release configuration „ Click OK and complete the commissioning with Finish. Hans Turck GmbH & Co. KG | T +49 208 4952-0 | F +49 208 4952-264 | more@turck.com | www.turck.com...
- Page 47 The Turck Safety Configurator changes to the online mode and opens the Diagnostics configuration. Fig. 38: TSC – Diagnostics configuration (online) V01.00 | 2020/07...
-
Page 48: Application Example - Configuring A Safety Function In Tsc
In the dialog box State of output switching element x select OSSD 63 under Assignment. Fig. 39: TSC – 1. OSSD, state of output switching element OSSD 63 Hans Turck GmbH & Co. KG | T +49 208 4952-0 | F +49 208 4952-264 | more@turck.com | www.turck.com... - Page 49 „ Select the device State of output switching element from the device library and place it at the function input. In the dialog box State of output switching element x select OSSD 64 under Assignment. Fig. 40: TSC – 1. OSSD, state of output switching element OSSD 63 and OSSD 64 The activation of the emergency shutdown at FDI0/1 or the light grid at FDI2/3 switches off output FDX8/9.
- Page 50 Fig. 41: TSC – 2. OSSD, state of output switching element OSSD 62 The activation of the emergency shutdown at FDI0/1 or the light grid at FDI2/3 switches off output FDX8/9. Hans Turck GmbH & Co. KG | T +49 208 4952-0 | F +49 208 4952-264 | more@turck.com | www.turck.com...
- Page 51 Monitored start of FDX8/9 and FDX10/11 „ Delete the device Automatic start in OSSD 1 and OSSD 2 and replace it with the device Monitored start. „ Select FDI4 under Address. Fig. 42: TSC – monitored start via standard input (example 1. OSSD) The safe outputs FDX8/9 and FDX10/11 will only restart with a positive edge at FDI4.
- Page 52 After an error, the safety function will only restart if the emergency shutdown as well as the light grid are error free and the release bit in the F-CPU is set. Hans Turck GmbH & Co. KG | T +49 208 4952-0 | F +49 208 4952-264 | more@turck.com | www.turck.com...
- Page 53 Monitoring an output in the F-CPU The state of the output is monitored via a PROFIsafe bit in the F-CPU. „ Open the Output assignment and assign a PROFIsafe bit to output FDX8/9. Fig. 44: TSC – output assignment PROFIsafe bit V01.00 | 2020/07...
-
Page 54: Checking And Loading The Configuration
Load the configuration into the device via the commissioning wizard ( [} 42]) or by using Ò the PC Monitor function. Fig. 45: TSC – sending the configuration Hans Turck GmbH & Co. KG | T +49 208 4952-0 | F +49 208 4952-264 | more@turck.com | www.turck.com... -
Page 55: Configuring Single Channel Safety Sensors
Configuring single channel safety sensors If a slot is configured as Single channel safety in Turck Safety Configurator, then the double channel function for the slot is disabled. Fig. 46: TSC – Single channel inputs No release circuits are generated for the single channel inputs. The OSSDs have to be created manually. - Page 56 Add a Single channel safety input from the device catalog to the new window Fig. 48: TSC – configuring an OSSD for a single channel safety input Hans Turck GmbH & Co. KG | T +49 208 4952-0 | F +49 208 4952-264 | more@turck.com | www.turck.com...
- Page 57 „ Link the single channel safe input with an Input F-CPU. Fig. 49: TSC – Linking a single channel safe input with the PLC „ Add an automatic start and assign a PROFIsafe bit in order to be able to monitor the single channel sensor from the PLC.
-
Page 58: Configuring The Device At Profinet/Profisafe In Tia Portal
Add device to the PROFINET-IO-System (100). Fig. 51: Adding the TBPN-L5-4FDI-4FDX to PROFINET. TBPN-L5-4FDI-4FDX appears as a modular slave with four virtual slots. Hans Turck GmbH & Co. KG | T +49 208 4952-0 | F +49 208 4952-264 | more@turck.com | www.turck.com... - Page 59 Fig. 52: Slots of TBPN-L5-4FDI-4FDX The function of these slots is either pre-defined via GSDML or can only be used for a specific purpose. Module Name turck-tbpn-l5-4fdi-fdx (de- Main module, parameterization of parameters (deactivation of fault name) protocols, etc.) which concern the complete device.
-
Page 60: Setting The F_Parameters
105 F_iPar_CRC CRC from the protocol in the Turck Safety Con- figurator, in this example: 113E Fig. 53: F_parameters of TBPN-L5-4FDI-4FDX Hans Turck GmbH & Co. KG | T +49 208 4952-0 | F +49 208 4952-264 | more@turck.com | www.turck.com... -
Page 61: Operating
Operating LED displays The device has the following LED indicators: Power supply Group and bus errors Status Diagnostics LED PWR Meaning No voltage connected or under voltage at V1 Green Voltage V1 and V2 OK No valid state, device switches to the safe state Red/green No valid state, device switches to the safe state LED 0…7... -
Page 62: Status- And Control Word
V1 too low (< 18 V DC). Control word The control word is not in use. Hans Turck GmbH & Co. KG | T +49 208 4952-0 | F +49 208 4952-264 | more@turck.com | www.turck.com... -
Page 63: Process Input Data
Bit 3 Bit 2 Bit 1 Bit 0 PROFIsafe input data n + 1 (The assignment depends on the configuration of the channels in Turck Safety Con- figurator) n + 2 PROFIsafe Status Byte [} 64] n + 3… PROFIsafe checksum (CRC) n + 5 Safe Unit Status [} 64]... - Page 64 Safe Unit Protective Mode Active Not active SUCM Safe Unit Configuration Mode Active Not active SUUM Safe Unit Unknown Mode Active Not active Hans Turck GmbH & Co. KG | T +49 208 4952-0 | F +49 208 4952-264 | more@turck.com | www.turck.com...
- Page 65 PROFIsafe Error Codes Code Name Meaning Remedy Destination The set PROFIsafe address does not „ Check parameteriza- (0x40) Address match the parameterized destination tion. Mismatch address (F_DEST_ADDR). „ Restart the device. Invalid The set destination address (0x41) Destination (F_DEST_ADDR) is not valid. Ad- Address dresses 0x0000 and 0xFFF are not al- lowed.
- Page 66 Turck Safety Configurator. Bits 1.4…1.7 are automatically assigned. The other bits can be configured by the user. Fig. 54: Output assignment in Turck Safety Configurator Hans Turck GmbH & Co. KG | T +49 208 4952-0 | F +49 208 4952-264 | more@turck.com | www.turck.com...
-
Page 67: Process Output Data
Bit 3 Bit 2 Bit 1 Bit 0 PROFIsafe output data n + 1 (The assignment depends on the configuration of the channels in Turck Safety Con- figurator) n + 2 PROFIsafe Control Byte [} 67] n + 3… PROFIsafe checksum (CRC) n + 5 Unlock Safe Unit [} 67]... - Page 68 These input bits are sent via Ethernet to the TBPN-L5-4FDI-4FDX and can be con- FB1.7 figured in the Turck Safety Configurator as field bus bits (inputs). Fig. 55: Input assignment in Turck Safety Configurator Hans Turck GmbH & Co. KG | T +49 208 4952-0 | F +49 208 4952-264 | more@turck.com | www.turck.com...
-
Page 69: Using The Configuration Memory
ü The memory chip is plugged from the device start and contains the actual configuration (identical configuration as in the Turck Safety Configurator). „ Load a new or changed configuration into the device via Turck Safety Configurator. 9.5.2 Loading a configuration from the memory chip ü... -
Page 70: Configuration Transfer And Module Behavior
Device running Ò Loading the configura- tion from the device to the memory Valid Valid equal Device start Ò Device running Hans Turck GmbH & Co. KG | T +49 208 4952-0 | F +49 208 4952-264 | more@turck.com | www.turck.com... -
Page 71: Reset The Device To Factory Settings (Factory Reset)
Configuration Module Diagnostics behavior In device External Device/ memory memory Valid Valid unequal Device start Configuration miss- Ò match, see „Memory Device running and F-Config Status” [} 65] Valid No memory Device start No memory chip chip plugged Ò plugged, see „Memory Device not running and F-Config Status”... -
Page 72: Restarting After Device Exchange Or Modification
Defective or faulty devices must not, in any event, be put back into circulation. Dispose of devices according to the chapter "Disposal” [} 74]. Hans Turck GmbH & Co. KG | T +49 208 4952-0 | F +49 208 4952-264 | more@turck.com | www.turck.com... -
Page 73: Maintenance
Maintenance The TBPN-L5-4FDI-4FDX is maintenance-free for the duration of use of 20 years. Used cables as well as connected sensors and actuators have to be tested according to vendor specifications during the duration of use of TBPN-L5-4FDI-4FDX. V01.00 | 2020/07... -
Page 74: Decommissioning
Defective or faulty devices must not, in any event, be put back into circulation. Send the devices back to Turck for testing and disposal. Hans Turck GmbH & Co. KG | T +49 208 4952-0 | F +49 208 4952-264 | more@turck.com | www.turck.com... -
Page 75: Technical Data
Technical Data 14.1 General technical data Devices TBPN-L5-4FDI-4FDX Ident no. 100001826 According to device labeling Power supply Connector TBPN-L5-4FDI-4FDX 7/8“, 5-pole V1 (incl. electronics supply) 24 VDC 24 VDC, only through connected Permissible range 20.4…28.8 VDC Isolation voltages ≥ 500 VAC... -
Page 76: Technical Data - Safety Inputs
Test pulse, typ. 0.6 ms Test pulse max. 0.8 ms Interval between 2 test pulses, min. 900 ms (for static inputs) Hans Turck GmbH & Co. KG | T +49 208 4952-0 | F +49 208 4952-264 | more@turck.com | www.turck.com... -
Page 77: Technical Data - Safety Outputs
14.3 Technical data – safety outputs Safety outputs Suitable for inputs according to EN 61131-2, type 1 Output level in OFF-state < 5 V Output level in OFF-state < 1 mA Test pulse resistive load, max. 0.5 ms Test pulse max. 1.25 ms Interval between 2 test pulses, typical 500 ms... - Page 78 Over 30 subsidiaries and over 60 representations worldwide! 100004769 | 2020/07 100004769 www.turck.com...
Need help?
Do you have a question about the TBPN-L5-4FDI-4FDX and is the answer not in the manual?
Questions and answers