NetApp E Series Replacing Manual
Replacing a drive drawer in shelves
Hide thumbs
Also See for E Series:
- Hardware maintainence manual (397 pages) ,
- Manual (133 pages) ,
- Maintaining (90 pages)
Advertisement
Quick Links
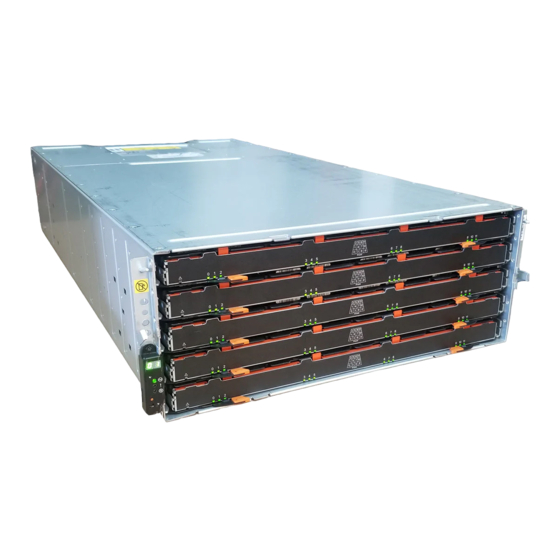
Replacing a drive drawer in E5760 and E2860 shelves
The steps to replace a failed drive drawer in an E-Series E5760 controller shelf, E2860 controller shelf or a DE460C drive shelf
depend on whether the volumes in the drawer are protected by Drawer Loss Protection. If all volumes in the drive drawer are in
volume groups or disk pools that have Drawer Loss Protection, you can perform this procedure online. Otherwise, you must stop
all host I/O activity and power off the shelf before replacing the drive drawer.
This procedure applies to the following controller shelf and drive shelf:
•
E5760 controller shelf
•
E2860 controller shelf
•
DE460C drive shelf
Each of these 60-drive shelves has five drive drawers.
And each of the five drawers can hold up to 12 drives.
215-11800_A0
September 2017
Copyright
Web: www.netapp.com • Feedback: doccomments@netapp.com
©
2017 NetApp, Inc. All rights reserved.
E-Series
1
Advertisement

Related Manuals for NetApp E Series


Summary of Contents for NetApp E Series
- Page 1 DE460C drive shelf Each of these 60-drive shelves has five drive drawers. And each of the five drawers can hold up to 12 drives. © 215-11800_A0 September 2017 Copyright 2017 NetApp, Inc. All rights reserved. Web: www.netapp.com • Feedback: doccomments@netapp.com...
- Page 2 Before you begin • You have obtained the following items: ◦ Antistatic protection Possible hardware damage – To prevent electrostatic discharge damage to the drive shelf, use proper Attention: antistatic protection when handling drive shelf components. ◦ Replacement drive drawer ◦...
- Page 3 • The volumes in the drive drawer cannot be in a Degraded state. Attention: Possible loss of data access – If a volume is already in a Degraded state, and you remove drives from the drive drawer, the volume can fail. About this task When you issue the CLI command, all drives in the affected drive...
- Page 4 • If a warning is displayed indicating that this command could not be completed, you must stop host I/O activity before removing the drawer. The warning is displayed because one or more drives in the affected drawer are in volume groups or disk pools that do not have Drawer Loss Protection.
- Page 5 If you are... Follow these steps... Replacing a drive drawer in an a. Turn off both power switches on the controller shelf. expansion drive shelf without Drawer Loss Protection b. Wait for all LEDs on the controller shelf to go dark. c.
- Page 6 fan canister handle b. Using the handle, pull the fan canister out of the drive tray, and set it aside. c. If the tray is powered on, ensure that the left fan goes to its maximum speed. Possible equipment damage due to overheating – If the tray is powered on, do not remove both fans at Attention: the same time.
- Page 7 Cable chain Vertical connector (connected to the midplane) Horizontal connector (connected to the drive drawer) The top cable chain is attached to drive drawer 1. The bottom cable chain is attached to drive drawer 5. 4. For easy access, use your finger to move the cable chain on the right side to the left. 5.
- Page 8 Orange ring on the vertical guide rail Cable chain, partially removed b. To unlatch the cable chain, insert your finger into the orange ring and press towards the middle of the system. c. To unplug the cable chain, carefully pull your finger toward you approximately 1 inch (2.5 cm). Attention: Leave the cable chain connector within the vertical guide rail.
- Page 9 Orange ring on horizontal guide rail Cable chain, partially removed b. To unlatch the cable chain, gently insert your finger into the orange ring and push down. The figure shows the orange ring on the horizontal guide rail (see item 1 in the figure above) being pushed down so that the rest of the cable chain can be pulled out of the enclosure.
- Page 10 Possible equipment damage due to overheating – If the shelf is powered on, do not remove both fans at the Attention: same time. Otherwise, the equipment might overheat. 11. Disconnect the left cable chain from its vertical guide rail: a. Using a flashlight, locate the orange ring on the end of the cable chain attached to the vertical guide rail. b.
- Page 11 Possible loss of data access – Make sure to record the exact location of each drive before removing it. Attention: 5. Remove the drives from the drive drawer: a. Gently pull back the orange release latch that is visible on the center front of each drive. The following image shows the orange release latch for all 12 drives in a drive drawer.
- Page 12 Orange release latch for drive 1 Orange release latch for drive 2 Orange release latch for drive 3 Orange release latch for drive 4 Orange release latch for drive 5 Orange release latch for drive 6 Orange release latch for drive 7 Orange release latch for drive 8 Orange release latch for drive 9 Orange release latch for drive 10...
- Page 13 Drive drawer release lever b. Disengage both release levers by pulling the latches toward you. c. While holding both release levers, pull the drive drawer toward you. d. Remove the drive drawer from the drive shelf. Installing a drive drawer Installing a drive drawer into a drive tray entails sliding the drawer into the empty slot, installing the drives, and replacing the front bezel.
- Page 14 Lock-out tumbler Drawer guide 2. Position the replacement drive drawer in front of the empty slot and slightly to the right of center. Positioning the drawer slightly to the right of center helps to ensure that the lock-out tumbler and the drawer guide are correctly engaged.
- Page 15 Callout Cable chain Connector Connects to Left Vertical Midplane Horizontal Drive drawer Attaching the cable chains...
- Page 16 Callout Cable chain Connector Connects to Right Horizontal Drive drawer Vertical Midplane Steps 1. From the back of the drive shelf, remove the fan canister on the right side, and set it aside. 2. If the shelf is powered on, ensure that the left fan goes to its maximum speed. Attention: Possible equipment damage due to overheating –...
- Page 17 Horizontal guide rail Vertical guide rail Attention: Risk of equipment malfunction — Make sure to slide the connector into the guide rail. If the connector rests on the top of the guide rail, problems might occur when the system runs. d.
- Page 18 Possible equipment damage due to overheating – If the shelf is powered on, do not remove both fans at the Attention: same time. Otherwise, the equipment might overheat. 7. Reattach the left cable chain: a. Locate the horizontal and vertical connectors on the cable chain and their corresponding horizontal and vertical guide rails inside the enclosure.
- Page 19 d. Raise the handle on the drive to vertical. e. Align the two raised buttons on each side of the drive with the notches on the drawer. The figure shows the right side view of a drive, showing the location of the raised buttons. Raised button on the right side of the drive.
-
Page 20: Copyright Information
No part of this document covered by copyright may be reproduced in any form or by any means—graphic, electronic, or mechanical, including photocopying, recording, taping, or storage in an electronic retrieval system—without prior written permission of the copyright owner. Software derived from copyrighted NetApp material is subject to the following license and disclaimer:... -
Page 21: Trademark Information
NetApp reserves the right to change any products described herein at any time, and without notice. NetApp assumes no responsibility or liability arising from the use of products described herein, except as expressly agreed to in writing by NetApp. The use or purchase of this product does not convey a license under any patent rights, trademark rights, or any other intellectual property rights of NetApp. - Page 22 • Fax: +1 (408) 822-4501 • Support telephone: +1 (888) 463-8277...
Need help?
Do you have a question about the E Series and is the answer not in the manual?
Questions and answers