
Related Manuals for NetApp E5600


Summary of Contents for NetApp E5600
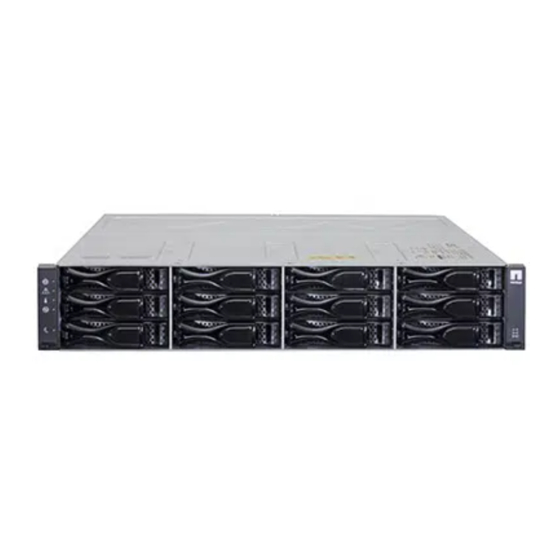
- Page 1 E-Series Systems E5600 Controller-Drive Tray and Related Drive Trays Installation Guide December 2015 | 215-10564_A0 doccomments@netapp.com...
-
Page 3: Table Of Contents
Table of Contents | 3 Contents Deciding whether to use this guide ............. 6 Step 1 - Preparing to install a controller-drive tray ........7 Key terms ........................8 Storage array ....................8 Controller-drive tray ..................8 Controller ......................8 Drive tray ...................... - Page 4 4 | E5600 Controller-Drive Tray and Related Drive Trays Installation Guide Topology ......................51 Direct topology ....................51 Switch or fabric topology ................51 Things to know - Storage array configuration specifications ........51 Things to know - Host channels ................52 Procedure - Connecting host cables on a controller-drive tray .........
- Page 5 Table of Contents | 5 Things to know - General behavior of the LEDs on the drive trays ......121 Things to know - Display sequence code definitions ..........123 Things to know - Component failure identifications ..........124 Things to know - Lock-down codes ................ 125 Things to know - Seven-segment display use cases ..........
-
Page 6: Deciding Whether To Use This Guide
Deciding whether to use this guide This guide is intended for hardware installers and system administrators who are installing an E5600 controller-drive tray and the related drive trays. This guide does not provide extensive conceptual background or information about how to install and ®... -
Page 7: Step 1 - Preparing To Install A Controller-Drive Tray
Step 1 - Preparing to install a controller-drive tray Use this document to install one of the following controller-drive tray models and all necessary drive trays for your configuration: • E5612 controller-drive tray • E5624 controller-drive tray • E5660 controller-drive tray The following tables show the configuration options. -
Page 8: Key Terms
8 | E5600 Controller-Drive Tray and Related Drive Trays Installation Guide Possible hardware damage – To prevent electrostatic discharge damage to the tray, Attention: use proper antistatic protection when handling tray components. Possible hardware damage – To prevent potential damage to the tray and enhance Attention: serviceability, install any 60-drive trays towards the bottom of the cabinet. -
Page 9: Basic Hardware
Step 1 - Preparing to install a controller-drive tray | 9 Basic hardware Table 3: Basic hardware Item Cabinet • Ensure that your cabinet meets the installation site specifications of the various storage array components. Site Preparation Guide for more information. Refer to the •... -
Page 10: Configuration Cables And Connectors
10 | E5600 Controller-Drive Tray and Related Drive Trays Installation Guide Item Mounting rails and screws The mounting rails that are available with the drive tray are designed for an industry-standard cabinet. InfiniBand switch (optional) Gigabit Ethernet switch for Management (optional) •... - Page 11 Step 1 - Preparing to install a controller-drive tray | 11 Item SAS host cables for the 6-Gb/s SAS HIC. 1m-to-5m passive cables 5m-to-100m optical SAS cables 15m and 20m active cables Host mini-SAS-HD to mini-SAS-HD cables for the 12-Gb/s SAS HIC. 1m-to-5m passive cables 5m-to-100m optical SAS cables 15m and 20m active cables...
-
Page 12: Tools And Other Items
12 | E5600 Controller-Drive Tray and Related Drive Trays Installation Guide Item InfiniBand cables Use these cables for InfiniBand connections to hosts with the host interface card. 1m-to-3m passive cables used to connect the 56-Gb InfiniBand HIC to the host. -
Page 13: Things To Know - More Details About Cables, Sfps, And Qsfps
Step 1 - Preparing to install a controller-drive tray | 13 Item A Phillips screwdriver A flat-blade screwdriver Anti-static protection A flashlight Things to know - More details about cables, SFPs, and QSFPs The controller-drive tray supports SAS drive connections and SAS, InfiniBand, Fibre Channel, or iSCSI host connections. - Page 14 14 | E5600 Controller-Drive Tray and Related Drive Trays Installation Guide SAS cable SFF-8088 connector • SAS host mini-SAS-HD to mini-SAS-HD cable connection • SAS host mini-SAS-HD to mini-SAS cable connection • Mini-SAS to mini-SAS cable connection • InfiniBand QSFP host connection with copper cables •...
- Page 15 Step 1 - Preparing to install a controller-drive tray | 15 • SFP transceiver and drive tray fiber optic host cable for controller-drive tray connections SFP transceiver Fiber optic cable • iSCSI host cable with an RJ-45 connector SFP transceiver Fiber optic cable •...
-
Page 16: Things To Know - Taking A Quick Glance At The Hardware In A Controller-Drive Tray Configuration
16 | E5600 Controller-Drive Tray and Related Drive Trays Installation Guide Table 6: Supported SFP transceivers* Vendor Model Version/Data Rate* Avago AFBR-57D9AMZ 8 Gb/s AFBR-57D9AMZ-EP1 8 Gb/s AFBR-703SDZ 10 Gb/s AFBR-709SMZ SFP+ 10 GbE/s for iSCSI AFBR-709SMZ-EP1 SFP+ 10 GbE/s for iSCSI... - Page 17 Step 1 - Preparing to install a controller-drive tray | 17 • The configuration of the host ports might appear different on your system depending on which host interface card configuration is installed. Refer to the Site Preparation Guide for information about the installation requirements of these components.
- Page 18 18 | E5600 Controller-Drive Tray and Related Drive Trays Installation Guide End Cap Power LED End Cap Standby Power LED End Cap Locate LED End Cap Over-Temperature LED End Cap Service Action Required LED • Controller with a SAS HIC – Rear view...
- Page 19 Step 1 - Preparing to install a controller-drive tray | 19 1GbE Link 2 Up LED 16 SAA LED 1GbE Management connector 2 17 Fault LED SAS Expansion Link 1 Fault LED 18 Cache Active SAS Expansion Link 1 Up LED 19 Seven-segment display 10 SFF-8088 SAS connector 1 (Expansion) 20 Mini USB port...
- Page 20 20 | E5600 Controller-Drive Tray and Related Drive Trays Installation Guide Host Interface Card QSFP Channel 1 Host Interface Card Logical Link 1 Active LED Host Interface Card Physical Link 1 Active LED Mini USB port Host Interface Card Logical Link 2 Active LED...
- Page 21 Attention: Risk of equipment malfunction – To avoid exceeding the functional and environmental limits, install only drives that have been provided or approved by NetApp, Inc. Not all controller-drive trays are shipped with pre-populated drives. System integrators, resellers, system administrators, or users of the controller-drive tray can install the drives.
- Page 22 22 | E5600 Controller-Drive Tray and Related Drive Trays Installation Guide ESM A canister Expansion port SFF-8088 connector 1 (IN) Expansion port SFF-8088 connector 2 (IN) Seven-segment display Serial port RJ-45 Ethernet connector Expansion port SFF-8088 connector (OUT) Power-fan canister...
- Page 23 Step 1 - Preparing to install a controller-drive tray | 23 • DE6600 drive tray – Rear view Fan canister ESM A ESM B Expansion port SFF-8088 connectors (IN) Expansion port SFF-8088 connector (OUT) Power canister...
-
Page 24: Step 2 - Installing And Configuring The Switches
Step 2 - Installing and configuring the switches Things to know - Switches and routers Most of the switches and routers, as shipped from the vendor, require an update to either Note: their firmware or their settings to work correctly with the storage array. Depending on the configuration of your storage array, you might use either Fibre Channel switches, iSCSI switches, or InfiniBand switches. - Page 25 Step 2 - Installing and configuring the switches | 25 Vendor Model Version/Data Rate Cisco 9148 8 Gb/s 9506 8 Gb/s 9509 8 Gb/s 9513 8 Gb/s B-Series 8/24c for HP 8 Gb/s Blade Center AJ821B MDS for HP Blade Center 8 Gb/s AW564A 9710...
-
Page 26: Procedure - Installing And Configuring Switches
26 | E5600 Controller-Drive Tray and Related Drive Trays Installation Guide Vendor Model Speed Qlogic 6240 • 8 Gb/s FC • 10 Gb/s iSCSI 6250 • 8 Gb/s FC • 10 Gb/s iSCSI 6260 8 Gb/s FC Refer to technical support for the latest information about new switches that are tested and certified to work with various hardware and software combinations. -
Page 27: Step 3 - Installing The Host Bus Adapters For The Controller-Drive Tray
Step 3 - Installing the host bus adapters for the controller-drive tray Key terms Host bus adapter (HBA) A physical board that resides in the host. The HBA provides for data transfer between the host and the controllers in the storage array over the I/O host interface. Each HBA contains one or more physical ports. -
Page 28: Procedure - Installing Host Bus Adapters
28 | E5600 Controller-Drive Tray and Related Drive Trays Installation Guide By default, the 56-Gb/s InfiniBand HIC supports the iSCSI Extensions for Remote Direct Memory Access (iSER) protocol. If you want to convert this to SCSI RDMA Protocol (SRP), you can apply a feature pack key file in SANtricity Storage Manager. -
Page 29: Procedure - Installing Host Channel Adapters
• The models of the HCAs that are supported • The firmware requirements and the software requirements for the HCAs As needed, refer to NetApp Interoperability to verify your configuration. Note: Steps NetApp 1. Install your HCA, including the appropriate version of the firmware. Refer to Interoperability for information. -
Page 30: Step 4 - Installing The Controller-Drive Tray
Step 4 - Installing the controller-drive tray Things to know - General installation The power supplies meet standard voltage requirements for both domestic and worldwide operation. Ensure that the combined power requirements of your trays do not exceed the power Note: capacity of your cabinet. - Page 31 Step 4 - Installing the controller-drive tray | 31 76 cm (30 in.) clearance in front of the cabinet 61 cm (24 in.) clearance behind the cabinet E5624 controller-drive tray – Airflow and clearance requirements 76 cm (30 in.) clearance in front of the cabinet 61 cm (24 in.) clearance behind the cabinet 2.
- Page 32 Risk of equipment malfunction – To avoid exceeding the functional and Attention: environmental limits, install only drives that have been provided or approved by NetApp, Inc. Not all controller-drive trays are shipped with pre-populated drives. System integrators, resellers, system administrators, or users of the controller-drive tray can install the drives.
- Page 33 Step 4 - Installing the controller-drive tray | 33 Cabinet mounting holes Adjustment screws for locking the mounting rail length Mounting rails Clip for securing the rear of the controller-drive tray b. Place the mounting rail inside the cabinet, and extend the mounting rail until the flanges on the mounting rail touch the inside of the cabinet.
- Page 34 34 | E5600 Controller-Drive Tray and Related Drive Trays Installation Guide Alignment spacers d. Insert one M5 screw through the front of the cabinet and into the top captured nut in the mounting rail. Tighten the screw. e. Insert two M5 screws through the rear of the cabinet and into the captured nuts in the rear flange in the mounting rail.
- Page 35 Step 4 - Installing the controller-drive tray | 35 Mounting rail Clip Partial view of the controller-drive tray rear sheet metal Mounting holes 7. Secure the front of the controller-drive tray to the cabinet. Use the two screws to attach the flange on each side of the front of the controller-drive tray to the mounting rails.
- Page 36 36 | E5600 Controller-Drive Tray and Related Drive Trays Installation Guide Screw Mounting hole Securing the E5624 controller-drive tray to the cabinet...
-
Page 37: Procedure - Installing Drives In The E5612 Or E5624 Controller-Drive Tray
Step 4 - Installing the controller-drive tray | 37 Screw Note: The rear of the controller-drive tray contains two controllers. The top of the controller-drive tray is the side with the labels. 8. Secure the side of the controller-drive tray to the mounting rails by performing these steps: a. - Page 38 Risk of equipment malfunction – To avoid exceeding the functional and Attention: environmental limits, install only drives that have been provided or approved by NetApp, Inc. Drives might be shipped but not installed. System integrators, resellers, system administrators, or users can install the drives.
-
Page 39: Procedure - Installing The E5660 Controller-Drive Tray
Step 4 - Installing the controller-drive tray | 39 • Installing a drive in the E5624 controller-drive tray Drive handle In some applications, the drive handle might have the hinge on the right. Note: 3. For the E5612, install the second drive beneath the first drive. For the E5624, install the second drive to the right of the first drive. - Page 40 40 | E5600 Controller-Drive Tray and Related Drive Trays Installation Guide 81 cm (32 in.) clearance in front of the cabinet 61 cm (24 in.) clearance behind the cabinet Note: Fans pull air through the controller-drive tray from front to back across the drives.
- Page 41 Step 4 - Installing the controller-drive tray | 41 4. With the help of at least three other persons, remove the controller-drive tray and all of the contents from the shipping carton, using the four controller-drive tray handles (two to a side) as shown in the following figure.
- Page 42 42 | E5600 Controller-Drive Tray and Related Drive Trays Installation Guide Screws for securing the mounting rail to the cabinet (rear) Existing tray Industry standard cabinet • If you are installing the mounting rails above an existing tray, position the mounting rails directly above the tray.
- Page 43 Step 4 - Installing the controller-drive tray | 43 c. Place the mounting rail inside the cabinet, and extend the mounting rail until the flanges on the mounting rail touch the inside of the cabinet. d. Insert one M5 screw through the front of the cabinet, and screw it into the top captured nut in the mounting rail.
- Page 44 44 | E5600 Controller-Drive Tray and Related Drive Trays Installation Guide Rear bracket a. Ensure that the adjustment screws on the mounting rail are loose but not detached so that the mounting rail can extend or contract as needed. b. Place the mounting rail inside the cabinet, and extend the mounting rail until the flanges on the mounting rail touch the inside of the cabinet.
- Page 45 Step 4 - Installing the controller-drive tray | 45 Top cabinet mounting hole on the rear EIA support rail Bottom cabinet mounting hole on the rear EIA support rail 9. Remove the bezel from the front of the controller-drive tray. 10.
- Page 46 46 | E5600 Controller-Drive Tray and Related Drive Trays Installation Guide Pull the thumb latch away from the controller-drive tray to detach the hook. Shift the handle down to release the other four hooks. Move the handle away from the controller-drive tray.
-
Page 47: Procedure - Installing Drives In The E5660 Controller-Drive Tray
Risk of equipment malfunction – To avoid exceeding the functional and Attention: environmental limits, install only drives that have been provided or approved by NetApp, Inc. Drives might be shipped but not installed. System integrators, resellers, system administrators, or users can install the drives. - Page 48 48 | E5600 Controller-Drive Tray and Related Drive Trays Installation Guide Procedure - drive-removal procedures. Never ship a 60-drive tray with drives installed. See Removing drives from a 60-drive tray for instructions on how to remove the drives from the 60- drive tray.
-
Page 49: Procedure - Removing Drives From A 60-Drive Tray
Step 4 - Installing the controller-drive tray | 49 6. Repeat Step through Step to install all of the drives. 7. Slide the drawer back into the drive tray by pushing it from the center and closing both levers. Risk of equipment malfunction – Make sure to completely close the drive drawer Attention: by pushing both levers. - Page 50 50 | E5600 Controller-Drive Tray and Related Drive Trays Installation Guide c. Place the drive in static-free packaging and away from magnetic devices. Possible loss of data access – Magnetic fields can destroy all the data on the Attention: drive and cause irreparable damage to the drive circuitry. To avoid loss of data access and...
-
Page 51: Step 5 - Connecting The Controller-Drive Tray To The Hosts
Step 5 - Connecting the controller-drive tray to the hosts Key terms Topology The logical layout of the components of a computer system or network and their interconnections. Topology deals with questions of what components are directly connected to other components from the standpoint of being able to communicate. -
Page 52: Things To Know - Host Channels
52 | E5600 Controller-Drive Tray and Related Drive Trays Installation Guide Item Specification iSCSI HIC host port rate 1, 10 (auto-negotiated) (Gb/s) Supported combined cache 12 GB per controller and processor memory sizes Maximum number of drive 15 drive trays... - Page 53 Step 5 - Connecting the controller-drive tray to the hosts | 53 • Four iSCSI ports at 10 Gb/s A HIC of the same interface and number of ports must be installed on each controller. • Host channels on the E5612 and E5624 with SAS HIC - Rear view Mini-SAS host interface card port 1 Mini-SAS host interface card port 2 Mini-SAS host interface card port 3...
-
Page 54: Procedure - Connecting Host Cables On A Controller-Drive Tray
54 | E5600 Controller-Drive Tray and Related Drive Trays Installation Guide SFP+ host channel 3 SFP+ host channel 4 Procedure - Connecting host cables on a controller-drive tray About this task The type of host interface cards (HICs) (SAS, iSCSI, Fibre Channel, or InfiniBand) must match the type of the host bus adapters (HBAs) to which you connect them. - Page 55 Step 5 - Connecting the controller-drive tray to the hosts | 55 Host HBA 1 or NIC 1 HBA 2 or NIC 2 Host port 1 Host port 2 Host port 3 Host port 4 Controller A Controller B ◦ Direct topology –...
- Page 56 56 | E5600 Controller-Drive Tray and Related Drive Trays Installation Guide Host HBA 1 or NIC 1 HBA 2 or NIC 2 Host port 1 Host port 2 Host port 3 Host port 4 Controller A Controller B • Switch or fabric topology – Two hosts and a dual controller-drive tray with a four-port...
- Page 57 Step 5 - Connecting the controller-drive tray to the hosts | 57 Host HBA 1 or NIC 1 HBA 2 or NIC 2 Host port 1 Host port 2 Host port 3 Host port 4 Controller A Controller B • Mixed topology –...
- Page 58 58 | E5600 Controller-Drive Tray and Related Drive Trays Installation Guide Host HBA 1 or NIC 1 HBA 2 or NIC 2 Host port 1 Host port 2 Host port 3 Host port 4 Controller A Controller B 2. Plug either the SAS cable or copper IB cables into the controller.
- Page 59 Step 5 - Connecting the controller-drive tray to the hosts | 59 5. Repeat these steps for each controller and host channel that you intend to use.
-
Page 60: Step 6 - Installing The Drive Trays For The Controller-Drive Tray Configurations
Step 6 - Installing the drive trays for the controller- drive tray configurations Things to know - General installation of drive trays If you are installing the drive tray in a cabinet with other trays, ensure that the combined Note: power requirements of the drive tray and the other trays do not exceed the power capacity of your cabinet. - Page 61 Step 6 - Installing the drive trays for the controller-drive tray configurations | 61 76 cm (30 in.) clearance in front of the cabinet 61 cm (24 in.) clearance behind the cabinet • DE5600 drive tray – Airflow and clearance requirements 76 cm (30 in.) clearance in front of the cabinet 61 cm (24 in.) clearance behind the cabinet Fans pull air through the tray from front to back across the drives.
- Page 62 62 | E5600 Controller-Drive Tray and Related Drive Trays Installation Guide • If you are installing the mounting rails below an existing tray, allow either 8.7-cm (3.4-in.) vertical clearance for the DE1600 drive tray or 8.8-cm (3.5-in.) vertical clearance for the DE5600 drive tray.
- Page 63 Step 6 - Installing the drive trays for the controller-drive tray configurations | 63 Cabinet mounting holes Adjustment screws for locking the mounting rail length Mounting rails Clip for securing the rear of the drive tray b. Place the mounting rail inside the cabinet, and extend the mounting rail until the flanges on the mounting rail touch the inside of the cabinet.
- Page 64 64 | E5600 Controller-Drive Tray and Related Drive Trays Installation Guide Alignment spacers d. Insert one M5 screw through the front of the cabinet and into the top captured nut in the mounting rail. Tighten the screw. e. Insert two M5 screws through the rear of the cabinet and into the captured nuts in the rear flange in the mounting rail.
- Page 65 Step 6 - Installing the drive trays for the controller-drive tray configurations | 65 Mounting rail Clip Partial view of the drive tray rear sheet metal Mounting holes 7. Secure the front of the drive tray to the cabinet. Use the two screws to attach the flange on each side of the front of the drive tray to the mounting rails.
- Page 66 66 | E5600 Controller-Drive Tray and Related Drive Trays Installation Guide Screw Mounting hole • DE5600 drive tray...
-
Page 67: Procedure - Installing Drives In The De1600 And De5600 Drive Trays
Risk of equipment malfunction – To avoid exceeding the functional and Attention: environmental limits, install only drives that have been provided or approved by NetApp. Drives might be shipped but not installed. System integrators, resellers, system administrators, or users can install the drives. -
Page 68: Procedure - Installing The De6600 Drive Tray
68 | E5600 Controller-Drive Tray and Related Drive Trays Installation Guide Drive handle • Installing a drive in the DE5600 drive tray Drive handle In some applications, the drive handle might have the hinge on the right. Note: 3. For the DE1600 drive tray, install the second drive beneath the first drive. For the DE5600 drive tray, install the second drive to the right of the first drive. - Page 69 Step 6 - Installing the drive trays for the controller-drive tray configurations | 69 Risk of equipment malfunction – To avoid possible equipment damage and ensure Attention: safe and efficient servicing of the equipment, install DE6600 drive trays towards the bottom of a cabinet.
- Page 70 70 | E5600 Controller-Drive Tray and Related Drive Trays Installation Guide b. Push the handle up until it clicks in place with the thumb latch. 4. With the help of at least three other persons, remove the drive tray and all of the contents from the shipping carton, using the four drive tray handles (two to a side) as shown in the following figure.
- Page 71 Step 6 - Installing the drive trays for the controller-drive tray configurations | 71 Screws for securing the mounting rail to the cabinet (front) Screws for securing the mounting rail to the cabinet (rear) Existing tray Industry-standard cabinet 6. To attach the mounting rails to the cabinet, do one of the following: •...
- Page 72 72 | E5600 Controller-Drive Tray and Related Drive Trays Installation Guide Front of the mounting rail Two M5 screws for the rear EIA support rail Front of the cabinet Two M5 screws for the front EIA support rail Adjustment screws...
- Page 73 Step 6 - Installing the drive trays for the controller-drive tray configurations | 73 i. Insert one M5 screw through the front of the mounting rail. You use this screw to attach the drive tray to the cabinet. 8. Attach the shorter, adjustable size mounting rails to the cabinet. Front of the mounting rail Rear of the mounting rail Rail fix bar...
- Page 74 74 | E5600 Controller-Drive Tray and Related Drive Trays Installation Guide M5 screws d. Insert two M5 screws through the rear of the cabinet, and screw them into the captured nuts in the rear flange in the mounting rail. e. Counting up from the bottom of the mounting rail, place the bottom of the rear bracket in the 8th hole of the cabinet, so that the top of the rear bracket is in the 11th hole.
- Page 75 Step 6 - Installing the drive trays for the controller-drive tray configurations | 75 Top cabinet mounting hole on the rear EIA support rail Bottom cabinet mounting hole on the rear EIA support rail 9. Remove the bezel from the front of the drive tray. 10.
- Page 76 76 | E5600 Controller-Drive Tray and Related Drive Trays Installation Guide Pull the thumb latch away from the controller-drive tray to detach the hook. Shift the handle down to release the other four hooks. Move the handle away from the controller-drive tray.
-
Page 77: Procedure - Installing The Drives In The De6600 Drive Tray
Risk of equipment malfunction – To avoid exceeding the functional and Attention: environmental limits, install only drives that have been provided or approved by NetApp. Attention: Risk of equipment malfunction – All DE6600 drive trays have a limit of five solid state drives (SSDs) per drawer. - Page 78 78 | E5600 Controller-Drive Tray and Related Drive Trays Installation Guide Steps 1. Unlatch the drive drawer by pulling out on both levers at the front of the drawer. 2. Using the extended levers, carefully pull the drive drawer out until it stops. Do not completely remove the drive drawer from the controller-drive tray.
-
Page 79: Things To Know - Connecting The Power Cords
Step 6 - Installing the drive trays for the controller-drive tray configurations | 79 6. Repeat Step through Step to install all of the drives. 7. Slide the drawer back into the drive tray by pushing it from the center and closing both levers. Risk of equipment malfunction –... -
Page 80: Step 7 - Connecting The Controller-Drive Tray To The Drive Trays
Step 7 - Connecting the controller-drive tray to the drive trays Use this step to cable the controller-drive tray and related drive trays. For additional information, see Hardware Cabling Guide . Key terms Drive channel The path for the transfer of data between controllers and the drives in the storage array. Things to know - Controller-drive tray •... -
Page 81: Things To Know - Drive Trays
Step 7 - Connecting the controller-drive tray to the drive trays | 81 Controller canister A SFF-8088 SAS channels (drive expansion) Controller canister B SFF-8088 SAS channels (drive expansion) To maintain data access in the event of the failure of a controller, an ESM, or a drive Note: channel, you must connect a drive tray or a string of drive trays to both drive channels on a redundant path pair. - Page 82 82 | E5600 Controller-Drive Tray and Related Drive Trays Installation Guide Drive tray Maximum Drive size Number of Number of SAS Expansion (Out) number of SAS In connectors drives connectors DE5600 6.35 cm (2.5 in.) DE6600 • 8.89 cm (3.5 in.) •...
-
Page 83: Things To Know - Cabling Configurations For The E5612 And E5624 Controller-Drive Trays
Step 7 - Connecting the controller-drive tray to the drive trays | 83 ESM A ESM B SAS In connectors SAS Expansion (Out) connectors Things to know - Cabling configurations for the E5612 and E5624 controller-drive trays The figures in this section show representative cabling configurations. The configurations shown guarantee that redundant data paths exist between the controller-drive tray and all attached drive trays in a storage array. - Page 84 84 | E5600 Controller-Drive Tray and Related Drive Trays Installation Guide • One controller drive tray and three DE1600 or DE5600 drive trays • One controller drive tray and five or more DE1600 or DE5600 drive trays...
-
Page 85: Things To Know - Cabling Configurations For The E5660 Controller-Drive Tray
Step 7 - Connecting the controller-drive tray to the drive trays | 85 Things to know - Cabling configurations for the E5660 controller-drive tray The figures in this section show representative cabling configurations. The configurations shown guarantee that redundant data paths exist between the controller-drive tray and all attached drive trays in a storage array. - Page 86 86 | E5600 Controller-Drive Tray and Related Drive Trays Installation Guide • DE5600 • DE6600 You can attach the controller-drive tray to various combinations of all three drive tray models. You must ensure that both controllers have access to all available drive trays by making sure that: •...
- Page 87 Step 7 - Connecting the controller-drive tray to the drive trays | 87 • One controller-drive tray and six or more DE1600 or DE5600 drive trays...
- Page 88 88 | E5600 Controller-Drive Tray and Related Drive Trays Installation Guide • One controller-drive tray and one DE6600 drive tray...
- Page 89 Step 7 - Connecting the controller-drive tray to the drive trays | 89 • One controller-drive tray and three DE6600 drive trays • One controller-drive tray and five DE6600 drive trays...
-
Page 90: Procedure - Connecting The Drive Trays To The Controller-Drive Tray
90 | E5600 Controller-Drive Tray and Related Drive Trays Installation Guide Procedure - Connecting the drive trays to the controller- drive tray Steps 1. Attach a cable from the SAS Expansion (Ch1) connector on controller A in the controller-drive tray to a SAS In connector on ESM A in the first drive tray. - Page 91 Step 7 - Connecting the controller-drive tray to the drive trays | 91 2. Attach a cable from the SAS Expansion (Ch 1) connector on controller B in the controller-drive tray to the second SAS In connector on ESM A in the first drive tray. 3.
-
Page 92: Step 8 - Connecting The Ethernet Cables
Step 8 - Connecting the Ethernet cables Use this step if you are using out-of-band management for your storage array. If you use in-band Step 9 - Connecting the power cords management, you can ignore this step and continue with page 94. -
Page 93: Procedure - Connecting Ethernet Cables
Step 8 - Connecting the Ethernet cables | 93 Because the controllers support the Auto-MDIX feature, you do not need an Ethernet crossover cable. Procedure - Connecting Ethernet cables About this task Perform these steps to connect Ethernet cables for out-of-band management. Steps 1. -
Page 94: Step 9 - Connecting The Power Cords
Step 9 - Connecting the power cords Use the following information to connect the power cords in your storage array. Things to know - AC power cords • For each AC power connector on the drive tray, make sure that you use a separate power source in the cabinet. - Page 95 Step 9 - Connecting the power cords | 95 Power switches 3. Connect the primary power cords from the cabinet to the external power source. 4. Connect either a cabinet interconnect power cord, the power cords provided with the drive tray, or the power cords specific to your particular cabinet to the AC power connector on each power canister in the drive tray.
-
Page 96: Step 10 - Turning On The Power And Checking For Problems In A Controller-Drive Tray Configuration
SANtricity Software your storage array. Continue with either the appropriate Express Guide or the Installation Reference , available from the NetApp E-Series and EF-Series Systems Documentation Center Procedure - Turning on the power to the storage array and checking for problems in a controller-drive tray... - Page 97 Step 10 - Turning on the power and checking for problems in a controller-drive tray configuration | 97 Table 12: LEDs on the left end cap Location Color Controller- White Identifies a controller-drive Normal status. Drive Tray tray that you are trying to Locate find.
- Page 98 98 | E5600 Controller-Drive Tray and Related Drive Trays Installation Guide Table 13: LEDs on the drive Location Color Blinking Drive Green The power is Drive I/O The power is Power turned on, and the activity is turned off. drive is operating taking place.
- Page 99 Step 10 - Turning on the power and checking for problems in a controller-drive tray configuration | 99 Drive state Drive Power LED Drive Service Action (Green) Required LED (Amber) Service action required – A fault condition exists, and the drive is offline. •...
- Page 100 100 | E5600 Controller-Drive Tray and Related Drive Trays Installation Guide Location Color Native Green At least one of the four A link error has Host Link PHYs in the Host IN occurred. 1 Service port is working and a...
- Page 101 Step 10 - Turning on the power and checking for problems in a controller-drive tray configuration | 101 Table 16: LEDs on the controller canister – SAS host interface card subplates Location Color Host Amber At least one link is active The SAS link is down.
- Page 102 102 | E5600 Controller-Drive Tray and Related Drive Trays Installation Guide Table 17: LEDs on the controller canister – FC or iSCSI host interface card subplates Location Color SFP+ Green The link is up (LED The controller has not Channel 1...
- Page 103 Step 10 - Turning on the power and checking for problems in a controller-drive tray configuration | 103 Location Color SFP+ Green The physical link is The physical link is not Channel 4 active. active. Physical Link Up • LEDs on the controller canister – Infiniband host interface card subplates Table 18: LEDs on the controller canister –...
-
Page 104: Things To Know - Leds On The E5660 Controller-Drive Tray
104 | E5600 Controller-Drive Tray and Related Drive Trays Installation Guide Table 19: LEDs on the power-fan canister Location Color Standby Power Green The controller-drive The controller-drive tray tray is in Standby is not in Standby mode, mode, and DC... - Page 105 Step 10 - Turning on the power and checking for problems in a controller-drive tray configuration | 105 Table 20: LEDs on the left bezel Location Color Power Green Power is present. Power is not present. Standby Power Green The controller-drive tray is The controller-drive in Standby Power mode.
- Page 106 106 | E5600 Controller-Drive Tray and Related Drive Trays Installation Guide 92025-01 Table 21: LEDs on the power canister Location Color Standby Power Green The controller-drive The controller-drive tray tray is in Standby is not in Standby mode. mode. Power DC Power...
-
Page 107: Things To Know - General Behavior Of The Leds On The Controller-Drive Tray
Step 10 - Turning on the power and checking for problems in a controller-drive tray configuration | 107 Table 22: LEDs on the fan canister Location Color Fan Power Green Power to the fan canister Power to the fan is available. customer-replaceable unit (CRU) is not available. - Page 108 108 | E5600 Controller-Drive Tray and Related Drive Trays Installation Guide Symbol Location Function (Canisters) Service Action Drive • On – When the drive tray Required (Fault) LED is on, the cable is attached and at least one lane has a link up status, but at least one lane has a link down status.
- Page 109 Step 10 - Turning on the power and checking for problems in a controller-drive tray configuration | 109 Symbol Location Function (Canisters) Controller-Drive Tray Front bezel on the • On – The temperature of Over-Temperature controller-drive the drive tray has reached tray an unsafe condition.
-
Page 110: Things To Know - Service Action Allowed Leds
110 | E5600 Controller-Drive Tray and Related Drive Trays Installation Guide Symbol Location Function (Canisters) Ethernet Speed and Controller The speed of the Ethernet Ethernet Activity ports and whether a link has been established are indicated: • Left LED On – 1-Gb/s speed. - Page 111 Step 10 - Turning on the power and checking for problems in a controller-drive tray configuration | 111 Table 24: LEDs on the left end cap Location Color Drive Tray Locate White Identifies a drive tray Normal status. that you are trying to find.
- Page 112 112 | E5600 Controller-Drive Tray and Related Drive Trays Installation Guide Table 25: LEDs on the drive Location Color Blinking Drive Power Green The power is Drive I/O The power is turned on, and the activity is turned off. drive is operating taking place.
- Page 113 Step 10 - Turning on the power and checking for problems in a controller-drive tray configuration | 113 • LEDs on the ESM canister Table 27: LEDs on the ESM canister Location Color Host Link 1 Amber At least one PHY of the No link error has Fault four connectors is...
- Page 114 114 | E5600 Controller-Drive Tray and Related Drive Trays Installation Guide Location Color Amber At least one of the four Normal status. Expansion PHYs in the Out port is Link Fault working, but another PHY cannot establish the same link to the Expansion Out connector.
-
Page 115: Things To Know - Leds On The De6600 Drive Tray
Step 10 - Turning on the power and checking for problems in a controller-drive tray configuration | 115 Table 28: LEDs on AC power-fan canister Location Color Standby Green The drive tray is in The drive tray is not in Power Standby mode, and DC Standby mode. - Page 116 116 | E5600 Controller-Drive Tray and Related Drive Trays Installation Guide Table 29: LEDs on the left bezel Location Color Drive Tray Green Power is present. Power is not present. Power Drive Tray Green The drive tray is in The drive tray is not in Standby Power Standby Power mode.
- Page 117 Step 10 - Turning on the power and checking for problems in a controller-drive tray configuration | 117 Location Color Host Link 2 Amber At least one PHY of the No link error has Fault four connections is occurred. working, but another PHY cannot establish the same link to the device connected to the...
- Page 118 118 | E5600 Controller-Drive Tray and Related Drive Trays Installation Guide Location Color Things to know - Seven- Note: For more information about the seven-segment tray IDs, see segment display for the ESMs on the drive trays on page 129.
-
Page 119: Things To Know - Leds On The De6600 Drive Drawers
Step 10 - Turning on the power and checking for problems in a controller-drive tray configuration | 119 Table 32: LEDs on the fan canister Location Color Fan Power Green Power from the fan Power to the fan canister is available. customer-replaceable unit (CRU) is not available. -
Page 120: Things To Know - Leds On The De6600 Drives
120 | E5600 Controller-Drive Tray and Related Drive Trays Installation Guide Table 33: LEDs on the drawer Location Color Blinking Drive or Drawer Blue The drive canister The drive canister Service Action can be removed cannot be Allowed safely from the... -
Page 121: Things To Know - General Behavior Of The Leds On The Drive Trays
Step 10 - Turning on the power and checking for problems in a controller-drive tray configuration | 121 Location Color Blinking Drive Service Amber An error has Normal status. Action occurred. Required • Drive state represented by the LEDs Table 35: Drive state represented by the LEDs Drive State Drive Activity Drive Service Action... - Page 122 122 | E5600 Controller-Drive Tray and Related Drive Trays Installation Guide Symbol Location General Behavior Standby Power Front bezel on the • On – The drive tray is in Standby drive tray mode, and the main DC power is off.
-
Page 123: Things To Know - Display Sequence Code Definitions
Step 10 - Turning on the power and checking for problems in a controller-drive tray configuration | 123 Symbol Location General Behavior Link Service ESM canister • On – The cable is attached and at Action Required least one lane has a link-up (Fault) status, but one lane has a link- down status. -
Page 124: Things To Know - Component Failure Identifications
124 | E5600 Controller-Drive Tray and Related Drive Trays Installation Guide Category Category Detail Codes Code Component failure • dx+ = Processor or cache DIMM. • Cx = Cache DIMM. • Px+ = Processor DIMM. • Hx+ = Host interface card. -
Page 125: Things To Know - Lock-Down Codes
Step 10 - Turning on the power and checking for problems in a controller-drive tray configuration | 125 Component Seven-Segment Display Used in this Controller State Code Power-on Suspended Operational Diagnostics Category delimiter (--) The separator between category- After (--), a "CF" (for Component Failure) is detail code pairs is displayed, followed by one of the codes used when more... - Page 126 126 | E5600 Controller-Drive Tray and Related Drive Trays Installation Guide Diagnostic Code Description An unsupported host interface card has been detected, which results in a suspended controller state. A sub-model identifier either has not been set or has been mismatched, which results in a suspended controller state.
-
Page 127: Things To Know - Seven-Segment Display Use Cases
Step 10 - Turning on the power and checking for problems in a controller-drive tray configuration | 127 Diagnostic Code Description The power supply is incapable of powering the controller, which results in a suspended controller state. The SBB pairing fails, which results in a suspended controller state. Things to know - Seven-segment display use cases The following table shows both startup errors and operation errors that can be used to point to a component failure. - Page 128 128 | E5600 Controller-Drive Tray and Related Drive Trays Installation Guide Use Cases Repeating sequence SE+ dF+ blank- • A component that is not a field replaceable unit failure has been detected. SE+ dF+ "--"+ CF+ Px + blank- •...
-
Page 129: Things To Know - Seven-Segment Display For The Esms On The Drive Trays
Step 10 - Turning on the power and checking for problems in a controller-drive tray configuration | 129 Use cases Repeating sequence dE+ L2+ "--"+ CF+ Cx + blank- • A cache memory diagnostic failure has been detected. dE+ L3+ "--"+ CF+ b1 + blank- •... - Page 130 130 | E5600 Controller-Drive Tray and Related Drive Trays Installation Guide Diagnostic Code Description A non-catastrophic hardware failure has occurred. The ESM is operating in a Degraded state. The ESM canister is incompatible with the drive tray firmware.
-
Page 131: Regulatory Compliance Statements
NetApp, Inc. is not responsible for any radio or television interference caused by unauthorized modification of this equipment or the substitution or attachment of connecting cables and equipment other than those specified by NetApp. It is the user’s responsibility to correct interference caused by such unauthorized modification, substitution, or attachment. - Page 132 132 | E5600 Controller-Drive Tray and Related Drive Trays Installation Guide...
- Page 133 Do not use power cord with other products. Translation of notice: Use only NetApp supplied power cords with NetApp equipment. Compliance with the Spanish Royal Decree 106/2008 Este aviso se proporciona de conformidad con, además de otros requisitos, el Real Decreto español 106/2008: El precio de venta al público de las baterías, los acumuladores y las celdas de potencia...
-
Page 134: Copyright Information
NetApp assumes no responsibility or liability arising from the use of products described herein, except as expressly agreed to in writing by NetApp. The use or purchase of this product does not convey a license under any patent rights, trademark rights, or any other intellectual property rights of NetApp. -
Page 135: Trademark Information
NetApp, Inc., in the United States, and/or other countries. All other brands or products are trademarks or registered trademarks of their respective holders and should be treated as such. A current list of NetApp trademarks is available on http://www.netapp.com/us/legal/netapptmlist.aspx... -
Page 136: How To Send Comments About Documentation And Receive Update Notifications
Twitter account @NetAppDoc. You can also contact us in the following ways: • NetApp, Inc., 495 East Java Drive, Sunnyvale, CA 94089 U.S. • Telephone: +1 (408) 822-6000 • Fax: +1 (408) 822-4501 •...
Need help?
Do you have a question about the E5600 and is the answer not in the manual?
Questions and answers