
Related Manuals for Danfoss VTT Series


Summary of Contents for Danfoss VTT Series
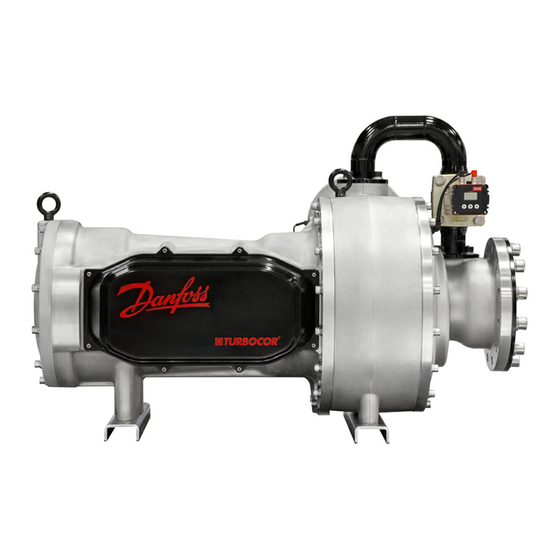
- Page 1 Applications and Installation Manual Variable Twin Turbo Centrifugal Compressors VTT Series VTT880, VTT1000, VTT1200 http://turbocor.danfoss.com...
- Page 2 THIS PAGE INTENTIONALLY LEFT BLANK Page 2 of 73 M-AI-VT-001-EN Rev.C.1...
-
Page 3: Table Of Contents
Content Contents Introduction ............................7 Organization of this Manual ..................................7 Document Symbols .....................................8 Definitions ........................................9 Overview of the VTT Compressor .......................11 VTT Product Nomenclature ................................... 11 Features of the VTT Compressor ................................13 Configurations of the VTT Compressor Models ..........................13 Compressor Module .................................... - Page 4 Content Refrigerant Piping Design ........................33 Refrigerant Piping Connections ................................33 Motor Cooling Connections .................................. 33 Motor Cooling Port Specifications ............................... 34 Economizer Port Types ..................................34 Drive Module Piping ....................................35 Refrigerant Cooling .................................... 36 Cold Plate Tube ....................................36 Piping Design Guidelines ..................................
- Page 5 Content Circuit Grounding ...................................... 62 Drive Module Controls Connections ..............................62 Drive Module Control Terminal Types ..............................63 Drive Module ModBus and Interlock Connections ........................64 Drive Module Installing Control Terminals ............................65 Drive Module Basic Wiring ..................................65 Default Settings ....................................65 Interlock .........................................
- Page 6 This publication contains proprietary information inability to manufacture or use information to Danfoss Turbocor Compressors (DTC). By contained in this manual, even if advised of the accepting and using this manual, the user agrees possibility of such damages.
-
Page 7: Introduction
Turbocor compressors. It is not intended to Some potential safety situations may not be inform on fundamental safety, refrigeration foreseen or covered in this guide. Danfoss and electrical design skills. It is assumed and Turbocor Compressors (DTC) assumes personnel presumed that persons using this manual... -
Page 8: Document Symbols
Introduction Document Symbols The following symbols are used in this document. NOTE: Indicates something to be noted by the reader. NOTE DANGER: Indicates an essential operating or maintenance procedure, practice, or condition, which, if not strictly observed, could result in serious injury to or death of personnel or long-term health hazards. -
Page 9: Definitions
DC-DC converter supplies and electrically isolates high and low DC voltages that are DC-DC Converter required by the control circuits. Danfoss Turbocor Compressors An intolerable or unsafe condition that can result in equipment failure. Faults will cause Fault the compressor controller to reduce shaft speed and shut down the system. A fault requires a manual or auto reset from the chiller controller. - Page 10 Introduction Term Definition Permanent Magnet Switch off the 3-phase mains until the compressor capacitor bank is discharged – then Power Cycle turn the 3-phase mains on again. Pressure Ratio Is the ratio of discharge pressure/suction pressure in absolute terms. Pulse Width Modulation A type of terminal that takes advantage of its resistance features to transform and absorb REGEN Terminal electrical power.
-
Page 11: Overview Of The Vtt Compressor
Overview of the VTT Compressor VTT Product Variable Twin Turbo (VTT) Centrifugal series of The VTT series of compressors are an oil free Nomenclature compressors is the newly designed group of centrifugal design based on magnetic bearing compressors that covers the nominal capacity range technology, using a modular approach containing from 200 to 350 tons. - Page 12 Overview of the VTT Compressor VTT Drive Portion Nomenclature Revision C VTT Ancillary and Accessory Items Nomenclature Revision C Page 12 of 73 M-AI-VT-001-EN Rev.C.1...
-
Page 13: Features Of The Vtt Compressor
Overview of the VTT Compressor Features of the VTT • Oil free, magnetic bearing, variable speed, • Water-cooled or equivalent evaporative cooled Compressor two-stage centrifugal compressors with chiller applications economizer option • ETL certified • Nominal capacity ranges from 200 to 350 tons •... -
Page 14: Capacity Control Using Intraflow
Using this technology enables VTT series • Increased turn-down capabilities extend the compressors to use vanned diffusers, which stable operating envelope far beyond what can improves overall compressor efficiency. -
Page 15: Dc-Dc Converter
Overview of the VTT Compressor DC-DC Converter The DC-DC converter provides the compressor with +24V DC (with respect to 0V) and HV+ (+250V DC with respect to HV-) for the bearing pulse width modulation (PWM) amplifier. The DC-DC Converter receives a high voltage DC supply from the drive module. -
Page 16: Drive Module
This dual external controllers. cooling provides some redundancy in nearly all operating conditions. The active thermal The VTT series compressors use a drive module management system also ensures uniform with the following features: cooling and prevents condensation on the drive module. -
Page 17: Drive Module External Components
Overview of the VTT Compressor Drive Module External Figure 5 shows the location of the external general components of the drive module. Components Figure 5 Drive Module - Exterior General Components Drive Module Internal Figure 6 shows the location of the internal components of the drive module. Components Figure 6 Drive Module Components... -
Page 18: Safety Precautions
Overview of the VTT Compressor Table 2 Component Definition Remarks Interior Components RFI Filter Device to suppress radio frequency interference (RFI). Optional Descriptions Control Card Input/output communication and control board. Standard Power Card Supplies power to the internal components. Standard Mains Input Three-phase AC power supply to the adjustable frequency drive module. -
Page 19: Drive Module Logic To Power Interface
Overview of the VTT Compressor Figure 7 Basic Block Diagram To provide an overview, the main drive module operation description describes these sections components are grouped into three categories: in greater detail while explaining how power The control logic section, logic to power and control signals move throughout the drive interface, and power section. -
Page 20: Drive Module Control Input And Output Signals
Overview of the VTT Compressor The inverter section is made up of six IGBTs, A Hall effect type current sensor is on each phase commonly referred to as switches. One switch of the output to measure motor current. This is necessary for each half phase of the three- type of device is used instead of more common phase power, for a total of six. -
Page 21: Drive Module Technical Specifications
Overview of the VTT Compressor Drive Module Technical Model N165 N232 N262 Specifications Nominal Power output (kW) Mains Input AC Current Table 3 380 V Electrical Data 400 V 460 V 575 V 380 V 400 V 460 V 575 V Maximum Output Current 380 V 400 V... -
Page 22: System Interface Connections
Overview of the VTT Compressor System Interface This section describes how to set up the control control wiring connection guidelines, interface Connections interface including the control interface wiring, cable specifications and mounting details. Figure 9 System Architecture Revisions A and B and Control Interface Page 22 of 73 M-AI-VT-001-EN Rev.C.1... - Page 23 Overview of the VTT Compressor Revision C and later Page 23 of 73 M-AI-VT-001-EN Rev.C.1...
- Page 24 Overview of the VTT Compressor Table 4 System Interface Cables Configuration Length If Part Maximum Cable Point 1 Shield Termination Point 2 Description Supplied Cable Spec Voltage Supplied Installed Number Length By DTC 22 (AWG) DTC/ CIM Terminal (G) 110059 CAN/Interlock 24Vdc Shielded...
-
Page 25: Compressor Control Module (Ccm) Board
Overview of the VTT Compressor Figure 10 Revisions A and B Revision C CCM and PWM Compressor Control The CCM board provides circuitry with the • Bearing monitoring and Control Module (CCM) Board following functionalities: • Motor cooling Electronic Expansion Valves (EEV) (EEV_MOT) •... -
Page 26: Compressor Interface Module (Cim) Board
Overview of the VTT Compressor Compressor Interface The CIM provides compressor communication communication options. Communication Module (CIM) Board interfaces, control of EEVs and optional chiller between the CIM and CCM is provided through sensor monitoring capabilities. The CIM supports an internal CAN bus communication interface. Universal Serial Bus (USB) and RS-485 ModBus Figure 13 Revisions A and B... -
Page 27: Sensor Monitoring
RS-485 systems can be implemented using on the second wire. In other words, if one wire two-wire or four-wire modes. The VTT Series is transmitting a high, the other wire will be Compressors use the two-wire system with transmitting a low, and vice versa. - Page 28 Overview of the VTT Compressor Figure 14 Balanced Data Transmission Balanced Data Transmission/ Differential Concept Differential Concept The RS-485 system uses a master/slave A basic RS-485 system requires an I/O driver architecture where each slave device (the VTT with differential outputs and an I/O receiver with Series Compressors) has its unique address differential inputs.
-
Page 29: Rs-485 Cable Specifications
Overview of the VTT Compressor Table 8 Specification RS-485 RS-485 Specification Mode of Operation Differential 1 Driver Total Number of Drivers and Receivers on One Line 32 Receivers Maximum Cable Length 100m (328 feet) Maximum Data Rate 30Mb/s Maximum Driver Output Voltage -7V to +12V Driver Output Signal Level (Loaded Min) Loaded... -
Page 30: Environment And Application Boundaries
Pressure - All Models Maximum Pressure Fault Limits 1240 Mains AC Input Supply VTT series compressors are designed to operate voltage/frequency at or beyond the range limit Voltage and Frequency within an acceptable rated voltage and frequency. will cause the compressor to shut down. The +/-... -
Page 31: Refrigerant Type
During mains drop-out, Kinetic back-up ensures faults are present. that the frequency converter keeps running Refrigerant Type The VTT series compressors are totally oil-free discharge check valves be approved by their and designed for use with refrigerant R134a. manufacturer for use in oil-free systems. In... -
Page 32: Drive Module Vibration
Environment and Application Boundaries Drive Module Vibration The Drive Module has been tested according to The Drive Module complies with requirements the procedure based on the following standards: that exist for units mounted on the walls of production premises. • EC/EN 60068-2-6: Vibration (sinusoidal) - 1970 •... -
Page 33: Refrigerant Piping Design
Refrigerant Piping Design Refrigerant Piping Figure 15 shows the mechanical connections on Connections the VTT compressor. Figure 15 Mechanical Connections DISCHARGE FLANGE MOTOR COOLING EXIT PORT SUCTION FLANGE ECONOMIZER PORT MOTOR COOLING INLET FITTING Table 15 Interface Size Mechanical Connections Suction Flange ANSI B16.5 Class 300, 150 mm (6") Pipe Discharge Flange... -
Page 34: Motor Cooling Port Specifications
Refrigerant Piping Design Figure 16 Motor Cooling Path Subcooled Liquid Superheated Vapor Electronnic Expansion Valve To Evaporator To the vapor side of the evaporator Motor Cooling Port The motor cooling inlet port is factory-fitted with valve with a 10 mm (3/8") inch sweat connection Specifications an electronic expansion valve. -
Page 35: Drive Module Piping
Refrigerant Piping Design Drive Module Piping Figure 18 illustrates the required piping for the Drive Module. Figure 18 Drive Module Piping Page 35 of 73 M-AI-VT-001-EN Rev.C.1... -
Page 36: Refrigerant Cooling
Refrigerant Piping Design Refrigerant Cooling The Drive Module is equipped with refrigerant and/or high compressor load. A separate liquid cooling to aid and compliment the cooling air refrigerant supply must be provided to the fans. Most of the time, the air cooled heat sink module;... -
Page 37: Motor And Drive Module Cooling Requirements
Refrigerant Piping Design Motor and Drive Module NOTE Cooling Requirements Sub-cooled liquid must be fed to the motor and drive module cooling port of the compressor. It must be solid liquid with a minimum of 6° F (3.5°C) sub cooled at the connection point to the motor and drive module cooling port of the compressor. -
Page 38: Refrigeration Schematics
Refrigerant Piping Design Refrigeration Schematics Figure 19 Typical Refrigeration Piping Schematic RECOMMENDED ALL OTHERS ARE REQUIRED CHILLED WATER EEV_P EVAPORATOR CONDENSER DRIVE TOWER WATER MODULE SUBCOOLING CIRCUIT Figure 20 Typical Refrigeration Piping Schematic with Flash Tank Economizer RECOMMENDED ALL OTHERS ARE REQUIRED CHILLED WATER EEV_P EVAPORATOR... - Page 39 Refrigerant Piping Design Figure 21 Typical Refrigeration Piping Schematic with Sub-cooler Economizer RECOMMENDED ALL OTHERS ARE REQUIRED CHILLED WATER EEV_P EVAPORATOR CONDENSER DRIVE TOWER WATER MODULE SUBCOOLING CIRCUIT ECONOMIZER, SUBCOOLER TYPE NOTE The components marked with (*) are recommended. All the other components are mandatory. NOTE The above Typical Refrigeration Piping Schematics are for the systems with a single compressor on a single circuit.
- Page 40 Refrigerant Piping Design Table 17 Symbols Description Symbol Description Orifice Service Valve Check Valve Solenoid Valve Electronic Expansion Valve (EEV) Filter / Drier Sight Glass Economizer, Flash Tank Economizer, Sub-Cooler Type NOTE Due to their use of magnetic bearings, Turbocor compressor chiller systems are inherently oil- free.
-
Page 41: Options And Accessories
Options and Accessories Drive Module Cooling Tables 18 and 19 provide a list of components that are required for use with the VTT compressor Table 18 EEV_P Pressure Regulator Orifice Drive Module Cooling Components Item Location Drive Module Cooling Exit Line *Drive Module Cooling Inlet Line Function Temperature Regulator... -
Page 42: Physical Data Of The Vtt Compressor
Physical Data of the VTT Compressor NOTE Compressor Module All dimensional data is for the VTT1200 compressor. Other models will be added in the future. Figure 22 Isometric View with General Parts Figure 23 Suction Flange View (Front) Page 42 of 73 M-AI-VT-001-EN Rev.C.1... - Page 43 Physical Data of the VTT Compressor Suction Flange Details Tapped Holes M20 x 2.5 Pitch Circle Diameter (PCD) 269.74 (10.61") Number of Holes Inlet (Suction) Flange ANSI B16.5 Class #300 Inlet Diameter 152 mm (5.98") Outside (Over All) Dimension 510 mm (20.7") Flange Outside Diameter 318 mm (12.51") Figure 24...
- Page 44 Physical Data of the VTT Compressor Figure 25 Right Side View Discharge Flange Details Economizer Flange Details Economizer Flange ANSI B16.5 Class #300 Discharge Flange ANSI B16.5 Class #300 Number of Holes Number of Holes Pitch Circle Diameter (PCD) 200.15 (7.87") Pitch Circle Diameter (PCD) 98.55 (3-7/8") Tapped Holes...
- Page 45 Physical Data of the VTT Compressor Figure 27 Bottom View 320 (12.59”) 561 (22.08”) 76 (2.99”) 6 (.23”) CROSS SECTION OF THE CHANNEL Rails Details Material AL 6061-T6 Channel 72 x 38 x 6.35 (3’ x 1’ . 5" x Dimensions (Size) 0.25") Page 45 of 73...
-
Page 46: Drive Module
Physical Data of the VTT Compressor Drive Module Module Table 20 Drive Module Physical N232 & N262 1041 mm (41") 432 mm (17") 381 mm (15") 125 kg (275 lbs) Specifications N165 838 mm (33") 330 mm (13") 381 mm (15") 61 kg (135 lbs) Figure 28 [3.9]... - Page 47 Physical Data of the VTT Compressor Figure 30 Left Side View, N165 Figure 31 [14.9] Right Side View, N165 [3.2] [0.7] [0.8] [5.8] [33.2] [22.1] Indicator Description Table 21 Ceiling Legend for right and left side views Air space outlet minimum 225 mm (8.9") Air space inlet minimum 225 mm (8.9") Floor Page 47 of 73...
- Page 48 Physical Data of the VTT Compressor Figure 32 Front View, N232 and N262 [3.8] [8.3] [34.6] [24.5] Figure 33 Rear View, N232 and N262 [16.5] [13.6] [11.0] [5.1] [4.2] [8.4] 1107 [12.6] [43.6] 1051 [41.4] [33.7] [10.7] Page 48 of 73 M-AI-VT-001-EN Rev.C.1...
- Page 49 Physical Data of the VTT Compressor Figure 34 Right Side View, N232 and N262 Figure 35 Left Side View, N232 and N262 Table 21 Indicator Description Legend to the right and Ceiling left side views Air space outlet minimum 225 mm (8.9") Air space inlet minimum 225 mm (8.9") Floor Page 49 of 73...
-
Page 50: Dc-Dc Converter Dimensions
DC-DC Converter Dimensions Figure 36 DC-DC Converter Dimensions • • • WARNING • • • Heat output of up to 85 watts, vented UL listed enclosure shall be used. Page 50 of 73 M-AI-VT-001-EN Rev.C.1... -
Page 51: Installations Guidelines
Safety information is located Some potential safety situations may not be throughout the manual to alert service personnel foreseen or covered in the manual. Danfoss of potential hazards. Turbocor (DTC) expects personnel using this Safety Summary... -
Page 52: Required Tools
Installations Guidelines Required Tools The following table lists the hand tools required to perform the procedures outlined in this manual. • • • DANGER • • • All electrical instruments must be rated to 600V AC and 1000V DC. Service Tools / Test Equipment Table 22 17 mm Hex Allen Key Service Tools and Test... -
Page 53: Compressor Module Installation
Compressor Module Installation Rigging Requirements For compressor rigging, two eye bolts are the compressor into its final location; provided (one at each end). A properly designed see Figure 38. spreader bar should be used to safely position Figure 37 Rigging Set up •... -
Page 54: Clearance
Compressor Module Installation • • • CAUTION • • • The above Figure is a guide only for design of a spread bar. It is intended to provide dimensions for the position of eyebolts and center of gravity. When designing and building the spread bar, it is OEM’s responsibility to ensure all applicable engineering calculations and safety requirements are met. - Page 55 Compressor Module Installation 13. Tighten the M20 Allen head screws with a 16. Using the new O-rings supplied with the torque wrench to the recommended torque compressor, attach all refrigerant line level shown in Table 23. connections. 14. Slowly release the load from the crane so 17.
-
Page 56: Drive Module Installation
Drive Module Installation • • • WARNING • • • Safety HIGH VOLTAGE Drive Modules contain high voltage when connected to AC mains input power. Only qualified personnel should perform installation, start up, and maintenance. Failure to perform installation, start up, and maintenance by qualified personnel could result in death or serious injury. -
Page 57: Airflow
Drive Module Installation Airflow The necessary airflow over the heat sink must be secured. The flow rate is shown in Table 24. Frame Door fan/top fan Heat Sink Fan Table 24 Heat Sink and Front N165 102 m3/hr (60 CFM) 420 m3/hr (250 CFM) Channel Airflow N232 and N262... -
Page 58: Controls Installation
Controls Installation Control Wiring Guidelines To ensure proper control wiring techniques, the i.e., all external contactors/switches must not following guidelines must be adhered to: introduce current into the circuit. 1. The ground reference of the external circuit 3. All interlock and analog output cables must be connected to the CIM must be at the same shielded with one end of the shield connected to the potential as the ground reference on the CIM. - Page 59 Controls Installation Revision C Page 59 of 73 M-AI-VT-001-EN Rev.C.1...
- Page 60 Controls Installation Table 26 Rev A and B OEM Installed Connections Connector # Label Function Description Cable Specifications 24VDC CIM Power 24VDC from the CCM to CIM J2 Pin +/− Interlock Drive Interlock Safety interlock from the Drive, Open when drive is in fault J2 Pin P/N/GND Can Bus CAN Communication...
-
Page 61: Cim Board Mounting And Dimensions
Controls Installation CIM Board Mounting The CIM (Figure 42) must be installed in a UL- and Dimensions approved electrical enclosure equipped with DIN EN 50022, 50035, or 50045 mounting rails. Figure 42 Compressor Interface Module (CIM) Assembly Dimensions Page 61 of 73 M-AI-VT-001-EN Rev.C.1... -
Page 62: Cim Board Rs-485 Cable Connections
Controls Installation CIM Board RS-485 Cable Connect the RS-485 cable to the CIM as follows: 3. Attach the cable ground shield to the COM Connections 1. Attach the positive (+) polarity wire to the terminal. NETA terminal. 4. Connect the other end of the RS-485 cable to 2. -
Page 63: Circuit Grounding
Controls Installation Circuit Grounding Improper grounding or voltage in circuits customer’s negative terminals and the ground connected to the CIM can lead to component (J1 COM or Modbus shield) terminal on the CIM. failures. In particular, the interlock and analog If the measured voltage is not zero, determine output circuits are sensitive to improperly the source of the voltage. -
Page 64: Drive Module Modbus And Interlock Connections
Controls Installation Table 27 Connector # Description Control Terminal Location Connector 1 provides four programmable digital input terminals, two additional terminals, programmable as input or output, a 24VDC terminal supply voltage, and a common for optional customer supplied 24V DC voltage. Connector 2 provides terminals (+) 68 and (-) 69 are for an RS-485 serial communications connection. -
Page 65: Drive Module Installing Control Terminals
Controls Installation Drive Module Installing To connect the cable to the spring loaded Disconnect power before removing the cable Control Terminals terminal, from the terminal. 1. Strip approximately 9-10 mm (3/8") of 1. Insert a screwdriver (Max. 0.4 x 2.5 mm) into insulation. -
Page 66: Drive Module Serial Communications
Controls Installation Drive Module Serial RS-485 is a two-wire bus interface compatible Low-impedance earth (ground) connection Communications with multi-drop network topology. of the screen at every node is important. Terminate each segment at both ends, using the Therefore, connect a large surface of the screen termination switch (S801) of the drive module. -
Page 67: Drive Module Rs-485 Bus Termination
Controls Installation Drive Module RS-485 Bus The S801 switch on the drive module is used to switch needs to be set to ON to communicate Termination enable termination on the RS-485 port. Its default with VTT compressor. The switch is located setting is OFF. -
Page 68: Led Cover Description
Controls Installation LED Cover Description Figure 50 shows the Light-Emitting Diode (LED) indicators and Table 30 provides the descriptions Figure 50 LED Indicators Warning Alarm Warning Light Label Description Table 30 Green A solid green light indicates the unit is powered up. LED Indicator Descriptions A solid yellow light indicates a warning condition exists (unit can Yellow... -
Page 69: Electrical Power Wiring
Electrical Power Wiring The Drive Module rectifies AC voltage from mains The motor is supplied with variable voltage and into DC voltage after which this DC voltage frequency that enables infinitely more variable is converted into AC power with a variable speed control of the three-phased permanent amplitude and frequency. -
Page 70: Mains Ac Input Line Connection
Electrical Power Wiring Mains AC Input Line All Drive Modules may be used with an isolated • Connect three-phase AC input power wiring Connection input source, as well as with ground reference to terminals L1, L2, and L3 power lines when supplied from an isolated line •... -
Page 71: Safety Grounding Connection
Electrical Power Wiring Figure 55 Position of Earth Terminals Safety Grounding The Drive Module has a high leakage current Connection and must be grounded appropriately for safety reasons according to EN 50178. • • • DANGER • • • The earth leakage current from the drive module exceeds 3.5 mA. To ensure a good mechanical connection from the earth cable to the earth connection (terminal 95), the earth grounding must be reinforced in one of the following ways: Earth ground wire of at least 10 mm2. -
Page 72: Motor Rotation Check
Electrical Power Wiring Figure 57 Item Description Motor Terminal Block Details M10 Nut M10 Split Washer M10 Flat Washer M10 x 1.5 Threaded Stud Spacer Copper C1100 Motor Rotation Check If the direction of rotation of the motor is wrong, connections on two of the phases at the drive it can be corrected by swapping the terminal module end of the cable. -
Page 73: Connection Tightening Torques
Electrical Power Wiring Connection Tightening When tightening all electrical connections, it bad electrical connection. Always use a torque Torques is very important to tighten with the correct wrench to tighten the bolts. torque. Too low or too high torque results in a Table 33 Tightening Torques, Terminal No... - Page 74 Danfoss Turbocor 1769 E. Paul Dirac Drive 1769, Tallahassee FL 32310 USA | +1 850 504 4800 M-AI-VT-001-EN Rev.C.1 - April 2018 © Copyright Danfoss Turbocor Compressors Inc. | 2018...
Need help?
Do you have a question about the VTT Series and is the answer not in the manual?
Questions and answers