Premier Mounts PRF Installation Instructions Manual
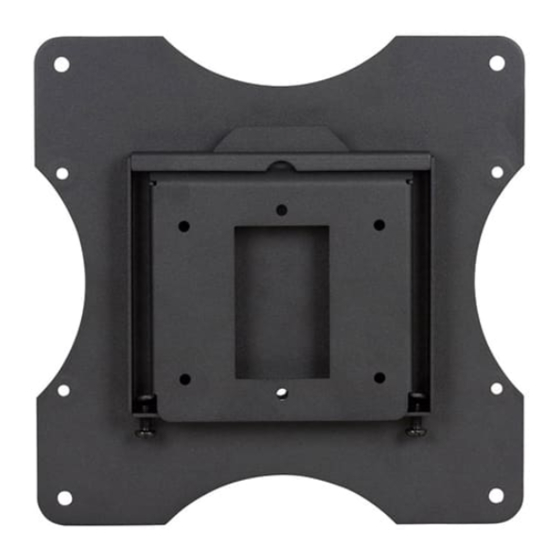
Universal ultra-flat mount
Hide thumbs
Also See for PRF:
- Installation manual (3 pages) ,
- Installation instructions manual (13 pages)
Table of Contents
Advertisement
Quick Links
Advertisement
Table of Contents

Related Manuals for Premier Mounts PRF


Summary of Contents for Premier Mounts PRF
- Page 1 INSTALLATION INSTRUCTIONS Universal Ultra-Flat Mount Model: PRF NORTH AMERICA 2620 Palisades Drive Corona, CA 92882 USA USA and Canada Phone: 1.800.368.9700 Fax: 1.800.832.4888 Other Locations Phone: (001).714.632.7100 Fax: (001).714.632.1044...
-
Page 2: Table Of Contents
INSTALLATION INSTRUCTIONS IN AN EASILY ACCESSIBLE LOCATION FOR FUTURE REFERENCE. PREMIER MOUNTS DOES NOT WARRANT AGAINST DAMAGE CAUSED BY THE USE OF ANY PREMIER MOUNTS PRODUCT FOR PURPOSES OTHER THAN THOSE FOR WHICH IT WAS DESIGNED OR DAMAGE CAUSED BY... -
Page 3: Installation Tools
Screwdriver Parts List Your Premier Mounts product is shipped with all proper installation hardware and components. Make sure that none of these parts are missing and/or damaged before beginning installation. If there are parts missing and/or damaged, please stop the installation and contact Premier Mounts (800) 368-9700. -
Page 4: Mounting Hardware
Parts List (cont’d) Mounting Hardware Standard Hardware M4 x 5mm Combo Screw (4) M6 x 12mm Combo Screw (4) M4 x 10mm Combo Screw (4) M4 x 12mm Combo Screw (4) M6 x 20mm M4 x 10mm Flat Head Combo Screw (4) Combo Screw (6) M4 x 12mm Flat Head Combo Screw (6) -
Page 5: Features
Wall Plate These mounting points also act as mounting points if you ˝ decide to mount the PRF to a handy box, using 6-32 x 1 screws. It is recommended that all electrical wiring be done by a licensed electrician. -
Page 6: Installing The Prf Mount
Installing the PRF Mount Introduction Thank you for purchasing Premier Mount’s Universal Ultra-Flat Mount. Please ensure that you have all the hardware listed on the front of the page. If any of the hardware described is missing, do not continue. Contact PREMIER MOUNTS Customer Service at (800) 368-9700. -
Page 7: Solid Surface
Installing the PRF Mount (cont’d) Step 4 Place the wall plate against the wall, placing the upper mounting hole over the hole that was drilled. Level Level the wall plate and mark the lower mounting point. Pilot Hole Once the wall plate is level and the second mounting... - Page 8 Installing the PRF-280 Mount (cont’d) ˝ S tep 2 Drill four (4) pilot holes using a 1/8” drill bit and power drill. Solid Surface 1/8” Drill Bit Mounting Hole Power Drill Step 3 All electrical wiring should be done prior to mount installation.
-
Page 9: Determining The Mounting Hardware
Determining the Mounting Hardware Step 1 Insert the Thread Depth Indicator through the thread inserts found on the back of the flat panel. Step 2 Using a pencil, mark the depth of the thread insert on the Thread Depth Indicator. Step 3 Compare and verify the depth of the remaining thread inserts. -
Page 10: Vesa 75/100 Installation
VESA 75/100 Installation Step 1 If your flat panel has a 200mm x 100mm or 200mm x 200mm mounting pattern, the VESA Adapter Plate must be used. Please refer to the M4 x 10mm Screw VESA Adapter Plate Pattern to determine the appropriate mount placement. -
Page 11: Attaching The Ufp-280 Adapter Plate
200mm x 100mm Mounting Pattern Installation If using a 200mm x 100mm mounting pattern to attach the PRF to your flat panel, please use six (6) M4 Flat head screws. Using rounded combo screws for the 200mm x 100mm VESA plate may damage your flat... -
Page 12: Attaching The Prf To The Adapter Plate
Flat Panel Technical Specifications All measurements are in inches(mm). Please refer to the hardware pack that is included with the PRF to determine the correct mounting hardware for your application. NOTE: 200 x 100 VESA Pattern M4 Phillips Flat Head screws only. -
Page 13: Warranty
What Premier Mounts Will Do At the sole option of Premier Mounts, Premier Mounts will repair or replace any product or product part that is defective. If Premier Mounts chooses to replace a defective product or part, a replacement product or part will be shipped to you at no charge, but you must pay any labor costs.
Need help?
Do you have a question about the PRF and is the answer not in the manual?
Questions and answers