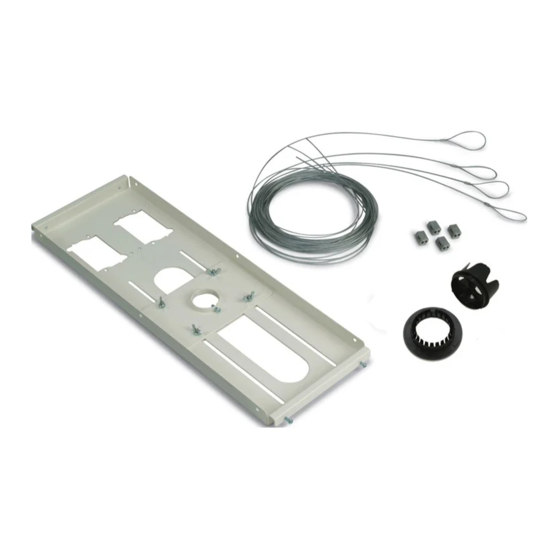
Premier Mounts PP-FCTA-QL Installation Instructions Manual
Ceiling adapter
Hide thumbs
Also See for PP-FCTA-QL:
- Installation manual (15 pages) ,
- Installation instructions manual (27 pages)
Table of Contents
Advertisement
Quick Links
Other Locations – Phone: (001)-714-632-7100; Fax: (001)-714-632-1044
©Premier Mounts 2008
9533-030-001-01
INSTALLATION INSTRUCTIONS
PP-FCTA-QL
NORTH AMERICA
3130 East Miraloma Avenue
Anaheim, CA 92806 USA
USA and Canada –
Phone: 800-368-9700
Fax: 800-832-4888
Ceiling Adapter
Shilton Industrial Estate,
Shilton, Coventry, England CV79JY
Phone: +44 (0) 2476 614700
Fax: +44 (0) 2476 614710
EUROPE
Swallow House,
Advertisement
Table of Contents

Summary of Contents for Premier Mounts PP-FCTA-QL
-
Page 1: Installation Instructions
NORTH AMERICA 3130 East Miraloma Avenue Anaheim, CA 92806 USA Phone: 800-368-9700 Other Locations – Phone: (001)-714-632-7100; Fax: (001)-714-632-1044 ©Premier Mounts 2008 9533-030-001-01 INSTALLATION INSTRUCTIONS PP-FCTA-QL Ceiling Adapter USA and Canada – Fax: 800-832-4888 EUROPE Swallow House, Shilton Industrial Estate,... -
Page 2: Table Of Contents
THESE INSTALLATION INSTRUCTIONS IN AN EASILY ACCESSIBLE LOCATION FOR FUTURE REFERENCE. PREMIER MOUNTS DOES NOT WARRANT AGAINST DAMAGE CAUSED BY THE USE OF ANY PREMIER MOUNTS PRODUCT FOR PURPOSES OTHER THAN THOSE FOR WHICH IT WAS DESIGNED OR DAMAGE CAUSED BY UNAUTHORIZED ATTACHMENTS OR MODIFICATIONS, AND IS NOT RESPONSIBLE FOR ANY DAMAGES, CLAIMS, DEMANDS, SUITS, ACTIONS OR CAUSES OF ACTION OF WHATEVER KIND RE- SULTING FROM, ARISING OUT OF OR IN ANY MANNER RELATING TO ANY SUCH USE, ATTACHMENTS OR MODIFICATIONS. -
Page 3: Parts List
This ceiling adapter comes packaged with installation hardware and components. Make sure that none of these parts are missing and/or damaged before beginning installation. If there are parts missing and/or damaged, please stop the installation and contact Premier Mounts (800-368-9700). Ceiling Adapter... -
Page 4: Plate Assembly
Step 10. The mounting hole should be located in the center-most location of the ceiling tile. Step 11. Once the mounting hole has been cut, place the ceiling plate assembly on the t-bar rails. Page 4 PP-FCTA-QL 1/4-20 Wing Nuts Upper Adapter Plate Mount... -
Page 5: Securing The Plate
PP-FCTA-QL Securing the Plate Step 1. Position and slide the adapter plate to the hole and secure the ceiling plate to the rails by tightening the four (4) M5 x 16mm Phillips head screws. Step 2. Center the stud plate to the hole and secure the plate by tightening the four wing nuts.. - Page 6 PP-FCTA-QL The electrical cut-outs allow for both single and square electrical box installations. Electrical Box Page 6 Installation Instructions...
-
Page 7: Ceiling Anchoring
PP-FCTA-QL Ceiling Anchoring THE PP-FCTA-QL MUST SECURED USING THE SUPPLIED QUICK LOCKS AND BRAIDED CABLES. Truss Truss Loop Braided Cable Truss ceiling Step 1. Loop the braided cable around the truss. Step 2. Run the open end through the loop. -
Page 8: Cable Lock Operation
To release the braided cable, slide the release pin to disengage. Braided Braided Cable Cable Directional Input Arrows Release Pin Mounting Hole Mounting Hole PP-FCTA-QL Braided Cable 6” Excess Directional Input Arrows Release Pin Release Pin Installation Instructions... - Page 9 PP-FCTA-QL Step 1. Thread each braided cable through the Quick Lock, the mounting hole in the corner of ceiling mount, and then completely through the opposite side of the Quick Lock to secure. To relieve tension on the braided cable, slide the release pin on the Quick Lock.
-
Page 10: Securing Pipe To Pp-Fcta-Ql
Securing Pipe to the PP-FCTA-QL Step 1. Secure the 1½” (NPT) pipe to the ceiling plate and tighten by using one (1) M5 x 16 Phillips head screw (supplied) to the plate. The M5 x 16 Phillip head screw must be used to stabilize the 1½” (NPT) pipe. -
Page 11: Warranty
What Premier Mounts Will Do At the sole option of Premier Mounts, Premier Mounts will repair or replace any product or product part that is defective. If Premier Mounts chooses to replace a defective product or part, a replacement product or part will be shipped to you at no charge, but you must pay any labor costs.


Need help?
Do you have a question about the PP-FCTA-QL and is the answer not in the manual?
Questions and answers