Table of Contents
Advertisement
Quick Links
Uninterruptible Power Supply
(UPS/200 to 240 V model)
BU5002R/BU3002R/BU3002RH
Instruction Manual
The English translation is for reference purposes only.
⚫ This instruction manual provides important safety-related information. Thoroughly read and
understand this manual before installing and using the product.
⚫ Keep this instruction manual in a convenient location so that you can refer to it whenever
necessary. No part or whole of this instruction manual may be reproduced without permission.
⚫ The contents of this instruction manual are subject to change without notice.
⚫ The warranty certificate is included in the product package.
BU 5 0 0 2 R
BU 3 0 0 2 R/BU 3 0 0 2 RH
Advertisement
Table of Contents

Related Manuals for Omron BU5002R


Summary of Contents for Omron BU5002R
- Page 1 Uninterruptible Power Supply (UPS/200 to 240 V model) BU5002R/BU3002R/BU3002RH Instruction Manual BU 5 0 0 2 R BU 3 0 0 2 R/BU 3 0 0 2 RH The English translation is for reference purposes only. ⚫ This instruction manual provides important safety-related information. Thoroughly read and understand this manual before installing and using the product.
-
Page 2: Introduction
• The maximum output capacity is as follows: 5000 VA/4500 W for BU5002R, 3000 VA/2700 W for BU3002R, and 3000 VA/2700 W for BU3002RH. BU5002R/BU3002R/BU3002RH... -
Page 3: Notes On The Use Of The Ups
Foreign Exchange and Foreign Trade Act. Exporting this product without acquiring the required permissions will be punishable based on these laws. • This UPS cannot be used in computer rooms complying with the standard ANSI/NFPA75 in order to protect electronic computers/data processing devices. BU5002R/BU3002R/BU3002RH... -
Page 4: Voluntary Control Council For Interference By Information Technology Equipment (Vcci) Applicable Class
● Windows is the registered trademark of Microsoft Corporation in the United States and/or other countries. ● The names of other companies and products mentioned herein are the trademarks or registered trademarks of their respective owners. ©OMRON SOCIAL SOLUTIONS CO., LTD. 2020 All Rights Reserved. BU5002R/BU3002R/BU3002RH... -
Page 5: Procedure From Installation To Operation
Procedure from installation to operation Procedure from installation to operation Procedure from installation to operation is as follows. BU5002R/BU3002R/BU3002RH... -
Page 6: Table Of Contents
2-3-1 Connecting devices to the AC output (AC receptacle) (BU5002R only) ......44 2-3-2 Connecting a device to the AC output (AC receptacle) (BU3002R only) ......44 2-3-3 Connecting a device to the AC output (terminal block) (BU5002R, BU3002R only) ..47 2-3-4 Connecting to a computer ....................50 2-4 Connecting the AC input .................. - Page 7 7-2-1 Contact signal I/O card (SC08) ..................121 7-2-2 Overview of network card (SC21) and SNMP/Web card (SC20G2) ........ 122 8 Troubleshooting ..................123 Reference documents ................127 A. Specifications ....................... 127 B. External dimensions .................... 129 C. Battery life ......................134 BU5002R/BU3002R/BU3002RH...
-
Page 8: Safety Precautions
⚫ For any purposes where a breakdown has possibility of causing serious social and/or public damage (Example: Main computer systems, main communication equipment, etc.) ⚫ Any other usage with the same level of importance BU5002R/BU3002R/BU3002RH... - Page 9 The ear brackets alone cannot support this product without the support angles. ⚫ The mass of each unit is about 57 kg for the BU5002R, about 31 kg for the BU3002R, and about 30 kg for the BU3002RH.
- Page 10 ⚫ There is a risk of smoke generation and ignition due to defective contact if the prescribed round terminal or the amount of stripping are not used. ⚫ There is a risk of smoke generation and ignition if a bare wire is used or a screw is loose. BU5002R/BU3002R/BU3002RH...
- Page 11 In addition, do not turn on the “Power” switch when the cover is removed. ⚫ If the “Power” switch is turned on, voltage is applied to the output terminal block, which may cause electric shock. ⚫ When replacing a cable, make sure to fix the cable with a clamp. BU5002R/BU3002R/BU3002RH...
- Page 12 Do not insert your hand or a metal object into the fan housing opening. ⚫ There is a possibility of an electric shock or short circuit. Do not insert your finger into the fan. ⚫ The fan rotates when the AC input is connected. ⚫ There is a possibility of an injury. BU5002R/BU3002R/BU3002RH...
- Page 13 ⚫ You may be injured if the product is toppled or dropped. ⚫ The support angles or other parts may be bent and become unusable. ⚫ The mass of the unit is about 57 kg for the BU5002R, 31 kg for the BU3002R, and about 30 kg for the BU3002RH.
- Page 14 Safety precautions Caution (for installation and connection) Connect the unit to a power supply outlet (commercial power supply) with the following current capacity. BU5002R: 30 A or more BU3002R/BU3002RH: 18 A or more ⚫ The power supply cable may get hot.
- Page 15 ⚫ There is a risk of an electric shock. ⚫ The AC input plug of the unit is wired as shown in the following figure. BU5002R input plug (NEMA L6-30P) BU3002R input plug (NEMA L6-20P) (viewed from the pin direction)
- Page 16 ⚫ When the unit is operating, a voltage is generated on the metal parts of the input plug through the capacitor of the internal circuit, regardless of the elapsed time. BU5002R/BU3002R/BU3002RH...
- Page 17 ⚫ The output voltage can be set from the LCD menu by [3. Settings] - [In/Out Settings] - [O/P Voltage]. ⚫ The upper limit of capacity changes in 100 V output mode. BU5002R: 2500VA/2250W BU3002R/BU3002RH: 1500VA/1350W ⚫...
- Page 18 ⚫ It contains a lead battery, so there is a possibility of battery explosion or dilute sulfuric acid leakage. Do not insert any metal object in the power supply output receptacle of the unit or the terminal block. ⚫ There is a risk of an electric shock. BU5002R/BU3002R/BU3002RH...
- Page 19 ⚫ Contact with any part of a grounded battery induces a risk of electrical shock. ⚫ Battery replacement work must be carried out by a person who understands the hazardous properties of the battery and the issues requiring care, or the work must be carried out under their supervision. BU5002R/BU3002R/BU3002RH...
- Page 20 ⚫ If the battery is not used for a long time after purchasing, the battery properties degrade, and in some cases it becomes unusable. ⚫ The battery can be charged once the AC input is connected to commercial power. BU5002R/BU3002R/BU3002RH...
- Page 21 ⚫ If the output voltage or frequency of the generator is outside the input voltage or frequency range of the unit, operation will switch to backup operation. ⚫ Even when the input frequency is within the range, if there is a sudden change of 5 Hz/sec or more, operation will switch to backup operation. BU5002R/BU3002R/BU3002RH...
- Page 22 ⚫ To prevent a fire, connect an emergency stop switch (ESD) rated 30 A or more to the BU5002R, and 20 A or more to the BU3002R/BU3002RH. (When the unit is used as a conforming product of UL standards, follow the National Electrical Code, and ANSI/NFPA 70) ⚫...
- Page 23 When connecting a device that generates a back electromotive force such as a relay to the signal output circuit, connect a diode to prevent the back electromotive force on both ends of the relay. BU5002R/BU3002R/BU3002RH...
-
Page 24: Preparation
Caution This unit is a heavy object with a mass of about 57 kg for BU5002R and about 31 kg for BU3002R. Lift or carry this unit by 2 or more people. ⚫ You may be injured if the product is dropped. - Page 25 1 Preparation 1-2 Checking the contents Contents BU5002R BU3002R/BU3002RH Packaged fittings 1 box 1 box Fittings for support angle Support angle (L) Support angle (R) Ear bracket Ear bracket mounting flat-head screws (M3) Fixing screws for EIA/JIS rack (M5) Mounting nuts for EIA rack...
-
Page 26: Related Products (Options)
1 Preparation 1-3 Related products (options) 1-3 Related products (options) Model number Product name BU5002R BU3002R BU3002RH Replacement battery pack BUB5002R BUB3002R Expansion battery unit BUM5002R BUM3002R Network card SC21 SNMP/Web card SC20G2 Contact signal I/O card SC08 Replacement fan... -
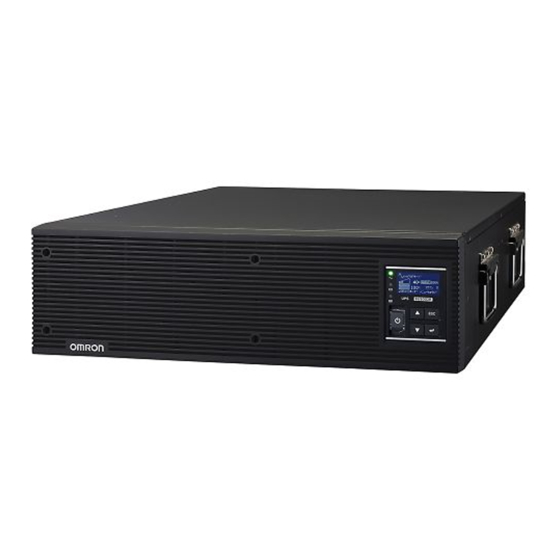
Page 27: Names Of Each Part
For information on the function of each part, refer to “2. Installation and connection” on page 30 and “3. Check and start the operation” on page 59 that provide the details. ⚫ Front view · BU5002R · BU3002R, BU3002RH 1. Air vent 2. - Page 28 1 Preparation 1-4 Names of each part ⚫ Rear view <BU5002R> <BU3002R> <BU3002H> A: Option slot K: AC Input cable B: Contact signal port L: AC output receptacles A C: RS-232C port M: AC output receptacles B D: Cooling fan...
-
Page 29: I/O Circuit Block Diagram
230/240 VAC Rectifier Filter Noise (high power Inverter factor filter (sine wave) Input Input converter) overcurrent relay protection Output switching Step-up converter Control Charging Power supply switch circuit circuit Battery At overload/abnormal During normal operation During backup operation BU5002R/BU3002R/BU3002RH... -
Page 30: Installation And Connection
⚫ A surge absorber is provided on the power supply input cable, and if a withstanding voltage test is conducted, the surge absorber may be damaged. ⚫ If conducting an insulation resistance test, perform it in the 250 VDC range. BU5002R/BU3002R/BU3002RH... -
Page 31: Installation
The product serial number is indicated on the seal on the back of the unit (in the case of BU3002R, the seal on the top), and on the product serial number seal included in the packaging. It can be displayed on the LCD panel as well. Correct positions Incorrect positions BU5002R/BU3002R/BU3002RH... -
Page 32: 2-1 Rackmount Installation (Eia/Jis 19-Inch Rack, Server Rack)
The ear brackets alone cannot support this product without the support angles. ⚫ The mass of each unit is about 57 kg for the BU5002R, about 31 kg for the BU3002R, and about 30 kg for the BU3002RH. - Page 33 BU3002RH, so the explanation is given for the BU3002RH. When installing onto the rack, first remove the battery from the main unit. At the time of shipment of the BU5002R, the UPS main unit and the battery are packaged separately, so the battery is not in the main unit.
- Page 34 Place the UPS on the support angles, push it in all the way to the back (), and securely fix the ear brackets onto the server rack using the provided 2 fixing screws for EIA/JIS rack (M5). () The remaining 6 fixing screws for EIA/JIS rack (M5) are not used. BU5002R/BU3002R/BU3002RH...
- Page 35 The fixing flat-head screws for JIS rack (M5) are not used. Remove the battery. See “4-4 Replacing the battery” for the procedure for removing the battery. Securely fix the 12 mounting nuts for EIA rack (M5) onto the server rack. () BU5002R/BU3002R/BU3002RH...
- Page 36 Support angle (L) Support angle (R) Securely fix the ear brackets on the right and left side faces of the UPS using the provided 8 ear bracket mounting flat-head screws (4 pcs x 2). () BU5002R/BU3002R/BU3002RH...
- Page 37 Place the UPS on the support angles, push it in all the way to the back (), and securely fix the ear brackets onto the server rack using the 4 provided EIA/JIS rack fixing screws (M5). () After fixing, install the battery. See “4-4 Replacing the battery” for the installation procedure. BU5002R/BU3002R/BU3002RH...
-
Page 38: Stationary Installation
⚫ When installing vertically, be sure to use the stand for vertical layout provided with the product. Remove the battery when moving the unit. ⚫ If not removed, because of the heavy object, there is a risk of injury by dropping the product, or by the sheer weight of the product. BU5002R/BU3002R/BU3002RH... - Page 39 When installing the rubber feet, first remove the battery from the main unit. At the time of shipment of the BU5002R, the UPS main unit and the battery are packaged separately, so the battery is not in the main unit.
- Page 40 When installing in the vertical layout, first remove the battery from the main unit. At the time of shipment of the BU5002R, the UPS main unit and the battery are packaged separately, so the battery is not in the main unit.
- Page 41 Remove the battery. See “4-4 Replacing the battery” for the procedure for removing the battery. Stand the UPS upright. See “2-2 Installation” for the installation orientation. Be careful not to overturn the UPS without a battery because the center of gravity of the UPS is shifted upward. BU5002R/BU3002R/BU3002RH...
- Page 42 The hole diameter for fixing the stands for vertical layout to the floor surface is 8 mm. The bolts are to be provided by the customer. After fixing, install the battery. See “4-4 Replacing the battery” for the installation procedure. BU5002R/BU3002R/BU3002RH...
-
Page 43: Connecting The Equipment
⚫ The output voltage can be set from the LCD menu by [3. Settings] - [In/Out Settings] - [O/P Voltage]. ⚫ The upper limit of capacity changes in 100 V output mode. BU5002R: 2500VA/2250W BU3002R/BU3002RH: 1500VA/1350W ⚫ In 100 V output mode, it is not possible to switch to bypass operation. -
Page 44: Connecting Devices To The Ac Output (Ac Receptacle) (Bu5002R Only)
Connect devices you want to back up to the AC output receptacles of the UPS. • If you need more output receptacles than those of the UPS, supply additional output receptacles. <Example of connection for BU5002R> 2-3-2 Connecting a device to the AC output (AC receptacle) (BU3002R only) - Page 45 (IEC60320 C19) Connect it directly. Connect it directly. Plug of a device to connect Plug of a device to connect The BUX3002RP (option) is available for the BU3002R as a clamp for preventing pullout of plugs of connected devices. BUX3002RP BU5002R/BU3002R/BU3002RH...
- Page 46 The separate output overcurrent protection switches of group B and group C are activated to turn the switch off in the event of an excess current flowing. In this case, after removing the cause, press the switch that had tripped to cancel it. BU5002R/BU3002R/BU3002RH...
-
Page 47: Connecting A Device To The Ac Output (Terminal Block) (Bu5002R, Bu3002R Only)
⚫ To prevent a fire, connect an emergency stop switch (ESD) rated 30 A or more to the BU5002R, and 20 A or more to the BU3002R/BU3002RH. (When this unit is used as a conforming product of UL standards, follow the National Electrical Code, and ANSI/NFPA 70) ⚫... - Page 48 2 Installation and connection 2-3 Connecting the equipment Remove 1 M3 screw and detach the terminal block cover. <BU5002R> <BU3002RH> There is a cap attached to the cable clamp of the terminal block cover, so remove the cap by pressing with a screwdriver or the like, to form a hole through which the wires can pass.
- Page 49 <BU3002RH> When installing the G terminal of the G terminal: Connect to earth wire BU5002R, pass it below the L1 and L1 terminal: Connect to line wire L2 wires, and arrange the wiring L2 terminal: Connect to neutral wire horizontally.
-
Page 50: Connecting To A Computer
<BU5002R> <BU3002RH> For the BU5002R, the BUX5002RH (option) that is compatible with wire diameters from 7 mm to 12 mm is available, and for the BU3002RH, the BUX3002RH (option) that is compatible with wire diameters from 9 mm to 15 mm is available. -
Page 51: Connecting The Ac Input
⚫ There is a risk of an electric shock. ⚫ The AC input plug of the unit is wired as shown in the following figure. BU5002R input plug (NEMA L6-30P) BU3002R input plug (NEMA L6-20P) (viewed from the pin direction) -
Page 52: Connecting To The Ac Input Terminal Block (Bu5002R/Bu3002Rh)
You can perform “3-2 Checking the operation” on page 76 also before charging the battery. 2-4-2 Connecting to the AC input terminal block (BU5002R/BU3002RH) Warning Do not carry out any operations involving connection to the terminal block of the unit while the input plug is connected to the commercial power supply ⚫... - Page 53 When using BU5002R, as a conforming product of UL standards, using the AC input plug that is connected at the time of shipment, use in 4660 VA/4200 W or less.
- Page 54 Crimp the specified round terminal onto each wire and tighten it using the screw on the terminal block. (See Figure 2) Figure 1 <BU5002R> <BU3002RH> Figure 2 Crimp the round terminal onto the wire rod to be connected to the terminal block.
- Page 55 <BU5002R> <BU3002RH> When installing the G terminal of the G terminal: Connect the ground BU5002R, pass it below the L1 and wire L2 wires, and arrange the wiring L1 terminal: Connect the line horizontally. L2 terminal: Connect the neutral line...
- Page 56 Tighten the plastic part of the cable clamp and fix the wire. Then fasten the terminal block cover of the output cable to the main unit. For the BU5002R, the BUX5002RH (option) that is compatible with wire diameters from 7 mm to 12 mm is available, and for the BU3002RH, the BUX3002RH (option) that is compatible with wire diameters from 9 mm to 15 mm is available.
-
Page 57: Connecting The Expansion Battery Unit
⚫ There is a risk of smoke generation and ignition if 4 or more are connected. Detach the battery expansion connector cover on the back of the UPS unit. Remove the 2 screws on the battery expansion connector cover when detaching. • BU5002R Expansion battery connector cover • BU3002R Expansion battery connector cover •... - Page 58 Connect the connecting cable of the expansion battery unit to the battery expansion connector on the back of the UPS unit (). Then, fix the connector cover that has been removed (). • BU5002R Expansion battery unit: BUM5002R ...
- Page 59 It is necessary to remove the cover in order to turn the switch ON. After turning the switch ON, either store the cover so that it is not lost, or install the cover on to the UPS again with the switch turned ON. BU5002R/BU3002R/BU3002RH...
-
Page 60: Checking And Starting The Operation
ON output is OFF Orange Battery mode LED In backup operation Not in backup with battery operation Battery replacement Battery replacement Battery replacement required due to not required battery deterioration or end of life of the battery or UPS BU5002R/BU3002R/BU3002RH... -
Page 61: Switch
Move the selected cursor downward or decrease the value. • Return to the menu ESC switch • Cancel • Stop the buzzer sound (Hold down for 0.5 seconds or longer) Enter switch Select the menu item or determine the value. BU5002R/BU3002R/BU3002RH... -
Page 62: Buzzer Sound
(page 66) For the condition for sounding the buzzer, you can set to OFF during backup operation or Always OFF. In the LCD menu, set the condition by selecting [3:Settings] - [Local Settings] - [Audible Alarm]. BU5002R/BU3002R/BU3002RH... -
Page 63: Status Screen On The Lcd
An icon representing the status of the UPS is displayed. See “3-1-7 How to interpret icons, LED, and buzzer sounds” (page 66). ■ Text displayed on top/bottom Messages indicating the status or prompting user action are displayed in conjunction with the icons. BU5002R/BU3002R/BU3002RH... - Page 64 ■ Load level The load level gauge displays the connected capacity of the connected devices as a percentage. The maximum connected capacity is shown as 100%. BU5002R: 5000 VA/4500 W indicated as 100% BU3002R: 3000 VA/2700 W indicated as 100% BU3002RH: 3000 VA/2700 W indicated as 100% ■...
-
Page 65: Status Screen Example
3 Checking and starting the operation 3-1 Names and functions of each part of the operation and display sections ■ Number of expansion battery units The number of expansion battery units connected to the UPS is displayed. BU5002R BU3002R BU3002RH Expansion battery unit... -
Page 66: How To Interpret Icons, Led, And Buzzer Sounds
ECO mode. ■ In test operation ○: ON, ●: OFF Symbol Text Icon Buzzer Output Charge displayed Description Solution status on top OFF/di Test A self-diagnostic test is in ○ ○ ● None schargi Test mode mode process. BU5002R/BU3002R/BU3002RH... - Page 67 ● intervals Dischar Battery low low. Output stops by shutting of 1 ging soon. them down seconds (end processing). Output stopped due to Battery Charge the ● ● ● None low battery (displayed empty battery. for a few seconds). BU5002R/BU3002R/BU3002RH...
- Page 68 Note: You can check the input AC I/P The AC input voltage by abnormal selecting “1. frequency is high. Measurements ” - “Input/Output AC I/P The AC input Meter” in the abnormal frequency is low. LCD menu. BU5002R/BU3002R/BU3002RH...
- Page 69 40°C or less. high. ○ ○ ○ Battery Intermittent, The battery is Check the Charging is discon at intervals (Note Fault-E10 battery cable (Note (Note (Note stopped nection of 2 seconds connected. connection. Note 1: Varies depending on the operational status. BU5002R/BU3002R/BU3002RH...
- Page 70 Meter”. voltage is low, so if continued in normal ○ ○ Battery operation, it will ● Continuous voltage Fault-E4 (Not (Not change to bypass Disch e 1) e 1) operation, and if in arging backup operation output will stop. BU5002R/BU3002R/BU3002RH...
- Page 71 Contact the and output stops shop of purchase. in the case of backup operation. Intermitt ent, ○ ○ Fault-E1 The life of the UPS ● Replace the UPS. (Note (Note life intervals Discha has expired. of 0.2 rging seconds BU5002R/BU3002R/BU3002RH...
- Page 72 (Note 1) Fault-E4 Battery undervoltage Due to an error in the battery charging voltage (undervoltage), the UPS shifts to bypass operation when in normal operation, and stops outputting power when in backup operation. (Note 1) BU5002R/BU3002R/BU3002RH...
- Page 73 Note 1: Commercial power is directly supplied during bypass mode. If the UPS cannot switch to the bypass mode, or if a power outage has occurred while in bypass operation (AC input OFF), the LCD may display 2 types of message at maximum. BU5002R/BU3002R/BU3002RH...
-
Page 74: Text Displayed At Bottom
To change the language setting from Japanese to English with the "Standard" menu type, for example, follow the procedure below. Connect the AC input cable to the power outlet, and press the switch. Select [3.Settings], and press the switch. Select [Local Settings], and press the switch. BU5002R/BU3002R/BU3002RH... -
Page 75: Calendar Settings
Press the [ESC] switch, and check that the language has changed. 3-1-10 Calendar settings At the time of shipment of the BU5002R, the main unit and the battery were packaged separately, so the internal clock is not set. Also with the BU5002R/BU3002R/BU3002RH, when the battery is replaced with no AC input, likewise it becomes unset. -
Page 76: Checking The Operation
The UPS is shipped fully charged, but the backup time may be shortened due to self-discharge as a result of long-term storage, so it is recommended to charge the UPS before use. BU5002R/BU3002R/BU3002RH... - Page 77 In backup mode due to a power Intermittent, outage or an AC input fault. 1 second The residual battery capacity is intervals low, so output will stop soon. The residual capacity of the battery has been depleted, so None output has stopped. BU5002R/BU3002R/BU3002RH...
- Page 78 The status display returns to the original status, and the buzzer sound stops (the status becomes as follows). Icon Description The “Power” switch is in ON status. The UPS is operating normally. This completes the operation checks. This completes all of the installation and connection. BU5002R/BU3002R/BU3002RH...
-
Page 79: Basic Operations Including Running And Stopping The Ups
>”, the operation mode changes to backup operation and the self-diagnosis test is automatically executed for 10 seconds. When the battery voltage is low, the self-diagnosis test is not carried out. The self-diagnosis test starts automatically after the battery is charged. BU5002R/BU3002R/BU3002RH... - Page 80 When a power outage or an input power fault occurs, operation is automatically switched to back up operation, and power output continues using electrical power from the battery (this is referred to as “backup operation”). During backup operation, the screen becomes the battery mode as follows. Backup operation state (battery mode screen) BU5002R/BU3002R/BU3002RH...
- Page 81 If you do not want to activate the connected devices, either turn off their switches or disable the automatic start setting for recovery from a power outage ([3. Settings] - [Boot Settings] - [Auto Reboot]). BU5002R/BU3002R/BU3002RH...
- Page 82 At the same time, the icon changes to “ ”. In addition, the power output from the UPS stops. Even if the “Power” switch is turned off, as long as AC power is supplied from the commercial power supply, the battery is charged automatically. BU5002R/BU3002R/BU3002RH...
-
Page 83: Operations Using The Lcd Menu
3-4 Operations using the LCD menu 3-4-1 UPS setting menu Selected item is highlighted Menu title Scroll bar Menu list The selected item is highlighted. Popup window This dialog box is displayed when additional information or confirmation is required. BU5002R/BU3002R/BU3002RH... - Page 84 3-4 Operations using the LCD menu ■ Basic operations on the menu screen Switch Description [▲] [▼] Move the cursor up/down, increase/decrease the selected value Select the menu item or determine the value [ESC] Return to the menu, cancel BU5002R/BU3002R/BU3002RH...
-
Page 85: Lcd Menu Item List
Total: 0 to xxxx kWh and the number of elapsed Period: 0 to xxxx days days. Average Power Usage Displays the average of the Average power usage: amounts of electric power 0 to xxxx Wh used so far. BU5002R/BU3002R/BU3002RH... - Page 86 Auto OFF 3 minutes LCD Test ☆ Checks if the LCD and Execute LCD test LEDs turn on. Audible Alarm Sets the conditions for the Buzzer setting: ON (factory buzzer to sound. default), OFF during backup operation, Always OFF BU5002R/BU3002R/BU3002RH...
- Page 87 208 V, 220 V, 230 V, 240 V, 100 V Frequency Switches the frequency Frequency range: Advanced Range ☆ range mode. Normal range (factory default), Wide range (Note 1) ECO Mode ☆ Switches to the Eco mode. Enable, Disable (factory default) (Note 2) BU5002R/BU3002R/BU3002RH...
- Page 88 The time to stop the output of OFF delay: 0 to 9 seconds Segments(C) "power supply output" group OFF delay: 0.0 to 0.9 minutes C can be accelerated. OFF delay: 0 to 30 minutes (Factory default: 0 seconds) (Note 3) BU5002R/BU3002R/BU3002RH...
- Page 89 Warning ☆ battery warning can be 30% (factory default), detected. Change the level: 0 to 100% BSsignal Sets the condition for BS BS signal valid range: ValidRange ☆ Contact signal reception. Always enabled (factory default), Only for backup operation BU5002R/BU3002R/BU3002RH...
- Page 90 UPS shutdown. Year/month/day/hour/minute, message AC input Log Displays up to 10 logs of AC input log: events that occurred in the Year/month/day/hour/minute, past. message Reset All Log Data Clears each piece of log Executes Reset All Log Data data. BU5002R/BU3002R/BU3002RH...
- Page 91 (BS) of the contact signal. * When the shutdown software is used with the RS-232C connector connected to the cable, mode A operates regardless of the settings. (1) When the UPS is stopped by BS signal after occurrence of a power outage BU5002R/BU3002R/BU3002RH...
-
Page 92: Charging The Battery
3-6 Measuring the initial value of backup time ● The initial backup time value measured in your environment of use can be used as a guide when checking the battery and deciding the shutdown software setting values. “4-3. Measuring the backup time” → Page 96 BU5002R/BU3002R/BU3002RH... -
Page 93: Recharging The Battery
(If a power outage occurs immediately after the start of charging, backup stops immediately.) Charge the battery as described in “3-5 Charging the battery”. Preparation for starting operation is now complete. BU5002R/BU3002R/BU3002RH... -
Page 94: Maintenance And Inspection
(factory default), At startup/every 4 weeks, Disable * This test can also be performed from the shutdown software. Refer to the instruction manual of the shutdown software for a detailed explanation. The instruction manual can be downloaded from the following website. URL:https://www.oss.omron.co.jp/ups/support/download/ups.html BU5002R/BU3002R/BU3002RH... -
Page 95: Checking The Battery
• When comparing the initial value of backup time measured by the customer and the current backup time, it is not possible to make an accurate judgment unless the capacity of the devices connected to the UPS is the same as that when the initial value was measured. BU5002R/BU3002R/BU3002RH... -
Page 96: Measuring The Backup Time
Do not conduct measurement if there is a possibility of a failure when the power supply stops. Every time an expansion battery unit is connected, the charging time is increased by 16 hours for each unit. BU5002R/BU3002R/BU3002RH... -
Page 97: Estimated Backup Time
● Backup time graph (this is a graph for the initial value of a new product, with properties at 25°C.) If the temperature is lower then the backup time is shorter than the value on the graph (table) below. ● If the capacity of the connected devices is smaller then the backup time becomes longer. BU5002R/BU3002R/BU3002RH... - Page 98 4 Maintenance and inspection 4-3 Measuring the backup time BU5002R Backup time graph (initial value for a new product. Graph with properties at 25°C) 1000 One expansion battery unit Two expansion battery units Three expansion battery units 1000 1500 2000...
- Page 99 900 1000 1350 1500 2000 2500 2700 Backup No expansion 12.4 10.6 time battery unit (min) 1 expansion battery unit 2 expansion 1509 439 battery units 3 expansion 2023 614 battery units * The maximum connection capacity when set to 100 V output is 1,350W. BU5002R/BU3002R/BU3002RH...
-
Page 100: Replacing The Battery
⚫ There is a risk that an injury could be caused if it falls. Do not insert metal parts into the battery connector. Do not short-circuit the connector terminals. ⚫ There is a risk of electric shock, fire, or injury. ⚫ Electric energy remains inside used batteries. BU5002R/BU3002R/BU3002RH... - Page 101 * When an input power error such as power outage occurs during battery replacement while the unit is operating, the backup process is disabled and output stops. * Do not replace the battery during the backup operation. It will stop the output. BU5002R/BU3002R/BU3002RH...
-
Page 102: Notification That The Battery Needs To Be Replaced
⚫ The battery deteriorates even if it is stored. Note that as the temperature is increased the life rapidly shortens. 4-4-2 Battery replacement method BU5002R Loosen the 4 screws () on the front panel of the UPS, and remove the front panel (). - Page 103 (). Remove the 2 screws that are fastening the battery cover (). Press the battery cover gently to the right side, then pull forward to remove the cover (). Battery cover BU5002R/BU3002R/BU3002RH...
- Page 104 After replacing the battery, execute the self-diagnosis test. The self-diagnosis test can be performed automatically from the LCD menu of the unit by selecting [2. Control] - [Start Function Test]. After the self-diagnosis test has been completed, the status automatically returns to the normal operational status. BU5002R/BU3002R/BU3002RH...
- Page 105 Loosen the 4 screws () on the front panel of the UPS, and remove the front panel (). Press the clip that locks the battery connector (), and pull off the connector while holding the battery connector (). BU5002R/BU3002R/BU3002RH...
- Page 106 * If replacing while the operation is stopped, a “clicking” sound is heard when the connector is connected, but there is no problem. Attach the battery cover with the 2 screws. Attach the front panel of the UPS with the 4 screws. BU5002R/BU3002R/BU3002RH...
- Page 107 After replacing the battery, execute the self-diagnosis test. The self-diagnosis test can be performed automatically from the LCD menu of the unit by selecting [2. Control] - [Start Function Test]. After the self-diagnosis test has been completed, the status automatically returns to the normal operational status. BU5002R/BU3002R/BU3002RH...
-
Page 108: Replacing The Fan
⚫ The fan rotates when the AC input is connected. ⚫ Check that the fan has stopped. Notes When the unit is used as a conforming product of UL standards, do not replace the fan. ⚫ The fan replacement function does not comply with the UL standard. BU5002R/BU3002R/BU3002RH... -
Page 109: Fan Replacement Procedure
* Do not start the replacement operation until you have checked that the power to the UPS is OFF, and that the fan has stopped. <BU5002R> Replacement fan: BUF5002R Remove the screw fixing the cover of the fan connector using a Phillips screwdriver () and remove the cover of the fan connector. - Page 110 Fan bottom surface Installation facing outside Insert the fan connector until a “clicking” sound is heard. () The pin of the connector is easily bent, so take care. Fix the cover of the fan connector with 1 screw. () BU5002R/BU3002R/BU3002RH...
- Page 111 Remove the four screws. Pull the fan to the front in order to take it out (). While pressing the tab of the connector to which the fan is connected (), pull out the connector. () BU5002R/BU3002R/BU3002RH...
- Page 112 Fully insert the connector of the new fan until a “clicking” sound is heard. () Insert the fan into the main unit (). Fix the fan on the back of the UPS unit with 4 screws using a Phillips screwdriver. Attach it with four screws. BU5002R/BU3002R/BU3002RH...
-
Page 113: Cleaning The Unit
Stop all the connected devices and the UPS and unplug the “AC input” plug from the power outlet (commercial power supply) before wiping off the dust. Wipe off the dust with a dry cloth, and then connect again. (For information on the connection procedure:) “2-3 Connecting the equipment” → page 43 BU5002R/BU3002R/BU3002RH... -
Page 114: Using The Shutdown Software
Software” are available. Choose which one to download and use according to your preference of usage. Refer to the following website for details about compatibility. URL:https://www.oss.omron.co.jp/ups/product/soft/soft.html If downloading Power Act Pro, refer to the document for download which comes with the UPS. BU5002R/BU3002R/BU3002RH... -
Page 115: Contact Signal
UPS with a sufficient battery level to prepare for the next occurrence of a power outage. On this UPS, the standard contact signal I/O port and the optional relay output type contact I/O card (SC08) contact signal input output can be used. BU5002R/BU3002R/BU3002RH... -
Page 116: Signal Output
The UPS can be operated or stopped in accordance with contact ation an externally connected contact point or the ON/OFF point status of an open contact circuit. The connection terminal has contact signal input output Oper Open connector pin numbers 6-7. ates Closed Stops BU5002R/BU3002R/BU3002RH... -
Page 117: Contact Signal I/O Connector (Dsub9P Female)
DC 5 to 24 V Voltage that can be applied: Low (OFF) DC 0.5 V or less DC 35 V or less Maximum current: 50 mA ● Remote ON/OFF Voltage between terminals: DC 8 to 16 V Current when closed: max. 15 mA BU5002R/BU3002R/BU3002RH... -
Page 118: Contact Signal Circuit Inside The Ups
6 Contact signal 6-1 Contact signal 6-1-6 Contact signal circuit inside the UPS 2.5 k +12 V Remote ON/OFF + Remote ON/OFF - BU5002R/BU3002R/BU3002RH... -
Page 119: Examples Of Use Of Contact Signal Circuits
A relay output type contact signal card is available for separate purchase. It can be loaded into the option slot on the back of the UPS. For details refer to our website. (https://www.oss.omron.co.jp/ups/) • Contact signal card (relay output type) -
Page 120: Using An Optional Card
The procedure for the contact I/O card is the same. Turn OFF the “Power” switch and turn off the commercial power supply. Remove the 2 screws, and remove the cover. <BU5002R> <BU3002R/BU3002RH> Carefully insert the optional card and securely tighten the 2 screws. -
Page 121: Optional Card
On this UPS, the standard contact signal I/O port and the optional relay output type contact I/O card (SC08) contact signal input/output can be used. BU5002R/BU3002R/BU3002RH... -
Page 122: Overview Of Network Card (Sc21) And Snmp/Web Card (Sc20G2)
○ Equipped with a standard MIB (RFC1628) and a proprietary MIB (swc mib) ○ Using JAVA applet to monitor the power supply status ○ UPS error notification function For details, refer to the instruction manual of the network card or the SNMP/Web card. They can be downloaded from our website (https://www.oss.omron.co.jp/ups/support/download/ups.html). BU5002R/BU3002R/BU3002RH... -
Page 123: Troubleshooting
UPS is faulty. nt sound Contact the shop of purchase. 0.5-seco ON/Disc Fault-E20 A breakdown of an Operation continues but the UPS is harging internal component or faulty. Contact the shop of intermitte internal circuit has been purchase. nt sound detected. BU5002R/BU3002R/BU3002RH... - Page 124 UPS switches to bypass operation. (note 1). Continuo OFF/dis Fault-E12 An abnormal battery The UPS is faulty, so contact the us sound chargin Battery Over temperature was shop of purchase. temp detected during backup operation. Output will stop. BU5002R/BU3002R/BU3002RH...
- Page 125 8 hours or more. If expansion battery units are connected, more charging time is required. (24 hours when 1 expansion unit is connected, 40 hours when 2 are connected, and 56 hours when 3 are connected) BU5002R/BU3002R/BU3002RH...
- Page 126 (AC input OFF), output will stop. Note 2: A maximum of 2 types of message may be displayed alternately on the LCD. Note 3: The output varies depending on the circumstances (charging, LCD display message). BU5002R/BU3002R/BU3002RH...
-
Page 127: Reference Documents
Reference documents A. Specifications Reference documents A. Specifications Model number BU5002R BU3002R BU3002RH Operation method Full-time inverter power supply method Rated input voltage. AC 200 V/208 V/220 V/230 V/240 V input Start-up voltage range *1 AC 166 V to 288 V±3 V (at rated load) *2 Input voltage range *3 AC 176 V to 278 V±3 V (at rated load) *4... - Page 128 Reference documents A. Specifications Model number BU5002R BU3002R BU3002RH Number of phases Single phase 2 wires output Output receptacle NEMA L6-30R × 2/terminal C19 (female) × 2, Terminal block (backup) block C13 (female) × 8 Battery Expected life of sealed...
-
Page 129: External Dimensions
Reference documents B. External dimensions B. External dimensions Units: mm, tolerances: ±2 mm ■BU5002R ■BU3002R/BU3002RH BU5002R/BU3002R/BU3002RH... - Page 130 Reference documents B. External dimensions ■ Stands for vertical layout <BU5002R> Six, 8 dia. 130.5 <BU3002R> Four, 8dia. BU5002R/BU3002R/BU3002RH...
- Page 131 Reference documents B. External dimensions <BU3002RH> Four, 8 dia. BU5002R/BU3002R/BU3002RH...
- Page 132 Reference documents B. External dimensions ■ Rubber feet <BU5002R> 21.5 Attach the 6 rub b er feet <BU3002R/BU3002RH> 21.5 Attach the 6 rub b er feet BU5002R/BU3002R/BU3002RH...
- Page 133 Reference documents B. External dimensions ■ Support angle M IN .555 M AX.895 Rack installation external dimensions 557~891 <BU5002R> 4 50 <BU3002R/BU3002RH> BU5002R/BU3002R/BU3002RH...
-
Page 134: Battery Life
50% after 1 year (the battery capacity becomes smaller). The higher the storage temperature, the faster the speed of self-discharge. Storage temperature Auxiliary charging interval 40°C or lower 2 months 30°C or lower 4 months 25°C or lower 6 months BU5002R/BU3002R/BU3002RH... - Page 135 The English translation is for reference purposes only. In the event a difference arises regarding the meaning herein, the original Japanese version shall prevail as the official authoritative version. K1M-D-20006A...