Table of Contents
Advertisement
Quick Links
Uninterruptible Power Supply UPS
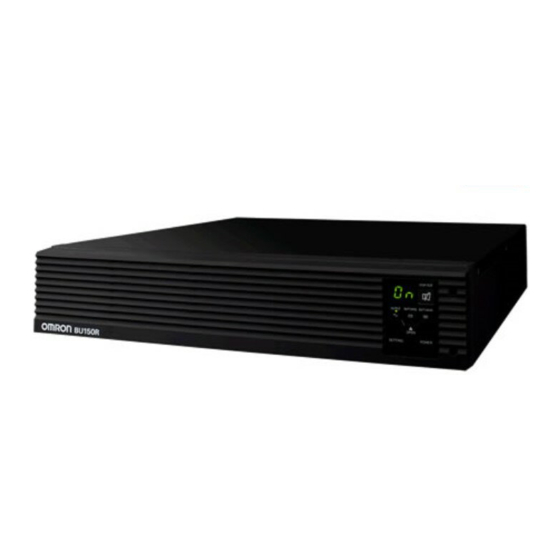
BU150R
Instruction Manual
This manual provides important safety-related information. Thoroughly read and understand this
manual before installing and using the product.
Keep this manual in a convenient location so that you can refer to it whenever necessary.
The contents of this manual are subject to change without notice.
The warranty is included with the product.
Advertisement
Table of Contents

Related Manuals for Omron BU150R


Summary of Contents for Omron BU150R
- Page 1 Uninterruptible Power Supply UPS BU150R Instruction Manual This manual provides important safety-related information. Thoroughly read and understand this manual before installing and using the product. Keep this manual in a convenient location so that you can refer to it whenever necessary.
-
Page 2: Introduction
Introduction Features of this product Thank you for purchasing Omron's Uninterruptible Power Supply (UPS). The UPS protects computers and other devices from power failures, voltage variations, instantaneous voltage drops, and surge voltage such as that caused by lightning (a phenomenon in which extraordinary high voltage occurs instantaneously). -
Page 3: Important Safety Instruction
The names of other companies and products mentioned herein are the trademarks or registered trademarks of their respective owners. © OMRON Corporation. 2016 All Rights Reserved IMPORTANT SAFETY INSTRUCTION 1. SAVE THESE INSTRUCTIONS. This manual contains important instructions for BA75T/BA100T/BA100R that should be followed when using the UPS and batteries. -
Page 4: Procedure From Installation To Operation
We recommend charging the UPS before using it. Operate 3. Check and start operation Perform maintenance and inspection Perform maintenance and inspection The battery must 4.1 Checking the battery be replaced Replace the battery 4.2 Replacing the battery BU150R... -
Page 5: Table Of Contents
3-5-2 Settings ..........................55 Maintenance and Inspection .............. 61 Checking the battery ..................61 4-1-1 Battery life expectancy ....................... 61 4-1-2 Self-diagnosis test ......................61 4-1-3 How to measure backup time .................... 62 4-1-4 Estimated backup time ...................... 63 BU150R... - Page 6 7-3-1 Main features ........................93 7-3-2 Specifications........................94 Connecting the battery unit ..............95 Connecting the battery unit................95 Troubleshooting ................. 97 Troubleshooting ....................97 References ..................99 10-1 Specifications ....................99 10-2 Dimensions ....................101 10-3 Battery life ..................... 105 BU150R...
-
Page 7: Safety Precautions
This is a Class A product based on the standard of the VCCI Council. If this equipment is used in a domestic environment, radio interference may occur, in which case, the user may be required to take corrective actions. BU150R... - Page 8 There is a danger of an electrical shock or electric leak. Provide secure grounding. Connect the terminal to a commercial power source and ground it. A failure or leak that occurs when the unit is not properly grounded may result in electric shock. BU150R...
- Page 9 Leave at least 5 cm of space between the vent and the wall. When installing the unit on a rack, place it on the lowermost shelf. Injury may result if the unit falls. BU150R...
- Page 10 Using the unit under such conditions may cause a fire. If you notice such a condition, stop using the unit and contact us for inspection and repairs. A readily accessible disconnect device shall be incorporated external to the equipment. BU150R...
- Page 11 Do not insert metal objects into the power supply output receptacle of the UPS. Doing so may result in electric shock. Do not insert metal objects into the battery connectors. Do not short between the connector terminals. Doing so may result in electric shock. BU150R...
- Page 12 Remove the connection from ground if any part of the battery is determined to be grounded. Servicing of batteries should be performed or supervised by personnel knowledgeable of batteries and the required precautions. Keep unauthorized personnel away from batteries. BU150R...
- Page 13 This is to ensure that the unit is used in line with the conditions described in the included documentation. This manual contains important safety-related information. Please read and understand the contents of the manual before beginning operation. BU150R...
- Page 14 Turn OFF the unit's "Power" switch when storing it. Do not install or store the unit in a place exposed to direct sunlight. The rise of temperature may cause the built-in battery to deteriorate rapidly and become unusable. BU150R...
-
Page 15: Preparation
Checking the contents Check whether all the package contents are included and there is no damage found on their appearance. If you should notice defects or anything wrong, contact us; OMRON Electronic Systems & Equipments Customer Support Center. Connection cable (RS232C) - Page 16 19-Inch racks Label (How to Battery Serial number Product support angle determine replacement label warranty operating date label (2 per set) (Japanese) status) Registration User Precautions Guidance for Shutdown post card registration (Japanese/Eng replace software guide guide lish/Chinese) service (Japanese) BU150R...
-
Page 17: Related Products
4 pcsof long life type b) Nominal voltage of total battery string: 24VDC c) Nominal capacity of total battery string: 34W Replacement Expansion SNMP/Web Contact signal battery pack battery unit card I/O card Replacement Cable Retaining (UPS service) cable clamp BU150R... -
Page 18: Name Of Each Part
“3 Check and start operation” (P.33) that provides the details. ■Front view Air vent Operation panel <Enlarged view of the operation panel> A: Status indicator E: “Setting switch” B: “Power supply output” LED F: “Power” switch C: “Battery mode” LED G: “Buzzer Pause/Test” switch D: “Battery replacement” LED BU150R... -
Page 19: Rear View
C: RS232C port J: Power supply output receptacle A D: Remote ON/OFF port K: Power supply output receptacle B E: Air vent L: Power supply output receptacle C F: Ground terminal M: Hole for retaining cable clamp G: Battery expansion connector BU150R... -
Page 20: Diagram Of The Input/Output Circuit Block
(high power Noise input (sine factor filter wave) Input Power converter) overcurrent supply protection relay Output switching (4 ms. max.) Step-up converter Control Power supply Charging circuit switch circuit At startup/capacity exceeded/error Battery During Line mode During Battery mode BU150R... -
Page 21: Installation And Connection
The UPS permits the following installing methods. Choose the one best suited for the environment. Correct Positions Ba careful not to get your fingers caught when arranging the unit. Note: Upright stand is necessary for this position. (Air vents are facing upward) BU150R... - Page 22 2 Installation and connection 2-1 Installation Incorrect Positions BU150R...
-
Page 23: Rackmount Installation (Eia/Jis 19-Inch Rack/Server Rack)
Rack rail (rear) Ear brackets Rail length fixing screws (M4 x 8) Ear bracket mounting flat-head screws (M3 x 6) EIA/JIS rack fixing screws (M5 x 16) JIS rack fixing flat-head screws (M5 x 14) EIA rack fixing nuts (M5) BU150R... - Page 24 (R). The rear rack rails are same. Rack rail (rear) Rackrail (front) ① ① 4 rail length fixing screws Adjust the length of support angles to suit the server rack, and then securely tighten the screws that were half-tightened in step 1. (②) BU150R...
- Page 25 ③ Support angle Adjust the length to ② suit the server rack and ② tighten securely ③ Rack fixing screws Server rack BU150R...
- Page 26 2 included EIA/JIS rack fixing screws (M5) to securely fasten the ear brackets to the server rack. (⑥) ⑤ Push completely in Use the unit fixing ⑥ screws to fasten * Be sure to use the support angles. BU150R...
-
Page 27: Stationary Installation
Make sure that this product does not slide or fall. ■Upright installation Attach the rack stands for vertical layout provided with the product to the UPS unit on the left and right sides with M4 binding head 4 screws. Stand for vertical layput BU150R... -
Page 28: How To Connect Devices To Back Up
Group C NEMA5-15R 2 (rated capacity15A) Disconnect the AC Input Plugs of all devices you want to back up such as your PC and modems from a wall outlet (commercial power source). Computer peripheral devices Wall outlet (commercial power source) BU150R... - Page 29 See also "5 To perform shutdown processing of the devices" ( P.77 ) and "6 The contact signal functions" ( P. 84 ). Note: If you do not use the UPS monitoring software and Contact Signal, this step is not required. BU150R...
- Page 30 C ■Fixing power cables A connected power cable can be fixed with a retaining clip (BUX150R) provided as an option. This clip prevents an input plug from being detached in such a case as when the cable is pulled. BU150R...
-
Page 31: Connecting The Ac Input
We recommend charging the battery before using the UPS. "3-2 Checking the operation" ( P.40 ) can be performed also before charging the battery. BU150R... - Page 32 Confirm the colors of the wires and fix with screws as shown in the figure. Tighten with the tightening torque 1.57 Nm. Tightening with a torque other than the specified torque may lead to fire or burns. N: White wire L: Black wire FG: Green wire BU150R...
-
Page 33: Check And Start Operation
Backup is operating. Backup is not mode" LED This status is called operating. "Battery Mode". "Battery Battery replacement is Battery replaceme necessary due to the replacement is nt" LED battery deterioration or not necessary. the end of battery life. BU150R... -
Page 34: Switch
UPS stops. Additional Information: If the AC input is connected to the commercial power source, then the battery will be charged regardless of the "Power" switch. Buzzer Pause/ Stop the beeper by pressing for 0.5 seconds or Test switch longer BU150R... -
Page 35: Setting Switch
●Setting for beeper sound in the event of power failure, etc. ("Setting" switch 1) Factory setting: OFF OFF:The beeper sounds when an alarm is necessary. ON:The beeper does not sound for backup operation or battery replacement. The beeper sounds for other errors (connection capacity exceeded, operation error, etc.). BU150R... - Page 36 AC input. ON: Mode B After UPS stopped, the UPS is automatically started in the AC input's "OFF to ON" timing that is detected. (Definition of AC input OFF: When AC input is OFF for 1 second or more) BU150R...
- Page 37 Starts up when BS signal turns OFF BS signal Power output (Setting switch 4 OFF: Starts up when AC input Mode A) turns from OFF to ON Power output (Setting switch 4 ON: Mode B) For 10 seconds as a default setting. BU150R...
- Page 38 OFF: UPS start shutdown process when detecting close condition of remote input signal. ON: UPS start shutdown process when detecting open condition of remote input signal. ●AC input plug selection ("Setting" switch 8) Factory setting: OFF OFF: Use 15Aplug ON:Use 20A plug BU150R...
-
Page 39: Beep Sound
0.5second 2 second 1-second 4-second intervals: intervals: 4second 1 second ・Continuous Continuous ■Stopping the beep sound When the beep is sounding, you can stop it by pressing and holding the "STOP/TEST" switch for 0.5 seconds or longer. BU150R... -
Page 40: Checking The Operation
"Power" switch "ON" Operating normally When the battery capacity is lower than the setting, the following display appears on 7 segment LED. indicates blinking) Status Description indicator Battery charge is low, so the unit is waiting to start up. BU150R... - Page 41 If not the same as the one → "3-4 Interpreting beeps and displays" ( P.46 ) shown above must apply. Take necessary measures and then proceed to 5. Disconnect the unit's AC input from the commercial power. The unit enters Battery Mode. BU150R...
- Page 42 Reconnect the AC input to the commercial power source. Status indicator returns to its normal state and the beeping sound stops. (The status is as shown below.) Status Description indicator "Power" switch "ON" Operating normally Checking the operation is now complete. BU150R...
-
Page 43: Start And Stop Procedures And Basic Operation
Power Battery Inverter Startup Bypass Self-diagnostic operation preparation operation test a few a few about seconds seconds 15 sec. 1 sec. <Note> D-1: Display the latest UPS fault mode (If there is no record for UPS fault, UPS display the BU150R... - Page 44 When charge of the battery does not remain If a power failure or abnormal power input is resolved after the battery is discharged completely and power output is stopped, the UPS restarts automatically and resumes power output. The expended battery begins to charge. BU150R...
- Page 45 Press and release the "Power" switch of the UPS, and then the "Power" switch turns OFF. The power output from the UPS stops at the same time. Additional Information Even if you turn off the "Power" switch, if AC is supplied from commercial power, the battery is automatically charged. BU150R...
-
Page 46: Interpreting Beeps And Displays
Simple Shutdown Software. 3-4-2 Displays and beeps while testing Power Battery Battery Status supply Chargi mode replacement Beep Description Solution indicator output lamp lamp lamp Self-diagnostic test None Dischar ―― in progress. ging NOT operation in bypass mode. BU150R... -
Page 47: Displays And Beeps During Power Failure Or Ac Input Error
(Same as 1-second Battery level is low, so Discharging above.) intervals output will soon stop. Battery is dead, so output stopped. (This Charge the None Discharging is displayed only for a battery. few seconds.) NOT operation in bypass mode. BU150R... - Page 48 AC input voltage is too high and AC None (ON) input frequency is too low. AC input frequency None (ON) is too low. AC input voltage and AC input None (ON) frequency are both too low. BU150R...
-
Page 49: Displays And Beeps When There Is An Equipment Failure
There is a problem with the UPS or the connected device. Switched to bypass operation due to Contact our sales ――― blinking Continuous abnormal rise in output voltage. (Note representative or bypass (Note 2) Omron Electronic Systems & Equipment Customer Support Center. BU150R... - Page 50 Switched to bypass operation due to Contact our sales ――― blinking Continuous abnormal drop in output voltage. (Note representative or bypass (Note 2) Omron Electronic Systems & Equipment Customer Support Center. (1) When "Power" switch is "ON" Power Battery Battery Status...
- Page 51 Note 1 In bypass operation, commercial power is output directly. Output stops when a power failure (AC input OFF) occurs in bypass operation. Note 2 The displays and operations vary according to the status. Note 3 Devices such as dryers, some solenoid valves, etc., which have a half-wave rectifier. BU150R...
-
Page 52: Display And Beep For Battery Replacement
There is a problem with the UPS. Contact our sales representative or Stopped charging due to abnormal Continuous Omron Electronic rise in battery charge voltage. Systems & Equipment Customer Support Center. Stopped charging due to abnormal (Same as Continuous drop in battery charge voltage. -
Page 53: Ups Operation Mode Settings
It is possible to set the delay time of BU signal after AC fail occur. (Setting range: 0 to 90 seconds, Default setting: 0 second) 6. Dry contact logic setting (BU,BL,TR,WB) Four types of output signal can be set On/Off (See also "6-1 Contact signal functions"). BU150R... - Page 54 The number of expansion batteries "BUM150RA" to be connected is set. Be sure to set this when using expansion batteries. If the setting is not made correctly, it may cause a drop in backup time. Setting range : 0 - 6 ( Default setting : 0 ) BU150R...
-
Page 55: Settings
The "Power" switch is turned ON while the "Buzzer Pause/Test" switch is pressed. The UPS operation mode can be set. Note: While in setting mode, output from the power supply output is OFF even if the "Power" switch is ON. BU150R... - Page 56 Shortly press the "Buzzer Pause/Test" switch (for one second or shorter) to select a parameter. When the "Power" switch is turned OFF, the setting mode quits and the unit enters "Power" switch OFF status (status Press the "Power" switch again to start up the UPS. BU150R...
- Page 57 ("BUT" setting) current setting Backup 0.1 min. Backup 0.2 min. (0.1 min. step) Backup 0.9 min. Backup 1 min. Backup 2 min. (1 min. step) Backup 10 min. Backup 20 min. (10 min. step) Backup 90 min. (next page) BU150R...
- Page 58 Charge 20% (10% step) Charge 90% Delay 0 min. BS signal delay (Default) Display ("DBS" setting) current setting Delay 0.2 min. Delay 0.5 min. Delay 1 min. Delay 2 min. (1 min. step) Delay 10 min. Disable (next page) BU150R...
- Page 59 BL signal Set and display reversed Current state of setting TR signal Current state of WB signal BL signal test Dry contact test Display TR signal test BU signal test WB signal test BS signal test Remote ON/OFF test BU150R...
- Page 60 Expansion battery unit Expansion unit count setting Display current setting Expansion battery unit 1 unit Expansion battery unit 2 units Expansion battery unit 3 units Expansion battery unit 4 units Expansion battery unit 5 units Expansion battery unit 6 units BU150R...
-
Page 61: Maintenance And Inspection
・Performed with one time per four weeks on the condition that the "Power" switch is ON When charge of the battery is not completed, the self-diagnosis test is not performed immediately. * The automatic execution of a self-diagnostic test every four weeks can be turned ON/OFF using the "Setting" switch 3. BU150R... -
Page 62: How To Measure Backup Time
Pull out the AC input plug and measure the backup time. Measure the period of time from when the UPS automatically stops until all the indicators are turned off. The backup time measured for the first time after purchasing the UPS becomes the "backup time initial value". BU150R... -
Page 63: Estimated Backup Time
Calculate the initial value of the backup time for the total capacity of the connected devices from the graph on the next page. * The smaller the capacity of connected devices becomes, the longer the backup time becomes. * The smaller the capacity of connected devices becomes, the longer the backup time becomes. BU150R... - Page 64 3 connected 1050 575 4 connected 1300 720 Backup time (min) 5 connected 1580 850 6 connected 1680 1030 710 * These backup times are for reference only. Times may vary according to battery life and external environmental conditions (temperature, etc.). BU150R...
-
Page 65: Replacing The Battery
Guidance for replace service " provided with the replacement battery pack. Additional Information When the battery replacement LED lights up/blinks and beeper sounds, press the "Buzzer Pause/Test" switch for 0.5 seconds to stop the beeper. (Lighting/blinking of "battery replacement" LED does not disappear.) BU150R... -
Page 66: Notification That The Battery Needs To Be Replaced
For the first 3 years after When 3 years or more have 30℃ starting use passed after starting use For the first 4 years after When 4 years or more have 25℃ starting use passed after starting use BU150R... -
Page 67: Procedure For Replacing The Battery
Remove the battery connectors from the cable holders. Remove the locking clip of connectors (①). Hold the battery connector, and pull the connectors apart (②). ② Hold the battery ① Remove the locking connector, and pull clip the connectors apart BU150R... - Page 68 Remove the screw on the sheet metal cover (①). Screw Sheet metal cover ① Lightly push in the sheet metal cover to the right (①) first, and pull the left side towards you to detach it (②). ② ① BU150R...
- Page 69 Hold the battery tight with both hands and be careful not to drop the battery. * To pull out the battery pack, do not take hold of its connector or cable. * Handle with care as the battery pack is heavy. Red tape Recess BU150R...
- Page 70 ・Replacement battery pack : model : BUB150RA Insert the right end of the sheet metal cover into the UPS unit (①), push the left side in (②), and attach it by sliding it to the left (③). ③ ② ① Sheet metal cover BU150R...
- Page 71 Note : You may hear a “pop” sound when you connect the battery if it is replaced after the unit’s operation is stopped, but this sound is not abnormal. ① Connect by holding ② Insert the connector’s Cable holder groove into the holder here BU150R...
- Page 72 ① Insert the clamp on the left side of the front panel into a groove on the UPS unit ② Push the right side of the front panel in ③ Tighten the two screws Battery replacement is now complete. BU150R...
-
Page 73: Replacing The Fan
Do not put your fingers into the fan. The fan spins when connecting the AC input. Doing so may result in injury. Before turn off the “Power”, disconnect the AC Input Plugs from a wall outlet (commercial power source). BU150R... -
Page 74: Fan Replacement Procedure
① Loosen the two screws with a + screwdriver Remove the 4 cooling fan screws (①) and the fan guard. Pull the fan toward you to remove it. (②) Fan guard ① ② 4Screws BU150R... - Page 75 * Make sure the cable does not become pinned under the fan's cover. * Fix so that the label on the fan unit faces the back side. ① ② Insert the fan into Fix the fan guard and the fan the UPS unit together with four screws BU150R...
-
Page 76: Cleaning
Tighten the two screws Fan replacement is now complete. Cleaning Moisten a soft cloth with water or detergent, squeeze it tightly, and wipe the product lightly. Do not use chemicals such as thinner and benzene. (They cause deformation or discoloration.) BU150R... -
Page 77: To Perform Shutdown Processing Of The Devices
If a power failure occurs and then the power is restored while auto shutdown is still in progress, UPS output will stop temporarily after the set time elapses. After shutdown is finished, do not turn on the computer until the UPS has finished restarting. BU150R... -
Page 78: Ups Monitoring Software Function List
12. Output receptacle control - ● 13. Redundant power supply - ● support 14. Remote UPS - ● management 15. Mail send - ● 16. SNMP management - ● 17. Telnet connection - - 18. SYSLOG support - ● BU150R... - Page 79 16. SNMP management UPS management information can be sent to the SNMP manager. 17. Telnet connection Settings such as shutdown parameters can be made via the Telnet connection. 18. SYSLOG support UPS management information can be recorded in SYSLOG. BU150R...
-
Page 80: The Supported Os Of The Ups Monitoring Software
・Windows 8 ・Windows Server 2012 ・Windows 7 Simple Shutdown Software ・Windows Server 2008 R2 ・Windows XP ・Windows Server 2003 ・Windows Server 2003 R2 ・Windows Vista ・Windows Server 2008 The most recent version can be downloaded from our website (http://www.omron.co.jp/ese/ups/support/download/download.html) BU150R... -
Page 81: How To Use The Ups Monitoring Software
"Simple Shutdown Software" allows you to automatically shut down the PC when a power failure occurs. It can be downloaded from our website, For more information, refer to the manual of this software. You can download the manual of this software on our homepage. http://www.omron.co.jp/ese/ups/support/download/download.html BU150R... -
Page 82: How To Connect
Connect the UPS to a computer. Cable: Included connection cable (RS232C) When connecting 2 or more computers to the UPS (Only when using PowerAct Pro) Power output Master Agent Slave Agent Slave Agent Connection cable (RS-232C) Shutdown BU150R... - Page 83 5-2 How to use the UPS monitoring software Install the “PowerAct Pro” or “Simple Shutdown Software” to the PC you want to shut down. <Installation method> Refer to the “PowerAct Pro” installation guide. Refer to the “Simple Shutdown Software” manual. BU150R...
-
Page 84: The Contact Signal Functions
Goes ON when an internal failure of the UPS occurs or when the battery life counter expires. Battery Replacement Signal Goes ON when the test determines that battery output (WB) replacement is necessary due to deterioration or when the battery life counter goes off-scale. BU150R... -
Page 85: Type Of Input Signals
Screw size: inch screw Remote ON/OFF input (-) #4-40 UNC Remote ON/OFF input (+) Backup signal output (BU) Battery Replacement Signal output (WB) Note 1: When fixing the D-SUB(9 pin) connector by screw, Please tighten manually without using the electric driver. BU150R... -
Page 86: Remote On/Off Port
Remote ON/OFF Voltage between DC5V terminals: Current when closed: max.10mA 6-1-6 Contact Signal circuit Signal output (BL, TR, BU, WB) Remote ON/OFF UPS Stop Signal input (BS) 470Ω Remote ON/OFF (+) 560Ω 2.4V Remote ON/OFF (-) BU150R... -
Page 87: Example Of The Use Of The Contact Signal Circuit
If you do not want to start the connected devices, turn OFF their switches or set the auto startup setting after recovery from power failure ("Setting" switch 2) to ON (Auto startup is not performed). BU150R... -
Page 88: How To Use Option Cards
This section describes how to mount a SNMP/Web card as an example. The procedure is the same for a contact I/O card. Turn the power of the UPS unit off. Detach the option card cover on the back by removing two screws. Option card cover BU150R... - Page 89 7 How to use option cards 7-1 How to mount an option card Insert the option card and fix it using the screws removed previously. Insert the option card forward sufficiently so that it fits into the connector in the UPS unit. Option card BU150R...
-
Page 90: Contact I/O Card
In addition, by inputting a backup stop signal from the system, the UPS can be stopped while battery power still remains to respond to another power failure. BU150R... -
Page 91: Specifications
DC8V - 24V (for the 24V setting) DC5V - 12V(for the 12V setting) LOW (OFF) DC0.7V or less Remote ON/OFF Voltage between terminals: DC5V Current when closed: max. 10mA * For details, see the manual attached to a contact I/O card. BU150R... -
Page 92: Snmp/Web Card
7 How to use option cards 7-3 SNMP/Web card SNMP/Web card シリアル リセッ ト 通信 電源 10 100 BU150R... -
Page 93: Main Features
Schedule d operation (automatic start, automatic stop) can be performed via a network. UPS standard MIB(RFC1628) and Omron's proprietary MIB(swc mib) provided Monitoring the power supply condition using a Java applet The power supply condition is displayed in graph form, so that it can be visually checked. -
Page 94: Specifications
10.4 Supported on Power PC CPU incorporated Macintosh computer ・For details, see the manual attached to a SNMP/Web card. ・The latest firmware can be downloaded from Omron's home page (http://www.omron.co.jp/ese/). ・For the latest specifications, check with Omron's homepage (http://www.omron.co.jp/ese/). BU150R... -
Page 95: Connecting The Battery Unit
(See "3-5 UPS operation mode settings" ( P.53)). Detach the battery expansion connector cover on the back of the UPS unit. Loosen one screw at the bottom of the battery expansion cover when detaching. ② ① Battery expansion connector cover BU150R... - Page 96 If the LED does not turn on, check the connection condition. Set the number of expansion batteries. For the setting procedure, refer to "3-5 UPS operation mode settings " (P.53). BU150R...
-
Page 97: Troubleshooting
There are too many connected devices. Reduce the number of connected devices until “ ” is displayed on the status indicator. See also “3-4 shows “ ”, and the Interpreting beeps and displays” ( P.46 ) beeper sounds at 0.5-second intervals. BU150R... - Page 98 Then, turn the power to the unit and beeper sounds connected devices back ON and check whether " " is displayed on the continuously status indicator. See also “3-4 Interpreting beeps and displays” ( P.46 ), BU150R...
-
Page 99: References
Output receptacle NEMA 5-15R x 6 Type Sealed lead battery 12V/9Ah×4 Voltage / Capacity x Quantity Backup time 10min. (900W) (25°C, initial characteristics) 6min. (1200W) Battery Charging time 8 hours Battery Expected life: 5 Expected life: 5 years life years BU150R... - Page 100 Rated load/ Rated input voltage/ When battery charge current is at maximum With an input plug provided as standard (NEMA 5-15P), the maximum output capacity is 1200VA/1050W. To use the UPS up to its maximum output capacity, use an attached 20A plug (NEMA L5-20P). BU150R...
-
Page 101: Dimensions
10 References 10-2 Dimensions 10-2 Dimensions Unit: mm/ Tolerance: ±2mm ■BU150R BU150R... - Page 102 10 References 10-2 Dimensions ■Stand for vertical layput BU150R...
- Page 103 10 References 10-2 Dimensions ■Rubber feet BU150R...
- Page 104 10 References 10-2 Dimensions ■Using Ear brackets 44.5 BU150R...
-
Page 105: Battery Life
(and the battery level lowers) to approximately 80% over half a year, and to approximately 50% over a year. Higher the storage temperature is, faster the battery will self-discharge. Storage temperature Auxiliary charging interval 40°C or less 2 months 30°C or less 4 months 25°C or less 6 months BU150R... - Page 106 No part or whole of this manual may be reproduced without permission. The contents of this manual are subject to change without notice. KIL-D-15104A...
Need help?
Do you have a question about the BU150R and is the answer not in the manual?
Questions and answers