
Subscribe to Our Youtube Channel
Related Manuals for Taylor C302


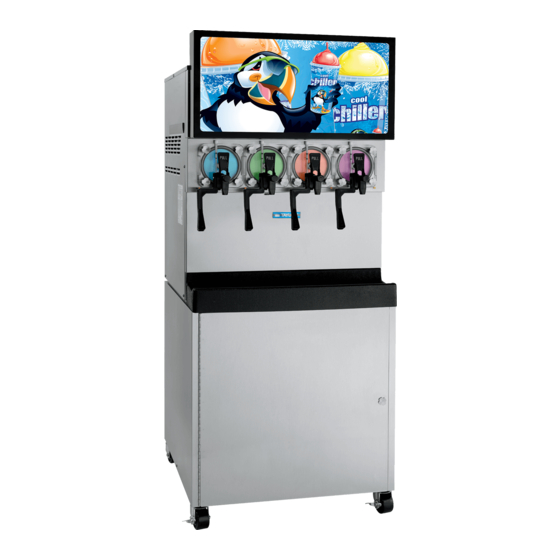
Summary of Contents for Taylor C302
- Page 1 OPERATOR’S MANUAL Model C302 Slush Freezer Original Operating Instructions 6/22/04(Original Publication) 059661-M (Updated 1/28/2019)
- Page 2 Only instructions originating from the factory or its authorized translation representative(s) are considered to be the original set of instructions. © June 2004 Taylor Company 059661-M Any unauthorized reproduction, disclosure, or distribution of copies by any person of any portion of this work may be...
-
Page 3: Table Of Contents
C302 ........ - Page 4 Table of Contents Section 6: Operating Procedures Assembly ............6-1 Sanitizing .
-
Page 5: Section 1: To The Installer
104°F (40°C) at reduced capacities. ® of Taylor machines. • Only authorized Taylor service personnel should perform installation, maintenance, and repairs WARNING! This machine must NOT be on Taylor machines. installed in an area where a water jet or hose can be •... -
Page 6: Air-Cooled Machines
A booster pump must be Figure 1-1 provided if this pressure is not available. Note: Water lines beyond 200 ft. (61 m) require 1/2 in. (13 mm) water lines. To the Installer Model C302... -
Page 7: Electrical Connections
If the supply cord is damaged, it must be replaced by an authorized Taylor service technician in order to avoid a WARNING! This machine must be properly hazard. grounded. Failure to do so can result in severe personal injury from electrical shock. -
Page 8: Initial Freezing Cylinder Cleaning
For information regarding applicable local laws, please contact your local authorized Taylor distributor. CAUTION! This equipment contains fluorinated greenhouse gases (F-Gas) to provide refrigeration using a hermetically sealed circuit or within foam insulation. -
Page 9: Section 2: To The Operator
It should also be noted that Taylor does not warrant the study these procedures together in order to be properly refrigerant used in its machines. For example, if the... - Page 10 TO THE OPERATOR Notes: To the Operator Model C302...
-
Page 11: Section 3: Safety
Safety Section 3 We at Taylor Company are concerned about the safety of the operator when he or she comes in contact with the freezer and its parts. Taylor has gone to extreme efforts WARNING! Avoid injury. to design and manufacture built-in safety features to •... - Page 12 Please refer contact. to the cleaning section of this manual for the proper • USE EXTREME CAUTION when removing the procedure to clean this machine. beater assembly. The scraper blades are very sharp. Safety Model C302...
- Page 13 Noise Level: Airborne noise emission does not exceed 78 dB(A) when measured at a distance of 39 in. (1.0 m) from the surface of the machine and at a height of 62 in. (1.6 m) from the floor. Safety Model C302...
- Page 14 SAFETY Notes: Safety Model C302...
-
Page 15: C302
Description Part No. Item Description Part No. Panel-Side Left 059721 Panel-Front-Lower 059652 Panel-Rear 059657 Shelf-Drip Tray 059653 Panel-Side Right 059722 Tray-Drip 059654 Display-LED 15.4"Tall 068575 Shield-Splash 059659 Panel-Front-Upper 068909 Switch-Rocker SPST Off-On 059627 Panel-Front-Shell 59576-SPN Operator Parts Identification Model C302... -
Page 16: Beater Door Assembly
OPERATOR PARTS IDENTIFICATION Beater Door Assembly Figure 4-2 Operator Parts Identification Model C302... - Page 17 O-ring-9/32 OD X 1/16 Wall 029751 Blade-Scraper-FCB 16L 041103 (25 to Bag) Shaft-Beater-Slush 083418 Plug-Prime-Slush 039568 Seal-Drive Shaft 032560 O-ring-1.129 OD X .989 ID X 039219 O-ring-7/8 OD X .139W (25 to 025307 .070W (25 To Bag) Bag) Operator Parts Identification Model C302...
-
Page 18: Accessories
014753 Brush A.-Package X64275 Kit A.-Tune Up X59121 Brush-Mix Pump Body-3" X 7" 023316 Lubricant-Taylor Hi PERF 048232 Brush-DBL End 013072 Sanitizer-Stera Sheen See Note *Not Shown – A sample container of sanitizer is sent with the Brush-Rear BRG 1"D X 2"LG X 14 013071 machine. -
Page 19: Section 5: User Interface
When placed in the ON position, these control switches allow SLUSHTECH operation. Product Light Liquid Crystal Displays There are two liquid crystal displays (LCDs) located on the upper front panel behind the illuminated display. The two LCDs display information for the two freezing User Interface Model C302... -
Page 20: Operational Mode Displays
Line 1 indicates the operating mode for each freezing pressing the OFF (<- -) key to clear the fault message cylinder. and the warning tone. Line 2 indicates the status of the syrup systems in each User Interface Model C302... - Page 21 The fault clears FAULT DESCRIPTION when the condition is corrected. L: NO FAULT FOUND R: SYRUP PRESS LOW FAULT DESCRIPTION + + + L: BEATER OVERLOAD R: BEATER OVERLOAD + + + User Interface Model C302...
- Page 22 This screen will appear if an invalid date is entered (example: if the date entered exceeds the days of that month). FAULT DESCRIPTION L: BARREL NOT COOLING R: NO FAULT FOUND SET CLOCK + + + 14:30 02/31/04 INVALID DATE User Interface Model C302...
- Page 23 + + + - - - machine to the operator menu. 13. Screen E is SYSTEM INFORMATION. It consists of POWER SAVER STANDBY six display features. CYCLE 1 01:00 08:30 + + + - - - User Interface Model C302...
- Page 24 MENU (SELECT) key to return to the operator menu. cylinder(s). Note: Viscosity is checked only when the product temperature is below 40°F (4.4°C). RINSE / SANITIZE RINSE SANITIZE EXIT CURRENT CONDITIONS - - - L*1200Hd 27.3F < > - R*2140Hd 27.3F User Interface Model C302...
-
Page 25: Syrup Out Indicator
As a safety feature, the re-enabled automatically. If the audio alarm is silenced refrigeration system automatically stops to prevent a for greater than 30 minutes without correcting the fault, it freeze-up in the freezing cylinder (barrel). will be re-enabled automatically User Interface Model C302... -
Page 26: Product Light
Remove the splash shield and front drip tray. Take these parts to the sink and brush-clean them. Reinstall the parts onto the freezer. Use a clean, sanitized towel and wipe down the front of the machine, including the doors and spouts. User Interface Model C302... -
Page 27: Section 6: Operating Procedures
Section 6 O-ring, and the shaft portion that comes in contact Note: The Model C302 contains four 7 qt. (6.6L) with the bearing on the beater drive shaft. Do not freezing cylinders. lubricate the hex end of the drive shaft. - Page 28 3/8 in. (9.52 mm) inside the front of the freezing cylinder. Important! Failure to properly seat the beater may cause damage to the beater and the door. 10189 Figure 6-4 Figure 6-6 Operating Procedures Model C302...
- Page 29 8. Insert the draw valve into the freezer door spout from the front of the machine. The valve is properly 11133 installed when the hole in the draw valve is visible in the slot of the freezer door spout. Figure 6-11 Operating Procedures Model C302...
- Page 30 13. Insert the spring into the front of the door spout. 11446 Figure 6-17 Figure 6-14 14. Place the threaded cap on the end of the draw valve cavity. Turn the cap clockwise until it is secure. Operating Procedures Model C302...
-
Page 31: Sanitizing
Firmly push the door into place. Install the four handscrews on the studs and finger-tighten them equally in a crisscross pattern to ensure that the door is secure. Do not overtighten the handscrews. Figure 6-21 Operating Procedures Model C302... - Page 32 YES. Pressing the MENU Figure 6-23 (SELECT) key at this time will start the flow of sanitizing solution into the left freezing cylinder. SANITIZE LEFT SIDE - - - < > - Operating Procedures Model C302...
-
Page 33: Priming/Brixing
Press the OFF (<- -) key. 12. Press the BEATER (- - -) key. Agitate the solution in the freezing cylinders for 5 minutes. 13039b Figure 6-28 Figure 6-26 Operating Procedures Model C302... - Page 34 6. Slowly move the syrup sampling valve to the fully open position by turning the handle down toward the sampling line. Allow the liquid to run into a pail until all the sanitizer is removed and full-strength product is flowing. 18032 Figure 6-33 Figure 6-31 Operating Procedures Model C302...
-
Page 35: 120 Day Closing Procedure
ALWAYS FOLLOW LOCAL HEALTH CODES. incorrectly brixed product. Close the draw valve. 12. Press the PRIME (+ + +) key. Allow the liquid level to fill to the prime plug hole. Operating Procedures Model C302... -
Page 36: Draining Product From The Freezing Cylinders
OPERATING PROCEDURES Rinsing To disassemble the Model C302, the following items will be needed: Note: The following instructions are for one pair of • Two cleaning pails freezing cylinders under an LCD. • Necessary brushes (provided with freezer) 1. To place the left cylinder in the Rinse mode, press •... -
Page 37: Cleaning
Press the OFF (<- -) key and close the through the syrup system into the freezing cylinder. draw valves. 9. Repeat step 1 through step 7 for the other side of the SANITIZE machine. LEFT SIDE - - - < > - 6-11 Operating Procedures Model C302... -
Page 38: Disassembly
2. Return to the freezer with a small amount of cleaning solution. With a single-service towel, wipe clean the rear shell bearing surface. Brush-clean the rear shell bearings at the back of the freezing cylinders with the black bristle brush. 6-12 Operating Procedures Model C302... -
Page 39: Section 7: Operator Checklist
Using a screwdriver and a cloth towel, keep the prevent possible electrical damage. rear shell bearing and the female hex drive socket Your local Taylor distributor can perform this service for clean and free of lubricant and product deposits. you. ... - Page 40 OPERATOR CHECKLIST Notes: Operator Checklist Model C302...
-
Page 41: Section 8: Troubleshooting Guide
Replace or install correctly on drive pan(s) into front drip worn, missing, or incorrectly shaft. tray. installed. b. Worn rear shell bearing. b. Contact a service technician to - - - replace rear shell bearing. Troubleshooting Guide Model C302... - Page 42 O-rings. b. Use food grade lubricant b. Wrong type lubricant on draw valve O-rings. (example: Taylor Lube HP). c. Worn or missing draw valve c. Replace or install O-rings on draw 6-3/9-1 O-rings. valve.
- Page 43 Double-Ended Brush Inspect and replace if Minimum necessary. White Bristle Brush, 1-1/2 in. x 2 in. Inspect and replace if Minimum necessary. White Bristle Brush, 3 in. x 7 in. Inspect and replace if Minimum necessary. Parts Replacement Schedule Model C302...
- Page 44 PARTS REPLACEMENT SCHEDULE Notes: Parts Replacement Schedule Model C302...
- Page 45 LIMITED WARRANTY Taylor warrants the Product against failure due to defect in materials or workmanship under normal use and service as follows. All warranty periods begin on the date of original Product installation. If a part fails due to defect during the applicable warranty period, Taylor, through an authorized Taylor distributor or service agency, will provide a new or remanufactured part, at Taylor’s option, to replace the failed defective part at no charge for the part.
- Page 46 7. Failure, damage, or repairs due to faulty installation, misapplication, abuse, no or improper servicing, unauthorized alteration, or improper operation or use as indicated in the Taylor Operator’s Manual, including but not limited to the failure to use proper assembly and cleaning techniques, tools, or approved cleaning supplies.
- Page 47 LEGAL REMEDIES The owner must notify Taylor in writing, by certified or registered letter to the following address, of any defect or complaint with the Product, stating the defect or complaint and a specific request for repair, replacement, or other correction of the Product under warranty, mailed at least thirty (30) days before pursuing any legal rights or remedies.
- Page 48 LIMITED WARRANTY ON EQUIPMENT Notes: 10-4 Limited Warranty on Equipment Model C302...
- Page 49 Taylor warrants the Parts against failure due to defect in materials or workmanship under normal use and service as follows. All warranty periods begin on the date of original installation of the Part in the Taylor unit. If a Part fails due to defect during the applicable warranty period, Taylor, through an authorized Taylor distributor or service agency, will provide a new or remanufactured Part, at Taylor’s option, to replace the failed defective Part at no charge for the Part.
- Page 50 Taylor. 5. Replacement of wear items designated as Class “000” Parts in the Taylor Operator’s Manual, as well as any release sheets and clips for the Product’s upper platen assembly.
- Page 51 LEGAL REMEDIES The owner must notify Taylor in writing, by certified or registered letter to the following address, of any defect or complaint with the Part, stating the defect or complaint and a specific request for repair, replacement, or other correction of the Part under warranty, mailed at least thirty (30) days before pursuing any legal rights or remedies.
- Page 52 LIMITED WARRANTY ON PARTS Notes: 11-4 Limited Warranty on Parts Model C302...
Need help?
Do you have a question about the C302 and is the answer not in the manual?
Questions and answers