
Related Manuals for EverFocus VANGUARD 4x2H


Summary of Contents for EverFocus VANGUARD 4x2H
- Page 1 VANGUARD 4x2H / 8x4H / 16x8H 4CH / 8CH / 16CH H.265 4K Hybrid DVR User’s Manual Copyright © EverFocus Electronics Corp. Release Date: October, 2018...
- Page 2 All rights reserved. No part of the contents of this manual may be reproduced or transmitted in any form or by any means without written permission of the EverFocus Electronics Corporation. Windows is a registered trademark of the Microsoft Corporation.
- Page 3 Safety Precautions Refer all work related to the installation of this product to qualified service personnel or system installers. Do not block the ventilation openings or slots on the cover. Do not drop metallic parts through slots. This could permanently damage the appliance. Turn the power off immediately and contact qualified service personnel for service.
- Page 4 All operating and use instructions should be followed. Cleaning Unplug the unit from the outlet before cleaning. Do not use liquid cleaners, abrasive or aerosol cleaners. Use a damp cloth for cleaning. Attachments Do not use attachments not recommended by the product manufacturer as they may cause hazards.
- Page 5 This Product is RoHS compliant. Your EverFocus product is designed and manufactured with high quality materials and components which can be recycled and reused. This symbol means that electrical and...
-
Page 6: Table Of Contents
TABLE OF CONTENTS Introduction ........................1 Features .......................... 2 Dimensions ........................2 Packing List ........................2 Front Panel ........................3 Rear Panel ........................3 Connection and Installation.................... 5 Hard Disk Installation ...................... 5 2.1.1 Hard Disk Compatibility List ..................6 Basic Connection ...................... - Page 7 3.5.2.2.5 Picture Playback .................... 54 OSD Setup Menu ......................58 Channel ......................... 59 4.1.1 Channel ........................59 4.1.1.1 Analog Channels....................59 4.1.1.2 IP Channels ......................60 4.1.1.2.1 Auto Add IP Cameras ..................61 4.1.1.2.2 Manually Add IP Cameras ................62 4.1.1.3 Protocol Manage ....................
- Page 8 4.3.2 PIR ........................... 103 4.3.3 IO ..........................105 4.3.4 PTZ Linkage ......................107 4.3.5 Exception ......................... 108 Network ........................109 4.4.1 General ........................109 4.4.1.1 General ........................ 109 4.4.1.2 PPPoE ........................110 4.4.1.3 Port Configuration ....................111 4.4.2 DDNS ........................112 4.4.3 Email ........................
- Page 9 Remote Live View Window ..................143 5.2.1 Camera List ......................144 5.2.2 Live View Function Icons ..................145 5.2.3 PTZ Setting Panel ....................147 5.2.4 Color Panel ......................149 Playback ........................150 5.3.1 Download ........................ 153 Remote Settings ......................154 5.4.1 Channel ........................
- Page 10 5.4.3.3 I/O ........................180 5.4.3.4 Exception......................182 5.4.4 Network ........................183 5.4.4.1 General ........................ 183 5.4.4.1.1 General ......................183 5.4.4.1.2 PPPoE ......................184 5.4.4.1.3 Port Configuration ..................185 5.4.4.2 DDNS ........................186 5.4.4.3 Email ........................187 5.4.4.3.1 Email Configuration ..................187 5.4.4.3.2 Email Schedule ....................
-
Page 11: Introduction
DVR through your handheld devices; or use VANGUARD CMS video management system for remote management. EverFocus’ H.265 VANGUARD series DVRs are the best choice for a complete surveillance solution. It is versatile, flexible and well catered to the needs of the industry. -
Page 12: Features
Note: 1. Equipment configurations and supplied accessories vary by country. Please consult your local EverFocus office or agents for more information. Please also keep the shipping carton for possible future use. 2. Contact the shipper if any items appear to have been damaged in the shipping process. -
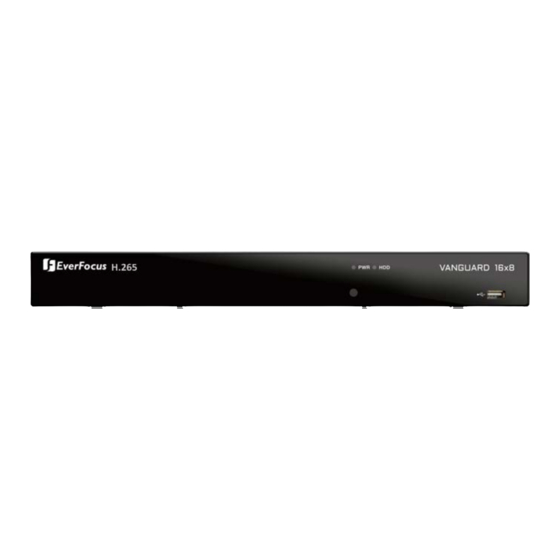
Page 13: Front Panel
H.265 VANGUARD 4x2H / 8x4H / 16x8H 1.4 Front Panel VANGUARD 16x8H / VANGUARD 8x4H / VANGUARD 4x2H H.265 VANGUARD 16x8 No. Name Description Power: When power is on, the LED will continue lighting in green. LED Indicator HDD: When power is on, the LED will continue lighting in red. When HDD is reading/writing data, the LED will flashes red. - Page 14 H.265 VANGUARD 4x2H / 8x4H / 16x8H Name Description Connects to audio input devices, such as microphones. Note that the Audio Input microphones with a (built-in) amplifier and external power supply are required. Connects to an audio output device, such as speakers. Note that the...
-
Page 15: Connection And Installation
H.265 VANGUARD 4x2H / 8x4H / 16x8H Chapter 2. Connection and Installation 2.1 Hard Disk Installation You can install one 3.5” HDD (VANGUARD4x2H) or two 3.5” HDDs (VANGUARD 8x4H / VANGURD 16x8H) inside the DVR for recording videos. The maximum capacity of each HDD is up to 8TB. -
Page 16: Hard Disk Compatibility List
Screws. Screw the housing cover back to the DVR. 2.1.1 Hard Disk Compatibility List Please go to the product page (Download) on EverFocus’ Website www.everfocus.com.tw to see the latest Storage Compatibility List. It’s recommended to use the hard disk models listed on the Storage Compatibility List to ensure your hard disks are compatible. -
Page 17: Basic Connection
H.265 VANGUARD 4x2H / 8x4H / 16x8H 2.2 Basic Connection The instructions below describe the basic connection to the DVR. The image below uses VANGUARD 16x8H as example. Main Monitor 3.5" HDD TVI/AHD/SD Camera (VGA) Network Power Supply Main Monitor... -
Page 18: Terminal Block
H.265 VANGUARD 4x2H / 8x4H / 16x8H 2.2.1 Terminal Block VANGUARD 16x8H provides 16 alarm inputs, 1 alarm output and 1 RS-485. VANGUARD 8x4H provides 8 alarm inputs, 1 alarm output and 1 RS-485. VANGUARD 4x2H provides 4 alarm inputs, 1 alarm output and 1 RS-485. -
Page 19: Accessing The Web Interface
H.265 VANGUARD 4x2H / 8x4H / 16x8H Accessing the Web Interface You can look up the IP address and access the Web interface of the DVR using the IP Utility (IPU) program, which is included in the software CD. The IP Utility can also be downloaded from EverFocus’... - Page 20 H.265 VANGUARD 4x2H / 8x4H / 16x8H Note for the first time login: When the Plug-in blocked appears on the browser, click download to download the plug-in and install to your computer. Reload the webpage and you should see the remote live view page now.
- Page 21 H.265 VANGUARD 4x2H / 8x4H / 16x8H If you are unable to backup or record during remote operation, you may need to turn off the firewall and turn User Account Control off. To turn User Account Control off, on the computer, click Start > Control Panel > System and Security >...
-
Page 22: Getting Started
H.265 VANGUARD 4x2H / 8x4H / 16x8H Chapter 3. Getting Started After pressing the power switch to turn on the DVR, the DVR will enter the System Initialization process. When the process is done, it’s required to set up a password for the administrator account immediately in order to protect your privacy. -
Page 23: Turning On / Off The Power
H.265 VANGUARD 4x2H / 8x4H / 16x8H After clicking the Apply button, the below Login page appears. Input the User Name, Password and then click Login. If you want to login using the pattern lock, click the Pattern button and draw the pattern. -
Page 24: Startup Wizard
H.265 VANGUARD 4x2H / 8x4H / 16x8H 3.2 Startup Wizard The Startup Wizard will guide you through some basic settings for the DVR. Please follow the on- screen instructions to proceed. Note: If you don’t want to run the startup Wizard to make any settings when you restart the DVR next time, you can go to Setup >... - Page 25 H.265 VANGUARD 4x2H / 8x4H / 16x8H 【Local Connection】 DHCP: For DHCP users, check DHCP, the router will automatically assign all the below IP parameters to the DVR. IP Address: The IP address of the DVR. The IP address consists of four groups of numbers, separated by periods.
- Page 26 H.265 VANGUARD 4x2H / 8x4H / 16x8H 3. Configure the Date/Time settings. You can also configure the NTP and DST settings. Click Next to proceed. 【Date and Time】 Date: Click on the calendar icon to set the system date. Time: Click to set the system time.
- Page 27 H.265 VANGUARD 4x2H / 8x4H / 16x8H 【DST】 DST stands for Daylight Saving Time. Enable DST: Check the box to enable the Daylight Saving Time (DST) function. Time Offset: Select the amount of time to offset for DST. DST Mode: Choose to set up the daylight saving time in weeks or in days.
- Page 28 H.265 VANGUARD 4x2H / 8x4H / 16x8H b. Click to add the selected IP camera(s) to the DVR. Input the User Name and Password of the IP camera(s). c. You can also click on the right-side list to add an individual IP camera to a single channel.
- Page 29 H.265 VANGUARD 4x2H / 8x4H / 16x8H 5. Configure the Disk settings. For the first time use HDD or a new HDD, users have to format the HDD before use. Click to select the HDD in the Select column and then click Format HDD to format the selected HDD.
- Page 30 H.265 VANGUARD 4x2H / 8x4H / 16x8H 7. Mobile information. You can scan the QR code with EverFocus VANGUARD App installed on your mobile device to add the DVR to your app and then remotely access to the DVR (please refer to 4.6.5 Information for more details).
- Page 31 H.265 VANGUARD 4x2H / 8x4H / 16x8H 9. After clicking the Finish button, the system will enter the Live View window (refer to 3.3 Live View Window). 10. To start using the DVR, click any function and the Unlock window appears. Input the password of the DVR (default password is 11111111) and then click the Unlock button to unlock the screen, the OSD Setup menu appears.
-
Page 32: Live View Window
H.265 VANGUARD 4x2H / 8x4H / 16x8H 3.3 Live View Window IP-CH3 Failed to connect to cameras, please check the network connection! Name Description The word prefixed to the Camera Title represents: A-: The connected camera is an AHD camera. - Page 33 H.265 VANGUARD 4x2H / 8x4H / 16x8H The wordings displayed on the channel represent: Channel State VIDEO LOSS: Analog camera is disconnected. No Camera: IP camera is disconnected. Double-click on a channel can display the channel in full screen. To exit the full screen mode, double-click on the channel again.
-
Page 34: Live Channel Tool Bar
H.265 VANGUARD 4x2H / 8x4H / 16x8H 3.4 Live Channel Tool Bar You can left-click any channel on the Live View Window to bring up its Live Channel Tool Bar. Name Description Click the button to start manual recording. During the process of manual recording, the icon will display in red. -
Page 35: Digital Zoom (Pip)
H.265 VANGUARD 4x2H / 8x4H / 16x8H 3.4.1 Digital Zoom (PIP) You can use the Digital Zoom function to have a close-up view on the desired locations of a live channel. Navigation Box Live full screen channel Preview Window To perform the digital zoom function: 1. -
Page 36: Ptz Control Panel
H.265 VANGUARD 4x2H / 8x4H / 16x8H 3.4.2 PTZ Control Panel With the PTZ Control Panel, you can control the connected PTZ cameras or enter the analog camera OSD using the UTC panel. On the Live View window, select a PTZ camera by clicking on the channel, the selected channel will be highlighted with a blue frame. -
Page 37: Ptz Control
H.265 VANGUARD 4x2H / 8x4H / 16x8H 3.4.2.1 PTZ Control Click PTZ to display the PTZ Control panel. With this panel, you can control the connected PTZ camera. Note that before using this function, you have to connect the PTZ cameras to the DVR and configure the related PTZ settings. -
Page 38: Preset Setting
H.265 VANGUARD 4x2H / 8x4H / 16x8H 3.4.2.2 Preset Setting Click Preset to enter the Preset Setting panel. On this panel, you can set up Preset positions, perform the Go to Preset function and also perform the Cruise function. Preset Setting Panel... - Page 39 H.265 VANGUARD 4x2H / 8x4H / 16x8H To perform the Go to Preset Point function: 1. Set up the preset points in advance. Please refer to the steps of “To set up Preset Points” above. 2. Select a preset number (1-255) by clicking on the No. input box.
-
Page 40: Utc Control
Click UTC to enter the UTC Control panel. On this panel, you can display the analog camera OSD menu and configure the camera OSD settings. Note: EverFocus’ PTZ cameras can only connect to VANGUARD series DVRs through RS- 485. Therefore, EverFocus’ PTZ cameras does not support the UTC function. -
Page 41: Taskbar
H.265 VANGUARD 4x2H / 8x4H / 16x8H 3.5 Taskbar The Taskbar is located at the bottom of the screen. There are two ways to bring up the Taskbar. You can try either way to bring up the Taskbar. Right-click on the Live screen, the Taskbar will appear ... -
Page 42: Start Menu
H.265 VANGUARD 4x2H / 8x4H / 16x8H 3.5.1 Start Menu Click the Start icon to bring-up the Start Menu. You can use the Start Menu to switch user, search and playback, enter system setup menu, lock and unlock the screen, showdown, reboot or logout the system. -
Page 43: Search
H.265 VANGUARD 4x2H / 8x4H / 16x8H 3.5.1.2 Search Click Search can display the Playback window. You can use the Playback window to play back the recordings or snapshot images. You can also use the Playback window to backup recordings or snapshot images to a USB storage device. Please refer to 3.5.2 Search and Playback. -
Page 44: Lock / Unlock Screen
H.265 VANGUARD 4x2H / 8x4H / 16x8H 3.5.1.4 Lock / Unlock Screen You can use the Lock Screen function to protect unauthorized OSD operation. Right-click on the screen or move your mouse cursor to the bottom of the screen to bring up the Taskbar. -
Page 45: Shutdown
H.265 VANGUARD 4x2H / 8x4H / 16x8H 3.5.1.5 Shutdown You can Shutdown, Reboot or Logout the system using the Shutdown window. 3.5.1.5.1 Shutdown 1. Right-click on the screen or move your mouse cursor to the bottom of the screen to bring up the Taskbar. -
Page 46: Reboot
H.265 VANGUARD 4x2H / 8x4H / 16x8H 3.5.1.5.2 Reboot 1. Right-click on the screen or move your mouse cursor to the bottom of the screen to bring up the Taskbar. Click the Start icon to display the Start Menu and then select Shutdown. -
Page 47: Logout
H.265 VANGUARD 4x2H / 8x4H / 16x8H 3.5.1.5.3 Logout 1. Right-click on the screen or move your mouse cursor to the bottom of the screen to bring up the Taskbar. Click the Start icon to display the Start Menu and then select Shutdown. -
Page 48: Search And Playback
H.265 VANGUARD 4x2H / 8x4H / 16x8H 3.5.2 Search and Playback You can use the Playback window to search and play back the recordings or snapshot images. The search modes include General, Events, Sub-Periods, Smart and Picture. You can also use the Playback window to backup recordings or snapshot images to a USB storage device. - Page 49 H.265 VANGUARD 4x2H / 8x4H / 16x8H No. Name Description Click to enter each Search mode (General, Events, Sub-Periods, Smart Search Mode and Picture) to search and play back the recordings or snapshot images. Please refer to 3.5.2.2 Search Mode for more details.
-
Page 50: Playback Control Panel
H.265 VANGUARD 4x2H / 8x4H / 16x8H 3.5.2.1 Playback Control Panel You can use the playback control panel to operate the below functions: 2 3 4 7 8 9 10 11 No. Name Description Click to display the Playback Layout in full screen. Right-click the Full Screen mouse to exit the Full Screen. - Page 51 H.265 VANGUARD 4x2H / 8x4H / 16x8H Time Indicator Indicates the current playback time. You can use your mouse to drag the time bar to the left or right to search the desired time for playing back. Single-click on the time bar at a certain time will start playing back from the clicked time.
-
Page 52: Full Screen On Playback Window
H.265 VANGUARD 4x2H / 8x4H / 16x8H 3.5.2.1.1 Full Screen on Playback Window On the Playback Control Panel, click the Full Screen button to display the Playback Layout in full screen. To exit the Full Screen, click the Full Screen button again on the Playback Control Panel. - Page 53 H.265 VANGUARD 4x2H / 8x4H / 16x8H Playback Control Panel...
-
Page 54: Backup Video Clips
H.265 VANGUARD 4x2H / 8x4H / 16x8H 3.5.2.1.2 Backup Video Clips To backup video clips: 1. Ensure the USB storage device has been inserted to the DVR. 2. On the Playback Control Panel, click the Video Clip button . The button will then change to a Back-up button 3. -
Page 55: Search Mode
H.265 VANGUARD 4x2H / 8x4H / 16x8H 3.5.2.2 Search Mode You can use the General, Events, Sub-Periods, Smart and Picture pages to search and play back the recordings or snapshot images. 3.5.2.2.1 General Playback You can use this page to search, play back and backup all types of recordings. Click the General button to enter the General Playback mode. -
Page 56: Event Playback
H.265 VANGUARD 4x2H / 8x4H / 16x8H 3.5.2.2.2 Event Playback You can use this page to search, play back and backup the event recordings to the USB storage device. The Event Playback page gives you a summary of all events on the list. You can display the events with Thumbnail, List or Details list type. - Page 57 H.265 VANGUARD 4x2H / 8x4H / 16x8H Descending order: Click to display the events in descending order. Select: Check the box to select all the events on the list. Uncheck the box to deselect all the events on the list.
- Page 58 H.265 VANGUARD 4x2H / 8x4H / 16x8H Playback: Click the Playback icon can play back the event. Lock: Click the icon to lock or unlock the event. The locked events will be stored in the hard disk and will not be overwritten.
- Page 59 H.265 VANGUARD 4x2H / 8x4H / 16x8H Backup: Check the event boxes to select the events and then click the Backup button can back-up the event recordings to the USB storage device. 【Playback View】 You can perform the below functions using the Playback View.
-
Page 60: Sub-Periods Playback
H.265 VANGUARD 4x2H / 8x4H / 16x8H 3.5.2.2.3 Sub-Periods Playback This function allows you to divide a recording into several segments with equal time-length; and then play back the segments simultaneously. For example, for a 60-minute recording, if you select 4 split-screen, the recording will be divided into 4 segments with 15-minute in length each. - Page 61 H.265 VANGUARD 4x2H / 8x4H / 16x8H Take the below image for example, on the playback layout, the fifth segment has been clicked, therefore, the segment has been highlighted with a blue frame. On the time bar, you can see two lines: upper one and lower one. The upper time bar indicates the clicked...
-
Page 62: Smart Playback
H.265 VANGUARD 4x2H / 8x4H / 16x8H 3.5.2.2.4 Smart Playback Smart Playback allows you to easily search and play back the motion events in one or more specific areas of a channel. To perform the Smart Playback function: 1. Click the Calendar button to select a date. - Page 63 H.265 VANGUARD 4x2H / 8x4H / 16x8H Defining Smart Areas: 1. Follow Step 1 ~ Step 6 above to enter the Smart Area Define page. Apply All Click and hold it to drag it to other location Clear All Return Search 2.
-
Page 64: Picture Playback
H.265 VANGUARD 4x2H / 8x4H / 16x8H 3.5.2.2.5 Picture Playback You can use this page to search and play back the snapshot images and backup the images to a USB storage device. No. Name Description You can use this panel to search for the snapshot images based on the... - Page 65 H.265 VANGUARD 4x2H / 8x4H / 16x8H Descending order: Click to display the snapshots in descending order. Select: Check the box to select all the snapshots on the list. Uncheck the box to deselect all the snapshots on the list.
- Page 66 H.265 VANGUARD 4x2H / 8x4H / 16x8H Details: Click to display the snapshots in detailed list. Playback: Click the Playback icon in the Playback column can display the snapshot image. You can then click the buttons to display the next or previous snapshot image.
- Page 67 H.265 VANGUARD 4x2H / 8x4H / 16x8H 【Snapshot List】 You can perform the below functions using the Event List. Image Display: Click a snapshot image on the list can display the image on the viewing window. Continuous Playback: Click a snapshot image on the list and then click the Play button on the Playback Control Panel, the snapshot images will be automatically playing back continuously starting from the clicked one to the last one.
-
Page 68: Osd Setup Menu
H.265 VANGUARD 4x2H / 8x4H / 16x8H Chapter 4. OSD Setup Menu You can use the OSD Setup Menu to configure system settings. Right-click on the screen or move your mouse cursor to the bottom of the screen to bring up the Taskbar. -
Page 69: Channel
IP cameras manually or automatically using this page. 4.1.1.1 Analog Channels This page is only available for VANGUARD 4x2H and VANGUARD 8x4H. If you want to add more IP cameras to the DVR, you can disable the analog cameras in order to release more channels for adding IP cameras. -
Page 70: Ip Channels
H.265 VANGUARD 4x2H / 8x4H / 16x8H 4.1.1.2 IP Channels You can add IP cameras manually or automatically using this page. Search: Click to search for the IP cameras on the network. The searched IP cameras will be displayed on the upper list. -
Page 71: Auto Add Ip Cameras
H.265 VANGUARD 4x2H / 8x4H / 16x8H You can also use the buttons on the Added IP Camera list to perform the functions: Delete: Click to delete the IP camera. Add: Click to bring up the Add IP Camera window to add an IP camera. Please refer to 4.1.1.2.2 Manually Add IP Cameras for more details. -
Page 72: Manually Add Ip Cameras
H.265 VANGUARD 4x2H / 8x4H / 16x8H 4.1.1.2.2 Manually Add IP Cameras 1. Click Add to bring-up the Add IP Camera page. 2. Click Search to search for the IP cameras on the network. Note that the IP cameras that have been added to the DVR will not be displayed. -
Page 73: Protocol Manage
H.265 VANGUARD 4x2H / 8x4H / 16x8H 4.1.1.3 Protocol Manage On this page, you can edit RTSP (Custom 1-16) protocol for IP camera connection. Custom Protocol: Select a custom RTSP protocol profile from the drop-down list to be configured. Up to 10 profiles can be configured. -
Page 74: Live
H.265 VANGUARD 4x2H / 8x4H / 16x8H 4.1.2 Live You can configure camera OSD or image settings on this page. Channel: Displays the channel number. Setup: Click to enter the OSD and image setup page. You can use the left-side panel to adjust the parameters. - Page 75 H.265 VANGUARD 4x2H / 8x4H / 16x8H Covert: Select to covert the camera stream on the live view. The channel will be black-out on the Live Window, however, the system will still record the streams. Channel Name: Optionally input a channel name.
-
Page 76: Image Control
H.265 VANGUARD 4x2H / 8x4H / 16x8H 4.1.3 Image Control You can configure the image settings for supported IP cameras. Channel: Displays the channel number. Setup: Click to enter the setup page. You can use the left-side panel to adjust the parameters. -
Page 77: Ptz
UTC function, select COAX1 or COAX2. For more details on UTC function, please refer to 3.4.2.3 UTC Control. Note: EverFocus’ PTZ cameras can only connect to VANGUARD series DVRs through RS- 485. Therefore, EverFocus’ PTZ cameras does not support the UTC function. -
Page 78: Motion
H.265 VANGUARD 4x2H / 8x4H / 16x8H 4.1.5 Motion You can configure the motion settings and motion event notifications on this page. You can also enable the Push Notification function to send motion event alerts to your mobile devices (with VANGUARD App installed). For more details on Push Notification, please refer to Appendix B: Push Notification. - Page 79 H.265 VANGUARD 4x2H / 8x4H / 16x8H 2. To further set up the motion event notifications, click the Alarm button to enter the Motion alarm setup page (please refer to 4.3.1 Motion).
-
Page 80: Pir
This function is only available when the supported analog/IP cameras with PIR function are connected. For the supported cameras, please contact EverFocus (ts@everfocus.com.tw). When the camera detects an object move in or out of the PIR sensor range, the DVR will start recording or send alert notifications. - Page 81 H.265 VANGUARD 4x2H / 8x4H / 16x8H shape (at least five sides) on the image. You can also drag the area and drop it to the desired location on the image. If you want to adjust the size of the area, drag the red dots to re-size.
-
Page 82: Video Cover
H.265 VANGUARD 4x2H / 8x4H / 16x8H 4.1.7 Video Cover This function is only available for analog cameras. The Privacy Mask can block out sensitive areas from view. This feature is useful when users don’t want the sensitive information visible. -
Page 83: Intelligent
H.265 VANGUARD 4x2H / 8x4H / 16x8H 4.1.8 Intelligent The optional intelligent functions, including Perimeter Intrusion Detection (PID), Line Crossing Detection (LCD), Stationary Object Detection (SOD), Pedestrian Detection (PD), Face Detection (FD), and Cross Counting (CC). 4.1.8.1 PID When objects (people, vehicle or other objects) enter in or out of a pre-defined region, the PID (Perimeter Intrusion Detection) event will be triggered. -
Page 84: Configuring Pid Detection Area
H.265 VANGUARD 4x2H / 8x4H / 16x8H Show Message: Check the box to display an “S” letter on the upper-right corner of the live channel when an event is triggered. Send Email: Check the box to enable the Email alert function. When an event is triggered, the DVR will send an email alert with a snapshot to the pre-configured Email receiver. - Page 85 H.265 VANGUARD 4x2H / 8x4H / 16x8H a. Use your mouse to click 4 points to draw a rectangle shape. The shape should be convex. Concave shape is not allowed. b. If you want to move the area to other position or re-size the area, select the area by checking the red box on the upper-left corner of the area, the borders of the area will change to red color.
-
Page 86: Lcd
H.265 VANGUARD 4x2H / 8x4H / 16x8H 4.1.8.2 LCD When objects (people, vehicle or other objects) cross a pre-defined line, the LCD (Line Crossing Detection) event will be triggered. You can configure some event actions like event recording, Email alert or pop-up full screen when an event is triggered. -
Page 87: Configuring Lcd Detection Lines
H.265 VANGUARD 4x2H / 8x4H / 16x8H Full Screen: If this function is enabled and a PIR event is triggered, the triggered channel will be displayed in full screen. Record Channel: Select the channel(s) you want to record when an event is triggered on this channel. - Page 88 H.265 VANGUARD 4x2H / 8x4H / 16x8H c. Click the Save button to save the settings. d. You can follow the steps above to configure more lines. Up to 4 lines can be configured. e. You can click the Remove All button to remove all the lines. To remove a certain line, select the line by checking the red box on the upper-side of the line, and then click the Remove button.
-
Page 89: Sod
H.265 VANGUARD 4x2H / 8x4H / 16x8H 4.1.8.3 SOD When DVR detects missing objects and unattended objects in a pre-defined area, the SOD (Stationary Object Detection) event will be triggered. You can configure some event actions like event recording, Email alert or pop-up full screen when an event is triggered. -
Page 90: Configuring Sod Detection Area
H.265 VANGUARD 4x2H / 8x4H / 16x8H that for this function to work, you have to set up the Email function in advance (refer to 4.4.3 Email). Full Screen: If this function is enabled and a PIR event is triggered, the triggered channel will be displayed in full screen. - Page 91 H.265 VANGUARD 4x2H / 8x4H / 16x8H 1 Lost & Legacy c. Click the Save button to save the settings. d. You can follow the steps above to configure more areas. Up to 4 areas can be configured. e. You can click the Remove All button to remove all the areas. To remove a certain area, select the area by checking the red box on the upper-left corner of the area, and then click the Remove button.
- Page 92 H.265 VANGUARD 4x2H / 8x4H / 16x8H 4.1.8.4 PD When DVR detects moving people in a pre-defined area, the PD (Pedestrian Detection) event will be triggered. You can configure some event actions like event recording, Email alert or pop-up full screen when an event is triggered.
-
Page 93: Configuring Pd Detection Area
H.265 VANGUARD 4x2H / 8x4H / 16x8H Full Screen: If this function is enabled and a PIR event is triggered, the triggered channel will be displayed in full screen. Record Channel: Select the channel(s) you want to record when an event is triggered on this channel. - Page 94 H.265 VANGUARD 4x2H / 8x4H / 16x8H c. Click the Save button to save the settings. d. You can follow the steps above to configure more areas. Up to 4 areas can be configured. e. You can click the Remove All button to remove all the areas. To remove a certain area, select the area by checking the red box on the upper-left corner of the area, and then click the Remove button.
- Page 95 H.265 VANGUARD 4x2H / 8x4H / 16x8H 4.1.8.5 FD When DVR detects faces of moving people in a pre-defined area, the FD (Face Detection) event will be triggered. You can configure some event actions like event recording, Email alert or pop-up full screen when an event is triggered.
-
Page 96: Configuring Fd Detection Area
H.265 VANGUARD 4x2H / 8x4H / 16x8H Full Screen: If this function is enabled and a PIR event is triggered, the triggered channel will be displayed in full screen. Record Channel: Select the channel(s) you want to record when an event is triggered on this channel. - Page 97 H.265 VANGUARD 4x2H / 8x4H / 16x8H c. Click the Save button to save the settings. d. You can follow the steps above to configure more areas. Up to 4 areas can be configured. e. You can click the Remove All button to remove all the areas. To remove a certain area, select the area by checking the red box on the upper-left corner of the area, and then click the Remove button.
- Page 98 H.265 VANGUARD 4x2H / 8x4H / 16x8H 4.1.8.6 CC The DVR will count the times when objects (people, vehicle or other objects) cross a pre- defined line, and the CC (Cross-Counting) event will be triggered. You can configure some event actions like event recording, Email alert or pop-up full screen when an event is triggered.
-
Page 99: Configuring Cc Detection Lines
H.265 VANGUARD 4x2H / 8x4H / 16x8H Send Email: Check the box to enable the Email alert function. When an event is triggered, the DVR will send an email alert with a snapshot to the pre-configured Email receiver. Note that for this function to work, you have to set up the Email function in advance (refer to 4.4.3 Email). - Page 100 H.265 VANGUARD 4x2H / 8x4H / 16x8H c. Click the Save button to save the settings. d. You can follow the steps above to configure more lines. Up to 4 lines can be configured. e. You can click the Remove All button to remove all the lines. To remove a certain line, select the line by checking the red box on the upper-side of the line, and then click the Remove button.
-
Page 101: Schedule
H.265 VANGUARD 4x2H / 8x4H / 16x8H 4.1.8.7 Schedule In order to active the intelligent recording function, you need to configure the schedule recording for Intelligent events. The schedule will be activated 24 hours a day, 7 days a week. -
Page 102: Intelligent Analysis
H.265 VANGUARD 4x2H / 8x4H / 16x8H 4.1.8.8 Intelligent Analysis On this page, you can search and view the statistical result of CC detection (Cross Counting). For more details on CC detection, please refer to 4.1.8.6 CC. Select the criteria and then click the Search button, the results will be listed at the lower... -
Page 103: Record
H.265 VANGUARD 4x2H / 8x4H / 16x8H 4.2 Record You can configure the recording settings on this page. 4.2.1 Encode On this page, you can configure the recording video or network transmission picture quality. Generally, main stream defines the recording video quality which will be saved in the HDD;... - Page 104 H.265 VANGUARD 4x2H / 8x4H / 16x8H Bitrate Control: Select CBR (constant bitrate) if the scene is simple and less changing, such as a gray wall. Select VBR (variable bitrate) if the scene is complex, such as a department store. If VBR is selected, select a video quality next to Bitrate Control.
-
Page 105: Sub Stream
H.265 VANGUARD 4x2H / 8x4H / 16x8H 4.2.1.2 Sub Stream Sub stream defines the video quality which is being viewed via remote access, for example web client and CMS. Channel: Displays channel number. Resolution: Select a recording resolution. FPS: Select a FPS (frames per second) for the recording. Please note that the FPS options may differ if you select Normal (4K) Mode or 5MP Mode for Record Mode (please refer to 4.6.1.1 General). -
Page 106: Mobile Stream
H.265 VANGUARD 4x2H / 8x4H / 16x8H 4.2.1.3 Mobile Stream Mobile stream defines the video quality which is being viewed via remote access through mobile devices. Note that Mobile Stream is only available for IP cameras. Channel: Displays channel number. -
Page 107: Record
H.265 VANGUARD 4x2H / 8x4H / 16x8H 4.2.2 Record On this page, you can configure the recording parameters and recording schedule for each channel. 4.2.2.1 Record Channel: Displays channel number. Record Switch: Check the box to enable the function. Stream Mode: Select a recording mode for the channel. If you select DualStream, the system will record both Main Stream and Sub Stream. -
Page 108: Record Schedule
H.265 VANGUARD 4x2H / 8x4H / 16x8H 4.2.2.2 Record Schedule On this page, you can configure the recording schedule for Normal, Motion or PIR recordings. Channel: Select a channel from the drop-down list. Normal: Click the Normal button on the right-side and then move your mouse cursor over the schedule time blocks. -
Page 109: Capture
H.265 VANGUARD 4x2H / 8x4H / 16x8H 4.2.3 Capture On this page, you can configure the snapshot parameters or set up the snapshot schedule. 4.2.3.1 Capture On this page, you can configure the snapshot parameters. Channel: Select a channel from the drop-down list. -
Page 110: Capture Schedule
H.265 VANGUARD 4x2H / 8x4H / 16x8H 4.2.3.2 Capture Schedule On this page, you can configure the snapshot schedule. Channel: Select a channel from the drop-down list. Normal: Click the Normal button on the right-side and then move your mouse cursor over the schedule time blocks. -
Page 111: Alarm
H.265 VANGUARD 4x2H / 8x4H / 16x8H 4.3 Alarm You can configure the alarm settings on this page. 4.3.1 Motion After configuring the Motion Detection settings, you can further configure the Motion Alarm settings. To configure the Motion Detection setting, click the Motion button or click Setup >... - Page 112 H.265 VANGUARD 4x2H / 8x4H / 16x8H Send Email: Check the box to enable the Email alert function. When a motion event is triggered, the DVR will send an email alert with a snapshot to the pre-configured Email receiver. Note that for this function to work, you have to set up the Email function in advance (refer to 4.4.3 Email).
-
Page 113: Pir
H.265 VANGUARD 4x2H / 8x4H / 16x8H 4.3.2 After configuring the PIR Detection settings, you can further configure the PIR Alarm settings. To configure the PIR Detection setting, click the PIR Detection button or click Setup > Channel > PIR to enter the PIR Detection setup page (please refer to 4.1.6 PIR). - Page 114 H.265 VANGUARD 4x2H / 8x4H / 16x8H Full Screen: If this function is enabled and a PIR event is triggered, the triggered channel will be displayed in full screen. PIR Detection: Click the button to enter the PIR Detection setup page (please refer to 4.1.6 PIR).
- Page 115 H.265 VANGUARD 4x2H / 8x4H / 16x8H 4.3.3 After connecting the external IO devices to the DVR, you can further configure the IO Alarm settings. Alarm In: Displays the alarm input number. Alarm Type: Select an alarm type for the alarm input. Options include Normally-Open, Normally-Close and Off.
- Page 116 H.265 VANGUARD 4x2H / 8x4H / 16x8H Full Screen: If this function is enabled and an IO event is triggered, the triggered channel will be displayed in full screen. FTP Upload: When an IO event is triggered, the DVR will upload alarm images to FTP server.
-
Page 117: Ptz Linkage
H.265 VANGUARD 4x2H / 8x4H / 16x8H 4.3.4 PTZ Linkage You can associate an alarm trigger (motion or I/O) with a specific camera and then activate a PTZ camera to go to a preset position when the alarm is triggered. -
Page 118: Exception
H.265 VANGUARD 4x2H / 8x4H / 16x8H 4.3.5 Exception You can configure the system alarm settings on this page. Event Type: Displays the event types. • No Space on Disk: When an HDD is full. • Disk Error: When the HDD is not detected properly. -
Page 119: Network
H.265 VANGUARD 4x2H / 8x4H / 16x8H 4.4 Network You can configure the network settings on this page. 4.4.1 General This page allows you to configure network parameters, such as DHCP and PPPoE. 4.4.1.1 General The DHCP setting lets the system use an automatically assigned (dynamic) IP address. This address can change under certain circumstances, for instance, when the DVR’s network... -
Page 120: Pppoe
H.265 VANGUARD 4x2H / 8x4H / 16x8H 4.4.1.2 PPPoE This is a DSL-connection application. The ISP will ask the user to input a username and password. Contact your ISP for these details. Note: If PPPoE is selected as the IP type, the supplied IP Utility program will not be able to detect the device. -
Page 121: Port Configuration
P2P Switch: Check the box to enable the P2P function. If P2P function is enabled, a QR code will be displayed on the System Info page. You can scan the QR code with EverFocus VANGUARD App installed on your mobile device to add and remote access the DVR. Please refer to 4.6.5.1.1 Performing the P2P Function. -
Page 122: Ddns
H.265 VANGUARD 4x2H / 8x4H / 16x8H 4.4.2 DDNS You can configure the DDNS setting on this page. DDNS (Dynamic Domain Name System) is a service used to map a domain name to the dynamic IP address of a network device. You can set up the DDNS service for remote access to the DVR. -
Page 123: Email
H.265 VANGUARD 4x2H / 8x4H / 16x8H 4.4.3 Email You can configure the email settings for email alerts, or configure the Email schedule on this page. 4.4.3.1 Email Configuration You can configure the email settings for email alerts. When events occur, the DVR will send Email alert with a snapshot image (.jpg) to the receiver(s). -
Page 124: Email Schedule
H.265 VANGUARD 4x2H / 8x4H / 16x8H 4.4.3.2 Email Schedule You can configure the email schedule on this page. The selected event Email alerts will be sent out by the scheduled time. For example, if you set up Motion on Sunday between 6- 8am, the Motion Email alerts will only be sent out between 6-8am on Sunday. -
Page 125: Ftp
H.265 VANGUARD 4x2H / 8x4H / 16x8H 4.4.4 You can configure the FTP server setting on this page. When there is a Motion or I/O event occurs, the system will send an instant snapshot image to the FTP. For system alarm such as HDD lost and Video loss, the system will send alarm log to the FTP as well. -
Page 126: Device
H.265 VANGUARD 4x2H / 8x4H / 16x8H 4.5 Device You can configure the internal HDD and Cloud storage function on this page. 4.5.1 Disk 4.5.1.1 Disk You can configure the HDD settings on this page. Please connect the HDD(s) to the DVR in advance and ensure the power and SATA cables are properly connected between the DVR and HDD(s). - Page 127 H.265 VANGUARD 4x2H / 8x4H / 16x8H Select: Select the HDDs in the Select column to select the HDD(s), and then you can set up the Overwrite function or Format the HDD. Overwrite: Select Auto to enable the overwrite function; Off to disable the overwrite function.
-
Page 128: Disk Group
H.265 VANGUARD 4x2H / 8x4H / 16x8H 4.5.1.2 Disk Group You can configure the HDD to be different groups. HDD groups allow you to balance recordings across multiple hard drives. For example, you can record channels 1~4 to one hard drive and 5~8 to a second hard drive. This can reduce the amount of wear on the hard drives and may extend the life of the hard drives. -
Page 129: Cloud
H.265 VANGUARD 4x2H / 8x4H / 16x8H 4.5.2 Cloud You can configure the Cloud settings (Dropbox cloud storage) on this page. After configuring the settings, the system will automatically send the Motion and I/O alarm snapshot images to the associated Dropbox when alarm events occur. -
Page 130: System
H.265 VANGUARD 4x2H / 8x4H / 16x8H 4.6 System You can configure most of the system settings on the Main Menu. 4.6.1 General 4.6.1.1 General You can configure the general system settings on this page. Device Name: Input a desired name for your DVR. The name can include both letters and numbers. -
Page 131: Date And Time
H.265 VANGUARD 4x2H / 8x4H / 16x8H 4.6.1.2 Date and Time 【Date and Time】 Date: Set up the date for the system. Time: Set up the time for the system. Date Format: Select a format for the date. Time Format: Select a format for the time. - Page 132 H.265 VANGUARD 4x2H / 8x4H / 16x8H 【DST Setting】 The DST (Daylight Saving Time) function allows you to select the amount of time that Daylight Saving has increased by in your particular time zone or region. Enable DST: Check the box to enable the DST function.
-
Page 133: Output Configuration
H.265 VANGUARD 4x2H / 8x4H / 16x8H 4.6.1.3 Output Configuration You can configure the Main monitor and Call monitor settings on this page. Main Monitor Setting Video Output: Select Live-Out (Main Monitor) and then configure the below settings. Seq Mode: Select a layout for the sequence mode. For example, if you select Layout4, the DVR will display a quad view layout for all channels in sequence order. - Page 134 H.265 VANGUARD 4x2H / 8x4H / 16x8H Cursor Hidden Delay: Click the drop-down menu to select the time your DVR will hide the mouse cursor when idle. You can also disable this function by selecting OFF (password protection will be temporarily disabled).
-
Page 135: Multi-User
H.265 VANGUARD 4x2H / 8x4H / 16x8H 4.6.2 Multi-User You can configure the user settings on this page. Up to 7 user accounts (1 administrator and 6 users) can be configured. Default User: Select an user account as the default account. - Page 136 H.265 VANGUARD 4x2H / 8x4H / 16x8H Log Search: Allow users to check all the system logs. Parameter: Allow users to set all the parameter settings. Auto Reboot: Allow users to auto reboot the device. Manual Record: Allows users to manually start/stop recording.
-
Page 137: Maintenance
H.265 VANGUARD 4x2H / 8x4H / 16x8H 4.6.3 Maintenance On this page, you can search and view the system log, load default settings, upgrade the system, export and import system parameters and manager system auto reboot. 4.6.3.1 Log You can search for logs on this page. Select the start time, end time, log type and then click the Search button, the searched logs will be displayed on the list below. -
Page 138: Load Default
H.265 VANGUARD 4x2H / 8x4H / 16x8H Backup: Click to save all the searched logs to the USB storage device. Click the Backup button, the Backup window appears. You can also create a directory for the video clip(s) by clicking the Directory button on the upper-right corner. -
Page 139: Upgrade
H.265 VANGUARD 4x2H / 8x4H / 16x8H 4.6.3.3 Upgrade You can upgrade system firmware using this page. 1. Restore the firmware file (.sw) in a USB storage device and insert the USB storage device to the DVR. 2. Click the Select File button to select the firmware file from the USB storage device. -
Page 140: Auto Reboot
H.265 VANGUARD 4x2H / 8x4H / 16x8H 4.6.3.5 Auto Reboot This menu allows the system to auto reboot the DVR regularly. It is recommended to leave this function enabled, as it maintains the operational integrity of your DVR. Check the Auto Reboot box to enable the function and then set up the reboot time for the... -
Page 141: Ip Camera Maintain
H.265 VANGUARD 4x2H / 8x4H / 16x8H 4.6.4 IP Camera Maintain This menu allows you to upgrade the IP camera’s firmware and restore default settings of IP camera. 4.6.4.1 Upgrade This menu allows you to upgrade the IP camera’s firmware. -
Page 142: Reboot Ipc
H.265 VANGUARD 4x2H / 8x4H / 16x8H 4.6.4.3 Reboot IPC On this page, you can configure 1. Select one of the IP cameras you want to reboot. 2. Click the Reboot IPC button to start rebooting. You will be required to input the Admin... -
Page 143: Information
If P2P function is enabled, a QR code will be displayed on the Info page. You can scan the QR code with EverFocus VANGUARD App installed on your mobile device to add and remote access the DVR. To enable the P2P function, please refer to 4.4.1.3 Port Configuration. - Page 144 H.265 VANGUARD 4x2H / 8x4H / 16x8H 2. To add a DVR through P2P, tap the Menu button and then tap Device. 3. Tap Device ID and then scan the QR code on the info page of the DVR.
- Page 145 DVR and then click Save, the VANGUARD App will add the DVR. Once the DVR has been added, you can start accessing the DVR. For iOS users: 1. Install EverFocus VANGUARD App from Apple Store. After the installation process is complete, tap the Open button to start EverFocus VANGUARD App.
- Page 146 H.265 VANGUARD 4x2H / 8x4H / 16x8H 2. To add a DVR through P2P, tap Config > Devices > Add button > Manual. 3. In the Login Type field, tap Device ID.
- Page 147 H.265 VANGUARD 4x2H / 8x4H / 16x8H 4. Tap the QR code icon to scan the QR code on the info page of the DVR. 5. The scanned QR code will be displayed in the Device ID field. Input the Password of the DVR and then click Save, the VANGUARD App will add the DVR.
-
Page 148: Channel Information
H.265 VANGUARD 4x2H / 8x4H / 16x8H 4.6.5.2 Channel Information You can see the channel info on this page. 4.6.5.3 Record Info You can see the record info on this page. -
Page 149: Network State
H.265 VANGUARD 4x2H / 8x4H / 16x8H 4.6.5.4 Network State You can see the network state on this page. Total Band Width: It shows the DVR’s total input band width for IP cameras. Used Band Width: It shows the used band width of IP cameras. -
Page 150: Remote Access To The Dvr
H.265 VANGUARD 4x2H / 8x4H / 16x8H Chapter 5. Remote Access to the DVR Accessing the DVR on the Network Follow the steps below to access the DVR through a Web browser. Open a Web browser and in the address bar type the IP address of the DVR. - Page 151 H.265 VANGUARD 4x2H / 8x4H / 16x8H Note for the first time login: When the Plug-in blocked appears on the browser, click Allow… and then click Allow and Remember. Reload the webpage and you should see the remote live view page now.
- Page 152 H.265 VANGUARD 4x2H / 8x4H / 16x8H...
-
Page 153: Remote Live View Window
H.265 VANGUARD 4x2H / 8x4H / 16x8H 5.2 Remote Live View Window No. Name Description Camera List Click to hide or display the Camera List. Button Click to switch all the live streams to Main Stream, Sub Stream, or Mobile Stream (Mobile Stream is only available for IP cameras). -
Page 154: Camera List
H.265 VANGUARD 4x2H / 8x4H / 16x8H Click to enter the Local Settings page to set up the storage path, including Local Settings recording, download and snapshot. Please refer to 5.5 Local Settings. User / Logout Click User to view the login user info. Click Logout to log out the system. -
Page 155: Live View Function Icons
H.265 VANGUARD 4x2H / 8x4H / 16x8H 5.2.2 Live View Function Icons You can perform some functions for all the cameras on the Live View window. No. Name Description Divide Screen Click to select a layout. Play Click to display all camera streams on the Live window. - Page 156 H.265 VANGUARD 4x2H / 8x4H / 16x8H Click to turn on or off the audio of the selected channel. To perform this function, on the Live window, select a channel by clicking on it, Audio the selected channel will be highlighted with a blue frame, click the Audio button to enable the audio function.
-
Page 157: Ptz Setting Panel
H.265 VANGUARD 4x2H / 8x4H / 16x8H 5.2.3 PTZ Setting Panel You can control the connected PTZ (analog and IP) camera using the PTZ Control panel. On the Live View window, click the PTZ Setting button to display the PTZ Setting Panel. You can click the PTZ Setting button again to close the PTZ Control Panel. - Page 158 H.265 VANGUARD 4x2H / 8x4H / 16x8H Direction Buttons: Click the direction buttons to force the PTZ camera to turn to the direction. Auto Pan: Click to start the Auto Pan function. Click again to stop the Auto Pan function.
-
Page 159: Color Panel
H.265 VANGUARD 4x2H / 8x4H / 16x8H 5.2.4 Color Panel You can adjust Hue, Brightness, Contrast and Saturation value for each channel on the Live View window using the Color Panel. Click the Default button to restore all the value to factory default. -
Page 160: Playback
H.265 VANGUARD 4x2H / 8x4H / 16x8H 5.3 Playback Click the Playback button on the above navigation bar. The Playback window displays. For VANGUARD 16x8H, up to 16 multi-channel playback is supported; for VANGIARD 8x4H, up to 8 multi-channel playback is supported; for VANGIARD 4x2H, up to 4 multi-channel playback is supported. - Page 161 H.265 VANGUARD 4x2H / 8x4H / 16x8H You can use the Playback Panel to operate the below functions: 14 15 No. Name Description Play/Pause Click to Play or Pause playing back. Stop Click to Stop playing back. Forward by One Click the button to play the recording frame by frame.
- Page 162 H.265 VANGUARD 4x2H / 8x4H / 16x8H Click to stop playing back all the windows. This function is useful Stop All under the Multi-Channel Playback Separately mode (disable Synchronized playback). Audio Click to switch on/off the speaker. You can also adjust the volume.
-
Page 163: Download
H.265 VANGUARD 4x2H / 8x4H / 16x8H 5.3.1 Download You can download the searched recordings for a single channel on the Playback window. 1. Select a window you want to download the recordings by clicking on the window. The selected channel will be highlighted with a yellow frame. -
Page 164: Remote Settings
General). You can add IP cameras manually or automatically using this page. 5.4.1.1.1 Analog Channels This page is only available for VANGUARD 4x2H and VANGUARD 8x4H. If you want to add more IP cameras to the DVR, you can disable the analog cameras in order to release more channels for adding IP cameras. -
Page 165: Ip Channels
H.265 VANGUARD 4x2H / 8x4H / 16x8H 5.4.1.1.2 IP Channels You can add IP cameras manually or automatically using this page. Delete: On the IP cameras list, check the IP camera boxes and then click the Delete button to delete the selected IP cameras from the list. -
Page 166: Protocol Manage
H.265 VANGUARD 4x2H / 8x4H / 16x8H 5.4.1.1.3 Protocol Manage On this page, you can edit RTSP (Custom 1-16) protocol for IP camera connection. Custom Protocol: Select a custom RTSP protocol profile from the drop-down list to be configured. Up to 10 profiles can be configured. -
Page 167: Quick Add
H.265 VANGUARD 4x2H / 8x4H / 16x8H 5.4.1.1.4 Quick Add On the IP Channels page, click the Quick Add button to enter the Quick Add page. Quick Add Page When entering this page, DVR will automatically search for the IP cameras on the same network. -
Page 168: Live
H.265 VANGUARD 4x2H / 8x4H / 16x8H 5.4.1.2 Live You can configure camera OSD or image settings on this page. Channel: Select a channel. Name: Optionally input a channel name (English or Traditional Chinese). Show Name: Switch the button to the right to enable the function. -
Page 169: Ptz
UTC function, select COAX1 or COAX2. For more details on UTC function, please refer to 3.4.2.3 UTC Control. Note: EverFocus’ PTZ cameras can only connect to VANGUARD series DVRs through RS- 485. Therefore, EverFocus’ PTZ cameras does not support the UTC function. -
Page 170: Motion Detection
H.265 VANGUARD 4x2H / 8x4H / 16x8H 5.4.1.5 Motion Detection You can configure the motion settings and motion event notifications on this page. You can also enable the Push Notification function to send motion event alerts to your mobile devices (with VANGUARD App installed). For more details on Push Notification, please refer to Appendix B: Push Notification. -
Page 171: Pir Detection
This function is only available when the supported analog/IP cameras with PIR function are connected. For the supported cameras, please contact EverFocus (ts@everfocus.com.tw). When the camera detects an object move in or out of the PIR sensor range, the DVR will start recording or send alert notifications. -
Page 172: Video Cover
H.265 VANGUARD 4x2H / 8x4H / 16x8H 5.4.1.7 Video Cover This function is only available for analog cameras. The Privacy Mask can block out sensitive areas from view. This feature is useful when users don’t want the sensitive information visible. Up to four Privacy Masks can be configured. -
Page 173: Intelligent
H.265 VANGUARD 4x2H / 8x4H / 16x8H 5.4.1.8 Intelligent The optional intelligent functions, including Perimeter Intrusion Detection (PID), Line Crossing Detection (LCD), Stationary Object Detection (SOD), Pedestrian Detection (PD), Face Detection (FD), and Cross Counting (CC). 5.4.1.8.1 PID When objects (people, vehicle or other objects) enter in or out of a pre-defined region, the PID (Perimeter Intrusion Detection) event will be triggered. -
Page 174: Lcd
H.265 VANGUARD 4x2H / 8x4H / 16x8H 5.4.1.8.2 LCD When objects (people, vehicle or other objects) cross a pre-defined line, the LCD (Line Crossing Detection) event will be triggered. You can configure some event actions like event recording, Email alert or pop-up full screen when an event is triggered. To set up LCD, please... -
Page 175: Sod
H.265 VANGUARD 4x2H / 8x4H / 16x8H 5.4.1.8.3 SOD When DVR detects missing objects and unattended objects in a pre-defined area, the SOD (Stationary Object Detection) event will be triggered. You can configure some event actions like event recording, Email alert or pop-up full screen when an event is triggered. To set up SOD, please refer to 4.1.8.3 SOD for more details. -
Page 176: Schedule
H.265 VANGUARD 4x2H / 8x4H / 16x8H 5.4.1.8.6 CC The DVR will count the times when objects (people, vehicle or other objects) cross a pre- defined line, and the CC (Cross-Counting) event will be triggered. You can configure some event actions like event recording, Email alert or pop-up full screen when an event is triggered. -
Page 177: Intelligent Analysis
H.265 VANGUARD 4x2H / 8x4H / 16x8H 5.4.1.8.8 Intelligent Analysis On this page, you can search and view the statistical result of CC detection (Cross Counting). For more details on CC detection, please refer to 4.1.8.6 CC. Select the criteria and then click the Search button, the results will be listed at the lower... -
Page 178: Record
H.265 VANGUARD 4x2H / 8x4H / 16x8H 5.4.2 Record You can configure the recording settings on this page. 5.4.2.1 Encode On this page, you can configure the recording video or network transmission picture quality. Generally, main stream defines the recording video quality which will be saved in the HDD;... -
Page 179: Sub Stream
H.265 VANGUARD 4x2H / 8x4H / 16x8H 5.4.2.1.2 Sub Stream Sub stream defines the video quality which is being viewed via remote access, for example web client and CMS. To configure the settings, please refer to 4.2.1.2 Sub Stream. 5.4.2.1.3 Mobile Stream Mobile stream defines the video quality which is being viewed via remote access through mobile devices. -
Page 180: Record
H.265 VANGUARD 4x2H / 8x4H / 16x8H 5.4.2.2 Record On this page, you can configure the recording parameters and recording schedule for each channel. 5.4.2.2.1 Rec Parameters Channel: Select a channel. Stream Mode: Select a recording mode for the channel. If you select DualStream, the system will record both Main Stream and Sub Stream. -
Page 181: Schedule
H.265 VANGUARD 4x2H / 8x4H / 16x8H 5.4.2.2.2 Schedule On this page, you can configure the recording schedule for Normal, Motion or PIR recordings. Channel: Select a channel from the drop-down list. Normal: Move your mouse cursor over the schedule time blocks. The first line of the time block on each day is the Normal time blocks. - Page 182 H.265 VANGUARD 4x2H / 8x4H / 16x8H If you want to apply the same configurations from one channel to other channels, click the Copy (channel) button. If you want to apply the same configurations from one day to other days, click the Copy (day) button.
-
Page 183: Capture
H.265 VANGUARD 4x2H / 8x4H / 16x8H 5.4.2.3 Capture On this page, you can configure the snapshot parameters or set up the snapshot schedule. 5.4.2.3.1 Capture On this page, you can configure the snapshot parameters. Channel: Select a channel from the drop-down list. -
Page 184: Capture Schedule
H.265 VANGUARD 4x2H / 8x4H / 16x8H 5.4.2.3.2 Capture Schedule On this page, you can configure the snapshot schedule. Channel: Select a channel from the drop-down list. Normal: Move your mouse cursor over the schedule time blocks. The first line of the time block on each day is the Normal time blocks. - Page 185 H.265 VANGUARD 4x2H / 8x4H / 16x8H If you want to apply the same configurations from one channel to other channels, click the Copy (channel) button. If you want to apply the same configurations from one day to other days, click the Copy (day) button.
-
Page 186: Alarm
H.265 VANGUARD 4x2H / 8x4H / 16x8H 5.4.3 Alarm You can configure the alarm settings on this page. 5.4.3.1 Motion After configuring the Motion Detection settings (please refer to 5.4.1.5 Motion Detection), you can further configure the Motion Alarm settings. - Page 187 H.265 VANGUARD 4x2H / 8x4H / 16x8H FTP Upload: Switch the button to the right to enable the FTP function. When a motion event is triggered, the DVR will upload alarm images to FTP server. Note that for this function to work, you have to set up FTP in advance, please refer to 5.4.4.4 FTP.
-
Page 188: Pir
H.265 VANGUARD 4x2H / 8x4H / 16x8H 5.4.3.2 PIR After configuring the PIR Detection settings (please refer to 5.4.1.6 PIR Detection), you can further configure the PIR Alarm settings. Channel: Select a channel from the drop-down list. Buzzer: Select a time for DVR buzzer to sound when a PIR event is triggered. Select Disable to disable the function. - Page 189 H.265 VANGUARD 4x2H / 8x4H / 16x8H Click the Copy button to display the channel options. Select the channels and then click the Copy button to copy the same configurations from this channel to the selected channels.
-
Page 190: I/O
H.265 VANGUARD 4x2H / 8x4H / 16x8H 5.4.3.3 I/O After connecting the external IO devices to the DVR, you can configure the IO Alarm settings. Alarm In: Select an alarm input number. Alarm Type: Select an alarm type for the alarm input. Options include Normally-Open, Normally-Close and Off. - Page 191 H.265 VANGUARD 4x2H / 8x4H / 16x8H FTP Upload: Switch the button to the right to enable the FTP function. When an IO event is triggered, the DVR will upload alarm images to FTP server. Note that for this function to work, you have to set up FTP in advance, please refer to 5.4.4.4 FTP.
-
Page 192: Exception
H.265 VANGUARD 4x2H / 8x4H / 16x8H 5.4.3.4 Exception You can configure the system alarm settings on this page. Event Type: Select an event type. • No Space on Disk: When an HDD is full. • Disk Error: When the HDD is not detected properly. -
Page 193: Network
H.265 VANGUARD 4x2H / 8x4H / 16x8H 5.4.4 Network You can configure the network settings on this page. 5.4.4.1 General This page allows you to configure network parameters, such as DHCP and PPPoE. 5.4.4.1.1 General The DHCP setting lets the system use an automatically assigned (dynamic) IP address. This address can change under certain circumstances, for instance, when the DVR’s network... -
Page 194: Pppoe
H.265 VANGUARD 4x2H / 8x4H / 16x8H 5.4.4.1.2 PPPoE This is a DSL-connection application. The ISP will ask the user to input a username and password. Contact your ISP for these details. Note: If PPPoE is selected as the IP type, the supplied IP Utility program will not be able to detect the device. -
Page 195: Port Configuration
QR code will be displayed on the System Info page. You can scan the QR code with EverFocus VANGUARD App installed on your mobile device to add and remote access the DVR. Please refer to 4.6.5.1.1 Performing the P2P Function. -
Page 196: Ddns
H.265 VANGUARD 4x2H / 8x4H / 16x8H 5.4.4.2 DDNS You can configure the DDNS setting on this page. DDNS (Dynamic Domain Name System) is a service used to map a domain name to the dynamic IP address of a network device. You can set up the DDNS service for remote access to the DVR. -
Page 197: Email
H.265 VANGUARD 4x2H / 8x4H / 16x8H 5.4.4.3 Email You can configure the email settings for email alerts, or configure the Email schedule on this page. 5.4.4.3.1 Email Configuration You can configure the email settings for email alerts. When events occur, the DVR will send Email alert with a snapshot image (.jpg) to the receiver(s). -
Page 198: Email Schedule
H.265 VANGUARD 4x2H / 8x4H / 16x8H 5.4.4.3.2 Email Schedule You can configure the email schedule on this page. The selected event Email alerts will be sent out by the scheduled time. For example, if you set up Motion on Sunday between 6- 8am, the Motion Email alerts will only be sent out between 6-8am on Sunday. - Page 199 H.265 VANGUARD 4x2H / 8x4H / 16x8H applied with exception email alert function. Note that for this function to work, you will have to configure the exception settings in advance (please refer to 5.4.3.4 Exception). Intelligent: Move your mouse cursor over the schedule time blocks. The fourth line of the time block on each day is the Intelligent time blocks.
-
Page 200: Ftp
H.265 VANGUARD 4x2H / 8x4H / 16x8H 5.4.4.4 FTP You can configure the FTP server setting on this page. When there is a Motion or I/O event occurs, the system will send an instant snapshot image to the FTP. For system alarm such as HDD lost and Video loss, the system will send alarm log to the FTP as well. -
Page 201: Device
H.265 VANGUARD 4x2H / 8x4H / 16x8H 5.4.5 Device You can configure the internal HDD and Cloud storage function on this page. 5.4.5.1 Disk You can configure the HDD settings on this page. Please connect the HDD(s) to the DVR in advance and ensure the power and SATA cables are properly connected between the DVR and HDD(s). -
Page 202: Cloud
H.265 VANGUARD 4x2H / 8x4H / 16x8H 5.4.5.2 Cloud You can configure the Cloud settings (Dropbox cloud storage) on this page. After configuring the settings, the system will automatically send the Motion and I/O alarm snapshot images to the associated Dropbox when alarm events occur. - Page 203 H.265 VANGUARD 4x2H / 8x4H / 16x8H b. Input the username and password of the DVR. c. When this message appears, you are able to use the Cloud function.
-
Page 204: System
H.265 VANGUARD 4x2H / 8x4H / 16x8H 5.4.6 System You can configure most of the system settings on the Main Menu. 5.4.6.1 General 5.4.6.1.1 Date and Time System Time: Set up a system date. Date Format: Select a format for the date. - Page 205 H.265 VANGUARD 4x2H / 8x4H / 16x8H Week: Select a month, a particular day and time when Daylight Saving starts and ends. For example, 2am on the first Sunday of a particular month. Date: Select the start date (click the calendar icon), end date and time when Daylight Saving starts and ends.
-
Page 206: Multi-User
H.265 VANGUARD 4x2H / 8x4H / 16x8H 5.4.6.2 Multi-User You can configure the user settings on this page. Up to 7 user accounts (1 administrator and 6 users) can be configured. To edit the user privileges: 1. Select a user from the list by clicking on it, the below privilege options appears. - Page 207 H.265 VANGUARD 4x2H / 8x4H / 16x8H Manage Disk: Allow users to manage and control the HDD and USB storage device. Remote Login: Allow users to login the system remotely. SEQ Control: Allow users to use the sequence function. Manual Capture: Allow users to use the manual snapshot function.
-
Page 208: Maintenance
H.265 VANGUARD 4x2H / 8x4H / 16x8H 5.4.6.3 Maintenance On this page, you can search and view the system log, load default settings, upgrade the system, export and import system parameters and manager system auto reboot. 5.4.6.3.1 Load Default Select the desired items to be restored to factory default and then click Save. Restoring... -
Page 209: Upgrade
H.265 VANGUARD 4x2H / 8x4H / 16x8H 5.4.6.3.2 Upgrade You can upgrade system firmware using this page. Click the Scan button to select the firmware file from the computer. Click the Start button to start upgrading system. -
Page 210: Auto Reboot
H.265 VANGUARD 4x2H / 8x4H / 16x8H 5.4.6.3.3 Auto Reboot This menu allows the system to auto reboot the DVR regularly. It is recommended to leave this function enabled, as it maintains the operational integrity of your DVR. Select a user from the drop-down list and switch the Auto Reboot button to the right to enable the function. -
Page 211: Information
If P2P function is enabled, a QR code will be displayed on this Info page. You can scan the QR code with EverFocus VANGUARD App installed on your mobile device to add and remote access the DVR. To enable the P2P function, please refer to 5.4.4.1.3 Port Configuration. - Page 212 H.265 VANGUARD 4x2H / 8x4H / 16x8H 2. To add a DVR through P2P, tap the Menu button and then tap Device. 3. Tap Device ID and then scan the QR code on the info page of the DVR.
- Page 213 DVR and then click Save, the VANGUARD App will add the DVR. Once the DVR has been added, you can start accessing the DVR. For iOS users: 1. Install EverFocus VANGUARD App from Apple Store. After the installation process is complete, tap the Open button to start EverFocus VANGUARD App.
- Page 214 H.265 VANGUARD 4x2H / 8x4H / 16x8H 2. To add a DVR through P2P, tap Config > Devices > Add button > Manual. 3. In the Login Type field, tap Device ID.
- Page 215 H.265 VANGUARD 4x2H / 8x4H / 16x8H 4. Tap the QR code icon to scan the QR code on the info page of the DVR. 5. The scanned QR code will be displayed in the Device ID field. Input the Password of the DVR and then click Save, the VANGUARD App will add the DVR.
-
Page 216: Channel Information
H.265 VANGUARD 4x2H / 8x4H / 16x8H 5.4.6.4.2 Channel Information You can see the channel info on this page. -
Page 217: Local Settings
H.265 VANGUARD 4x2H / 8x4H / 16x8H 5.5 Local Settings You can configure the Record, Download and Snapshot storage path on this page. On the top menu bar, click Local Settings to enter this page. Record Path: Select a storage path for recordings. -
Page 218: Specification
H.265 VANGUARD 4x2H / 8x4H / 16x8H Chapter 6. Specification Model Name VANGUARD 4x2H System Operating System Embedded Linux Analog: Up to 4CH 8MP AHD/TVI/CVBS cameras Number of Channels IP: Up to 2CH 4MP IP cameras (up to 6CH if only IP cameras are... - Page 219 H.265 VANGUARD 4x2H / 8x4H / 16x8H Recording 4K Mode: Analog: 8MP: 6fps/CH; 5MP: 8fps/CH; 4MP: 10fps/CH; 3MP: 12fps/CH; 1080P: PAL: 25fps/CH) / NTSC: 30fps/CH Recording Rate / IP: PAL: 25fps/CH / NTSC: 30fps/CH Resolution 5MP Mode: Analog: 5MP: 12fps/CH; 4MP: 15fps/CH; 3MP: 20fps/CH; 1080P:...
- Page 220 H.265 VANGUARD 4x2H / 8x4H / 16x8H OSD: English, Japanese, Traditional Chinese, German, Russian, Language Dutch, Italian and more. Web: English Regulatory CE, FCC Functions Video Pause Video Loss Detection Motion Detection Event Log User Interface GUI (Graphical User Interface)
- Page 221 H.265 VANGUARD 4x2H / 8x4H / 16x8H Model Name VANGUARD 8x4H System Operating System Embedded Linux Analog: Up to 8CH 8MP AHD/TVI/CVBS cameras IP: Up to 4CH 4MP IP cameras (up to 12CH if only IP cameras are Number of Channels...
- Page 222 H.265 VANGUARD 4x2H / 8x4H / 16x8H Playback Synchronized Playback 8CH 4K Mode: Analog: 8MP: 7fps/CH (up to 4CH); 5MP: 10fps/CH (up to 8CH); 4MP: 15fps/CH (up to 8CH); 3MP: 17fps/CH (up to 8CH); 1080P: PAL: 25fps/CH (up to 8CH)/NTSC: 30fps/CH (up to 8CH)
- Page 223 H.265 VANGUARD 4x2H / 8x4H / 16x8H Schedule Setting User Access 2 Levels of User Access Defined Remote Client System Minimum Requirement Operating System Win7 (32 and 64-bit) / Win10 (32 and 64-bit) Intel Core I3-2100 Intel HD 2000 LAN Speed...
- Page 224 H.265 VANGUARD 4x2H / 8x4H / 16x8H Model Name VANGUARD 16x8H System Operating System Embedded Linux Analog: Up to 16CH 8MP AHD/TVI/CVBS cameras Number of Channels IP: Up to 8CH 4MP IP cameras (up to 8CH if only IP cameras are...
- Page 225 H.265 VANGUARD 4x2H / 8x4H / 16x8H Playback Synchronized Playback 16CH 4K Mode: Analog: 8MP: 7fps/CH (up to 8CH); 5MP: 10fps/CH (up to 16CH); 4MP: 15fps/CH (up to 16CH); 3MP: 17fps/CH (up to 16CH); 1080P: PAL: 25fps/CH (up to 16CH)/NTSC: 30fps/CH (up to 16CH)
- Page 226 H.265 VANGUARD 4x2H / 8x4H / 16x8H Schedule Setting User Access 2 Levels of User Access Defined Remote Client System Minimum Requirement Operating System Win7 (32 and 64-bit) / Win10 (32 and 64-bit) Intel Core I3-2100 Intel HD 2000 LAN Speed...
-
Page 227: Troubleshooting
H.265 VANGUARD 4x2H / 8x4H / 16x8H Chapter 7. Troubleshooting If you have problems with the system, run through the following checklist to see if you can solve the problem. 1. Q: What can I do if the system does not detect the HDD? A: Check if the power supply system is properly connected and power cord and power cables are securely connected, and if something wrong with the HDD interface. - Page 228 H.265 VANGUARD 4x2H / 8x4H / 16x8H 8. Q: Can I clear some records on HDD of DVR? A: In consideration of the file security, you may not clear part of records. If you want to remove all the records, you can format HDD.
-
Page 229: Usage Maintenance
H.265 VANGUARD 4x2H / 8x4H / 16x8H Chapter 8. Usage Maintenance 1. To shut down DVR, please firstly shut down the system and then turn off the power. Do not turn off the power directly or HDD data will be lost or damaged. -
Page 230: Appendix A: Ir Remote Control
H.265 VANGUARD 4x2H / 8x4H / 16x8H Appendix Appendix A: IR Remote Control The IR remote control is an accessory to enhance the convenient operation of the DVR. You can perform all the settings and operations from the remote control. -
Page 231: Appendix B: Push Notification
H.265 VANGUARD 4x2H / 8x4H / 16x8H Appendix Appendix B: Push Notification You can enable the Push Notification function to send motion event alerts to your mobile devices (with VANGUARD App installed). To use the Push Notification function, you have to set up the motion detection settings and enable the Push Notification function on the VANGUARD app. - Page 232 H.265 VANGUARD 4x2H / 8x4H / 16x8H 3. Switch the Push button to the right to enable the Push Notification function. 4. The Push Notification setting is complete. You can start receiving motion alarms from the DVR. 5. You can also tap on the alarms to play back the recordings.
- Page 233 TEL: +1 626 844 8888 FAX: +1 626 844 8838 www.everfocus.com sales@everfocus.com Ihr EverFocus Produkt wurde entwickelt Your EverFocus product is designed and und hergestellt mit qualitativ manufactured with high quality materials hochwertigen Materialien und and components which can be recycled Komponenten, die recycelt und wieder and reused.
Need help?
Do you have a question about the VANGUARD 4x2H and is the answer not in the manual?
Questions and answers