Table of Contents
Advertisement
Quick Links
Advertisement
Table of Contents

Related Manuals for Snom D717


Summary of Contents for Snom D717
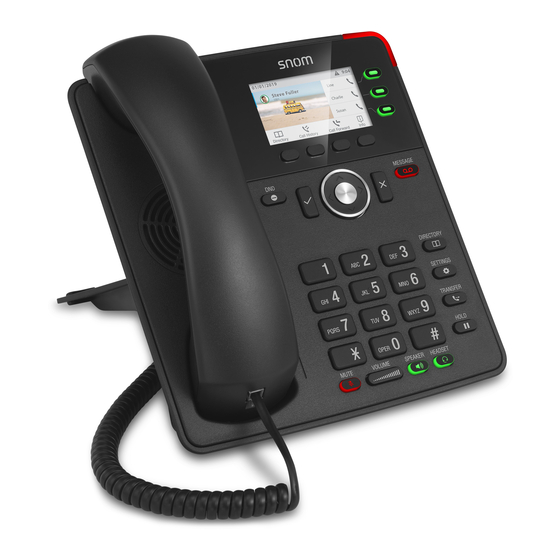
- Page 1 User Manual IP Phone D717...
-
Page 2: Table Of Contents
TABLE OF CONTENTS Copyright, Trademarks, GPL, Legal Disclaimers ............7 Important information ......................8 Safety instructions ......................... 8 Standards conformance ......................8 Product specifications ......................9 Disposal of the device ......................9 Cleaning ............................ 9 Setting up the phone ...................... 10 Delivery Content ........................10 Attaching footstand and handset ..................10 Wall mounting ........................11 Rotating the tab of the cradle .....................11... - Page 3 Settings ...........................28 Phone settings .........................28 Settings available in administrator mode .............28 Settings available in user mode ................30 Display settings .......................31 Adjusting the backlight on the phone's display ...........31 Adjusting display settings for connected D7s ............33 The phone's web interface .....................36 Opening the web interface ..................37 How the web interface works ..................38 User mode/administrator mode ..................39...
- Page 4 Using the phone ......................50 Making calls ...........................50 Selecting identity for current outgoing call ...............50 Using different audio devices ..................50 Handset ........................50 Headset ........................50 Speakerphone ......................50 Handset or headset and casing speaker ...............50 Using different dialing methods ...................51 Auto dial ........................51 Redialing ........................51 Calling number from call history (missed, received, dialed calls) ....51 Calling number from phone directory ..............52...
- Page 5 Turning off call forwarding ....................68 Turning forwarding of all calls on/off with a function key ........69 Configuring the function keys ..................70 Function key types on Snom phones ................70 Programming the function keys ..................72 Function key settings on the phone ................72 Context-sensitive keys ....................72...
- Page 6 Reset to factory values ..................... 105 TFTP Update ........................105 Manual initialization ......................105 Contacting Snom Support ....................106 Traces ........................... 106 Appendix 1 - Display Symbols and Icons ..............108 Symbols found in the function key line ................. 108 SmartLabel function symbols ..................
-
Page 7: Copyright, Trademarks, Gpl, Legal Disclaimers
Snom therefore disclaims all warranties and liability for the accurateness, completeness, and currentness of the information published, except in the case of intention or gross negligence on the part of Snom or where liability arises due to binding legal provisions. -
Page 8: Important Information
If the phone is not supplied with power via an Ethernet cable, use only a power adapter expressly recommended by Snom Technology (see "Product specifications" on page 9). Other power supplies may damage or destroy the phone, affect its behavior, or induce noise. -
Page 9: Product Specifications
Power: Power over Ethernet (PoE), IEEE 802.3af, Class 2. If PoE is not available, one of the following power adapters (not included in delivery) can be ordered separately: ◦ EU: Snom power adapter A6, Phihong model PSM10R-050, Snom PN 00004325 ◦ US: Snom power adapter A6, Snom PN 00004326 ◦... -
Page 10: Setting Up The Phone
D717 User Manual Setting up the Phone etting up the phone elivery Content Quick Installation General Public License Guide D735 Base phone unit Footstand Handset Handset cord Ethernet cable Quick Installation Guide, GNU General Public Licence ttaching footstand and handset The footstand can be attached at two different angles: 46°... -
Page 11: Wall Mounting
D717 User Manual Setting up the Phone 3. Plug the short end of the handset cord into the connector on the handset. 4. Place the phone on an even, horizontal surface. all mounting See "Appendix 3 - Wall Mounting" on page 114. -
Page 12: Connecting The Phone
D717 User Manual Setting up the Phone onnecting the phone (2, 3) (2, 3) (2, 3) (1, 2) (2, 3) If PoE not available Not included in delivery Optional The phone can be operated with Power over Ethernet (PoE) provided via the network cable or, if PoE is not avaible in your network, with the separately available 5V DC power adapter (see "Product... -
Page 13: Connecting A Headset
1. Connect the plug labeled D3xx/D785 on the 2xRJ12 cable that came with the Snom EHS Adapter to the jack marked EHS on the D717, and the plug labeled EHS box to the Snom EHS Adapter's RJ12 jack. For more information, see the illustrated EHS Advanced Quick Installation Guide at http://wiki.snom.com/Accessories/Documentation. -
Page 14: Initializing And Registering The Phone
For more information, see "Identities/accounts" on page 87. Initialization Snom phones are plug-and-play. Once the phone is connected to your network, it will begin to initialize. Note: Normally the initialization is completely automatic, using DHCP. If the phone... - Page 15 D717 User Manual Setting up the Phone 2. Next, you will be prompted in the language of your choice to select a time zone. This affects the time shown on your display. Fig. 1 Fig. 2 Fig. 3 ◦ Press , respectively, on the navigation key to move up or down the list one item at a time;...
-
Page 16: What To Do If Initialization And Registration Are Unsuccessful
What to do if initialization and registration are unsuccessful Your network or your VoIP provider may require more login data than requested by the Snom phone during the initialization and registration process. This data is entered on the web interface of the... -
Page 17: Correcting The Clock
See "Identities/accounts" on page 87 for more information. Note: A number of IP telephony service providers and a number of SIP PBXs require settings that are different from Snom’s standard factory settings. Snom’s web page lists numerous providers and PBXs that have been tested for interoperability with our phones and specific settings that may be required. -
Page 18: Getting To Know Your Phone
Press the function key underneath the display to show phone's IP address and URL to Snom's Wiki symbol to activate the function, open the list etc. depicted by the symbol above the key. - Page 19 D717 User Manual Getting to Know Your Phone Audio control keys Adjusting the volume ◦ of the ringer when the phone is idle or ringing ◦ of the handset/casing loudspeaker when in a call Mute/unmute microphone Toggling between handsfree and handset mode. Press to dial number and accept calls on speakerphone.
-
Page 20: Led Indicators
D717 User Manual Getting to Know Your Phone ED indicators Call indicator The bright-red LED situated on the top right corner of the phone indicates incoming, ongoing, held, and missed calls. LED status indications: • Blinking rapidly when a call is coming in. -
Page 21: Hard Keys
D717 User Manual Getting to Know Your Phone ard keys Context-sensitive, programmable function keys These function keys can be programmed on the Function Keys page of the phone's web interface with a number of key events; these functions will then be available when the phone is in idle mode. For more information, see "Configuring the function keys"... -
Page 22: Audio Control Keys
D717 User Manual Getting to Know Your Phone Hold key. See "Hold" on page 58 for further information. Turn "do not disturb" (DND) mode on and off for all identities registered on the phone (Fig. 1). If you want to turn on DND for one or more, but not all of the identities (Fig. 2), use the Configuration identity settings on the phone's web user interface. -
Page 23: Alphanumeric Keypad
D717 User Manual Getting to Know Your Phone Alphanumeric Keypad Input modes and navigation Activity Current audio mode: Handset Input mode Headset numerals Speakerphone when dialing Delete character to the left of the Move cursor cursor Pool: Directory, Redial to the left... -
Page 24: Entering Numerals, Letters, Special Characters, And Symbols
D717 User Manual Getting to Know Your Phone Entering numerals, letters, special characters, and symbols When entering letters and special characters, pause briefly after each character until the cursor has moved forward so that you won't overwrite the last character you entered. Pausing is not necessary when entering numerals. -
Page 25: Display Layout
D717 User Manual Getting to Know Your Phone isplay layout In idle mode Info/status bar Smart Confi gured labels identities Function key line Context-sensitive function key symbols Fig. 1 When active Showing SmartLabels Not showing SmartLabels Info/status bar Smart labels... - Page 26 D717 User Manual Getting to Know Your Phone ◦ Messages will be deleted automatically when the underlying cause is removed, i.e., call forwarding is turned off, HTTP password is set, etc. ◦ Temporarily suppressing messages: Press , if the button is available, or >...
-
Page 27: When The Phone Is Active
D717 User Manual Getting to Know Your Phone Function key line The symbols on the buttons in this line depict the functions that can be activated by pressing the function key underneath the respective symbol. See "Appendix 1 - Display Symbols and Icons" on page 108 for a complete list. -
Page 28: Settings
D717 User Manual Getting to Know Your Phone (Fig. 3). By pressing LED key P3 (see "At a glance" on page 18) for 2 seconds, the labels will be displayed in the alternative display mode, full label (Fig. 4), for 3 seconds. You can turn the display modes off, switch default and alternative display mode, and set a different timespan for returning to default mode on the phone and on the phone's web interface;... - Page 29 D717 User Manual Getting to Know Your Phone 1 Preferences 2 Call Features 3 Identity 4 Network 5 Maintenance 6 Information 1 Select outgoing 1 Language 1 IP Settings 1 Security 1 Status info Call forwarding identity 2 Reregister 1 Admin mode 2 Date &...
-
Page 30: Settings Available In User Mode
D717 User Manual Getting to Know Your Phone Settings available in user mode 1 Preferences 2 Call Features 3 Identity 4 Maintenance 5 Information 1 Select outgoing 1 Language 1 Security 1 Status info Call forwarding identity 1 Administrator 2 Date & Time... -
Page 31: Display Settings
D717 User Manual Getting to Know Your Phone Display settings The backlight on the display of the phone and on the displays of the connected expansion modules are adjusted separately on the phone and on the phone's web interface for the times when the devices are active and when they are idle. - Page 32 D717 User Manual Getting to Know Your Phone 2. Select Preferences and press 3. Select Display and press If there is no D7 expansion module connected to the phone, the Display menu appears (Fig. 3, if the ambient light sensor setting is off; Fig. 4, if it is set to regulate backlight on activity).
-
Page 33: Adjusting Display Settings For Connected D7S
D717 User Manual Getting to Know Your Phone 4. Enter the number of seconds in the text field of "Dim after (in seconds)". The default is 20 seconds. 5. Click on Apply and/or Save. Adjusting display settings for connected D7s You can adjust the intensity of the display's backlight, the display contrast, and the font size of the function key labels for the connected D7 expansion modules. - Page 34 D717 User Manual Getting to Know Your Phone ◦ Font size. As of FW version 8.9.3, it is possible to adjust the font size for the connected expansion modules. The size is set separately for line and tile layout, and the respective setting is applied to all connected modules with line or tile layout, respectively.
- Page 35 D717 User Manual Getting to Know Your Phone 6. Press the right or left arrow on the navigation key or the function key underneath the function key line to decrease or increase the backlight's intensity. 7. Press to save and return to the Expansion Modules menu.
-
Page 36: The Phone's Web Interface
D717 User Manual Getting to Know Your Phone The phone's web interface When the web interface is opened for the first time upon initialization or after a reboot, you will see the Security page. We urge you to set administrator and HTTP passwords to protect your phone. The default administrator password is 0000 (4 zeros);... -
Page 37: Opening The Web Interface
D717 User Manual Getting to Know Your Phone characters on the phone's keypad (see "Entering numerals, letters, special characters, and symbols" on page 24). Write the password down and store it in a safe place! ◦ HTTP user name and password. Enter the data in the text fields of the HTTP Server section and click Apply. -
Page 38: How The Web Interface Works
D717 User Manual Getting to Know Your Phone How the web interface works The vertical menu on the left side of the window is always the same, no matter which window happens to be open at the time. Available menu items depend on whether the phone is running in user or administrator mode. -
Page 39: User Mode/Administrator Mode
Getting to Know Your Phone ser mode/administrator mode Snom phones can be operated in administrator or user mode. In administrator mode, all settings are accessible and can be modified; in user mode, a number of settings are not accessible. The factory default is administrator mode. - Page 40 D717 User Manual Getting to Know Your Phone Fig. 1 Fig. 2 To return the phone and its web interface to administrator mode, open the Advanced Settings page, enter the administrator password in Administrator Login and click on Apply (Fig. 2). The default password is 0000 (4 x zero).
-
Page 41: Directories
D717 User Manual Directories irectories irectory The directory is the built-in directory of the phone. It can hold up to 1000 entries. Entries can be added and edited on the phone and on the web interface. Any changes you make on the web interface will not take effect until you click on "Save" or on "Apply"... -
Page 42: Contact Types
D717 User Manual Directories Contact Types VIP: Calls from numbers with this contact type will ring on your phone even when DND mode is active. You can assign a ringtone to this contact type. If your VIP is also assigned to a group (see below) and if that group has a distinct ringtone, the ringtone assigned to the group will be played. -
Page 43: Adding/Editing Entries On The Phone
D717 User Manual Directories Adding/Editing Entries on the Phone Adding new entry manually 1. Press to open the phone's directory. 2. Press the function key underneath Note: See "Input modes and navigation" and "Entering numerals, letters, special characters, and symbols" on page 24 for information on how to enter data. -
Page 44: Adding Current Caller
D717 User Manual Directories Adding current caller With the call on the line, you can add the caller's name (if transmitted) and phone number to the directory. If the name has not been transmitted, the number will be used for both name and number. -
Page 45: Adding/Editing Entries On The Web Interface
D717 User Manual Directories Fig. 1 Fig. 2 a. If there is more than one phone number associated with the entry and you want to delete only one of them, press (Fig. 2). b. Select the number you want to delete with (Fig. -
Page 46: Editing An Entry
D717 User Manual Directories ◦ Blue area: The data entered in the textfields will be displayed when the entry is opened on the phone. The data can be used to sort entries by group, name, organization, etc., and can be edited on the phone. - Page 47 D717 User Manual Directories • Adding additional phone number (subentry) for a name ◦ Jane Smith's entry has only one phone number, her SIP phone number. In this example, the phone number of Jane Smith's landline will be added to the directory.
-
Page 48: Deleting Entry On Web Interface
Deleting whole directory Deletes the entire directory irretrievably! Importing/Exporting Directory See our Wiki at http://wiki.snom.com/Web_Interface/V8/Directory. xternal directories Available if provided by your network, your VoIP provider, or another external source. LDAP Enter the necessary data received from your administrator, VoIP provider or other external source in the text fields of the phone‘s web interface >... - Page 49 D717 User Manual Directories 2. Enter the URI received from your administrator, VoIP provider or other external source in the text field of Contact list URI. 3. Optional: Click on the radio button on of the Publish presence setting. 4. Click on Apply and Save.
-
Page 50: Using The Phone
D717 User Manual Using the Phone sing the phone This section describes the functions of the phone with the factory default settings. If your phone was installed and/or set up by someone else, the default settings may have been changed. Please check with that person or company if the phone does not react as described here. -
Page 51: Using Different Dialing Methods
D717 User Manual Using the Phone Using different dialing methods Auto dial When this function is enabled, the phone will dial the number on the display when the time span in seconds specified in this setting has elapsed since the last digit was typed. In the default setting, the function is switched off. -
Page 52: Calling Number From Phone Directory
D717 User Manual Using the Phone Fig. 1 Fig. 2 Fig. 3 2. Use on the navigation key to select a call from the call list. 3. Press to dial the selected number. Calling number from phone directory 1. Press to open the phone's directory. -
Page 53: Speed Dialing
Call completion Note: This function depends on whether it is available in your network or not. On Snom phones call completion means that when a called number is busy or not available, you can have your phone call you back as soon as the dialed number is not busy anymore or available again. -
Page 54: Quicklookup (Number Guessing/Auto Completion)
D717 User Manual Using the Phone 3. When the number becomes available, you will see it announced on the display (Fig. 4). Fig. 4 4. Press to dial; or press to turn off call completion for this call. QuickLookup (number guessing/auto completion) -
Page 55: Accepting Calls
D717 User Manual Using the Phone ccepting calls Using different audio devices Handset: Pick up the handset. Headset: Press . If the phone is already in headset mode, you can also press the blinking line key. Speakerphone: Press or the blinking line key. -
Page 56: Call Waiting
D717 User Manual Using the Phone When these prerequisites are met, the status of the monitored extension is indicated by the LED of the function key: ◦ Blinking LED: Incoming call ringing. If the call is not answered, press the key to pick it up;... - Page 57 D717 User Manual Using the Phone Fig. 4 ◦ Press to return to the Connected screen with your current connection (Fig. 2 and - if there is more than one call waiting - Fig. 7). Note: Pressing will affect the call shown on the display, i.e., your current connection in Fig.
-
Page 58: Active Calls
D717 User Manual Using the Phone ctive calls Hold One call on hold Press to put the ongoing call on hold. Held calls are indicated threefold: ◦ By the text on the display. ◦ By the slowly blinking line key. -
Page 59: Conference
D717 User Manual Using the Phone In Fig. 3–5 there are two calls on hold. Fig. 3 shows the connected call, Fig. 4–5 the calls on hold. Press the function keys underneath to show the call not currently on screen. -
Page 60: Transferring Calls
D717 User Manual Using the Phone Fig. 2 Fig. 3 Fig. 4 • Selecting individual participants. ◦ On the conference screen (Fig. 2), press to select the first of the participants of the conference; press again to select the next one of the participants (Fig. 3). -
Page 61: Blind Transfer
D717 User Manual Using the Phone 2. Dial the number you want to transfer the call to and announce the call (Fig. 2). You can also select a number from the internal directory or one of the available external phone directories (see "Calling number from phone directory"... - Page 62 D717 User Manual Using the Phone 2. Dial the number (Fig. 8), or press to select a number from the internal directory or one of the available external phone directories (see "Calling number from phone directory" on page 52 and "Calling number from external directory" on page 52).
-
Page 63: Terminating Calls
D717 User Manual Using the Phone erminating calls • When using the handset: Place the handset in the cradle or press • When using speakerphone or a headset: Press issed calls Missed calls are indicated by the call LED (steady light), the missed call symbol in the status line (Fig. -
Page 64: Call Lists
D717 User Manual Using the Phone all lists Four call lists of missed, dialed, received, and all calls are stored on the phone. They contain the number, time and date, and duration of the calls. If the memory allotted to storing the call lists is full, the oldest ones will be overwritten. -
Page 65: Locking And Unlocking The Keyboard
D717 User Manual Using the Phone Fig. 5 Fig. 6 Fig. 7 Missed calls: To, from, time (and date if not today), total number of missed calls from caller (Fig. 5 and 6). Received and dialed calls: To, from, time (and date if not today), duration of call (Fig. 7). -
Page 66: Automatically
D717 User Manual Using the Phone Automatically There are four options for rejecting incoming calls automatically or to have them forwarded automatically, either always or under certain conditions: • Deny List. Calls from phone numbers on this list will not ring on your phone; callers will hear the busy signal. -
Page 67: Call Forwarding
D717 User Manual Using the Phone all forwarding The phone can be set to forward incoming calls, either always (Fig. 2, 3, and 4) or under certain conditions (Fig. 5 and 6). The settings can be done on the phone and on the web interface. -
Page 68: Making/Changing The Settings On The Phone And Turning On Call Forwarding
D717 User Manual Using the Phone Making/changing the settings on the phone and turning on call forwarding Forward all Forward when busy Forward after timeout Press Press Call Features Call Features Call Features Press Call Forwarding Call Forwarding Call Forwarding... -
Page 69: Turning Forwarding Of All Calls On/Off With A Function Key
D717 User Manual Using the Phone Turning forwarding of all calls on/off with a function key Turning call forwarding on Note: Call forwarding is set separately for each configured identity. When the setting is done on the phone, it applies to the identity selected as the outgoing identity at the time. -
Page 70: Configuring The Function Keys
Snom has therefore designed the function keys to be programmable, even the preprogrammed "hard keys" whose default function is printed on them. - Page 71 D717 User Manual Configuring the Function Keys other module of the same type is connected to the phone. They are not visible on the function keys page when no expansion module is connected. Settings descriptions: ◦ Context This setting specifies which configured identity will be used when executing the functionality of the key.
-
Page 72: Programming The Function Keys
D717 User Manual Configuring the Function Keys Note: The LP Feature must be deactivated for the functions Push2Talk and Line Info Layer. If the LP feature of a key has been disabled, use the Preferences menu to access the key's configuration menu. Open the Key x Function menu of the key (see "SmartLabel keys"... - Page 73 D717 User Manual Configuring the Function Keys Fig. 3 Fig. 4 Fig. 5 2. The keys in the Context-sensitive keys menu from top to bottom represent the keys underneath the display from left to right (Fig. 4). Select the key, in our example the left key, and press .
-
Page 74: Dedicated Keys
D717 User Manual Configuring the Function Keys 10. Press to return to the Context-sensitive keys menu (Fig. 14), or press for 3 seconds to return to the idle screen where the symbols in the function key line have been changed to LDAP and speed dial, respectively (Fig. -
Page 75: Smartlabel Keys
D717 User Manual Configuring the Function Keys SmartLabel keys 1. Select SmartLabel keys (Fig. 22). 2. In the SmartLabel keys menu, select the key (Fig. 23) and press to open the Key 1 Function menu (Fig. 24). The LED of the key flashes yellow. -
Page 76: Expansion Module Keys
D717 User Manual Configuring the Function Keys (Fig. 30) to save and return to the Key 1 Function menu 7. Enter the extension number and press (Fig 31). 8. Entering a label (Short Label and Full Label) is optional. This is the data displayed on the key's label area on the phone's display (see "SmartLabels"... -
Page 77: Programming The Function Keys On The Phone's Web Interface
D717 User Manual Configuring the Function Keys mapped onto the key will be displayed in the label area instead. Enter a name or other descriptive text (Fig. 37) and press , or press without entering data. 4. Press briefly to return to the Key Function menu (Fig. 38) which now shows the new setting;... -
Page 78: Key Assignment Page
D717 User Manual Configuring the Function Keys Key assignment page Fig. 2 - K ey assignment page, no D7 Expansion Module connected to phone Fig. 3 - K ey assignment page with one connected D7 Expansion Module. Apply button moves to bottom of page. -
Page 79: Selected Examples For Function Key Programming
D717 User Manual Configuring the Function Keys When D7 Expansion Modules are connected to the phone, their function keys are added to the function key page of the phone (Fig. 3, above). The settings of their function keys are stored on the phone and, unless deleted prior to the module's disconnection, remain available to be used when the same or any other module of the same type is connected to the phone. -
Page 80: Example 1, Extension Monitoring And Call Pick-Up
D717 User Manual Configuring the Function Keys Example 1, Extension monitoring and call pick-up This feature makes it possible to pick up a call ringing on another extension registered at the same registrar, for example when the other extension is busy or when the user is absent. The prerequisites for this function are: ◦... -
Page 81: Example 2, Extension Monitoring And Call Pick-Up On D7 Expansion Module
D717 User Manual Configuring the Function Keys Example 2, Extension monitoring and call pick-up on D7 expansion module • All functions available on the freely programmable LED function keys of the phone are available on the connected D7. • The prerequisites are the same as those for the LED function keys on the phone. See "Example 1, Extension monitoring and call pick-up"... -
Page 82: Example 3, Speed Dialing
D717 User Manual Configuring the Function Keys Example 3, Speed dialing Besides using the Speed Dial page on the web interface to program speed dial numbers, you can also put the functionality on the freely programmable function keys with LEDs on the phone or a connected expansion module. -
Page 83: Example 4, Changing Setting Of Context-Sensitive Key
D717 User Manual Configuring the Function Keys Example 4, Changing setting of context-sensitive key You can select a different key event to be available on the four keys under the display when the phone is in idle mode. You cannot change the functions that are available when the phone is active, for example when you are in a call, when the phone is ringing, etc. -
Page 84: Display Options For Smartlabel Keys
D717 User Manual Configuring the Function Keys Display options for SmartLabel keys A number of settings control the appearance of the SmartLabels on the display; they can be set on the phone and on the phone's web interface. There are separate settings for the idle screen, call screens, and other screens. - Page 85 D717 User Manual Configuring the Function Keys 5. Select Idle Screen Behavior (Fig. 2), Call Screen Behavior, or Other Screens Behavior and press bold italic to open the screen behavior menu (Fig. 3). The default settings are indicated in the following table. The available options for the three different screens are:...
-
Page 86: Settings On The Web Interface
D717 User Manual Configuring the Function Keys Settings on the web interface 1. On the phone's web interface, click on Function Keys in the menu on the left. Fig. 8 2. Click the SmartLabel tab. bold italic 3. The default settings are indicated in in the table. -
Page 87: Customizing The Phone Settings
If you want more information on a web interface setting, click on the radio button with the question mark that you see to the right of each item. It links to a page on Snom’s Wiki with detailed information about that particular item. - Page 88 D717 User Manual Customizing the Phone Settings On the web interface Open the web interface and click on an identity in the menu on the left. The configuration window for that identity will open; it contains five tabs, with the left one, Login, visible in the front. To view the other pages, click on the respective tab;...
-
Page 89: Assigning Ringtones
D717 User Manual Customizing the Phone Settings Assigning ringtones The phone has 10 built-in ringtones that can be assigned to identities, group types, and the contact type "VIP". It is also possible to download a custom melody. When an incoming call to an identity is ringing, the phone will play the ringtone assigned to that identity, unless it is a call from a VIP or from a group with a distinctive ringer of their own. -
Page 90: Date And Time Formats
D717 User Manual Customizing the Phone Settings ate and time formats Date and time formats can be set on the phone and on the web interface. The defaults are US time format and 24-hour clock (Fig. 1 and 2). European date and time formats are shown in Fig. 3 and 4, US date and time formats in Fig. -
Page 91: Time
D717 User Manual Customizing the Phone Settings • Web interface settings. 1. Open the Preferences page > Appearance tab > Interface elements section > U.S. Date Format. The default is "on". Select "on" to have the date shown on the phone's display in "mm/dd/yyyy" format. -
Page 92: Language Settings Of Phone And Web Interface
D717 User Manual Customizing the Phone Settings On the phone > Preferences > Date & Time > Time Zone. 1. Press Fig. 1 Fig. 2 ◦ Press to collapse the list to show only selected times zones and/or locations where the phone language is spoken). -
Page 93: Web Interface Language
D717 User Manual Customizing the Phone Settings Setting on the web interface 1. Open Preferences page > General tab > General Information section > Language. 2. Select the language from the drop-down list. 3. Click on Apply and Save. Web interface language 1. -
Page 94: Keyboard Locking
D717 User Manual Customizing the Phone Settings eyboard locking In the default setting, the keyboard can be locked for outgoing calls except for calls to the numbers defined as emergency numbers (see "Emergency numbers" on page 93) by pressing for 3 a »... -
Page 95: Allow/Disallow Keyboard Locking
D717 User Manual Customizing the Phone Settings Fig. 7 On the web interface 1. Open Preferences page > General tab > Privacy section > PIN to lock/unlock. Fig. 8 Note: The textfield always contains 8 dots, whether a PIN has been set or not and regardless of the length of the PIN. -
Page 96: Call Forwarding
D717 User Manual Customizing the Phone Settings all forwarding This feature automatically redirects all or certain incoming calls to another phone or a mailbox. Call forwarding is configured for each identity separately. On the web interface, the settings are configured on the Configuration identity (1-6) pages. If you set call forwarding on the phone, the settings are applied to the identity selected as the outgoing identity at the time of the configuration;... -
Page 97: Call Completion
3. Click on Apply and Save. all completion On Snom phones call completion means that when a called number is busy or not available, your phone will call you back as soon as the dialed number is not busy anymore or available again. The factory default setting is "off". -
Page 98: Call Waiting
D717 User Manual Customizing the Phone Settings all waiting Default setting: When in a call, another call coming in is announced visually in the status line and acoustically by a double beep. See "Call waiting" on page 56 on how to use this feature. Available settings: ◦... -
Page 99: Hiding My Caller Id
D717 User Manual Customizing the Phone Settings Setting on the web interface Call waiting is set independently for each identity. 1. In the menu on the left, click on the identity whose call waiting settings you want to change. 2. Click on the SIP tab. The setting Call Waiting Indication is the second to last on the page. -
Page 100: Rejecting Anonymous Calls
D717 User Manual Customizing the Phone Settings ejecting anonymous calls With this setting you will not receive calls from phones whose number is not shown on your display. Anonymous callers will hear the busy signal. Please note that calls from analog phone connections will, most likely, be received as anonymous calls. -
Page 101: Speed Dial
D717 User Manual Customizing the Phone Settings Setting on the web interface 1. Open the Preferences page > General tab > Contact search section. 2. To change the specified minimum number of characters required, type the new number into the text field of QuickLookup Start Length. -
Page 102: Auto Dial
D717 User Manual Customizing the Phone Settings Setting on the web interface 1. In the menu on the left side of the phone's web interface, click on Speed Dial. 2. Enter one phone number with any required prefixes (area code, country code, operator/auto attendant, etc.) in the text field for each respective number or special character in the table. -
Page 103: Auto Dial Target
D717 User Manual Customizing the Phone Settings 4. Select Timer and press 5. Enter a time span in seconds from 1 to 10 and press . As of FW 10.1.26, the valid time span is 1 to 2147483647 (68.1 years). -
Page 104: Software Update
10. DO NOT DISCONNECT THE POWER WHILE THE PHONE IS REBOOTING! uto provisioning For more information, see our web page http://wiki.snom.com/Features/Mass_Deployment. 1. Open the phone’s web interface > Advanced Settings page > Update tab. 2. Please click on the radio button of each line and read the information on each setting on its Wiki page before you configure the setting. -
Page 105: Troubleshooting
D717 User Manual Troubleshooting roubleshooting eboot 1. Press 2. Select Maintenance and press 3. Select Reboot and press 4. When asked whether to "Reboot?", press 5. Wait for the idle screen to reappear. ard reboot Disconnect the power, wait for 10 seconds, and reconnect. Wait for the idle screen to reappear. -
Page 106: Contacting Snom Support
Make sure to delete private and/or security-relevant data like the MAC address, public IP address, etc. races Snom Support may ask you to submit a SIP Trace and/or a PCAP Trace to help them analyze your problem. Performing a SIP Trace 1. - Page 107 D717 User Manual Troubleshooting 4. Click on Reload. 5. Copy the text and submit to Support in whatever form they requested you to use. If it is the public forum, make sure to delete private and/or security-relevant data like the MAC address, public IP address, etc.
-
Page 108: Appendix 1 - Display Symbols And Icons
Turning DND on and off Contacts list Forwarding all calls (turning on/turning off) Presence signaling on/off Retrieving messages from mailbox Settings menu Directory IP address of phone and Snom's web address Redial (dialed calls) Received calls Missed calls Favorites LDAP Directory Silencing ringer... - Page 109 D717 User Manual Appendix 1 Context-sensitive symbols These are the symbols displayed in the function key line when the phone is active, for example when a call is ringing, when you are dialing, etc. Confirming a selection or an action...
-
Page 110: Smartlabel Function Symbols
D717 User Manual Appendix 1 martLabel function symbols These are the symbols displayed in the SmartLabel area of the programmable function keys P1–P32 when the function key page with the configured key is on-screen. For information on the configuration of the keys see "Configuring the function keys" on page 70. - Page 111 D717 User Manual Appendix 1 Contacts / Presence state Delete message Deny all - reject current and all future calls from the number Directory (internal phonebook) Push2Talk DND (turning on/turning off) (red symbol = DND is on) Favorites Forwarding all calls (turning on/turning off)
-
Page 112: Display Indications
D717 User Manual Appendix 1 isplay indications On activity Outgoing call ringing Incoming call ringing Connected (single connection or conference) Call disconnected/terminated Dialed number is busy Holding call Call being held by other party On idle screen Outgoing identity •... -
Page 113: Appendix 2 - Status Messages
D717 User Manual Appendix 2 ppendix 2 - Status Messages Whenever there is a current message concerning the status of the phone, the function key will be available. Press the function key or, if it not available, > Information > Status Info) to open the Status info screen. -
Page 114: Appendix 3 - Wall Mounting
D717 User Manual Appendix 3 ppendix 3 - Wall Mounting Not included in the delivery are the two screws (diameter of head between 6 and 9 mm, diameter of body max. 4.5 mm) and two screw anchors/molly bolts/wall plugs appropriate for your type of wall. -
Page 115: Appendix 4 - Programmable Functions
(Busy Lamp Field) incoming call ringing on your own extension. These functionalities depend on your PBX; for more information, please check snom's interoperability page and the PBX manual. With Asterisk, generally use this feature rather than extension. Button This is a function key that is connected to your PBX to perform a task specified in the buttons document. - Page 116 These functionalities depend on your PBX; for more information, please check snom's interoperability page and the PBX manual. With Asterisk, generally use BLF rather than this function.
- Page 117 D717 User Manual Appendix 4 This function key can be used for regular calls to an extension that is reached via an IVR or auto attendant and a number of voice prompts where the caller has to make a selection by pressing a key after or during the prompt. If you know which keys need to be pressed in which order in order to reach the desired extension, the entire process can be automated and considerably speeded up.
- Page 118 D717 User Manual Appendix 4 Presence If supported by your PBX, the LED of this function key will reflect the presence status (ringing, busy, available, etc.) of the extension specified in the "Number" text field. The function key can also be used to dial the extension, usually when the destination signals availability.
-
Page 119: Key Events
FW versions lower than 8: Phone's IP address, MAC address, and firmware version. FW 8 and higher: Phone's IP address and the URI to Snom Wiki. IP address, MAC address, and firmware version can be found in Settings > 6 Information >... - Page 120 D717 User Manual Appendix 4 LDAP Directory Allows the user to look up a remote directory while dialing. Once set, this pressed key will open up the Direcory Search window. If LDAP is setup, corresponding matching entries as returned by the sever will be shown. If LDAP is not used and and presence_ lookup_number setting is turned on, the contact matches will be shown.
-
Page 121: Appendix 5 - Gnu General Public License
Appendix 5 - GNU General Public License COPYRIGHT NOTICE AND WARRANTY We protect your rights with two steps: (1) copyright the software, and (2) offer you this license which gives you legal permission to copy, DISCLAIMER distribute and/or modify the software. Also, for each author‘s protection and ours, we want to make certain that everyone understands that there is no warranty for this free software. - Page 122 Appendix 5 the Program itself is interactive but does not normally print such an modify or distribute the Program or its derivative works. These actions announcement, your work based on the Program is not required to are prohibited by law if you do not accept this License. Therefore, print an announcement.) by modifying or distributing the Program (or any work based on the Program), you indicate your acceptance of this License to do so, and...
- Page 123 If requested by you, the complete corresponding source code of the 11. BECAUSE THE PROGRAM IS LICENSED FREE OF CHARGE, THERE Software can be sent by Snom Technology GmbH on a standard data IS NO WARRANTY FOR THE PROGRAM, TO THE EXTENT PERMITTED BY APPLICABLE LAW.
- Page 124 Tel. +886 2 8751 1120 Fax +44 169 348 7509 Fax +886 2 8751 1130 offi ce.uk@snom.com offi ce.tw@snom.com Your specialist retailer - Ihr Fachhändler - Votre distributeur - Su distribuidor - Il tuo rivenditore: © Snom Technology GmbH v1.01...
Need help?
Do you have a question about the D717 and is the answer not in the manual?
Questions and answers