Table of Contents
Advertisement
Quick Links
EOF10-10/20
Operations & Service Manual
ISO 9001-2015
Giles Foodservice Equipment
2750 Gunter Park Drive West • Montgomery, AL 36109 USA
Phone: 334.272.1457 • Toll Free: 800.554.4537
(USA & Canada Only)
Fax: 334.239.4117 • Website: www.gfse.com • Email: services@gfse.com
Printed in USA, Form 60347 (Rel. Date: Nov.1999, Rev. Date: Feb.2018, Rev. D)
Advertisement
Table of Contents

Related Manuals for GILES EOF10-10


Summary of Contents for GILES EOF10-10
- Page 1 EOF10-10/20 Operations & Service Manual ISO 9001-2015 Giles Foodservice Equipment 2750 Gunter Park Drive West • Montgomery, AL 36109 USA Phone: 334.272.1457 • Toll Free: 800.554.4537 (USA & Canada Only) Fax: 334.239.4117 • Website: www.gfse.com • Email: services@gfse.com Printed in USA, Form 60347 (Rel. Date: Nov.1999, Rev. Date: Feb.2018, Rev. D)
- Page 3 • During the Limited Warranty period, Giles will replace or recondition, at its factory, any part or parts of this unit which Giles inspectors judge defective, provided the unit has been subjected to normal usage, properly installed, operated and maintained.
-
Page 4: Table Of Contents
EOF10-10 Control Panel (Dual Display) ........ - Page 5 Setting the Cooking Temperature, EOF-20 Single Display ........41 5-01.3.1 Manually Setting the Cooking Temperature, EOF10-10 Dual Display ......42 5-01.4.
- Page 6 Table Of Contents EOF 10-10/20 8-05. EOF-20 Front Lower Cabinet (Right-Side)..........94 8-06.
- Page 7 Table Of Contents EOF 10-10/20 Notes:...
-
Page 8: Safety
The instructions contained in this manual have been prepared to aid you in learning the proper procedures for installing, operating and servicing your new Giles Model EOF Series Electric Fryers. Throughout this manual, safety precautions are identified through the use of the safety alert symbol and three sig- nal words: DANGER, WARNING and CAUTION. -
Page 9: Specific Safety Precautions
Safety EOF 10-10/20 Specific Safety Precautions For your safety, please observe the following precautions when operating or servicing Model EOF Electric Fryers. Adhering to the following important safety information will help to prevent personal injury and/or damage to the equipment. •... - Page 10 Safety EOF 10-10/20 • The appliance must remain in an upright (vertical) position. • Exercise care when removing wooden crate framework and the unit from shipping pallet. • DO NOT operate the appliance, unless its components and their intended functions are fully understood (see Section 3).
- Page 11 Safety EOF 10-10/20 • Components exposed on the Control Panel surface are impact-sensitive. To avoid damage and maintain proper operation, exercise care when working around, or using rolling carts or tables, near the appliance. • DO NOT install the unit near combustible walls and materials. Failure to maintain safe distance may result in fire.
-
Page 12: Introduction
(5) minutes; single system serves each vat. EOF10-10 Split Vat: Single fryer unit with a split cooking vat, providing two (2) completely separate 10” vats for cooking different food types, such as poultry and seafood, without flavor cross-over. -
Page 13: Specifications
Introduction EOF 10-10/20 1-04. Specifications 1-04.1. Overall Dimensions Inches [mm]... -
Page 14: 1-04.2. Regulatory Listings
Introduction EOF 10-10/20 1-04.2. Regulatory Listings 1-04.3. Basket Size Dimensions Volume Model Length Width Height In 3 EOF10-10 Vat 18-1/2 5-1/2 0.005 1-04.4. Vat Size & Oil Capacity Height Length Width Shortening Capacity (Top of element to Model (Inside) (Inside) - Page 15 Introduction EOF 10-10/20...
- Page 16 Control, and Fire Protection of Commercial Cooking Operations, NFPA 96. Compliance with the above steps will help to ensure safe and proper installation of this equipment. If there are any questions concerning these procedures, contact a nearby Giles Manufacturer’s Representative, or call Giles Technical Support at 800.554.4537.
-
Page 17: Installation
Be sure all casters are unlocked; the Fryer bank can then be easily manuvered manually. IMPORTANT! Giles shall not be liable for damages caused to the unit by improper use of material handling equipment or poor work practices, or for personal injuries or property damage which may be incurred during installation of this equipment. -
Page 18: Electrical Requirements
Phase Amp Draw *EOF10-10 EOF-20 * EOF10-10 unit is a split vat fryer with a single power supply ... kW rating is total of the unit. 2-04. Electrical Connections NOTE: Each unit in the Fryer bank requires a separate power supply. Electrical installation materials (breakers, conduit, fittings, wire, etc.) and installation labor shall be supplied by the customer. -
Page 19: 2-04.1. Electrical Connections Diagram
EOF 10-10/20 Installation 2-04. Electrical Connections - Contiuned 5. Connect the electrical ground wire between Ground Lug and a proper earth ground. 6. Route appropriately size power supply wires to the Disconnect and continue to Fryer. 7. Connect the power wires to the appropriate Terminal Blocks inside the Service Box, see Figure 2-04.1. 8. -
Page 20: Ventilation Of Fryer
Installation EOF 10-10/20 2-05. Ventilation of Fryer NOTE: Guidelines and codes for ventilation system requirements may differ from locale to locale. Always consult with the local authorities having jurisdiction to ensure compliance. Consult a professional ventilation or HVAC company for assistance in determining whether existing systems are suf- ficient the accommodate this equipment, or in designing a ventilation hood system to comply with code require- ments. - Page 21 Installation EOF 10-10/20...
-
Page 22: Overview
Overview EOF 10-10/20 3. Overview The following section provides a brief overview of the components, functions, and accessories of the EOF10-10/20 Fryer unit. Please review this section carefully before proceeding any further. Auto-Basket Lifts Section 3.01. EOF10-10 Split Vat with... - Page 23 Overview EOF 10-10/20 3-01. Basket Lifts and Baskets...
- Page 24 Overview EOF 10-10/20 3-01. Basket Lifts and Baskets Item Description Function Holds basket in the proper position as it raised or lowered by the Basket Carrier (2) Auto-Basket Lift. Elevator (2) Lowers or raises the Fry Basket. Placed inside the Fry Vat to prevent excess breading or product Fry Screen crumbs from falling into and accumulating in the area around the heating elements.
- Page 25 Overview EOF 10-10/20 3-02. EOF-20 Basket Hanger and Baskets...
- Page 26 Overview EOF 10-10/20 3-02. EOF-20 Basket Hanger and Baskets Item Description Function Holds basket(s) allowing excess oil to drain from cooked product. Basket Hanger Hanger located either over right vat. Placed inside the Fry Vat to prevent excess breading or product Fry Screen crumbs from falling into and accumulating in the area around the heating elements.
- Page 27 Overview EOF 10-10/20 3-03. Control Panel (EOF10-10 Dual Display)
- Page 28 Overview EOF 10-10/20 3-03. Control Panel (EOF10-10 Dual Display) Item Description Function Power Switch The Power Switch turns Fryer power ON and OFF. Turns power to heating elements ON/OFF. Place Switch in the OFF Heat Switch 2 & 10 position when performing certain functions and when unit is (Left &...
- Page 29 Overview EOF 10-10/20 3-04. EOF20 Control Panel Lift Switch is plugged...
- Page 30 Overview EOF 10-10/20 3-04. EOF20 Control Panel Item Description Function Power Switch The Power Switch turns Fryer power ON and OFF. Turns power to heating elements ON/OFF. Place Switch in the Heat Switch OFF position when performing certain functions and when unit is shutdown.
- Page 31 Overview EOF 10-10/20 3-05. Lower Cabinet, EOF10-10 (Left-Side)
- Page 32 Overview EOF 10-10/20 3-05. Lower Cabinet, EOF10-10 (Left-Side) Item Description Function Opens and closes the cook vat Drain Valve. Always be sure the valve is fully CLOSED (tab on handle hooked through panel opening) prior to adding cooking oil, or boil out solution. The Fryer will not...
-
Page 33: Lower Cabinet (Right-Side)
Overview EOF 10-10/20 3-06. Lower Cabinet, EOF20 (Right-Side) - Page 34 Disconnect Filter Pan Quick- Connects Filter Pan to fryer pump and filtration system. (Located Disconnect in Right-Side Cabinet on EOF10-10/20 Model) Pump Discharge Diverter Directs Filter Pump discharge to either return oil to the Cook Vats Valve Handle or send it to the Oil Discharge Hose.
-
Page 35: Filter Pan Assembly
Overview EOF 10-10/20 3-07. Filter Pan Assembly... - Page 36 Overview EOF 10-10/20 3-07. Filter Pan Assembly Item Description Function Hold-Down Lever Secures the Hold-Down Frame tightly against the filter media to create a seal with the Pan bottom. Holds and seals the filter media (paper or screen) against Filter Pan Hold-Down Frame bottom.
-
Page 37: Accessories Included
Overview EOF 10-10/20 3-08. Accessories (Included) Part Description/Part Number Function Kettle Drain Brush Used for cleaning the Fry Pot. P/N: 71025 Stir Utensil Used for stirring oil and product being P/N: 77775 cooked. Fry Vat Clean Brush Used for cleaning Fry Pot and P/N: 71100 Elements. - Page 38 Overview EOF 10-10/20 3-08. Accessories (Included) Part Description/Part Number Function L- Shaped Brush Used for cleaning between P/N: 73233 elements. Vat Drain Clean Out Used to clear excessive sediment build P/N: 36577 up from the Vat Drain. Used for removing liquid shortening from unit.
- Page 39 EOF-10-10 or the EOF-20. P/N: 70420 (1) EOF-20 Fry Screen P/N: 70083 Used to prevent excess breading or product from contacting the Heating (2) EOF10-10 Fry Screen Elements. P/N: 71110 Used for removing cooked product when Scoop Basket batch frying without Baskets.
-
Page 40: Accessories Not Included
Overview EOF 10-10/20 3-09. Accessories (Not Included) Part Description/Part Number Function Filter Paper Used to filter the cooking oil. P/N:60709 Filter Powder Used to help clean the cooking oil. P/N: 72004 Fryer Boil-Out Used to help clean the fry pot. P/N: 72003... - Page 41 EOF 10-10/20 3-09. Accessories (Not Included) Part Description/Part Number Function A portable oil disposal container with a capacity of 80 lbs of Giles Oil Caddy liquid shortening. P/N: 79187 Note: For use with filtered, warm oil only. No crumbs or debris.
-
Page 42: Installation Checkout & Preparation
Start-up assistance and basic operational training by a factory-approved service agent can possibly be arranged if desired. Expense for such service is not included as part of the Fryer purchase. Call Giles at 800.554.4537 for more details. Before attempting to operate the Fryer, please refer to Section 3 to become familiar with the various controls and their function. - Page 43 Installation Checkout & Prep EOF 10-10/20 4-01. Settings Before Each Test - Continued 3. Open the Right-side Cabinet Door and remove the Filter Pan. ③ 4. Ensure the Drain Valve Handle on each unit is in the CLOSED and Locked position (tab pushed thru opening &...
-
Page 44: Power Test
Installation Checkout & Prep EOF 10-10/20 4-02. Power Test The following test will ensure the unit has power. Perform test on each unit. 1. Follow steps shown in Section 4-01. 2. Be sure the main circuit breaker supplying the unit power is ON. -
Page 45: Heating Element Test
⑤ to the HEAT position (both switches on 7. Set the Heat Switch EOF10-10). The HEAT light(s) should turn on. Leave switch(s) in the HEAT position NO MORE THAN 10 to 12 SECONDS. EOF-20 Note: During this time, should the HEAT light turn off, an alarm sound and the OLED Display show a MAX ELEMENT TEMP or... -
Page 46: Filter Pump Test
EOF 10-10/20 Installation Checkout & Prep 4-04. Filter Pump Test The following test will ensure the Filter Pump is operating correctly. 1. Follow steps shown in Section 4-01. 2. Open right Cabinet Door (EOF-20). 3. Place the palm of your hand over the Filter Pan quick- ①... -
Page 47: Perform Boil Out Procedure
Installation Checkout & Prep EOF 10-10/20 4-05. Perform Boil Out Procedure Perform a Boil Out Procedure on each cook Vat to remove any dirt or debris that may have accumulated during shipping, and to remove any residue from manufacturing processes. See Section 6-01, Boil Out Procedure. After boil-out is complete, proceed to Section 4-06. -
Page 48: Fryer Operation
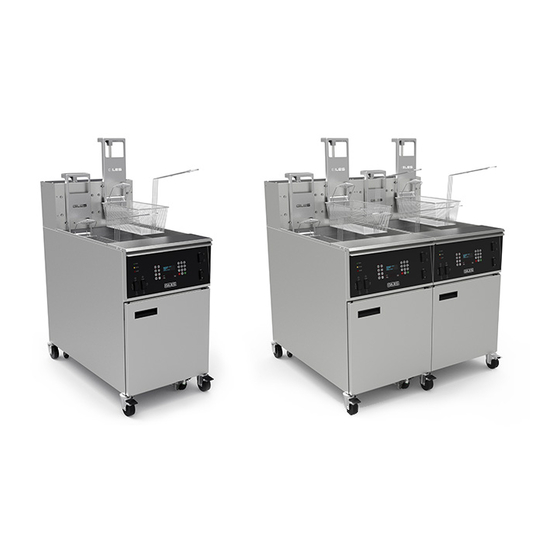
EOF Series Fryers are high capacity electric Fryers, banked together into a single unit that features a single oil filtration system. The EOF10-10/20 banked unit includes an EOF10-10 Fryer, a split-vat design single unit with two 10x20” cook vats, each separately controlled and an EOF20 Fryer is a 20” square vat. -
Page 49: Computer Controller
The following sections explain the functions, features, programming, and operational procedures for the two different Computer Cooking Controllers used on EOF Series Fryers ... Single & Dual Display. EOF20 EOF10-10, DUAL DISPLAY 5-01.1 Keys and Functions Numeric Keypad: Used for entering Fryer settings and to edit preset Menu Item cooking parameters. - Page 50 Fryer Operation EOF 10-10/20 5-01.1 Keys and Functions - Continued MENU Key: An action key which is pressed in combination with other keys to access programmed Menu Item presets. Fifty (50) Menu Presets are factory-programmed in the Controller. EDIT Key: An action key which is pressed in combination with other keys to enter edit mode for changing or creating Menu Item preset settings.
-
Page 51: 5-01.2 Controller General Operation
(a). EOF20/24, press the [START} key + select BASKET side: [4] = Left, [6] = Right, [5] = Both ... (b). EOF10-10, press the [START] key + [4} for LEFT VAT or [6] for RIGHT VAT. -
Page 52: 5-01.3. Setting The Cooking Temperature, Eof-20 Single Display
Fryer Operation EOF 10-10/20 5-01.3. Setting the Cooking Temperature, EOF-20 Single Display Cooking temperature setpoint is input manually as shown below. Menu Item presets in this Controller do not contain a cooking temperature setting. Instructions are shown on the OLED Display to help guide User through the process. FOR EOF-20 FRYER Use keypad to enter cooking... -
Page 53: 5-01.3.1 Manually Setting The Cooking Temperature, Eof10-10 Dual Display
Manually Setting the Cooking Temperature, EOF10-10 Dual Display Each side of the EOF10-10 unit is a separate cook Vat capable of maintaining a different cooking temperature. Menu Item Presets stored in the Dual Display Controller include a temperature setting, as well as Menu Item Names and cooking times, however rather than selecting a preset, temperature can also be manually set as described below. -
Page 54: 5-01.4 Manually Setting A Cook Time
Fryer Operation EOF 10-10/20 5-01.4 Manually Setting a Cook Time The following explains the procedure for manually inputting a cooking time, rather than selecting a preset. IMPORTANT! If the PASSCODE feature is enabled, cooking TIME cannot be manually input without first entering the required password. - Page 55 EOF 10-10/20 5-01.4.2 Manually Setting the Cooking Time - EOF10-10 Dual Display The following procedure is for manually inputting an oil temperature setpoint, rather than selecting a preset. Information is shown on the OLED Display to help guide Users through the process. NOTE: Left-hand Display is...
-
Page 56: Working With Menus
● Cooking Time - Cook time setting for the specific food item. ● Cooking Temperature (EOF10-10 Unit ONLY) - Cooking oil temperature setting for the specific food item. Temperature setpoint is automatically changed to this setting when the Preset is selected for cooking. -
Page 57: Selecting A Menu Preset For Cooking
Method (A) Enter a desired Menu no. [1-50]. Enter desired Menu no. [1-50]. EOF-20 EOF10-10, DUAL DISPLAY Use keypad to select Use keypad to select Basket side Vat Side to set [4]=Left [5]=Both [6]=Right [4]=LEFT [6]=RIGHT After selecting a desired Menu Preset, pressing the [START] key begins a cook cycle, see Section 5-01.6. If the actual oil temperature is lower than temperature setpoint and the Heat Switch is in the [HEAT] or [ON] position the Controller will enter PREHEAT mode and oil begins heating. - Page 58 Use numeric keypad [2] & [8] (UP/DOWN) to scroll through list to a desired Menu EOF-20 EOF10-10, DUAL DISPLAY Use keypad to select Use keypad to select Basket side Vat Side to set [4]=Left [5]=Both [6]=Right [4]=LEFT [6]=RIGHT After selecting a desired Menu Preset, pressing the [START] key begins a cook cycle, see Section 5-01.6. If the actual oil temperature is lower than temperature setpoint and the Heat Switch is in the [HEAT] or [ON] position the Controller will enter PREHEAT mode and oil begins heating.
-
Page 59: Editing A Menu Preset
Fryer Operation EOF 10-10/20 5-01.5.2 Editing a Menu Preset Editing [NAME] - Method 1: NOTE: Left-hand side on Dual Display Controller is the Letter by letter. active display when editing Menu Items. Select edit NAME as shown on left. Flashing cursor is positioned at 1st letter. - Page 60 NOTE: All digits must be entered, ex: 500 = 5:00. Edit SETPOINT TEMPERATURE - EOF10-10 UNIT ONLY: Scroll to and select [TEMP] as shown on previous page. NOT a preset value on the EOF-20 Unit; TEMP must be input manually.
- Page 61 Fryer Operation EOF 10-10/20 5-01.5.2 Editing a Menu Preset - Continued Edit STIR OVERRIDE Setting: Certain food products may, or may not, require stirring during the cook cycle, regardless of how the global STIR ALARM setting in USER SETTINGS (Section 5-01.8) is specified. STIR OVERRIDE is provided so that the STIR ALARM can be individually set for particular menu items.
-
Page 62: Cooking Cycle, General Overview
Fryer Operation EOF 10-10/20 5-01.6 Cooking Cycle, General Overview EOF-20 SINGLE DISPLAY The temperature SETPOINT, MENU NAME, and COOKING TIME currently selected for each Basket side are shown on the OLED Display. When in READY state the Temperature setpoint is shown on 7-Segment Display. The READY message indicates that the cooking oil is at proper temperature and the Fryer is ready for cooking. - Page 63 EOF 10-10/20 5-01.6 Cooking Cycle, General Overview - Continued EOF10-10, DUAL DISPLAY The temperature SETPOINT, MENU NAME, and COOKING TIME currently selected are shown on the OLED Display of each Vat. When in READY state the Temperature setpoint is shown on 7-Segment Display of each Vat.
-
Page 64: 5-01.7.1 Manally Operating Basket Lifts (If Equipped)
Basket is automatically raised from the oil. On EOF-20 Single Display unit, the message DONE COOKING - LEFT, RIGHT or BOTH is displayed. For EOF10-10 Dual Display unit, message DONE COOKING is shown on the appropriate vat display. Pressing the ALARM key silences the alarm and the Fryer re-enters READY state, ready to cook the next load of product. -
Page 65: Cool Mode
USER SETTINGS; factory-set default = 275°F. The setting can be edited by the user; valid range is 200°F to 350°F; see Section 5.01.8, Edit User Settings. EOF10-10, DUAL DISPLAY: EOF-20, SINGLE DISPLAY: Press [COOL] key once. Each Vat side can Press [COOL] key once. -
Page 66: Auto-Cool Feature
• To exit BOIL OUT Mode: press the [CLEAR] key once, then ... EOF-20: press [4] key to STOP the BOIL OUT cycle. EOF10-10: press [4] key to STOP left side ... [6] key to STOP right side. -OR- press [CLEAR] again to continue BOIL OUT Mode. -
Page 67: User Settings, Access & Edit
Fryer Operation EOF 10-10/20 5-01.8 User Settings - Access & Edit NOTE: The message TOO LOW or Press the Press the TIME key START key TOO HIGH will be displayed Use numeric keypad [4] & [6] (left/right) to scroll through list until if a value being entered is desired Setting is shown on the OLED Display. -
Page 68: Password Protection
User Settings Menu. If you desire to have Password protection enabled, or have questions concerning this feature, call Giles Technical Services at 800.554.4537 to request the passcode and instructions as to how to enable this feature. -
Page 69: Controller Errors & Alarms
An error occurred while saving settings to the EEPROM. Contact ER37 EEPROM Error Giles Tech Service (800.554.4537). The ADC (Analog-to-Digital Converter) chip that reads output ER38 Internal ADC Error from thermocouples is not working. MCB1 board must be replaced. Contact Giles Tech Service (800.554.4537). - Page 70 CHARCOAL FILTER MISSING (Error Code 22) - Not Applicable CLOGGED FILTER (Error Code 23) - Not Applicable E.A.C. DIRTY (Error Code 24) - Not Applicable NOTE: If an error condition cannot be resolved, please contact a factory-authorized service agent, or call 800.554.4537 for Giles Technical Support.
- Page 71 Fryer Operation EOF 10-10/20 5-02. Cooking Procedures This section describes procedures for cooking product on the EOF Series Fryers. Procedures presented assume beginning with a clean empty Fryer. 1. Set the cooking oil temperature to a desired EOF-20 setpoint; see Section 5-01.3, Manually Setting the Cooking Temperature, or select a desired Menu Item preset;...
- Page 72 Fryer Operation EOF 10-10/20 5-02. Cooking Procedures - Continued ① to the ON 6. Set the Power Switch ⑤ position. The Power Light will turn on. EOF-20 If the Fryer unit is equipped with Basket Lifts, and if User wants to enable them, ⑥...
-
Page 73: Cooking Procedure
Fryer Operation EOF 20/20 5-02. Cooking Procedure - Continued ⑪ 10. Check the oil level, it should now be at the FULL Mark . Add shortening if needed and stir in. If the HEAT light turns ON after adding additional oil, continue stirring until it turns OFF again before cooking. - Page 74 [5]=BOTH or [6]=RIGHT ... for EOF10-10, select Vat side to start; [<4]=LEFT, [6>]=RIGHT. Cooking settings for both Basket sides are shown on the EOF-20 Single Display ... EOF10-10 Dual Display shows setting for each Vat side. Timer begins as soon as side selection is made.
- Page 75 OLED Display on EOF-20 reads ALARM STIR LEFT/RIGHT/BOTH SIDE ... on ⑰ EOF10-10 each side displays separately. Press the [ALARM] key ⑯ using the provided stirring utensil stir the cooking product.
-
Page 76: Filtering Used Cooking Oil
Hold-down Frame is securely locked in place. 5. Add approximately 5 oz. of a suitable Filter Powder (available from Giles, P/N 72004), distributing evenly over the filter media surface. Use of a good quality filter aid is important for removing soluble impurities and reconditioning the oil. - Page 77 Fryer Operation EOF 10-10/20 5-03. Filtering Used Cooking Oil - Continued During the next steps cooking oil is drained from the vat, exposing the heating elements. Even though safety interlocks are in place, failure to place the HEAT Switch in the OFF position before draining could result in fire.
- Page 78 Fryer Operation EOF 10-10/20 5-03. Filtering Used Cooking Oil - Continued ⑨ 10. Used cooking oil will begin to circulate through the filter media in the Pan and return to the fry Vat. Leave the Drain Valve open to allow oil to continually circulate through the system for about 5 minutes.
-
Page 79: Removal Of Waste Cooking Oil From Fryer
This section explains the procedure for removing used cooking oil from Fryer for disposal. Oil must be removed before a Boil-Out procedure can be performed. In this section a Giles Oil Caddy (not included) is depicted for oil disposal; any suitable disposal system can be used. - Page 80 Discharge Hose Coupling ⑩ 7. Place the discharge end into an appropriate hot waste oil Disposal Container (Giles Oil Caddy is shown) ⑪, 8. Place the Pump Discharge Valve Handle inside the right-hand Cabinet, in the TO DISCHARGE HOSE position.
- Page 81 Fryer Operation EOF 10-10/20 5-04. Removal of Waste Cooking Oil from Fryer - Continued ⑬ 11. Place the Power Switch in the OFF position. ⑭ to the CLOSED 12. Push the Drain Valve Handle EOF-20 position, tuck tab behind panel. ⑮...
-
Page 82: Using Optional Stainless Filter Media Screen
This section describes use and care of the renewable, stainless steel, Filter Screen (SSFS). The SSFS is a direct replacement for paper filter media that can cleaned and reused many times. It is an optional item (Giles #41017) that can be ordered with new units, or purchased later as a filter paper alternative. -
Page 83: Normal Shut-Down
Green Power lights will turn OFF. 3. If required, turn off supply power to each Fryer unit at the main electrical panel. EOF10-10 5-07. Emergency Shut-Down In case of emergency, remove supply power to the unit by switching off main circuit breakers or disconnects within... - Page 84 Fryer Operation EOF 10-10/20 Notes:...
- Page 85 Fryer Operation EOF 10-10/20...
-
Page 86: Cleaning
4. Follow the use instructions of the Fryer Cleaner product being used, add the recommend amount of product to water and stir to mix. Boil-Out Cleaner is available from Giles, part number 72003 (case of 4, 8-lbs containers), or 72003-1 (single 8-lb container). - Page 87 NOTE: If a different boil-out temperature or time is required, the settings can be changed in USER SETTINGS, Section 5- EOF10-10 01.8. BOIL TEMP is variable between 185° - 208°F. BOIL OUT TIME is variable between 1 - 45 minutes.
- Page 88 Cleaning EOF 10-10/20 6-01. Boil Out Procedure - Continued 13. Remove Screen from the vat and, as needed, use Pot Brush & Element Brush to scrub residue from vat sides, bottom, and the heating elements. Rinse and flush the Vat thoroughly with clean warm water. Note: Take care to avoid damaging the temperature probes located inside the vat and attached to heating elements.
-
Page 89: Cleaning The Filter Pan & Renewing Filter Media
Cleaning EOF 10-10/20 6-02. Cleaning the Filter Pan & Renewing Filter Media This section explains the procedure for cleaning the Filter Pan and refreshing the filter media - either reusable mesh screen (SSFS) or disposable filter paper. At a minimum, this cleaning should be performed once per day of opera- tion, and each time a Boil-Out procedure (Section 6-01) is performed. - Page 90 Cleaning EOF 10-10/20 6-02. Cleaning the Filter Pan & Renewing Filter Media - Continued 7. Reassemble the Filter Pan and install either (1) new sheet of Filter Paper, or the clean, dry SSFS Screen, as applicable. 8. Reinstall Filter Pan Cover, position assembled Filter Pan ⑨...
- Page 91 Cleaning EOF 10-10/20 Notes:...
-
Page 92: Troubleshooting
EOF 10-10/20 EOF 10-10/20 7. Troubleshooting This section describes troubleshooting procedures. IMPORTANT! Most troubleshooting and repairs should only be performed by qualified service technicians. Users should only attempt actions involving operational procedures. For more detailed professional evaluation, wiring diagrams are provided for each unit; they are attached to the Back Panels, if needed. - Page 93 Troubleshooting EOF 10-10/20 7-01. Temperature Control System - Continued Problem Probable Cause Corrective Action FRYER HEATING SLOWLY: A. Incorrect cooking procedures Consult Operation Manual for proper Slow recovery procedures Heat Light staying ON continuously B. Heating element failing Replace faulty element C.
-
Page 94: Oil Filtration System
Troubleshooting EOF 10-10/20 7-01. Temperature Control System - Continued Problem Probable Cause Corrective Action FRYER WILL NOT HEAT: A. Power surge Place Power Switch to OFF for 5 sec- Power Light ON onds, return to ON Heat Switch in HEAT (ON) position High-Limit Light ON B. - Page 95 Troubleshooting EOF 10-10/20 7-03. Basket Lift System (Only if Equipped) Problem Probable Cause Corrective Action BASKET LIFT WILL NOT OPERATE (UP A. Power not ON Place Power Switch in ON position OR DOWN): B. Basket Lift Switch is not in the ON Place Lift Switch in ON position to position enable Basket Lifts...
-
Page 96: Parts List
Website: www.gfse.com or e-mail services@gfse.com. The goal at Giles is to provide the best possible customer service and assistance. To help us accomplish this, please obtain the following information and have it readily available when calling. The information is recorded on a Data/Serial Label attached to the Back Panel of each Fryer unit. -
Page 97: Front Header & Control Panel (Right-Side)
Parts List EOF 10-10/20 8-02. EOF-20 Front Header & Control Panel (Right-Side) Hidden... - Page 98 Parts List EOF 10-10/20 8-02. EOF-20 Control Panel & Front Header (Right-Side) Item Part Number Description 23755 THERMOSTAT, SAFETY, 450°F 20315 THERMOCOUPLE, J-TYPE, 13.5, UNGROUNDED (Requires #45111, FERRULE) THERMOCOUPLE, J-TYPE, 3, GROUNDED (Requires #45111, FERRULE) 23900 20366 TRANSFORMER, 20VA, 115/230V, 60HZ, CL2 23751 TERMINAL BLOCK, 6-POLE 21101...
-
Page 99: Eof10-10 Front Header & Control Panel (Left-Side)
Parts List EOF 10-10/20 8-03. EOF10-10 Front Header & Control Panel (Left-Side) * Not shown... - Page 100 Parts List EOF 10-10/20 8-03. EOF10-10 Front Header & Control Panel (Left-Side) Item Part Number Description 21101 SOCKET, RELAY, 8 PIN, 300V, 10A 21102 RELAY, 8 PIN, 240V, 10A 23751 TERMINAL BLOCK, 6-POLE 20366 TRANSFORMER, 20VA, 115/230V, 60HZ, CL2 23755 THERMOSTAT, SAFETY, 450°F...
-
Page 101: Eof10-10 Front Lower Cabinet (Left-Side)
Parts List EOF 10-10/20 8-04. EOF10-10 Front Lower Cabinet (Left-Side) Not shown/Hidden... - Page 102 Parts List EOF 10-10/20 8-04. EOF10-10 Front Lower Cabinet (Left-Side) Item Part Number Description 40784 VALVE, BALL, 1/2-IN, S/S W/NONSTICK SEALS 39257 DRAIN PULL HANDLE, WELD ASSEMBLY 40818 VALVE, BALL,1-1/4, DRAIN, SGL.THREAD END 35151 DOOR ASSEMBLY (WITHOUT PLASTIC HANDLE) 21157...
-
Page 103: Front Lower Cabinet (Right-Side)
Parts List EOF 10-10/20 8-05. EOF-20 Front Lower Cabinet (Right-Side) * Hidden/ Not Shown... - Page 104 LIMIT SWITCH, DRAIN, 15A, 250V (BEHIND PANEL) 65565 LABEL, FRONT BRACE, EOF-10-10/20 RIGHT SIDE 41900 COUPLING, FILTER PAN, QUICK-CONNECT, FEMALE 92285 COVER, FILTER PAN, EOF10-10/20 35813 FILTER PAN, COMPLETE ASSEMBLY, EOF10-10/20 40704 CASTER, 4-1/2”, SWIVEL, STEM MT w/BRAKE * Hidden/ Not Shown...
-
Page 105: Cook Vats
Parts List EOF 10-10/20 8-06. Cook Vats EOF10-10 EOF-20... - Page 106 THERMOCOUPLE, J-TYPE, 13-1/2”, UNGROUNDED (ELEM. TEMP SENSOR) 23900 THERMOCOUPLE, J-TYPE, 3”, GROUNDED (EOF20 OIL TEMP SENSOR) 20365 THERMOCOUPLE, J-TYPE, 12", GROUNDED (EOF10-10 HI-LIMIT SENSOR) 20362 THERMOCOUPLE, J-TYPE, 7-1/2”, UNGROUNDED (EOF10-10 OIL TEMP SENSOR) 39972 ELEMENT BRACKET, HI-LIMIT, EOF-10-10 39974 ELEMENT SPACER BRACKET, EOF-10-10 39975 BRACKET, ELEM.
-
Page 107: Rear Cabinet
Parts List EOF 10-10/20 8-07. Rear Cabinet EOF10-10 EOF-20 * Hidden/ Not Shown... - Page 108 20624 CONTACTOR, 60A RES, 4-POLE, MULTI-VOLT COIL (EOF-20) 21245 CONTACTOR, 60A RES, 3-POLE, MULTI-VOLT COIL (EOF10-10) 40989 DRAIN TUBE, EOF10-10/20, LEFT 10-10 VAT 40990 DRAIN TUBE, EOF10-10/20, RIGHT 10-10 VAT 40991 DRAIN TUBE, EOF-20 46712 CHECK VALVE, 1/2 NPT 71754 PUMP &...
-
Page 109: Filter Pan
Parts List EOF 10-10/20 8-08. Filter Pan NOTE: PERMANENT SUPPORT SCREEN ... NOT REMOVABLE + 12 Complete assembly + Optional Item... - Page 110 Parts List EOF 10-10/20 8-08. Filter Pan Item Part No. Qty. Description 40649 CASTER, LOW PROFILE, PLATE MOUNT 40956 HOSE, 1/2 NPT X 11-1/2”, SCT, W/SWIVEL FITTING 44150 FITTING, BRASS,MALE,1/2NPT, QUICK-DISCONNECT 30039-8 STUD, FILTER PAN SUPPORT FRAME 35809 HOLD-DOWN FRAME, WELD ASSEMBLY 30040-4 STUD, FILTER PAN HOLD-DOWN FRAME 54526...
- Page 111 Parts List EOF 10-10/20 Notes:...
- Page 113 2750 Gunter Park Drive West • Montgomery, Al 36109 USA 334.272.1457 • Toll-free 800.554.4537 • FAX 334.239.4117 • www.gfse.com • e-mail: services@gfse.com (USA & Canada Only) (Rel. Date: Nov.1999, Rev. Date: Feb.2018, Rev. D) Form No. 60327...
Need help?
Do you have a question about the EOF10-10 and is the answer not in the manual?
Questions and answers