
Related Manuals for SAMES KREMLIN Nanogun Airmix


Summary of Contents for SAMES KREMLIN Nanogun Airmix
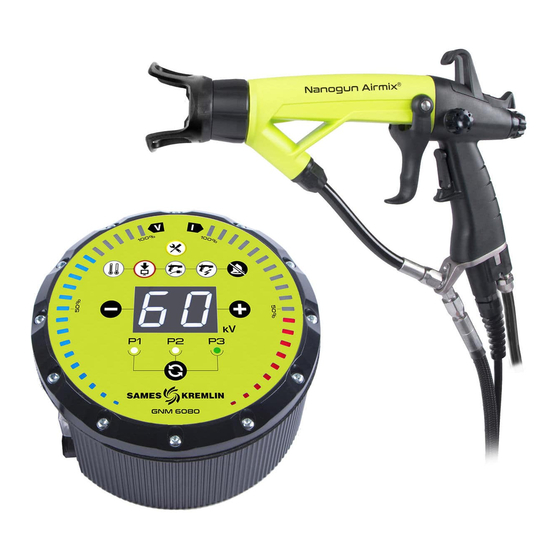
- Page 1 Nanogun Airmix and GNM 6080 versions LR - HR - MR SAMES KREMLIN SAS - 13, Chemin de Malacher - 38240 MEYLAN - FRANCE Tel. 33 (0)4 76 41 60 60 - www.sames-kremlin.com Index revision : D - March 2018...
- Page 2 SAMES KREMLIN SAS user manuals are written in French and translated into English, German, Spanish, Italian and Portuguese. The French version is deemed the official text and SAMES KREMLIN will not be liable for the translations into other language Index revision : D - March 2018...
-
Page 3: Table Of Contents
® Nanogun Airmix and GNM 6080 versions LR - HR - MR 1. Product identification - - - - - - - - - - - - - - - - - - - - - - - - - - - - - - - - - - 6 1.1. - Page 4 10.15. Electrical diagrams ......45 ® 10.15.1. GNM 6080 / Nanogun Airmix connection cable..45 10.15.2.
- Page 5 13.12. GNM 6080 control module ......75 ® 13.13. Options for Nanogun Airmix guns ....75 13.14.
-
Page 6: Product Identification
Zone 1. 1.1. Version identification 1.1.1. On the gun barrel ® The marking on the barrel is the same across the entire Nanogun Airmix line. 1.1.2. On the lower part of the gun handle Serial no. This marking combines, under a single number, the configurations of guns operating at the same level of pressure generation. -
Page 7: Gnm 6080 Control Module
This control step pertains to each of the electrical and electronic components as well as to the set of very specific program(s); you should contact your subsidiary, distributor or regular SAMES KREMLIN representative, who will inform you of the appropriate steps to take. -
Page 8: Health And Safety Guidelines
WARNING : Before using the Nanogun Airmix gun, be sure that all operators: • have received preliminary training by the SAMES KREMLIN companies, or by the Dis- tributors they have certified for this purpose. • have read and understood the user’s manual as well as all installation and use rules listed below. -
Page 9: Rules Of Use
• The protective clothing intended to be worn, including gloves, must be compliant with Standard EN 1149-5. The measured insulation resistance must not exceed 100MΩ. ® • The operator must also wear ear defenders when using the guns Nanogun Airmix (see § 4 page 16). - Page 10 • Closely follow use guidelines for the paints and solvents being applied (e.g. wear a mask). • Close and purge both the air and paint inlet prior to any extended equipment downtime. • Verify the good working order of the paint hose prior to any equipment start-up. •...
-
Page 11: Maintenance Rules
WARNING : Shutting off the compressed air supply line does not prohibit triggering high voltage should the trigger be activated. • The operator must have been trained by a SAMES KREMLIN company or else by the ® Distributors it has certified for this purpose, in order to carry out the Nanogun Airmix maintenance operations. -
Page 12: Products Used
2.4.1. Products used Given the diversity of products used and the impossibility to inventory the characteristics of these products, SAMES KREMLIN cannot be held liable for: • for any incompatibility in the materials of products used whenever they come into con- tact with the materials listed below: •... -
Page 13: Description Of Spray Gun And Gnm 6080 Control Module
® The Nanogun Airmix guns will be connected to the GNM 6080 control module. ® The versions of the Nanogun Airmix line are distinct by the base, the paint hose and the allowable product pressure. Characteristics Flat spray - 120 bar hose 7.5 m ®... -
Page 14: Gnm 6080 Control Module
Generator default: This default combines all internal generator defaults. If it is impos- sible to acknowledge this default, the problem would require a service call by the repairs department, please contact SAMES KREMLIN. Index revision : D - March 2018... - Page 15 Low-voltage connection default: The generator fails to detect or no longer detects the presence of the gun. After shutting off the power supply, verify the gun/genera- tor connection. High-voltage default: Defaults specific to gun operations related to the high voltage: •...
-
Page 16: Technical Characteristics
4. Technical characteristics 4.1. General characteristics of the guns Type of spray Flat Original nozzle assembled Maximum incoming paint pressure 120 bar 200 bar Incoming compressed air pressure 6 bar ± 1 bar Min/max ambient temperature 0°C - 40°C Maximum water flow rate See table below Spray width at 25 cm See table below... -
Page 17: Flows
4.2. Flows 4.2.1. Versions without whip (LR) Flat spray: Flow rate (in cc/min) Width, in Gauge at 70 bar at 120 bar at 200 bar 03-05 03-07 04-05 04-07 04-09 04-11 04-13 06-09 06-11 06-13 06-15 09-09 09-11 09-13 09-15 12-11 1030 12-13... -
Page 18: Version With Whip (Hr-Mr)
80 sec), the flow loss is around 20% to 25%. Note: for higher viscosities and very long hoses, above certain limits the flow starts to fall sud- denly and becomes almost zero: Nanogun Airmix 120 bars + Nanogun Airmix 200 bars 15/1 pump... -
Page 19: Characteristics Of The Gnm 6080
4.3. Characteristics of the GNM 6080 Category II installation (in accordance with Standard EN 61010-1). General Mass 1.7 kg Diameter: 168 mm Space requirements Height: 91 mm Operating temperature 0 - 40°C GNM 6080 input Voltage 88 - 264 V AC Frequency 50 - 60 Hz Maximum current... -
Page 20: Operations
The high-voltage order may be inhibited by shifting the gun switch. ® The Nanogun Airmix gun is equipped with a magnetic sensor that detects the trigger position. This sensor serves to activate the high-voltage power supply once the air valve returns to a value lying between 1 and 1.8 mm. -
Page 21: Specific Tooling
6. Specific tooling Part Number Designation Sales unit 900012843 Multipurpose wrench Part Number Designation Sales unit H1GMIN017 White Vaseline (100 ml) Dielectric grease for the high-voltage cascade and H1GSYN037 nozzle needle channel (100 ml) Part Number Designation Sales unit 900010160 Cartridge and air valve assembly tool Part Number Designation... - Page 22 • Allen wrenches (3 - 6 mm) • Torque wrench 1 to 5 Nm (R.304DA Facom) (Ref. SAMES KREMLIN: 240000095) • Flat wrenches (5 - 5.5 - 11 - 15 - 17 - 18 - 21 - 24 - 27) •...
-
Page 23: Use Of The Multipurpose Wrench
6.1. Use of the multipurpose wrench 1 : Clamping of the air cap ring. 2 : Extraction of the head nozzle. Index revision : D - March 2018 7115... -
Page 24: Installation
Pump air expansion valve Spray air cleaner / expansion valve Spray air valve GNM 6080 control module Gun air intake hose ® Nanogun Airmix Low-voltage electrical power sup- ply cable Pump compliant with the ATEX Directive for explosive atmos- pheres... -
Page 25: Use
AFNOR Cup no. 4. Nonetheless, some paints with a lower or higher viscosity (e.g. 120 seconds or more) may be projected as well. 8.1.2. Resistivity ® Use a paint whose resistivity is adapted to the Nanogun Airmix gun version that you own. The optimal resistivity range lies between 0.5 and 500 M Ω... -
Page 26: Spraying Rules
8.2. Spraying rules Regardless of the type of nozzle, the quality of spraying depends on both the supply pressure and the product viscosity: as viscosity increases, pressure must also rise, yet the final outcome is also influenced by the product’s proportions of heavy solvent / light solvent. A few key points: •... -
Page 27: Examples Of Poor Equipment Use
® It is prohibited to spray a liquid other than paint or varnish using the Nanogun Airmix model. It is prohibited to leave the gun or subject it to mechanical shocks. -
Page 28: Maintenance
10. Maintenance 10.1. Summary table of preventive maintenance To be carried out when the maintenance indicator light on the GNM 6080 turns on. Minimum Subassembly Designation Reference replacement period O-ring - chemically inert J3STKL046 3 months Seat casing O-ring - chemically inert J3STKL075 3 months Flat seal... -
Page 29: Electro-Pneumatic Coupling
WARNING : Prior to any maintenance operation carried out on the gun, please refer to the health and safety instructions (see § 2 page - Disconnect the control module. - Check that the air and paint circuits are no longer pressurised. - Dump the paint circuit. -
Page 30: Paint Hoses
10.3. Paint hoses It is not necessary to remove the electro-pneumatic coupling (see § 10.2 page 29) to complete these operations. 10.3.1. Paint hose - Version QD (HR) • Step 1: On the handle side, unscrew the cou- pling using a 15 flat wrench. Step 1 •... -
Page 31: Lr - Mr Paint Hose
10.3.2. LR - MR paint hose • Step 1: Unscrew the locknut of the stuffing Step 1 box using a 27 flat wrench, remove the stuff- ing box from the bracket. • Step 2: With a 21 flat wrench, unscrew the upper nut on the paint hose. -
Page 32: Spraying Head Assembly
10.4. Spraying head assembly Step 1 • Step 1: With the multipurpose wrench (P/N # 900012843), unscrew the air cap ring. • Step 2: Extract the head nozzle using the Step 2 multipurpose wrench. Do not use your fingers. If necessary, replace the head seal. For the reassembly step, proceed in the reverse order. -
Page 33: Replacement Of The Electrode Located In The Air Cap
10.5. Replacement of the electrode located in the air cap Disassembly: • Step 1: Pull out the conductive PTFE washer. Using one of the two housings on the back of the air cap, insert the screwdriver blade under the washer (do not use the housing where the centering pin is located). - Page 34 • Step 4: With the flat pliers, remove the small PTFE tube surrounding the electrode. Check that no residue remains in the elec- trode housing. If necessary pass by hand, a drill or a 1 mm metal rod into the hole. Reassembly: The repair kit includes an electrode equipped with its small PTFE tube.
- Page 35 • Step 3: Clip the PTFE conductive washer. Replace it if necessary. It is advised not to reuse it more of 3 or 4 times, the washer should not be able to be removed without the use of a tool. •...
-
Page 36: Barrel
10.6. Barrel • Step 1: Unscrew the seat casing using a 13- mm pipe wrench. Step 1 Then remove it. Should the O-rings and anti-extrusion rings located in front and back of the nozzle require replacement, remove them using a screwdriver, position the new rings and new seals in place while double checking their correct location and after coating them first... -
Page 37: Paint Nozzle Needle
• Step 3: Manually remove the adapter equipped with its joint and high-voltage Step 3 resistance by its spring and pulling on it. WARNING : Be careful not to damage the resistance during its extraction. 10.7. Paint nozzle needle • Step 1: Unscrew the paint nozzle needle in back of the gun, recover the spring. -
Page 38: Switch
10.8. Switch Step 1 • Step 1: With a 5.5-mm screwdriver, unscrew the washer head screw. Pull the switch lever upward. • Step 2: Replace the O-ring (see § 13.2 page 61). Insert the new switch into its housing. Coat the retaining screw with LOCTITE low strength thread lock and then clamp the screw so that the switch shows slight resist- ance. -
Page 39: Air Valve
10.10. Air valve • Step 1: Disassemble the paint nozzle needle (see § 10.7 page 37). • Step 2: Unscrew the air valve stop nut using an 18 flat wrench. Step 2 Point the gun barrel upwards and recover the spring and air valve. Should the parts not fall, tap in the palm of your hand or use the paint nozzle needle to withdraw the air valve. -
Page 40: Repairing The Air Valve
10.10.1. Repairing the air valve Three levels of maintenance are indeed possible: • Level 1: Standard level of maintenance since the air valve body is not subject to any fric- tion or wear. • Level 2: Corrective level, to be performed in case the valve body has deteriorated. •... -
Page 41: Fastening Hook
Level 3: If the magnet is broken or lost. • Replace the complete air valve (P/N # 910015405) (see § 10.10 page 39). Before using the gun, inspect the high-voltage on and off switches. If the high-voltage is permanently activated, disassemble the handle and remove one of the washers that serve to adjust the reed sensor position;... -
Page 42: High-Voltage Cascade
10.12. High-voltage cascade • Step 1: Remove the trigger see § 10.9 page 38, and remove the paint nozzle needle. • Step 2: Unscrew the 4 screws using a 2-mm crosspoint screwdriver while holding the bar- rel on the handle. Note: Each time a screw is disassembled, replace the fibre washers as well (P/N # Step 2... -
Page 43: Barrel
10.13. Barrel • Step 1: Remove the trigger see § 10.9 page 38, and the paint nozzle needle. • Step 2: Unscrew the four screws used to fasten the barrel onto the handle. • Step 3: Manually unscrew or by using a small flat pliers the three cascade connection wires, then carefully pull the contacts towards the back. -
Page 44: Handle
10.14. Handle • Step 1: Separate the barrel from the handle. • Step 2: Gun handle base Unscrew the air nipple using a 16 Allen wrench. Replace the seals every 12 months. Step 2 • Step 3: Unscrew the two screws (K35 x 14) with a 2 crosspoint screwdriver. -
Page 45: Electrical Diagrams
10.15. Electrical diagrams ® 10.15.1. GNM 6080 / Nanogun Airmix connection cable ® Output on the Nanogun Airmix side Output on the GNM 6080 side Yellow Yellow Brown Brown White White Pink Pink Green Green Black Black 10.15.2. GNM 6080 trigger cable... -
Page 46: Cleaning
In order to proceed with the cleaning steps, follow the instructions listed below: ® WARNING : It is strictly prohibited to immerse the Nanogun Airmix gun into the solvent WARNING : Use an appropriate solvent: not greasy, with high resistivity and non-chlorinated. -
Page 47: Hollow Cone Nozzle Cleaning
11.3. Hollow cone nozzle cleaning It is vital to clean the spraying head fully at the end of each shift or when use is interrupted, depending on the type of product between 5 and 30 minutes. Cleaning procedure: • Step 1: Disconnect the air and high voltage supplies. -
Page 48: Elimination Of Wastes
Reassembly: • Step 5: Remove the placebo injector. • Step 6: Coat the rear part (threading / seal) of the dielectric grease injector. • Step 7: Add more and/or put back the die- lectric grease on the HV contact. Coat the external thread of the barrel with dielectric grease. -
Page 49: Dismantling And Recycling
11.5. Dismantling and Recycling ® 11.5.1. Nanogun Airmix WARNING : All parts may be contaminated by paint and/or solvent residue. Before proceeding to dismantle the equipment, clean the gun and more specifically the inside of the paint hoses with an appropriate cleaning product and dry them with compressed air. - Page 50 20*, 26*, 22, 31, 32, Stainless steel 34, 35, 36 Plastic material containing fibre Plastic material, chemically inert rubber 25*, 28 Aluminium 27, 29 Rubber Plastic material containing fibre, copper, stainless steel Fibre joint Polyamide not loaded Not represented Air hose: PU Product hose: PTFE - aramid - PU Not represented Couplings: Zinc-plated steel or stainless steel...
-
Page 51: Gnm 6080
11.5.2. GNM 6080 Rep. Material Designation Keyboard / front side* Plastic material Fastening screws front side Steel Primary card support and front Aluminium side Electrical and electronic components, ROH Primary card printed circuit Bottom sheet metal and fastening Steel screws Electrical and electronic components, ROH Connector card printed circuit... -
Page 52: Common Malfunctions And Repairs
12. Common malfunctions and repairs Defaults Possible Causes Remedies Presence of air in the paint cir- Dump the paint circuit cuit Increase pressure at the pump Paint flow rate too slow or pressurised tank. Uneven paint flow Verify the filters, then dump the Impurities in the circuit circuit. - Page 53 See indication on the control Absence of high voltage module Insufficient high voltage Increase the high voltage ® Control the Nanogun Airmix Distance too great between output voltage spraying head and part Spray at a distance lying between 200 and 300 mm Clean the hooks.
-
Page 54: Spare Parts
13. Spare parts ® 13.1. Nanogun Airmix guns for both high resistivity (HR) and low resistivity (LR) solvent-based paints Index revision : D - March 2018 7115... -
Page 55: 120 Bar Version
Sales Spare parts Item Part Number Description unit level (*) ® Nanogun Airmix 120 bars LR JP with nozzle 09- 910021071-075 091 and paint hose 7.5 m ® Nanogun Airmix 120 bars LR JP with nozzle 09- 910021071-150 091 and paint hose 15 m ®... - Page 56 Sales Spare parts Item Part Number Description unit level (*) ® Nanogun Airmix 120 bar HR JP with nozzle 09- 910025956-075 091and paint hose 7.5 m ® Nanogun Airmix 120 bar HR JP with nozzle 09- 910021070-150 091and paint hose 15 m ®...
-
Page 57: 200 Bar Version
Sales Spare parts Item Part Number Description unit level (*) ® Nanogun Airmix 200 bars LR JP with nozzle 09- 910021077-075 091 and paint hose 7.5 m ® Nanogun Airmix 200 bars LR JP with nozzle 09- 910021077-150 091 and paint hose 15 m ®... - Page 58 Sales Spare parts Item Part Number Description unit level (*) ® Nanogun Airmix 200 bars HR JP with nozzle 910025957-075 09-091and paint hose 7.5 m ® Nanogun Airmix 200 bars HR JP with nozzle 910025957-150 09-091and paint hose 15 m ®...
-
Page 59: The Nozzles As An Option
13.1.3. The nozzles as an option Part Number Description Quantity 130001597 Nozzle MX03.05 Option 130001563 Nozzle MX03.07 Option 130001564 Nozzle MX04.05 Option 130001565 Nozzle MX04.07 Option 130001566 Nozzle MX04.09 Option 130001414 Nozzle MX04.111 Option 130001415 Nozzle MX04.131 Option 130001416 Nozzle MX06.091 Option 130001417 Nozzle MX06.111... -
Page 60: Fitted Air Cap Ring
13.1.4. Fitted air cap ring Sales Spare parts Item Part Number Description unit level (*) 910019358 Fitted air cap ring 900013829 HP nozzle protection 900010164 PTFE flat seal 160000170 FEP/FKM seal Level 1: Standard preventive maintenance. Level 2: Corrective maintenance. Level 3: Exceptional maintenance. -
Page 61: Nanogun Airmix ® Gun
® 13.2. Nanogun Airmix 25 26 Index revision : D - March 2018 7115... - Page 62 910019514 Equipped barrel 910015508 Equipped high-voltage cascade (see § 13.7 page 910019508 Fitted needle 910022672 ® Fitted Nanogun Airmix handle 120 bar 910022679 ® Fitted Nanogun Airmix handle 200 bar 900010239 Fastening hook 900010385 C M4 curved washer head screw...
- Page 63 129670405 Rotating air coupling option 250000037 Base-handle fastening screw 900010605 55° elbow 250000214 Elbow fastening screw 910022663 Trigger / pin lock assembly Fitted air valve (see § 13.6 page 66) 910018203 900010237 Trigger 900014446 4-finger trigger option Electro-pneumatic coupling 910015869-XXX (see §...
-
Page 64: Equipped Seat Casing (Flat Spray Only)
13.3. Equipped seat casing (Flat spray only) Spare Sales Item Part Number Description parts unit level (*) 910019359 Equipped seat casing J3STKL046 O-ring - chemically inert 900013368 Anti-extrusion ring 900012300 Anti-extrusion ring J3STKL075 O-ring - chemically inert 13.4. Equipped adapter (Flat spray only) Spare Sales Item... -
Page 65: Equipped Barrel
13.5. Equipped barrel Spare Sales Item Part Number Description parts unit level (*) 910019514 Equipped barrel 910015881 Seal cartridge 900012782 Anti-extrusion ring (included in Rep. 1) J3STKL005 O-ring - chemically inert (included in Rep. 1) J2FENV435 O-ring - FEP Viton J3STKL078 O-ring - chemically inert J3STKL019... -
Page 66: Equipped Air Valve And Air Valve Nut
Level 2: Corrective maintenance. Level 3: Exceptional maintenance. WARNING : Recover the magnet on the former air valve in order to retain the same trigger values. In case the magnet is lost, contact SAMES KREMLIN. Index revision : D - March 2018 7115... -
Page 67: Equipped Needle
13.7. Equipped needle Sales Spare parts Item Part Number Description unit level (*) 910019508 Equipped needle X7CEHU003 H M3 U brass nut Level 1: Standard preventive maintenance. Level 2: Corrective maintenance. Level 3: Exceptional maintenance. 13.8. Electro-pneumatic couplings GNM 6080 connection Spare Sales... -
Page 68: Paint Hoses
13.9. Paint hoses ® 13.9.1. For Nanogun Airmix HR guns 5a - 5b Sales Spare parts Item Part Number Description unit level (*) 910019204-075 Black 7.5-m HR product hose ∅ 5 910019204-150 Black 15-m HR product hose ∅ 5 910019204-300 Black 30-m HR product hose ∅... -
Page 69: For Nanogun Airmix ® Lr Guns
The filter (see § 13.13 page 75) may be placed between the steel fitting and the product hose. ® 13.9.2. For Nanogun Airmix LR guns 1a - 1b Sales Spare parts Item... -
Page 70: For Nanogun Airmix ® Mr Guns
® 13.9.3. For Nanogun Airmix MR guns 2a - 2b Sales Spare parts Item Part Number Description unit level (*) 910025953-075 Product hose MR 7.5 m ∅ 5 910025953-150 Product hose MR 15 m ∅ 5 910025953-300 Product hose MR 30 m ∅ 5 910025541 Whip HP ∅... -
Page 71: Nanogun Airmix ® Seal Kit
® 13.10. Nanogun Airmix seal kit Part Number Designation Location Quantity 910022694 ® Nanogun Airmix seal kit Barrel, air valve, on/off J3STKL005 Chemically inert O-ring button J2FENV435 FEP/FKM O-ring Barrel J3STKL078 Chemically inert O-ring Barrel J3STKL019 Chemically inert O-ring Barrel... -
Page 72: Hollow Cone Kit
13.11. Hollow cone kit Sales Spare parts Item Part Number Description unit level (*) 910025480-20 Hollow cone kit K20 910025480-30 Hollow cone kit K30 910025480-40 Hollow cone kit K40 910025480-50 Hollow cone kit K50 910025480-60 Hollow cone kit K60 910025480-70 Hollow cone kit K70 900011505 910018917... -
Page 73: Equipped Hollow Cone Seat Casing
13.11.1. Equipped hollow cone seat casing Sales Spare parts Item Part Number Description unit level (*) 910025478 Equipped hollow cone seat casing 999469300 Distribution carbine pad 900012300 Anti-extrusion ring J3STKL075 Chemically inert O-ring Level 1: Standard preventive maintenance. Level 2: Corrective maintenance. Level 3: Exceptional maintenance. -
Page 74: Procedure For Changing From A Flat Spray To A Round
13.11.2. Procedure for changing from a flat spray to a round spray WARNING : To carry out this operation, the gun must be disconnected from any supply (product / air / current). Remove the flat spray: 1 Loosen the cap nut (Ref.: 910019358). 2 Remove the cap (Ref.: 130001435), if the injector does not come away at the same time, remove it too. -
Page 75: Gnm 6080 Control Module
842635 5-m mass cable, lug D: 6 Level 1: Standard preventive maintenance. Level 2: Corrective maintenance. Level 3: Exceptional maintenance. ® 13.13. Options for Nanogun Airmix guns Online product filter Designation Part Number Versions Filter (M / F 1/2 JIC) -
Page 76: Appendices
13.14. Appendices 13.14.1. Hose protection casing This casing protects the hoses and cables, thereby guaranteeing flexibility and longevity. Description Part Number Sales unit Rilsan hose protection duct with 30 collars 910021086 50-m roll 13.14.2. Gun protection cover Description Part Number Sales unit Protective cover 900011711... -
Page 77: The Various Versions
14. The various versions 14.1. Equipment Titre Pistolet NANOGUN MX "Haute Pression" HP Title NANOGUN MX gun type High Pressure" HP Pistolet NANOGUN MX CE+ CSA N° GUN Pistolet NANOGUN MX HP Haute résistivité HR NANOGUN MX gun type HP High Resistivity LR CE + CSA 910021070 Haute résistivité... -
Page 78: Configurations
14.2. Configurations Index revision : D - March 2018 7115...
Need help?
Do you have a question about the Nanogun Airmix and is the answer not in the manual?
Questions and answers