
Subscribe to Our Youtube Channel
Related Manuals for TechniSat DIGITRADIO 1990


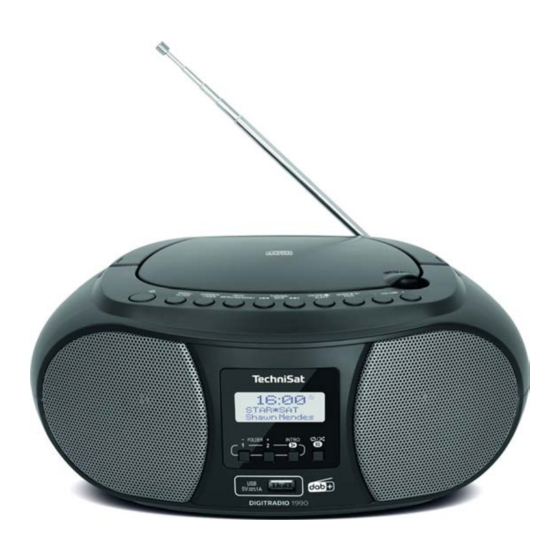
Summary of Contents for TechniSat DIGITRADIO 1990
- Page 1 Instruction Manual DIGITRADIO 1990 Portable DAB+/FM radio with CD player und Bluetooth music streaming...
- Page 2 Preface Dear Customer, Thank you for choosing the DIGITRADIO 1990 from TechniSat. This instruction manual is intended to help you get to know the extensive functions that your new unit offers and to make the best use of them. It will help you to use the product as intended and safely.
-
Page 3: Table Of Contents
1 Contents ..........................3 2 Illustrations .......................... 5 3 Safety advice ........................8 3.1 Intended use ............................8 3.2 Operating the DIGITRADIO 1990 correctly ................8 3.3 Scope of use............................9 3.4 Setting up the device ........................10 4 Disposal ..........................11 5 Legal notices ........................ - Page 4 10.4 Retrieving FM stations from a memory slot ..............20 10.5 Overwriting/Deleting a station memory slot ..............20 10.6 Adjusting the display ........................21 10.7 Scan settings ............................ 21 10.8 Audio settings ..........................21 11 CD player ........................... 21 11.1 Selecting CD mode ......................... 21 11.2 Inserting the CD ..........................
-
Page 5: Illustrations
2 Illustrations Top and front... - Page 6 Side illustrations and the rear...
- Page 7 Carry handle On/Standby (Hold down to switch on in battery mode) MODE/CLOCK - During operation: Switch sources; In standby mode: Set time manually. DIMMER/TIMER - During operation: Adjust display brightness; In standby mode: Set timer. INFO/MENU/MEMORY - Press briefly to select display; hold down to access the main menu;...
-
Page 8: Safety Advice
CDs and MP3 CDs. It is also possible to play from audio sources connected via Bluetooth. The device can be operated either via the mains or using batteries. 3.2 Operating the DIGITRADIO 1990 correctly Please take note of the following information to minimise safety risks, to prevent damage to the device and to make a contribution to environmental protection. -
Page 9: Scope Of Use
3.3 Scope of use WARNING! Never open the device! Touching live parts can be fatal! Observe all of the following instructions for the intended use of the device and to prevent damage to the device and injury to persons. In the event of damage resulting from incorrect connection, no warranty claim can be made. -
Page 10: Setting Up The Device
The CD player uses an invisible laser beam. If used incorrectly, this can injure your eyes. Never look directly into the open CD compartment. • This devices has been classified as a CLASS 1 LASER. 3.4 Setting up the device Place the device on a firm, secure and horizontal base. -
Page 11: Disposal
Remove the plug before a storm starts. Remove the plug if the device is not going to be used for a prolonged period, e.g. before going away on a long trip. Do not set up the device in the vicinity of equipment which emits intense magnetic fields (e.g. -
Page 12: Legal Notices
Directive 2014/53/EU. The complete text of the EU Declaration of Conformity is available at the following web address: http://konf.tsat.de/?ID=22795 TechniSat accepts no liability for product damage as a result of external influences, wear or improper handling, unauthorised repairs, modifications or accidents. -
Page 13: Servicing Notes
Technical Hotline is available: Mon. - Fri. 8:00 am - 6:00 pm on: +49 (0) 3925 9220 1800. Repairs can also be ordered directly online at www.technisat.de/reparatur. If the device needs to be returned, please use the following address only: TechniSat Digital GmbH Service-Center Nordstr. -
Page 14: Description Of The Device
6.1 Scope of delivery Please ensure that all of the following accessories are present: - DIGITRADIO 1990, mains cable, instruction manual. 6.2 Features of the radio - This digital DAB+ radio uses a new digital format that delivers a crystal-clear sound CD quality. -
Page 15: Battery Mode
To turn on your DIGITRADIO 1990, press the On / Standby button (2). Press the button again to switch it off. To turn the DIGITRADIO 1990 on in battery mode, you will need to press and hold the On/Standby button. -
Page 16: Adjusting The Volume
- Access menu - Keep the INFO/MENU/MEMORY button (5) pressed. - Navigate through the menu - TUNING/SKIP button (6, 7). - Save/Confirm changes - ENTER/STOP/SLEEP button (8). - Exit menu - Keep the INFO/MENU/MEMORY button (5) The currently selected function/option is shown in square brackets < >. The currently active function/option is shown with an asterisk *. -
Page 17: Dab+ (Digital Radio) Function
9 DAB+ (Digital Radio) function 9.1 What is DAB+? DAB+ is a new digital format through which crystal clear sound with no noise can be heard. In contrast to conventional analogue radio stations, DAB+ can be used to broadcast multiple stations on one and the same frequency. This is referred to as an ensemble or multiplex. -
Page 18: Selecting Stations
> Open the main menu by holding down the INFO/MENU/MEMORY button (5) and use the TUNING/SKIP buttons (6, 7) to select the <Manual Setting> item. Press the ENTER/STOP/SLEEP button (8). > Use the TUNING/SKIP buttons (6, 7) to select a channel (5A to 13F) and then press the ENTER/STOP/SLEEP button (8). -
Page 19: Overwriting/Deleting A Station Memory Slot
9.7 Overwriting/deleting a station memory slot > Simply save a new station on a favourite memory slot as described. When retrieving the factory settings all memory slots are deleted. 9.8 Adjusting the display > Press the INFO/MENU/MEMORY button (5) multiple times to scroll through the various display modes. -
Page 20: Searching For Stations Automatically
10.2 Searching for stations automatically As an alternative to manual setting of the reception frequency, you can also search for stations automatically. To do so, access the settings you have set up under Scan Settings. > Press the SCAN/Play/Pause/PAIR button (9). Scan appears in the display... The device now searches for the next station it can receive, and then plays it. -
Page 21: Adjusting The Display
10.6 Adjusting the display > Press the INFO/MENU/MEMORY button (5) multiple times to scroll through the various display modes. The following display modes are possible in FM mode: Frequency, Date, Time, Genre, Sound Info, Additional Info. 10.7 Scan settings > Open the main menu by holding down the INFO/MENU/MEMORY button (5) and use the TUNING/SKIP (6, 7) buttons to select the <Scan Settings>... -
Page 22: Playing Audio Cds
11.3 Playing audio CDs Use the SCAN/Play/Pause/PAIR (9), TUNING/SKIP (6, 7) and ENTER/STOP/SLEEP (8) play buttons to control audio CD playback. The track number (T) and track playing time now appears in the display. Play: Pause (during playback): Next track: Previous track: 2x Current track from the beginning: 1x Fast forward: hold down... -
Page 23: Playing Mp3 Cds
11.4 MP3 CD playback Playback of MP3 CDs is the same as for audio CDs. The folder number (F) followed by the track number and track playing time appear in the display. Play: Pause (during playback): Next track: Previous track: 2x Current track from the beginning: 1x Fast forward: hold down Fast rewind: hold down... -
Page 24: Programmed Playback
MP3 tracks that are located on a USB mass storage device such as a USB stick can be played on the DIGITRADIO 1990. Insert the USB mass storage device into the USB port (17) on the front of the DIGITRADIO 1990. -
Page 25: Bluetooth Playback
13 Bluetooth playback When an external playback device such as a smartphone is connected, you can play music tracks on the DIGITRADIO 1990. When doing so, you can control the playback on your external playback device. The maximum range in Bluetooth mode is 8 metres. If disruptive noise or dropouts occur during playback, reduce the distance between the external device and the DIGITRADIO 1990. -
Page 26: Audio In
DIGITRADIO 1990 and on the connected device. Set the volume on the connected device as high as possible and then regulate the volume on the DIGITRADIO 1990. If the volume on the connected device is set too low, you will probably hear interference in the sound on the DIGITRADIO 1990. -
Page 27: Other Functions
Select Sleep Timer > Off to switch off an active sleep timer. 15.2 Alarm function The DIGITRADIO 1990 has an internal alarm that you can program. The alarm is only available when the DIGITRADIO 1990 is connected to the mains. The alarm will not work in battery mode. >... -
Page 28: Equaliser
It is dimmed again after 10 seconds, to save battery power. 15.5 Setting the time The DIGITRADIO 1990 basically derives the current time from the DAB+ signal. If you are operating the device for the first time, it may take some time until the clock is synchronised. -
Page 29: Software Version
The software version currently installed will now be displayed. 15.8 Factory settings If you want to reset the DIGITRADIO 1990 to the delivery status, proceed as follows: Doing so will delete all settings, stations and favourites. Select DAB+ radio mode. -
Page 30: Problems With The Device
Symptom Possible cause/remedy The sound is weak or of Other devices such as televisions are poor quality. disrupting reception. Move the unit further away from these devices. The antenna is not extended or correctly orientated. Extend the antenna. Rotate the antenna to improve reception. -
Page 31: Technical Specifications
18 Technical data Model DIGITRADIO 1990 Power supply AC 100-240 V ~50/60 Hz, 18 W Power consumption Standby (without display lighting): 0.3 W Operating max.: 10 W Typical (medium volume): 2.5 W Battery mode 6 x R14/C cells, 1.5 V Bluetooth V4.2... - Page 32 m000/3952...
Need help?
Do you have a question about the DIGITRADIO 1990 and is the answer not in the manual?
Questions and answers