TechniSat DIGITRADIO 20 Instruction Manual
Under cupboard kitchen radio
Hide thumbs
Also See for DIGITRADIO 20:
- Instruction manual (168 pages) ,
- Instruction manual (96 pages)
Table of Contents
Advertisement
Quick Links
Download this manual
See also:
Instruction Manual
Advertisement
Table of Contents

Related Manuals for TechniSat DIGITRADIO 20


Summary of Contents for TechniSat DIGITRADIO 20
-
Page 1: Instruction Manual
Instruction Manual DIGITRADIO 20 Under Cupboard Kitchen Radio... -
Page 2: Important Safety Instructions
Important Safety Instructions 1. Read these instructions. 2. Keep these Instructions. 3. Heed all Warnings. 4. Follow all instructions. 5. Do not use the speaker near water. 6. Clean only with dry cloth. WARNING: TO REDUCE THE RISK OF FIRE OR ELECTRIC SHOCK, DO NOT EXPOSE THIS SPEAKER TO RAIN OR MOISTURE. -
Page 3: Table Of Contents
Contents Important Safety Instructions ..................... 2 Contents ............................ 3 Your radio ..........................4 Buttons ..........................4 Connecters ......................... 4 Getting Started .......................... 5 DAB Mode ..........................8 Selecting another Station ....................8 Secondary Service ......................8 Scanning Stations ......................8 Manual Tune ........................ -
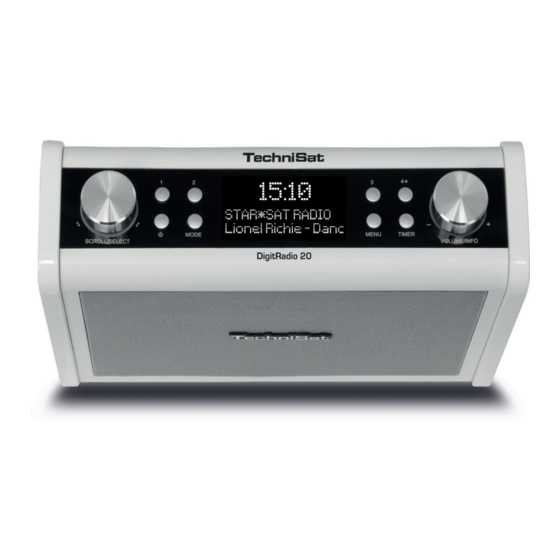
Page 4: Your Radio
Your radio Buttons 1. SCROLL/SELECT knob 7. MENU button Turn to browse options. Press to display or exit menu screen. Press to confirm option. 8. 3 button (Refer to ‘1 button’) 2. 1 button 9. TIMER button Press and hold to directly save preset Press to set Egg timer. -
Page 5: Getting Started
Getting Started Carefully remove your radio from the box. You may wish to store the packaging for future use. What you can find inside of your package Main unit x 1 Instruction Manual x 1 Power adapter x 1 Fixing plate x 1 Fixing screws x 5 Positioning your Radio There are two ways to place your radio - placing on a flat / stable surface or mounting under a... - Page 6 Figure 1 Figure 2 Figure 3 Caution Since the unit is heavy, be careful when installing the unit. To reduce the risk of fire, do not place any heating or cooking appliance beneath this unit.
- Page 7 Install the unit so that its power cord can be connected directly to a wall outlet. Do not use a converter or extension cord. Install the unit as far as possible from a source of noise. (for example, refrigerator, microwave oven, fluorescent lamp, etc.) Installing and Adjusting the Antenna Extend the antenna and insert to Antenna socket of unit to ensure you receive the best reception possible in both DAB and FM radio modes.
-
Page 8: Dab Mode
DAB Mode When you turn on the radio it will automatically search and store all the available stations. You should conduct an additional Full Scan to ensure all stations are picked up and stored. It is also recommended every few months to run a new scan to pick up any new DAB/DAB+ that may have begun broadcasting after purchasing your DAB radio. -
Page 9: Manual Tune
Manual Tune This can help you when adjusting your antenna or when adding stations that were missed while auto tuning. Press MENU button, turn SCROLL/SELECT knob to select ‘Manual tune’, and then press SCROLL/SELECT knob to confirm, the display will show the channel number and frequency. -
Page 10: Recalling A Preset Station
Recalling a Preset Station Press 4+ button to show the saved preset stations. Turn SCROLL/SELECT knob to select the stored preset station you want to play, and then press the SCROLL/SELECT knob to confirm. The display will show ‘Preset Recall <#: (Empty)>’ if the preset station isn’t allocated. You can also press 1, 2 or 3 button to directly recall preset station 1, 2 or 3. -
Page 11: Fm Mode
FM Mode Selecting FM Mode 1. Press MODE button repeatedly to select FM mode. 2. For initial use, it will start at the beginning of the FM frequency range (87.50MHz). Otherwise, the last listened FM station will be selected. 3. To manually scan the FM frequency, while FM frequency shows up, turn SCROLL/SELECT knob clockwise or anti-clockwise to change the frequency by 0.05MHz per step. -
Page 12: Storing Preset Stations
Storing Preset Stations Your radio can store up to 10 of your favourite FM stations. This will enable you to access your favourite stations quickly and easily. While your favorite station is playing, press and hold 4+ button until display show ‘Preset Store <#: (Empty)>’. -
Page 13: Aux In Mode
Aux in Mode AUX IN allows for quick and easy connection to an MP3 player or other external audio sources. Before connecting to the mains socket, use a 3.5mm audio cable (not supplied) to connect to your external audio device through the AUX IN socket of unit. Connect power adapter to mains socket, press POWER button to switch unit on. -
Page 14: General Operation
General Operation Setting Egg Timer This feature enables you to set a countdown timer while cooking for enjoying your cooking hour easy. Press TIMER button to select ‘Egg timer’. Turn SCROLL/SELECT knob to set the cooking time from 1 minute to 99 minutes, and then press SCROLL/SELECT knob to confirm. -
Page 15: Setting Backlight
Setting Backlight This feature enables you to adjust the brightness level of display. Press MENU button, and then turn SCROLL/SELECT knob to select ‘Backlight’, press SCROLL/SELECT knob to confirm. Turn SCROLL/SELECT knob to select ‘Power on' or 'Standby', and then press SCROLL/SELECT knob to confirm. -
Page 16: Specification
Specification Items Specifications Under Cupboard Kitchen Radio Description: FM: 87.5-108 MHz Frequency Range: DAB/DAB+: 174.928-239.200 MHz AC Input: 110-240V~, 50-60 Hz DC Output: 9V, 1000mA Power Requirements: (please use our provided adaptor) 3W rms Audio Output Power: Operation: 9W (Max) Power Consumption: Standby: <...
Need help?
Do you have a question about the DIGITRADIO 20 and is the answer not in the manual?
Questions and answers