
Related Manuals for Siegenia AEROVITAL Series


Summary of Contents for Siegenia AEROVITAL Series
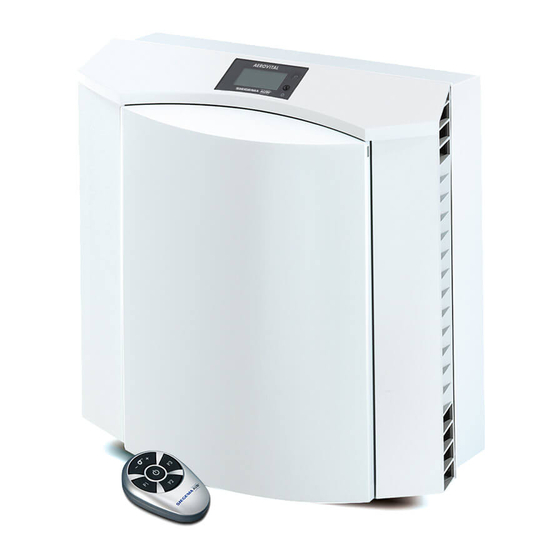
- Page 1 ASSEMBLY INSTRUCTIONS AERO Basic mounting box Airflow module Extension set Assembly sets for AEROVITAL ambience wall-mounted ventilator. Window systems Door systems Comfort systems...
-
Page 2: Table Of Contents
Content Content TARGET GROUP OF THIS DOCUMENTATION ........3 INTENDED USE ..........3 DIMENSIONS ..........4 FEEDBACK ON DOCUMENTATION .....4 SAFETY NOTES ...........4 SCOPE OF DELIVERY .........5 6.1. Basic.mounting.box ........5 6.2. Airflow.module.basic.mounting.box ..... 5 6.3. Extension.set.airflow.module ......5 INSTALLATION ...........6 7.1. Installation.requirements ......6 7.2. -
Page 3: Target Group Of This Documentation
• Please do not put any objects on top of the unit. planning.documents.of.SIEGENIA..The.installation. instructions.in.this.document.must.be.complied. • Do not use the device as a seat. with.at.all.times. • Make.sure.that.air.can.flow.in.and.out.at.the.two. • Be.sure.to.mount.the.supplied.SIEGENIA.weather. outer.sides.without.impedance..Do.not.hang.any. grille.for.the.protection.of.the.unit.from.the.outer. textiles.or.paper.or.similar.items.over.the.air.inlet. side. and outlet ports and do not place any objects directly.in.front.of.or.next.to.the.unit..Do.not.insert. -
Page 4: Dimensions
• Electrically.operated.unit..Risk.of.fatal.injury.from. – Should.a.solid.object.or.any.liquid.get.inside.the. electric.shock.or.fire. unit,.stop.operation.immediately.and.disconnect. the unit from the mains power supply. • To.prevent.personal.injury.or.damage.to.property,. always.comply.with.the.following.instructions • Hazard.due.to.third.party.attacks.on.SIEGENIA. WLAN.devices!.Please.observe.the.following.notes. – Insert.the.Euro.mains.plug.of.the.standard. to.protect.your.system.against.attacks.by.third. connecting.cable.only.into.a.suitable.230.V.AC. parties: mains.power.supply.socket. – Every.SIEGENIA.WLAN.device.is.protected.by. – If.the.mains.connection.cable.for.the.unit.is. two.passwords.(user.and.administrator)..It.is. -
Page 5: Scope Of Delivery
Assembly instructions AERO Basic.mounting.box Scope of delivery 6.1 Basic mounting box 6.2 Airflow module basic mounting box Item Name Quantity Airflow.module Plug.for.fixing.hole Hexagon.screw.M6.x.125 Bottom.washer.M8 Spacer.nut.M6.x.50 Assembly.instructions 6.3 Extension set airflow module Item Name Quantity Drilling.template Basic.mounting.box Plug.for.fixing.hole Cover.for.electrical.connection Cable.junction.box Hexagon.screw.M6.x.90 Hexagon.screw.M6.x.70 Item Name... -
Page 6: Installation
Assembly instructions AERO Basic.mounting.box Installation 7.1 Installation requirements 7.2 Additional requirements for AEROVITAL ambience smart Only.install.on.a.smooth.and.even.wall.(plastered) • The AEROVITAL ambience smart should be installed to be as free from interference as possible. Only.mount.the.mounting.box,.airflow.module.and. extension.to.a.level.underground..Even.out. • The.following.interferences.can.have.a.negative. underground.if.necessary.to.ensure.a.horizontal. influence.on.the.WLAN.signal: surface. – Water pipes ATTENTION –... -
Page 7: Installation.dimensions
Assembly instructions AERO Basic.mounting.box 7.3 Installation dimensions min. 300 min. 300 Interval to the front Interval.to.the.side.(vertical.wall) min. 300 Interval.to.the.side.(roof.slope,.figure.with.3.extensions) H39.WANS012EN-01 07.2019 7/20... -
Page 8: Installation.sequence
Assembly instructions AERO Basic.mounting.box 7.4 Installation sequence Mark.holes.for.core.drillings + max. 10 Drill the core holes Shorten the pipes 8/20 07.2019 H39.WANS012EN-01... - Page 9 Assembly instructions AERO Basic.mounting.box Insert the pipes Insulate.and.fit.the.weather.grille The.lamellae.on.the.weather.grille.must.point. downwards. Insulate.the.pipes.(depending.on.requirements) Insert the insect screen Seal the pipes Inside.=.airtight.seal Outside = free-air seal H39.WANS012EN-01 07.2019 9/20...
- Page 10 Assembly instructions AERO Basic.mounting.box Position.the.mounting.modules.in.the.wall.and.mark.the.bore.holes.(use.a.drilling.template.if.necessary) Drill.the.fixing.holes.and.fix.the.bolt.anchors/hanger.screws.in.the.wall Suitable.clamps.must.be.selected.according.to.the.structure.of.the.wall.and.provided.by.the.customer. 10/20 07.2019 H39.WANS012EN-01...
- Page 11 Assembly instructions AERO Basic.mounting.box Turn.distance.spacers.on.bolt.anchors/hanger.screws Position.mounting.modules.on.the.wall. Fix.airflow.module.and.extensions.with.bottom.washers.and.hexagon.screws.M6.x.125. Fix.basic.mounting.box.with.bottom.washers.and.hexagon.screws.M6.x.90. Position.plugs.for.fixing.holes. H39.WANS012EN-01 07.2019 11/20...
- Page 12 Assembly instructions AERO Basic.mounting.box Release and remove the top cover plate Remove.the.casing.cover Remove.the.muffler Release.and.remove.the.bottom.cover.plate Remove.the.supply.air.filter Remove.the.exhaust.air.filter.and.filter.bracket (left.and.right) Insert.screwing.plates 12/20 07.2019 H39.WANS012EN-01...
- Page 13 Assembly instructions AERO Basic.mounting.box DANGER Exposed.electrical.components Risk of fatal injury from electric shock or fire • Make.sure.that.the.power.supply.has.been.switched.off. prior.to.installation. • All-pole.safety.isolation.is.required.if.the.customer.is. routing.the.mains.cable. Cut.off.mains.plug Connect.device.to.electricity.grid Release cable strain relief Fix.cable.strain.relief H39.WANS012EN-01 07.2019 13/20...
- Page 14 Assembly instructions AERO Basic.mounting.box Slide.cable.junction.box.into.basic.mounting.box.① Position.AEROVITAL.ambience.in.basic.mounting.box.② Screw.on.AEROVITAL.ambience.using.4.hexagon.screws.M6.x.90 14/20 07.2019 H39.WANS012EN-01...
- Page 15 Assembly instructions AERO Basic.mounting.box Clip.on.cover.for.electrical.connection Remove.the.transit.support.adhesive.tape.(6.strips) Insert.the.air.supply.filter H39.WANS012EN-01 07.2019 15/20...
- Page 16 Assembly instructions AERO Basic.mounting.box Position.the.muffler.in.the.centre Position.the.ceramic.heat.accumulator.in.the.centre. and.press.upwards.until.it.engages WARNING High weight of the ceramic heat accumulator Risk.of.injury.due.to.ceramic.heat.accumulator.falling.out • Ensure that the ceramic heat accumulator does not fall down. • Proceed.with.caution. Position.the.top.cover.plate Position.the.exhaust.air.filter.and.filter.bracket.in.the. centre Fix.the.top.cover.plate 16/20 07.2019 H39.WANS012EN-01...
- Page 17 Assembly instructions AERO Basic.mounting.box Position.and.fix.the.bottom.cover.plate Switch on the current and perform a unit test run. Enter.the.illustrated.key.combination.to.do.this Close.the.casing.cover H39.WANS012EN-01 07.2019 17/20...
-
Page 18: Rectification Of Malfunctions
Assembly instructions AERO Basic.mounting.box Rectification of malfunctions Problem Possible cause Solution • Check.the.position.of.the.ceramic.heat.accumulator. Ceramic heat accumulator and.exhaust.air.filter.incl..filter.bracket.and.adjust.if. and.exhaust.air.filter.incl..filter. necessary bracket.are.not.seated.in.the. centre.of.the.casing • Perform.test.run.(see.page.17) • Open.the.inspection.flap.and.check.the.position.of.the. slider • Perform.test.run.(see.page.17) Increased noise Slider on motor is not suspended development.during.the. properly performance of the test 18/20 07.2019 H39.WANS012EN-01... -
Page 19: Technical Specifications
Assembly instructions AERO Basic.mounting.box Technical specifications AEROVITAL ambience with basic assembly set Level.1 24.m³/h Level.2 28.m³/h Air.throughput Level.3 41.m³/h Level.4 51.m³/h Level.5 56.m³/h Sound.absorption: = 54 dB n,e,w (measured.according.to.DIN.EN.10140-2) 10 Dimensions Basic mounting box Airflow module Extension H39.WANS012EN-01 07.2019 19/20... - Page 20 www.siegenia.com...
Need help?
Do you have a question about the AEROVITAL Series and is the answer not in the manual?
Questions and answers