
Related Manuals for Siegenia AEROVITAL


Summary of Contents for Siegenia AEROVITAL
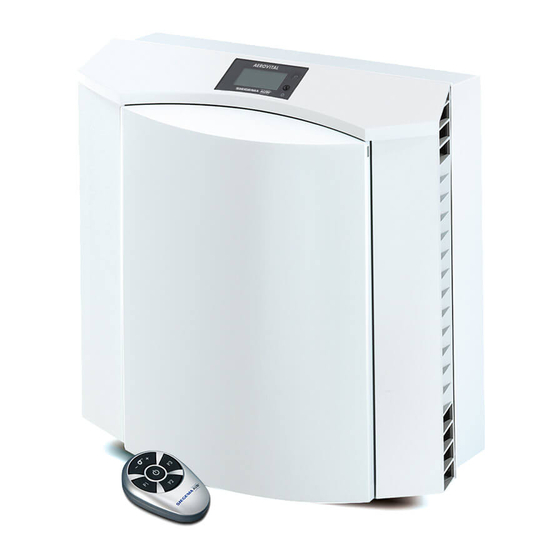
- Page 1 Original Operating instructiOns AERO AEROVITAL Wall mounted ventilator with heat recovery. Window systems Door systems Comfort systems...
-
Page 3: Table Of Contents
Original operating instructions AEROVITAL Contents Target group of this documentation ..............................4 Intended use ....................................4 Safety notices ....................................5 Scope of delivery .................................... 5 Installation ....................................... 6 Unit description .....................................12 Function ......................................14 Commissioning ....................................15 Operation (general)..................................15 Program overview ..................................17 Programming ....................................18... -
Page 4: Target Group Of This Documentation
• Do not install the unit in contaminated rooms and ensure that no hazardous substances can be drawn in. • The unit is not suitable for use in swimming pools and/or damp locations. • The AEROVITAL may only be mounted in a vertical position. The unit may not be installed on diagonal surfaces (e. g. walls/ceilings). -
Page 5: Safety Notices
Only insert the Euro plug of the standard connecting cable into a suitable 230 V AC socket. › If the mains connection cable for the device is damaged, it must be replaced by SIEGENIA, the company‘s customer service department, or similarly qualified personnel in order to prevent personal injury or damage to property. -
Page 6: Installation
AEROVITAL Original operating instructions Installation Risk of damage to property by drilling through concealed cables or pipes! › Before installing the unit, use a suitable cable and pipe detector at the installation location to identify the presence of concealed cables or pipes in the wall (such as water pipes). - Page 7 Original operating instructions AEROVITAL On-wall mounting 1. Align the drilling template with a spirit level and fix into place. 2. Mark four fastening drill holes and core drill hole on the wall. Notes: • The surface must be level (plastered).
- Page 8 AEROVITAL Original operating instructions Step 5: Fixing the pipe to the socket piece 1. Push the pipe side with the recessed middle bar onto the socket piece of the ventilation unit until the pipe is firmly seated. 2. Fix the transition point with the adhesive tape included in the delivery.
- Page 9 Original operating instructions AEROVITAL Step 7: Routing the cables With permanent electrical connection (a) 1. Lift the ventilation unit and push a small section of the attached pipe into the wall opening. 2. Draw the cable through the opening at the rear of the ventilation unit.
- Page 10 AEROVITAL Original operating instructions Step 9: Connecting the cable to the clamping block (only for permanent electrical connection) 1. Remove screws and cover. 2. Connect the cable to the clamping block. 3. Put on the cover and screw firmly into place.
- Page 11 Original operating instructions AEROVITAL Step 12: Closing the front panel and testing the function 1. Hook the front panel into the ventilation unit. 2. Press the front panel with both your hands until you hear the snap connection engage. 3. Plug the Euro plug into the socket, or switch on the fuse of the electrical circuit in the case of permanent electrical connection.
-
Page 12: Unit Description
AEROVITAL Original operating instructions Unit description AEROVITAL 1. Housing base 2. Display 3. Infrared receiver 4. Button 5. Housing frame 6. Front panel 7. Air inlet and outlet with closing caps 8. Cable duct 9. Socket piece 10. Mains cable with Euro plug... - Page 13 Note! The filter is monitored by the current consumption of the unit. If the unit is continually operated at air flow level 1 or 2, the AEROVITAL-processor will switch to air flow level 5 for approx. two minutes every 8 hours in order to check the filter for measuring reasons.
-
Page 14: Function
“ in the display of the AEROVITAL. The performance of the supply air and the exhaust air blower unit and consequently the air flow is variable in ten levels. If the AEROVITAL is switched off, the two blower units are out of operation. 03.2016... -
Page 15: Commissioning
› The AEROVITAL is connected directly to the 230-V AC mains power supply. However, the voltage is transformed to 12 V low voltage in the unit. In case of overload, a safety device (thermal overload protection) in the transformer disconnects the unit from 230 V AC mains power supply and automatically switches on again when the overload has been rectified. -
Page 16: Remote Control
• The activated air flow levels are indicated by the corresponding number of bars in the display. Button • On activation, the AEROVITAL always starts in pollen protection program P1. After voltage breakdown (e. g. power failure), the AEROVITAL will automatically start in the most recently used program (P1, P2 or P3). -
Page 17: Program Overview
• Three programs can be selected which can be programmed via remote control. • If a longer pause occurs during the programming (approx. 30 seconds), without the programming having been completed, the AEROVITAL will automatically switch back to the most recent operating mode. Changed values will not be saved. -
Page 18: Programming
• The desired room humidity can be set at between 30% and 90%. Example of programming The AEROVITAL should operate at air flow level 2 in basic ventilation mode and increase the air flow level automatically from a room humidity of 58%. - Page 19 • If only the room temperature is to be controlled, the room humidity must be set at 0%. Example of programming The AEROVITAL should operate at air flow level 2 in basic ventilation mode and increase the air flow level automatically from a room humidity of 65% or a room temperature of 25°C.
-
Page 20: Care And Maintenance
• Never clean the unit with a high-pressure cleaner or steam-jet cleaner. • Clean the AEROVITAL with a cloth moistened with a mild soap solution or cleaning agent. Battery replacement remote control If, when a button is pressed, no function is carried out, the batteries must be replaced. - Page 21 • The filter should be replaced whenever this is indicated in the display - every 6 months, at the latest. • Only use genuine filters from SIEGENIA. You can purchase replacement filters from SIEGENIA or from specialist retailers. Caution! Only activate and remove the specified unit components.
-
Page 22: Accessories
(c). 6. Reassemble the AEROVITAL in the reverse order. Note: Check the correct seating of the front panel if the AEROVITAL does not function at once after the filter exchange. Accessories Material description... -
Page 23: Technical Data
Original operating instructions AEROVITAL Technical data AEROVITAL Internal noise Level 1 = 23 dB (A) (measured according to DIN EN ISO 3745) Level 4 = 30 dB (A) Level 10 = 40 dB (A) Power consumption Level 1 10 watts... -
Page 24: Dimensions
AEROVITAL Original operating instructions Dimensions 03.2016... -
Page 25: Liability
Environmental protection Although our products do not fall within the scope of the German Electrical and Electronic Equipment Act, SIEGENIA will continue to meet the requirements of this Act and will endeavour to completely eliminate the use of substances that are hazardous to the environment as soon as this becomes technically feasible. -
Page 26: Eu Declaration Of Conformity
Siegen, 2014-11-03 S. Bauerdick (site manager) The technical documents will be provided by SIEGENIA-AUBI KG. This declaration certifies conformity with the directives cited but does not warrant properties in the legal sense. The safety instructions in the product documentation supplied must be followed. - Page 28 Phone: + Industriestraße Telefax: + Wilnsdorf info@sie enia.com GERMANY www.sie enia.com Hun ary Phone: + SIEGENIA worldwide: Austria Phone: + Italy Phone: + Belarus Phone: + Poland Phone: + Benelux Phone: + Russia Phone: + China Phone: + South Korea Phone: +...
Need help?
Do you have a question about the AEROVITAL and is the answer not in the manual?
Questions and answers