GARO Wallbox GLB Quick Start Manual
Stand-alone
Hide thumbs
Also See for Wallbox GLB:
- Assembly instructions/use and care manual (35 pages) ,
- Quick start manual (15 pages)
Table of Contents
Advertisement
Advertisement
Table of Contents

Related Manuals for GARO Wallbox GLB


Summary of Contents for GARO Wallbox GLB
- Page 1 GARO Wallbox GLB Quickstart guide stand-alone GLB Wallbox...
-
Page 2: Table Of Contents
TABLE OF CONTENTS Warnings Cautions Notes Installation of standalone GLB Wallbox Normal Use/Charging Basic LED indications Software GLB Service/Maintenance Troubleshooting/Support/FAQ mm Technical specifications Installation sketch Warranty form Warranty conditions Warnings When Dielectric Voltage Withstand Test is done on an installation, it is important to disconnect the terminal J1 on the GLB main board. -
Page 3: Cautions
Cautions Do not use private power generators as a power source for charging. Incorrect installation and testing of the GLB Wallbox could potentially damage either the vehicle’s battery and/or the GLB Wallbox itself. Do not operate the GLB Wallbox in temperatures outside its operating range – see technical specificatrions. -
Page 4: Installation Of Standalone Glb Wallbox
INSTALLATION OF STANDALONE GLB WALLBOX (for installation of GLB in cluster, see User manual at www.garoemobility.com/support) Protection type GLB Type GLB..-..37.. 2) 4) GLB..-..74.. 2) 4) GLB..-..22.. 1) 2) GLB..-..22..-A 2) 3) GLB..-..22..-B GLBDC..-..37.. GLBDC..-..74.. GLBDC..-..11.. GLBDC..-..22.. GLBDC..-..22..-A GLB Wallbox without RCCB or RCBO included in the enclosure must have Residual Current protection and must be protected with a max 32A fuse in the supply distribution box. -
Page 5: Normal Use/Charging
Select the appropriate group fuse (1x6A - 3x32A) and cable area for the electrical installation. Some countries require earth fault breakers to be installed. Follow local country regulations and select the appropriate earth fault equipment for the electrical installation. NOTE! Due to high currents for a long time in the cable, there is a high risk of voltage drop if the cable is under-dimensioned which can damage the electronics in an EV. -
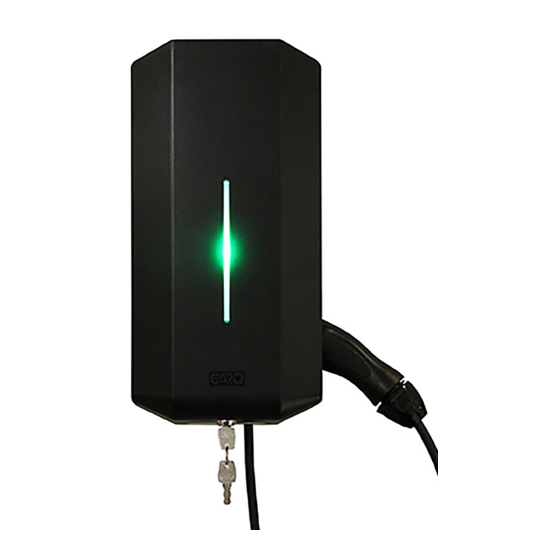
Page 6: Basic Led Indications
Basic LED indications Solid green light: ready for charging Flashing green light: GLB Wallbox waiting for start signal from electric vehicle Shifting blue light intensity: charging Other LED indications: see User manual at www.garoemobility.com/support Software GLB See User manual at www.garoemobility.com/support Ser vice/Maintenance See User manual at www.garoemobility.com/support Troubleshooting/Support/FAQ mm... -
Page 7: Installation Sketch
Installation sketch (figure 1) (figure 2) (7 x T20) (figure 3) - Page 8 Drill template (see the back of the box) (figure 4) Serial no./SSID password TERMINAL BLOCK (figure 5) 3-phase 1-phase (figure 6)
- Page 9 (7 x T20) label explaining charger status indication language label is placed on the side english information label (figure 7) (figure 8)
- Page 10 (figure 9) ON OFF (figure 10) Main fuse SW1(DIP 1-3) SW2(DIP 1-3) (figure 11)
-
Page 11: Warranty Form
Warranty form/Garantiblankett GLB Model:___________________________________ Electrical installation data / Elektrisk installation information Group fuse (A) Gruppsäkring (A)____________________________________________________________ Supply cable dimension: Area matningskabel:_________________________________________________________ Cable length: Längd matningskabel:________________________________________________________ Option Modules / Options-moduler RFID yes/no: RFID ja/nej:________________________________________________________________ Communication Module yes/no: Kommunikationsmodul ja/nej:_________________________________________________ Settings / Inställningar Mark existing positions: Markera nuvarande inställningar: Software version:... -
Page 12: Warranty Conditions
Warranty conditions EU Countries (except Sweden) The product benefits from warranty, Technical support and free service for a period of 60 months from the date of installation / commissioning, Thus undergoing repair or (if not possible) free replacement of any parts that have manufacturing defects. The deadline for resolving the non-compliance is 60 days. - Page 13 GARO AB Box 203, SE–335 25 Gnosjö Phone: +46 (0) 370 33 28 00 Fax: +46 (0) 370 33 28 50 info@garo.se garo.se...
Need help?
Do you have a question about the Wallbox GLB and is the answer not in the manual?
Questions and answers