Table of Contents
Advertisement
ORIGINAL OPERATING AND INSTRUCTION MANUAL
ELECTRONIC OVEN WITH TOUCH SCREEN
MKF 464 TS - MKF 511 TS - MKF 611 CTS – MKF 611 VCTS – MKF 623 CTS -
MKF 664 TS – MKF 616 TS – MKF 711 TS – MKF 711 VTS - MKF 1011 CTS
MKF 1011 VCTS – MKF 1064 TS – MKF 1016 TS - MKF 1111 TS –
MKF 1111 VTS - MKF 1664 TS – MKF 2011 TS
MKF 1664 TS – MKF 2011 TS
Advertisement
Table of Contents

Related Manuals for eka MILLENNIAL MKF 464 TS


Summary of Contents for eka MILLENNIAL MKF 464 TS
- Page 1 ORIGINAL OPERATING AND INSTRUCTION MANUAL ELECTRONIC OVEN WITH TOUCH SCREEN MKF 464 TS - MKF 511 TS - MKF 611 CTS – MKF 611 VCTS – MKF 623 CTS - MKF 664 TS – MKF 616 TS – MKF 711 TS – MKF 711 VTS - MKF 1011 CTS MKF 1011 VCTS –...
- Page 2 DECLARATION OF CONFORMITY Annex II A, of Directive 2006/42/EC Manufacturer's name TECNOEKA Srl Manufacturer's address Via Marco Polo, 11 - 35010 Borgoricco (PD) Name of the person in charge Imazio Oscar of the technical file Address of the person in charge Via Marco Polo, 11 - 35010 Borgoricco (PD) of the technical file Product type...
-
Page 3: Table Of Contents
CONTENTS 1. Technical service _________________________________________________________________________ 7 2. Instructions for the user ___________________________________________________________________ 7 2.1 Control panel _____________________________________________________________________ 7 2.2 Touch Screen control operation ______________________________________________________ 8 2.3 Explanations of the symbols: ________________________________________________________ 11 2.4 “HOME” screen __________________________________________________________________ 12 2.5 Operating parameters _____________________________________________________________ 13 2.6 Additional functions: ______________________________________________________________ 14 2.7 “Simplified”... - Page 4 GENERAL INFORMATION It is essential for this instruction manual to be stored together with the appliance for future referencing; in the event of misplacing it, a copy must be obtained directly from the manufacturer. This information has been prepared for your safety and that of others. Therefore, we kindly ask you to read it carefully before installing and using the appliance.
- Page 5 BURN and INJURY HAZARD The temperature of the appliance's external surfaces may exceed 60°C, only touch control elements. Burn hazard! Pay attention to handling food containers during and after cooking: they might be very hot. Wear appropriate protective thermal clothing to prevent burns. ...
- Page 6 USER SAFETY The appliance is intended for professional use in institutional and professional kitchens and must only be used by skilled personnel who have been trained on its proper use. For safety reasons the appliance must be supervised during operation. ...
- Page 7 RESIDUAL RISKS After baking open the door with caution, to avoid the violent outflow of heat which might cause burns. During oven operation pay attention to hot areas of its outer surfaces (marked on the appliance). Do not use the door handle to move the appliance (possible glass breakage). ...
-
Page 8: Technical Service
1. Technical service It is essential for this instruction manual to be stored together with the appliance for future referencing; in the event of misplacing it, a copy must be obtained directly from the manufacturer. This information has been prepared for your safety and that of others; therefore we kindly ask you to read it carefully before installing and using the appliance. -
Page 9: Touch Screen Control Operation
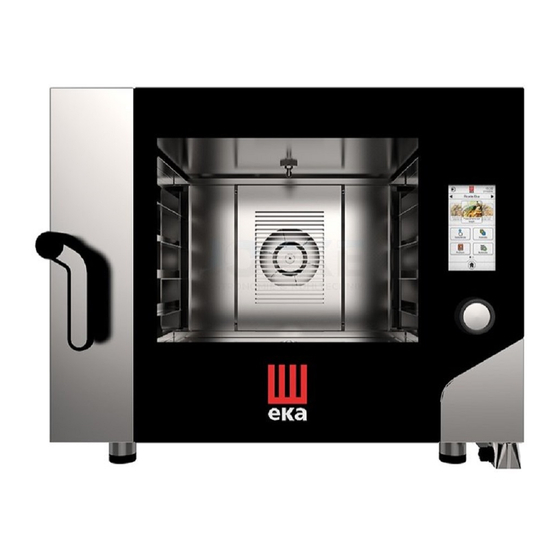
2.2 Touch Screen control operation The oven is equipped with a Touch Screen control and an adjustment knob. The Touch Screen control works by touching the icon of the displayed parameter and/or function with your finger (only use dry and clean fingers and no other tool such as knives, forks or other objects in general). Turning the adjustment knob clockwise/anti-clockwise changes the selected operating parameter, modifying the value shown on the display. - Page 10 Using the Touch Screen display TOUCH (confirms the active function, the selected operating parameter and the corresponding set value) SCROLL (selects the active function and the set parameter value) Examples:...
- Page 11 Using the knob TURN THE KNOB PRESS THE KNOB (changes the active (confirms the active function, the selected function, the selected operating parameter operating parameter and the and the corresponding corresponding set set value) value) PUSH Examples: PUSH By turning the knob clockwise, you can select the various active functions and the values of the operating parameters in sequence.
-
Page 12: Explanations Of The Symbols
2.3 Explanations of the symbols: CONFIRM Confirms the set operating parameter START Starts the cooking cycle STOP Stops the cooking cycle BACK Goes back to the previous screen HOME Goes back to the main screen ADDITIONAL Accesses the additional functions FUNCTIONS Activates the indicated function Deactivates the indicated function... -
Page 13: Home" Screen
2.4 “HOME” screen The “Home” screen (Fig.7) appears once the first switch-on procedure is completed. “Recipe book Board” (“Active functions”) Recipe books “Window” (“Available functions”) Fig.7 The “active functions” are those used by the oven. The “available functions” are those that can be potentially used by the oven for its operation. And they are: ... -
Page 14: Operating Parameters
2.5 Operating parameters from 1 minute to 11 hours and 59 minutes or INFINITE COOKING TIME = OFF = ON) COOKING from 30°C to 270°C TEMPERATURE CORE TEMPERATURE from 0 to 100°C (only in “Advanced Mode”) ΔT from 0 to 100°C (only in “Advanced Mode”) TEMPERATURE HUMIDITY from 0 to 100% with 10% step or OFF... -
Page 15: Additional Functions
2.6 Additional functions: The “PRE-HEATING” function can be enabled or disabled by the user; when enabled, there is an automatic increase of 40°C of the set cooking temperature. If, for example, a temperature of 180°C is set (“Fase 1” (Step 1)), the “PRE-HEATING”... -
Page 16: Simplified" Mode Function (Allows A Single Cooking Step)
2.7 “Simplified” mode function (allows a single cooking step) The following parameters can be set by touching the “Simplified” mode icon on the display: Fan speed Cooking time “Semi-static” cooking Cooking temperature Humidity % Fig.8 Fig.9 Fig.10 The parameter value is set by sliding, up or down, your finger on the “number”... -
Page 17: Advanced" Mode Function (Allows 10 Cooking Steps)
2.8 “Advanced” mode function (allows 10 cooking steps) The following parameters can be set by touching the “Advanced” mode icon on the display: Cooking steps (from 1 to 10) Core temperature Fan speed Cooking time ΔT “Semi-static”... - Page 18 INSIGHTS: COOKING WITH CORE PROBE There are two parameters to be set to cook with core probe: core temperature and cooking temperature. The cooking time is no longer a control parameter and so does not appear on the “summary screen”. If the cooking cycle consists of a single step, the oven works until the temperature detected by the core probe is reached inside the food.
-
Page 19: Cooking Cycle With Core Probe "Advanced" Mode
2.9 Cooking cycle with core probe “Advanced” mode Set the following parameters by touching the “Advanced” mode function icon on the display (Fig. 14) and then sliding your finger on the display to the left (Fig. 15): Core temperature Fan speed ... -
Page 20: Cooking Cycle With Core Probe And Δt Temperature "Advanced" Mode
The new value can be set by sliding the finger or turning the knob; touching the “” symbol in the window automatically confirms the value and the window goes back to “summary” screen mode; vice- versa, if the “ ” symbol is touched the new parameter value is not confirmed and the previous value remains active. -
Page 21: Cooking Cycle With "Pre-Heating" Function
Touching “” displays the “summary” screen (Fig. 21); touching it again, enables the cooking cycle. The following are displayed at the top-right of the screen: the actual temperature in the cooking chamber and the actual temperature of the core probe. The “ ”... -
Page 22: Program Storage (Recipe)
2.14 Program storage (recipe) The recipes (programs) created in “Simplified” or “Advanced” mode can be stored by touching the “ ” symbol at the top-left of the “summary” screen: the “Image and recipe name ” screen appears and a window with the text: “write here”. Touching the text displays an alphanumeric keypad (Fig. 22) to be used to enter the recipe name. -
Page 23: Recipe Book
All “Eka Recipes” are already available in the “Home” screen: by repeatedly touching the “ ” symbol and/or “ ” symbol, all “Chef Recipes” and “Most used recipes” also become available. To select the wanted one, simply slide, right or left, your finger on the photo representing the recipe dish;... -
Page 24: How To Delete Cooking Programs From The "Chef" Library
Fig.27 2.17 How to delete cooking programs from the “CHEF” library Only the recipes in the "CHEF" recipe book can be deleted by operating as follows: Touch the symbol and select the recipe you want to delete: the name of the recipe is highlighted on a red background (Fig. -
Page 25: Import / Export From "Usb" To "Chef Recipes
2.18 Import / export from "USB" to "Chef Recipes" The USB socket available to the lower door hinge allows to import/export cooking programs from/to the oven’s user library by using a USB stick After the USB stick has been connected to the available socket, scroll the screen to the left hand side and tap to the SETTINGS icon. -
Page 26: Export Some Recipes (Stored Programs)
If the "pen drive" does not contain stored recipes (programs), when "Import all recipes" is activated, a "window" appears that shows: "file not found". 2.18.3 Export some recipes (stored programs) The user through the "USB plug" can "export" some of the "Chef Recipes" into a "pen drive". After following the instructions of point 2.18, simply touch the words "Export some recipes": the "Export Recipes"... -
Page 27: Multi-Level" Function
2.19 “Multi-level” function The “Multi-level” function available on the “Home” screen ( ) allows using the “Servizio” (Service) mode. Fig. 30 Fig.31 Fig.32 Touching the “Multi-level” icon displays the “Service” mode screen, with the parameters that can be set (Fig. 30): ... -
Page 28: Accessories
2.20 Accessories From the “Home” screen ( ) slide your finger to the left on the “Available functions” window: the “Accessories” icon appears (Fig. 33); touching it displays the window that shows the types of accessories that can be used (Fig. 34): ... -
Page 29: Cooling
2.21 Cooling From the “Home” screen ( ) slide your finger to the left on the “Available functions” window: the “Cooling” icon appears (Fig. 38); touching it enables the function and the corresponding window (“Fast cooling”) appears, displaying in real time the temperature in the cooking chamber. Open the oven door to enable the function. -
Page 30: Settings
2.22 Settings From the “Home” screen ( ) slide your finger to the left on the “Available functions” window: the “Settings” icon appears (Fig.39); touching it displays the “summary” screen which shows the settings available (Fig.40): Display brightness Time and date ... -
Page 31: Wi-Fi Network Connection
2.23 Wi-Fi network connection Touching the “ ” icon the list of available Wi-Fi networks appears (Fig.41) Touch the name of the internet connection to which you want to connect and then touch the “” symbol to confirm (Fig.42). Fig.41 Fig.42 If the selected Wi-Fi network is password protected, the password request screen appears (Fig.43), proceed with the insertion of the password using the alphanumeric keypad and confirm by touching the symbol... -
Page 32: Software Update Availability (Oprative Function Update)
2.23.1 Software update availability (oprative function update) If a software update is available, the "software update availability" screen will appear (Fig.44). Fig.44 Touching the “” symbol, it activates the software update (from 5 to 10 min.), it ends when the "Home" screen reappears on the display. -
Page 33: Cleaning
Glass “up” (use with trolley) To obtain this position, the oven door must be opened (even partially) and by acting on the suitable “lever” in the lower portion (right side) of the door, behind the external glass, activate the “release” device to let the internal glass “slide”... -
Page 34: Semi-Automatic Cooking Chamber Cleaning
3.2 Semi-automatic cooking chamber cleaning spray specific degreaser for stainless steel on the internal walls of the cooking chamber, on the side grilles, on the fan covers (do not spray onto the fans through the grille) and on the internal door glass;... -
Page 35: Extraordinary Steam Generator Cleaning (Descaling)
3.4 Extraordinary steam generator cleaning (descaling) The innovative steam generator construction (heating element placed outside and not immersed in water), the washing and rinsing it undergoes systematically every time the oven is switched on, and the fact that it is fed with softened water (hardness between 0.5°F and 3°F), all evidently result in slowing down the formation of limescale inside it. -
Page 36: Door Gasket Cleaning
3.6 Door gasket cleaning For hygienic and functional reasons it is good practice to clean the door gasket at the end of every day the oven is used. It must be accurately washed with warm soapy water. It must be rinsed and dried with a soft cloth. -
Page 37: Troubleshooting
4 Troubleshooting Type of fault Cause of the fault Corrective action Non conforming connection to the Check connection to the mains power mains Control panel totally off Mains voltage not present Restore power supply voltage (the oven does not work) Electronic board protection fuse Contact a skilled technician (with microprocessor) blown... -
Page 38: Possible Alarms
5 Possible alarms Identify the causes that inhibit the oven operation Type of alarm Cause of the alarm Effect Corrective action Cooking chamber probe- electronic board/ microprocessor Impossible to Contact a skilled connection down start cooking technician Temperature probe not detected Damaged cooking chamber Impossible to start cooking probe... - Page 39 Open the oven door to allow “Fast cooling” function enabled Disabled oven “Fast cooling” with door closed operation of the cooking Door closed chamber open the door to cool the oven Overtemperature above 75°C Disabled oven Contact a skilled on the display card operation technician Display card...
-
Page 40: Possible Errors
6 Possible errors Communicate information on the abnormal operation of the oven without disabling it Type of error Cause of the error Effect Corrective action The oven automatically The display shows Power supply outage resumes operation from the type of error. the point where the The oven cooking cycle was... - Page 41 The display shows Too many cooking Activate multiple washing the type of error. cycles executed without cycles in “Intensive” mode Wash oven The oven washing (L3) excessive number of continues working cooking cycles executed without washing the oven The display shows the type of error.
-
Page 42: Technical Support
7. Technical support Before leaving the factory this appliance has been calibrated and tested by experienced and skilled personnel in order to obtain the best operation results. Any repair or calibration must be carried out with the utmost care and attention, solely using original parts. That is why it is required to always contact the Dealer who has sold the appliance or our nearest Technical Support Centre, specifying the kind of failure and the model of the appliance you have. -
Page 43: Conventional Warranty
9. Conventional warranty The Tecnoeka product is designed for food use only and is covered by warranty according to law (art. 1490 and subsequent c.c.) for Professional Customers, or customers who purchase from the Dealer with VAT number. The Tecnoeka product is professional and certified according to IEC EN 60335-1 and can only be sold to professional users.
Need help?
Do you have a question about the MILLENNIAL MKF 464 TS and is the answer not in the manual?
Questions and answers