Table of Contents
Advertisement
Advertisement
Table of Contents

Subscribe to Our Youtube Channel
Related Manuals for eka MILLENIAL MKF 464 TS


Summary of Contents for eka MILLENIAL MKF 464 TS
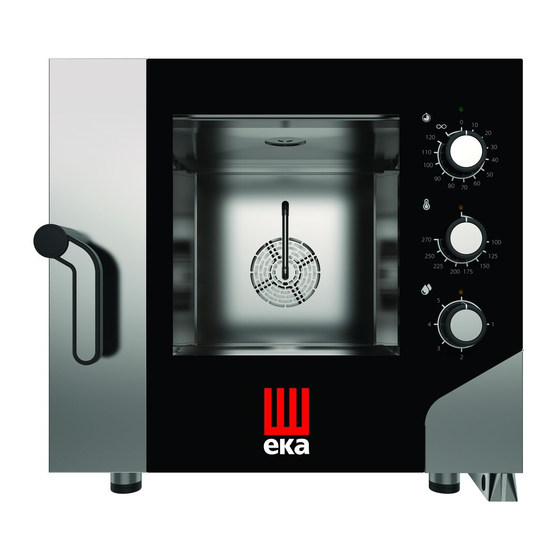
- Page 1 INSTALLATION AND MAINTENANCE MANUAL ELECTRONIC OVENS WITH TOUCH SCREEN MKF 464 TS - MKF 511 TS – MKF 611 CTS - MKF 611 VCTS MKF 664 TS – MKF 711 TS - MKF 711 VTS MKF 1011 CTS - MKF 1011 VCTS – MKF 1064 TS –...
-
Page 2: Table Of Contents
CONTENTS 1. Technical service _________________________________________________________________________ 2 2. General information ______________________________________________________________________ 2 3. Instructions for the installer ________________________________________________________________ 3 3.1 Storage __________________________________________________________________________ 3 3.2 Transportation of the appliance ______________________________________________________ 3 3.3 Unpacking the appliance ___________________________________________________________ 3 3.4 Removal of the protective film _______________________________________________________ 3 3.5 Protective film/package disposal ______________________________________________________ 3 3.6 Placement ________________________________________________________________________ 3 3.6.1 Table top oven placement _________________________________________________________ 4... -
Page 3: Technical Service
1. Technical service For periodic maintenance checks and repairs, contact your nearest Support Centre and only use original spare parts. Failure to comply with this provision shall forfeit the warranty right. 2. General information It is essential for this instruction manual to be stored together with the appliance for future referencing; in the event of misplacing it, a copy must be obtained directly from the manufacturer. -
Page 4: Instructions For The Installer
3. Instructions for the installer The following instructions are intended for skilled installers, to perform installation, electrical and water connection operations in the most correct manner and according to the safety regulations in force in the country of installation of the appliance. The Manufacturing Company shall not be liable for damage or harm to persons, pets or property arising from installation errors. -
Page 5: Stacking Ovens On Other Appliances
Warnings Make sure there are no objects and/or materials obstructing the oven’s exhaust device. The hot smoke/vapour produced during cooking must run freely out of the exhaust device in order not to compromise the regular operation of the oven. nflammable materials must not be left near the oven’s exhaust device. 3.6.1 Table top oven placement The appliance must be placed in a perfectly horizontal position on a table or similar support;... -
Page 6: Electrical Connection
3.7 Electrical connection The appliance’s connection to the electric power network and the connection systems must comply with the applicable regulations in the country of installation. Before setting up the electrical connection ensure that: the voltage and frequency of the power supply system match the specifications of the "technical data" plate affixed to the side of the appliance;... -
Page 7: Type Of Connection To The Mains
3.9 Type of connection to the mains 400V 3PH + N ~ Connect the 3 phase conductors (L1, L2, L3) of the cable respectively to the terminals of the terminal board marked with “1”(brown conductor), “2”(black conductor) and “3”(grey conductor) and the neutral (N) conductor to the terminals marked with “4”... - Page 8 mod. MKF 611 V C TS mod. MKF 1011 C TS mod. MKF 1011 V C TS mod. MKF 1064 TS mod. MKF 1111 TS mod. MKF 1111 V TS mod. MKF 1664 TS – MKF 2011 TS...
-
Page 9: Connection To The Water Mains
3.10 Connection to the water mains The appliance must be supplied with drinking water at a maximum temperature of 30°C. The water pressure must be between 100 and 200 kPa (1.0 -2.0 bar). If the mains pressure exceeds 2.0 bar, install a pressure reducer upstream of the appliance. If the value is lower than 1.0 bar use a pump to raise the pressure. -
Page 10: Water Drain
3.10.2 Washing water inlet The unit is equipped with a flexible polyethylene hose (2 meters) with quick fitting on one end, ¾" threaded female with relative gasket on the other end, and a special mechanical filter. Old joints must not be re-used. The appliance must be supplied with drinking water. -
Page 11: Water Drain For Floor-Standing Ovens
3.11.1 Water drain for floor-standing ovens The drain pipe is conveyed to an open (grilled) drain on the floor (Fig.1) and should not go into direct contact with the discharge point: the "air gap" (distance between the drain pipe coming from the appliance and the open drain) must be at least 25 mm. -
Page 12: Maintenance Instructions
4. Maintenance instructions A periodic check (at least once a year) of the appliance contributes to extending its service life and assures proper operation. Any maintenance operation on the appliance must only be done by highly qualified personnel trained in the operations being performed and authorised by . -
Page 13: Safety Thermal Devices
4.2 Safety thermal devices The appliance is equipped with a (manually reset) safety thermostat, to protect against excessive and hazardous overheating which might accidentally occur inside it. If the safety thermostat is activated, the power supply to the appliance is cut off. The safety thermostat is located at the back (bottom) of the appliance (see the attached "Technical Data Sheet");... -
Page 14: Disposal Of The Appliance/Packaging
4.6 Checking the cooking chamber gasket “seal” If the gasket on the "front" of the cooking chamber does not ensure proper "sealing" on the inside glass of the door, adjust the position of the 2 hinges (upper and lower) of the door and/or the (cross-shaped) handle "nose"... -
Page 15: Troubleshooting
5 Troubleshooting Type of fault Cause of the fault Corrective action Non-compliant connection to the Check the connection to the mains power mains Control panel totally off No mains voltage Restore the power supply voltage (the oven does not work) Blown electronic board protection Contact a skilled technician fuse (with microprocessor) - Page 16 Oven operation Contact a skilled Safety thermostat on Maximum oven disabled technician operating temperature exceeded tripped safety thermostat Wrong position of the door Oven operation glass Place the door glass up disabled Poorly positioned glass, move the glass upwards Wrong position of the door Oven operation Place the door glass down glass...
-
Page 17: Possible Errors
Overtemperature above 75°C Oven operation Contact a skilled on the auxiliary power micro disabled technician Auxiliary power micro card card overtemperature exceeded the temperature of 75°C 7 Possible errors Information on faulty oven operation without disabling it Type of error Error cause Effect Corrective action... -
Page 18: Technical Support
The screen displays Excessive humidity in the the type of error. The Contact a skilled cooking chamber oven continues technician Dryer malfunction working cannot reach the desired humidity”. The screen displays Activate multiple washing Too many cooking cycles the type of error. The cycles in “Intensive”... -
Page 19: Availability And Supply Of Spare Parts
As well as in the event that the customer is not able to produce the invoice, receipt or sales receipt proving the purchase or the terms outlined above are not respected, the guarantee is expressly excluded in the following cases: 1) Any failure or breakage of components caused by transport.
Need help?
Do you have a question about the MILLENIAL MKF 464 TS and is the answer not in the manual?
Questions and answers