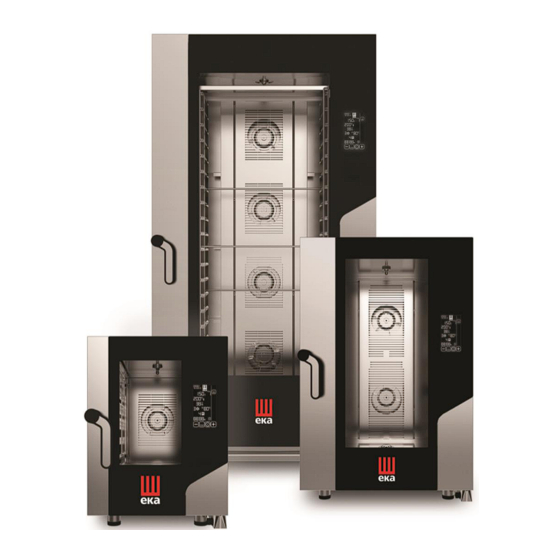
eka MKF 464 BM Installation And Maintenance Manual

eka MKF 464 BM Installation And Maintenance Manual

Electronic black mask ovens

Advertisement

TRANSLATION OF ORIGINAL INSTALLATION AND
MAINTENANCE MANUAL
ELECTRONIC BLACK MASK OVENS
MKF 464 BM- MKF 416 BM - MKF 511 BM - MKF 611 CBM
MKF 623 CBM - MKF 664 BM – MKF 616 BM – MKF 621 BM – MKF 711 BM
MKF 1011 CBM - MKF 1064 BM – MKF 1016 BM – MKF 1111 BM
MKF 1021 BM – MKF 1664 BM – MKF 2011 BM
fffffssdsdsdsdsdsELECTRONIC BLACK MASK OVENS

Advertisement

Table of Contents
loading

Summary of Contents for eka MKF 464 BM

  • Page 1 MAINTENANCE MANUAL ELECTRONIC BLACK MASK OVENS MKF 464 BM- MKF 416 BM - MKF 511 BM - MKF 611 CBM MKF 623 CBM - MKF 664 BM – MKF 616 BM – MKF 621 BM – MKF 711 BM MKF 1011 CBM - MKF 1064 BM – MKF 1016 BM – MKF 1111 BM MKF 1021 BM –...
  • Page 3: Table Of Contents

    CONTENTS 1. SERVIZIO TECNICO (TECHNICAL SERVICE) ____________________________________________________ 3 2. GENERAL INFORMATION __________________________________________________________________ 3 3. INSTRUCTIONS FOR THE INSTALLER _________________________________________________________ 4 3.1 Storage __________________________________________________________________________ 4 3.2 Transportation of the appliance ______________________________________________________ 4 3.3 Unpacking the appliance ____________________________________________________________ 4 3.4 Removal of the protective film _______________________________________________________ 4 3.5 Protective film/package disposal ______________________________________________________ 4 3.6.1 Table top oven placement _________________________________________________________ 5 3.6.2 Stacking ovens on other appliances _________________________________________________ 5...
  • Page 4: Servizio Tecnico (Technical Service)

    1. SERVIZIO TECNICO (TECHNICAL SERVICE) For periodic maintenance checks and repairs, contact your nearest Support Centre and only use original spare parts. Failure to comply with this provision shall forfeit the warranty right. 2. GENERAL INFORMATION It is essential for this instruction manual to be stored together with the appliance for future referencing; in the event of misplacing it, a copy must be obtained directly from the manufacturer.
  • Page 5: Instructions For The Installer

    3. INSTRUCTIONS FOR THE INSTALLER The following instructions are intended for skilled installers, to perform installation, electrical and water connection operations in the most correct manner and according to the safety regulations in force in the country of installation of the appliance. The Manufacturing Company shall not be liable for damage or harm to persons, pets or property arising from installation errors.
  • Page 6: Stacking Ovens On Other Appliances

    appliance under an extraction hood or to use the suitable condensation hoods in order to TECNOEKA. convey the smoke/vapour to the outside. Warnings Make sure there are no objects and/or materials obstructing the oven’s exhaust device. The hot smoke/vapour produced during cooking must run freely out of the exhaust device in order not to compromise the regular operation of the oven.
  • Page 7: Electrical Connection

    3.7 Electrical connection The appliance’s connection to the electric power network and the connection systems must comply with the applicable regulations in the country of installation. Before setting up the electrical connection ensure that: the voltage and frequency of the power supply system match the specifications of the "technical data" plate affixed to the side of the appliance;...
  • Page 8: Type Of Connection To The Mains

    (blue conductor); the earth conductor (yellow/green) must be connected to the terminal marked with the symbol (see diagram available by the terminal board). Mod. MKF 416 BM – MKF 464 BM – MKF 511 BM Mod. MKF 616 BM – MKF 664 BM – MKF 711 BM Mod. MKF 621 BM...
  • Page 9 Mod. MKF 1011 C BM Mod. MKF 1016 BM – MKF 1064 BM – MKF1111BM Mod. MKF 1021 BM Mod. MKF 1664 BM – MKF 2011 BM...
  • Page 10: Connection To The Water Mains

    3.10 Connection to the water mains The appliance must be supplied with drinking water at a maximum temperature of 30°C. The water pressure must be between 100 and 200 kPa (1.0 -2.0 bar). If the mains pressure exceeds 2.0 bar, install a pressure reducer upstream of the appliance. If the value is lower than 1.0 bar use a pump to raise the pressure.
  • Page 11: Water Drain

    3.10.2 Water inlet for automatic washing (if available) The unit is equipped with a flexible polyethylene hose (2 meters) with quick fitting on one end, ¾" threaded female with relative gasket on the other end, and a special mechanical filter. Old joints must not be re-used.
  • Page 12: Water Drain For Floor Ovens

    3.11.1 Water drain for floor ovens The drain pipe is conveyed to an open (grilled) floor drain (Fig.3) and should not go into direct contact with the discharge point: the "air gap" (distance between the drain pipe coming from the appliance and the open drain) must be at least 25 mm.
  • Page 13: Maintenance Instructions

    4. MAINTENANCE INSTRUCTIONS A periodic check (at least once a year) of the appliance contributes to extending its service life and assures proper operation. Any maintenance operation on the appliance must only be done by highly qualified personnel trained in the operations being performed and authorised by .
  • Page 14: Electronic Circuit Protection

    4.3 Electronic circuit protection The electronic circuit of the microprocessor cards housed inside the "electronic component drawer" is protected by fuses. If they “blow” they must be replaced with equivalent fuses with the same electrical and dimensional characteristics. Important “Blown" fuses should only be replaced after eliminating the anomalies that caused them to blow. This can only be done by a Service technician.
  • Page 15: Residual Risks

    Loss of “tightness“ on the “nose” side With the door open, loosen the locknut that secures the "nose" to its support; screw (clockwise) the "nose" by a full turn so that the end (cross-shaped) piece is perfectly horizontal again; screw on the previously loosened locknut.
  • Page 16: Troubleshooting

    5. TROUBLESHOOTING Type of fault Cause of the fault Corrective action Non-compliant connection to the Check the connection to the mains power mains Control panel totally off No mains voltage Restore the power supply voltage (The oven does not work) Blown electronic board protection Contact a skilled technician fuse (with microprocessor)
  • Page 17: Possible Alarms

    6. POSSIBLE ALARMS Type Alarm description Cause of the alarm Effect Corrective action alarm Connection interrupted Cooking chamber between cooking chamber temperature probe Impossible to start Contact skilled probe and not detected cooking technician micro power board (In red) Check that the "plug- socket"...
  • Page 18: Technical Support

    Incorrect position of the Oven operation Push the glass down The glass is up glass deactivated orange) Incorrect position of the Oven operation Push the glass up The glass is down glass deactivated (In red) Oven operation disabled. When the Mains power supply...
  • Page 19: Availability And Supply Of Spare Parts

    Including the event in which the customer is unable to produce the invoice, receipt or tax receipt as proof of purchase, meaning that the terms outlined above are not complied with, the warranty is expressly forfeited in the following cases: 1) Faults or breakdowns of components caused by transport.

Table of Contents