Table of Contents
Advertisement
USE AND INSTRUCTION MANUAL
USE AND INSTRUCTION MANUAL
USE AND INSTRUCTION MANUAL
USE AND INSTRUCTION MANUAL
MODD D D D . . . . E E E E KF
MOD
MOD
MOD
KF 1 1 1 1 1 1 1 1 1 1 1 1 1 1 1 1 E E E E UD
KF KF
Via
Via Marco Polo
Via
Via
Tel. +39.049.9300344 – – – – +39.049.5791479 Fax +39.049.5794387
Tel. +39.049.9300344
Tel. +39.049.9300344
Tel. +39.049.9300344
www.tecnoeka.com
www.tecnoeka.com
www.tecnoeka.com
www.tecnoeka.com
UD – – – – E E E E KF 10
UD
UD
TECNOEKA S.r.l.
TECNOEKA
TECNOEKA
TECNOEKA
Marco Polo, n.1
, n.11 1 1 1 - - - - 35010
Marco Polo
Marco Polo
, n.1
, n.1
+39.049.5791479 Fax +39.049.5794387
+39.049.5791479 Fax +39.049.5794387
+39.049.5791479 Fax +39.049.5794387
KF 1064
KF 10
KF 10
64
64 E UD
64
E UD – – – – EKF
E UD
E UD
rev.
rev. 0 0 0 0
rev.
rev.
S.r.l.
S.r.l.
S.r.l.
35010 Borgoricc
Borgoricco (Padova) Italy
o (Padova) Italy
35010
35010
Borgoricc
Borgoricc
o (Padova) Italy
o (Padova) Italy
E E E E - - - - mail:
mail:
mail: info@tecnoeka.com
mail:
info@tecnoeka.com
info@tecnoeka.com
info@tecnoeka.com
EKF 1016 E UD
EKF
EKF
1016 E UD
1016 E UD
1016 E UD
Advertisement
Table of Contents

Related Manuals for eka EKF 1111 E UD


Summary of Contents for eka EKF 1111 E UD
- Page 1 USE AND INSTRUCTION MANUAL USE AND INSTRUCTION MANUAL USE AND INSTRUCTION MANUAL USE AND INSTRUCTION MANUAL MODD D D D ..E E E E KF KF KF KF 1 1 1 1 1 1 1 1 1 1 1 1 1 1 1 1 E E E E UD UD –...
- Page 2 (CRISTINA LORA) X:\Sgq\PRODOTTI\1 - FORNI\FORNO ELETTRICO\LEka\MANUALI D'USO - Forno Elettrico 40 60 90 - LEka\Lingua Inglese\NUOVA GAMMA EF\Instruction manual EKF 1111 E UD - EKF 1064 E UD - EKF 1016 E UD - GB - rev. 1.doc page 2 _________________________________________________________________________________________...
- Page 3 Electronic Ovens rev. 0 __________________________________ EKF 1111 E UD – EKF 1064 E UD – EKF 1016 E UD Inde e e e x x x x 1 1 1 1 General information General information General information General information Technical specifications...
- Page 4 TECNOEKA Srl ______________________________________________________________ use and instruction manual 3.2.19 Start clock push button 3.2.20 Programmed ignition Magnetic door sensor First ignition Cooking techniques 3.5.1 Steam cooking 3.5.2 Convection cooking 3.5.3 Convection + steam cooking Other cooking techniques 3.6.1 Core temperature cooking technique 3.6.2 Cooking with “∆T”...
- Page 5 Electronic Ovens rev. 0 __________________________________ EKF 1111 E UD – EKF 1064 E UD – EKF 1016 E UD 1 1 1 1 ..General information General information General information General information This information has been prepared for your safety and that of others and we strongly advise reading it carefully before installing and using the oven.
- Page 6 TECNOEKA Srl ______________________________________________________________ use and instruction manual 1.2 Technical rating plate Technical rating plate Technical rating plate Technical rating plate Tecnoeka S.r.l., Via Marco Polo, 11 35010 Borgoricco (Padova) ITALY Model: E E E E KF KF 1 1 1 1 11 111 1 1 1 E E E E UD KF KF Voltage:...
- Page 7 Electronic Ovens rev. 0 __________________________________ EKF 1111 E UD – EKF 1064 E UD – EKF 1016 E UD 2.6 Posi 2.6 Positioning 2.6 Posi 2.6 Posi tioning tioning tioning Check the place where the appliance will be installed to ensure that the passages (doors and corridors) are wide enough (the appliance measurements are given in Fig.
- Page 8 TECNOEKA Srl ______________________________________________________________ use and instruction manual Installation / connection layout SERIAL SOCKET SOCKET TO CONNECT THE SENSOR TO THE CORE WATER OUTLET (DN 30 PIPE) WASHING WATER INLET WATER INLET (THREADED ¾” SOLENOID) STEAM OUTLET CABLE CLAMP (POWER LEAD) 10 WARNING! HOT SURFACE 11 DO NOT BLOCK VENTS 12 ACCESS OF WATER MAX.
- Page 9 Electronic Ovens rev. 0 __________________________________ EKF 1111 E UD – EKF 1064 E UD – EKF 1016 E UD 2.8 Connection of power cabl Connection of power cable e e e Connection of power cabl Connection of power cabl To reach the power terminal board remove the left side of the appliance. Loosen the cable- clamp on the back (at the bottom) of the appliance (see Fig.
- Page 10 TECNOEKA Srl ______________________________________________________________ use and instruction manual FIG. 2 FIG. 2 FIG. 2 FIG. 2 FIG. 3 FIG. 3 FIG. 3 FIG. 3 2.11 Thermal breaker safety devices 2.11 Thermal breaker safety devices 2.11 2.11 Thermal breaker safety devices Thermal breaker safety devices The appliance is supplied with a manually resetting thermal breaker to protect against excessive, dangerous temperatures which could be accidentally generated inside.
- Page 11 Electronic Ovens rev. 0 __________________________________ EKF 1111 E UD – EKF 1064 E UD – EKF 1016 E UD 3 3 3 3 ..User instructions User instructions User instructions User instructions 3.1 General i 3.1 General informat 3.1 General i...
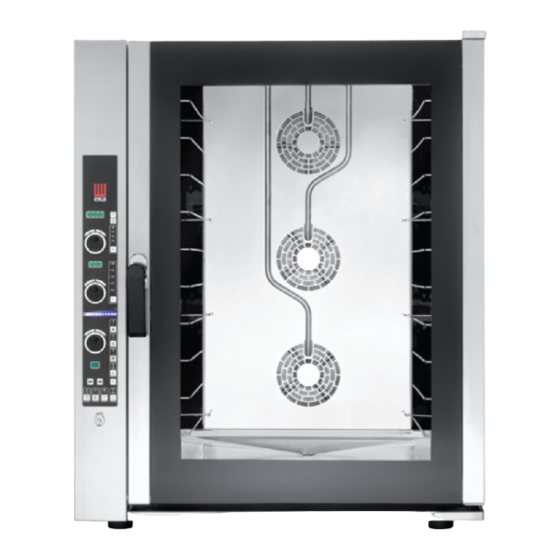
- Page 12 TECNOEKA Srl ______________________________________________________________ use and instruction manual 3.2 Operating instructions Operating instructions Operating instructions Operating instructions 3.2.1 3.2.1 3.2.1 3.2.1 Control panel Control panel Control panel Control panel 1. Time display 2. “+1” push button and hour/minute display (on the time display) 3.
- Page 13 Electronic Ovens rev. 0 __________________________________ EKF 1111 E UD – EKF 1064 E UD – EKF 1016 E UD 3.2.2 3.2.2 Programming cooking time 3.2.2 3.2.2 Programming cooking time Programming cooking time Programming cooking time To set the cooking time (from 1 minute to 4 hours) use the knob no. “1”. The set values can be seen on the time display.
- Page 14 TECNOEKA Srl ______________________________________________________________ use and instruction manual 3.2.7 3.2.7 Selecting cooking program number Selecting cooking program number 3.2.7 3.2.7 Selecting cooking program number Selecting cooking program number To select the cooking program number (there are 99 programs in all) press the push button (from 1 to 99) or the push button (from 99 to 1).
- Page 15 Electronic Ovens rev. 0 __________________________________ EKF 1111 E UD – EKF 1064 E UD – EKF 1016 E UD 3.2.12 3.2.12 Start/stop push button 3.2.12 3.2.12 Start/stop push button Start/stop push button Start/stop push button Once a programmed cooking cycle has been selected or a manual cycle set, press the push button to start cooking.
- Page 16 TECNOEKA Srl ______________________________________________________________ use and instruction manual 3.2.20 3.2.20 Programmed ignition Programmed ignition 3.2.20 3.2.20 Programmed ignition Programmed ignition With the oven turned OFF, when the push button is pressed, the parameters are shown that have been entered for programmed ignition: the time (time display), the day (temperature display) and the cooking program number (program display).
- Page 17 Electronic Ovens rev. 0 __________________________________ EKF 1111 E UD – EKF 1064 E UD – EKF 1016 E UD 3.5.2 3.5.2 Convection cooking (dry heat) 3.5.2 3.5.2 Convection cooking (dry heat) Convection cooking (dry heat) Convection cooking (dry heat) The heating elements heat the dry air inside the cooking chamber. This heated air is evenly distributed by the high speed of the fans.
- Page 18 TECNOEKA Srl ______________________________________________________________ use and instruction manual In this case, when the cooking cycle has been started, when the push button is pressed the temperature is selected automatically (shown on the temperature display) that is measured by the probe (led alight next to Warning Warning Warning...
- Page 19 Electronic Ovens rev. 0 __________________________________ EKF 1111 E UD – EKF 1064 E UD – EKF 1016 E UD 3.7 Operating methods Operating methods Operating methods Operating methods 3.7.1 Manual 3.7.1 Manual cooking cooking 3.7.1 3.7.1 Manual Manual cooking cooking After turning the oven ON (green led off), set the various cooking parameters.
- Page 20 TECNOEKA Srl ______________________________________________________________ use and instruction manual 3.8 Black 3.8 Black- - - - out 3.8 Black 3.8 Black When the power supply returns after a black-out, the oven will continue working counting the remaining time for the cooking cycle after the interruption. 3.9 Communications with PC Communications with PC Communications with PC...
- Page 21 Electronic Ovens rev. 0 __________________________________ EKF 1111 E UD – EKF 1064 E UD – EKF 1016 E UD 4. 4. 4. 4.4 4 4 4 Cleaning the door seal Cleaning the door seal Cleaning the door seal Cleaning the door seal For hygiene and good operations, it is good practice to clean the door seal at the end of each day’s work.
- Page 22 TECNOEKA Srl ______________________________________________________________ use and instruction manual 5 5 5 5 ..Ma Maintenance intenance intenance intenance 5.1 General information General information General information General information A periodic control (at least once a year) of the appliance aids to guarantee long life and correct operations.
- Page 23 Electronic Ovens rev. 0 __________________________________ EKF 1111 E UD – EKF 1064 E UD – EKF 1016 E UD 5. 5. 5. 5.4 4 4 4 Possible faults Possible faults Possible faults Possible faults Type o Type of fault f fault...
- Page 24 TECNOEKA Srl ______________________________________________________________ use and instruction manual Type of fault Type of fault Type of fault Type of fault Cause Cause Corrective action Corrective action Cause Cause Corrective action Corrective action “Er3” “Er3”is displayed on the temperature “Er3” “Er3” - Contact qualified - Cooling motor fan damaged display and an alarm is activated that can...
- Page 25 Electronic Ovens rev. 0 __________________________________ EKF 1111 E UD – EKF 1064 E UD – EKF 1016 E UD 5. 5. 5. 5.5 5 5 5 Wiring layout Wiring layout Wiring layout Wiring layout Power supply terminal board Door microswitch...
- Page 26 TECNOEKA Srl ______________________________________________________________ use and instruction manual 6 6 6 6 ..Technical service Technical service Technical service Technical service Before leaving the factory, the appliance was completely regulated and tested by expert specialised personnel to guarantee the best operating results. All repairs and settings must be performed with utmost care and attention, respecting national safety regulations in force.
- Page 27 Electronic Ovens rev. 0 __________________________________ EKF 1111 E UD – EKF 1064 E UD – EKF 1016 E UD 8 8 8 8 ..The Warranty The Warranty The Warranty The Warranty Your appliance is covered by warranty. The seller will replace or repair (and his decision will be final), free...
Need help?
Do you have a question about the EKF 1111 E UD and is the answer not in the manual?
Questions and answers