
Subscribe to Our Youtube Channel
Related Manuals for Zebex Z-8072


Summary of Contents for Zebex Z-8072
- Page 1 Z-8072 Hands-Free 2D Image Reader Service Guide Revision History Changes to the original manual are listed below: Version Date Description of Version July 13, 2016 Initial release...
-
Page 2: Table Of Contents
ERVICE UIDE Table of Contents Table of Contents................................2 Scanner Parts ..................................3 Take Apart ..................................5 Before You Start ..............................5 Important Instructions ..............................5 Tools to Prepare ..................................5 Z-8072 Service Guide 2 / 11... -
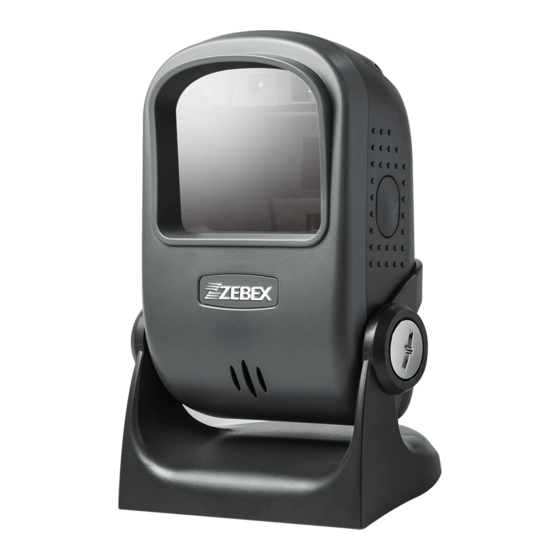
Page 3: Scanner Parts
Self tapping screw M2-8mm 521-004000-8R0 Self tapping screw M3-8mm 521-604000-010 Self tapping screw M3-10mm 684-100400-028 Z-8072 dust cover 866-807203-005 Z-8072 center mirror base assmbly 866-807200-401 Z-8072 engine assembly 030-005524-430 Sensor Board FPC (EMI) 24 Pin 522-904000-5R3 Z-8072 adjustable fixing screw 866-807201-306... - Page 4 ERVICE UIDE 540-D80720-001 Z-8072 speaker net 68B-000600-002 Z-8072 light filter 616-807204-201 Z-8072 SW P.C Board assembly 644-980720-002 Reflecting mirror cover plate 031-206004-520 LED Board FFC 4 Pin 616-807203-202 Z-8072 LED board assembly 616-807201-203 Z-8072 Main P.C board assembly 616-807202-202 Z-8072 IO P.C board assembly...
-
Page 5: Take Apart
Follow all instructions. • Heed all warnings. Tools to Prepare • Philips screwdriver. Please follow these steps to take apart Z-8072. Remove the screws (522-904000-5R3 x 2) from the sides. Separate the stand and the scanner. Z-8072 Service Guide 5 / 11... - Page 6 ERVICE UIDE Remove the back cover ring from the scanner. Remove the screws from the back cover (521-604000-010 x 4). Separate the front cover from the back cover and remove the speaker wire. Z-8072 Service Guide 6 / 11...
- Page 7 ERVICE UIDE Remove the self-tapping screws M2-5mm (521-013000-5R0 x6). Separate the front cover, speaker holder, dust cover holder, and speaker. Remove the self-tapping screws M3-8mm (521-004000-8R0 x4). Z-8072 Service Guide 7 / 11...
- Page 8 Separate center mirror base and back cover assembly. 10. Remove the self-tapping screws M2-5mm (521-013000-5R0 x2) and remove the IO P.C board. 11. Remove the self-tapping screws M2-8mm (521-003000-8R0 x4), the trigger the trigger rubber, and SW P.C board. Z-8072 Service Guide 8 / 11...
- Page 9 ERVICE UIDE 12. Remove the LIBER holder. 13. Separate the LED light guide panel and LIBER holder. 14. Remove the self-tapping screws M2-5mm (521-013000-5R0 x4) and remove the FFC cable. Z-8072 Service Guide 9 / 11...
- Page 10 ERVICE UIDE 15. Remove the main board. 16. Remove the self-tapping screws M1.6-4mm (521-202000-4R0 x2) and FFC cable and remove the LED board. 17. Remove the light filter and the reflecting mirror cover plate. Z-8072 Service Guide 10 / 11...
- Page 11 ERVICE UIDE 18. Remove the self-tapping screws M2mm (521-013000-5R0 x2) 19. Detach the engine and FFC cable. Z-8072 Service Guide 11 / 11...
Need help?
Do you have a question about the Z-8072 and is the answer not in the manual?
Questions and answers