Table of Contents
Advertisement
Advertisement
Table of Contents

Related Manuals for Zebex Z-6170


Summary of Contents for Zebex Z-6170
-
Page 2: Revision History
Revision History Changes to the original manual are listed below: Version Date Description of Version Aug. 17, 2009 Initial release May 03, 2010 Add DOF Aug 20, 2010 Modified SR pin number... - Page 3 Important Notice No warranty of any kind is made in regard to this material, including, but not limited to, implied warranties of merchantability or fitness for a particular purpose. We are not liable for any errors contained herein or incidental or consequential damages in connection with furnishing, performance or use of this material.
-
Page 4: Laser Safety
Laser Safety The laser scanner complies with safety standard IEC 60825-1 for a Class I laser produce. It also complies with CDRH as applicable to a Class IIa laser product. Avoid long term staring into direct laser light. Radiant Energy: The laser scanner uses one low-power visible laser diodes operating at 650nm in an opto-mechanical scanner resulting in less than 3.9μW radiated power as observed through a 7mm aperture and averaged over 10 seconds. -
Page 5: Table Of Contents
Table of Contents Introduction........................1 Unpacking ........................2 Outline ........................3 Installing the Device Using Suction Cup ..................... 4 Using Mounting Screw ..................5 Adjusting Scan Angle ....................6 Connection Interface Cable....................7 Connecting to the Host ..................8 Power Connection....................8 Verifying Scanner Operation ................ -
Page 6: Introduction
1. Introduction Elegant functional, newly-designed Hands-Free Single-Laser Omnidirectional Barcode Scanner leads the trend to the next aesthetical level. Its distinctive white color fits perfectly into places like bookstore, boutique and anywhere delicacy is a must. With unique designed single-laser scan engine, the scanner has 20-line omnidirectional laser beams reading at 1200 scans per second, and upgraded CPU for decoding most popular 1D barcodes at an unbeatable performance. -
Page 7: Unpacking
2. Unpacking The hands-free omnidirectional scanner package contains: 1 ea. Single line omnidirectional scanner 1 ea. Communication cable Power adapter 1 ea. (only for specific RS-232 cables as optional accessory) User’s manual & programming 1 ea. guide in CD-ROM 1 ea. Transparent self adhesive mylar a. -
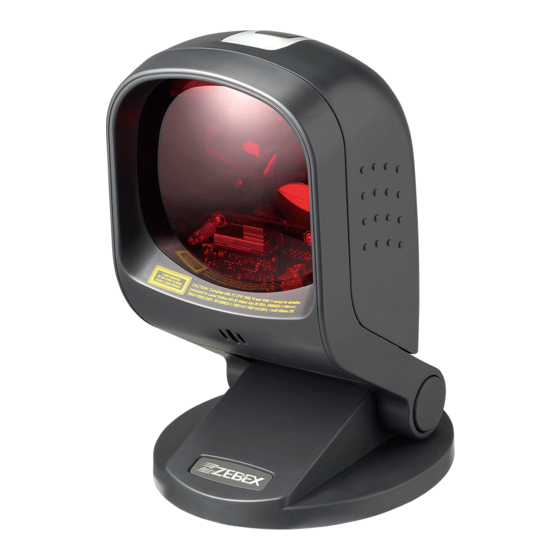
Page 8: Outline
3. Outline Figure 1: Outline Description Function Scan Window Read barcodes Speaker Exit For beep tone indication Allow adjustment of device body forwards or Hinge Shaft backwards LED Indicator Reading status indication Trigger Button Push to scan and switch to single-line scan mode Interface Cable Connection For interface communication cable connection Lever To control suction cup... -
Page 9: Installing The Device
4. Installing the Device 4.1 Using Suction Cup The device is designed with a cupulate stand, and easily sucks to any smooth surface without making any damage. It is most suggested to place on glass surface for best and firmest suction result, or use the transparent self adhesive mylar provided in package if your counter top is not 100% smooth. -
Page 10: Using Mounting Screw
4.2 Using Mounting Screw The device is reserved with 3 mounting holes for permanent fixture if required. Refer to the figure below for detailed information. Unit: mm(inch) Figure 4: Mounting screw holes... -
Page 11: Adjusting Scan Angle
5. Adjusting Scan Angle The device has a hinge shaft that allows tilt forwards and backwards in certain angle. Gently holds the device with one hand and move the scan angle as needed. Figure 5: Scan angle Do not let the scan beam facing directly to human eyes. -
Page 12: Connection
6. Connection 6.1 Interface Cable The interface cable comes with different host-end connectors, and there are 3 standard types of interface connection that this device supports: Keyboard wedge RS-232 interface HID USB interface **Refer to pg 12 for pin-out configuration of each interface available Insert the cable to device Follow as illustrated in Figure 6 to insert the RJ-45 connector side of cable into the device. -
Page 13: Connecting To The Host
6.2 Connecting to the Host Follow the steps below to connect the interface cable to the host. 1. Make sure the power of the host system is off. 2. Connect the host-end of the interface cable to the appropriate connector on the host system. -
Page 14: Verifying Scanner Operation
6.4 Verifying Scanner Operation Please follow the procedure below to verify scanning operation. 1. Insert the modular plug of the Interface cable into the back of the scanner until a firm click is heard. 2. If necessary, plug the power adapter into the jack on the interface cable. 3. -
Page 15: Setting Up The Scanner
7 Setting Up the Scanner In certain cases no setup is required. The scanner is either pre-programmed to suit the situation, or it automatically detects and is ready to go. In other cases the scanner must be informed about what kind of system it is connected to. This can be done in a few moments using the programming barcodes in the Programming Guide. -
Page 16: How To Scan In Different Mode
8 How to Scan in Different Mode The device is an omnidirectional presentation scanner with a 5 directional scan field with a 20 lines scan pattern. The scan volume extends approximately 20cm (8”) in front of the scan window. Barcode labels can be easily read when presented towards the scanning window. -
Page 17: Single-Line Scan Mode
8.2 Single Line Scan Mode In this mode the scanner can emit a single line pattern for users to handheld scanning of hard-to-read or multiple barcodes on one object. Sales clerks can switch it to single line scan option simply by pressing one button. Button Figure 10: Single-line switch button 1. -
Page 18: Sleep Mode
9 Sleep Mode After the scanner has been inactive for a period of time, the laser and the motor would automatically turn off and the scanner would enter the sleep mode. The blue LED would blink as indication. It takes 2 steps to enter the sleep mode. The first step is the laser switching off after 10 minutes;... -
Page 19: Led Indications
10 LED Indications There are red and blue dual color LED indications on the head of the device. They indicate the operational status of the scanner. The following are the LED statuses and their indications. LED Status Indication No power supplied to the scanner. Steady blue light The scanner is on and ready to scan. -
Page 20: Sound Indications
11 Sound Indications The device uses a speaker to give audible feedback on scanner operation. The following are the sound indications. Beeps Indication One beep A barcode has been successfully decoded. This indicates the scanner passed the power on Four beeps in series self-test and is operating properly. -
Page 21: Controlling The Scanner From The Pos System
12 Controlling the Scanner from the POS System The scanner can be controlled from the POS system via the RS-232C interface. Controlling can be accomplished by transmitting the following single byte commands to the scanner. The default settings of the commands are as follows: ASCII Code Function Byte is Also Called:... -
Page 22: Trouble Shooting
13 Trouble Shooting This section contains information about how to solve problems that you may encounter when operating the scanner. However, before referring to the tips, make sure that the scanner is installed as instructed in this manual and that all cables are properly connected. -
Page 23: Maintaining The Scanner
14 Maintaining the Scanner 14.1 Cleaning the Scan Window The scanner is designed for long-term trouble-free operation and rarely requires any maintenance. Only an occasional cleaning of the scanner window is necessary in order to remove dirt and fingerprints. Wipe the scan window with a soft lint-free cloth and a non-abrasive cleaner to avoid scratching and damaging the scan window. -
Page 24: Dimension
15 Dimension Unit: mm(inch) -
Page 25: Reading Field
16 Reading Field 16.1 Depth of Field 16.2 Width of Field... -
Page 26: Specification
17 Specification Operational Light Source 650nm visible laser diodes (VLD) Depth of Scan Field 0 - 200 mm (UPC/EAN 100%, PCS=90%) Scan Pattern 5 directions of scan field Scan Rate 1400 scans per second (omnidirectional) Number of Scan Lines 20 Minimum Bar Width 5mil @ PCS 90% Print Contrast... -
Page 27: Connector And Pin Out
18 Connector and Pin Out 18.1 Device PIN-OUT CONFIGURATION FUNCTION Keyboard RS-232C Power KB_CLK PC_CLK RTS_TTL TXD_TTL RXD_TTL KB_DATA PC_DATA CTS_TTL 18.2 Interface Cable Keyboard Wedge Cable (for PS/2) PIN-OUT CONFIGURATION MINI DIN (M) MINI DIN(F) FUNCTION FUNCTION PC Data KB Data N.C. - Page 28 RS-232C Cable – DCE pin out PIN-OUT CONFIGURATION DB-9 (F) FUNCTION USB Cable –USB Type A Connector Function...
Need help?
Do you have a question about the Z-6170 and is the answer not in the manual?
Questions and answers