
Related Manuals for Gator G4KDVR20


Summary of Contents for Gator G4KDVR20
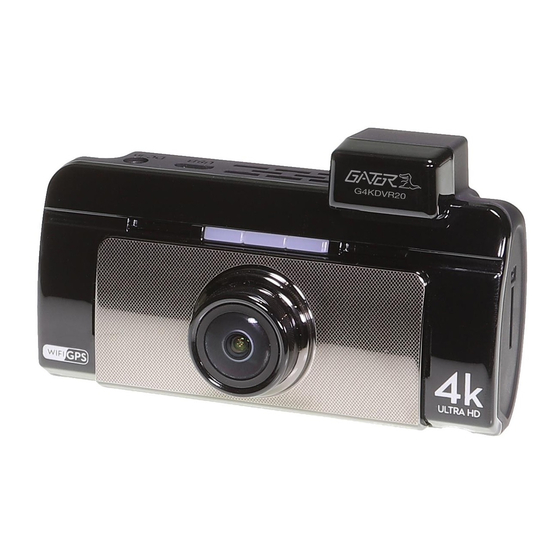
- Page 1 4KDVR20 4K ULTRa HD DaSH cam wifi / GPS TRaCKING OWNER’S MANUAL Note: This manual is considered correct at time of printing but is subject to change. For latest manuals and updates refer to the website. www.gatordriverassist.com...
-
Page 2: Introduction
Introduction Thank you for purchasing the Gator G4KDVR20 4K UHD Dash Cam. This product is a convenient and durable traveling video and data recorder. Please ensure that you have read the product manual and instructions in full, prior to installation and use. -
Page 3: Table Of Contents
Table of contents Introduction..............2 Product features..............2 Table of contents..............3 Package components............4 Product structure..............5 Installation of Dash Cam............7 Fixing the Dash Cam............8 Hard wiring kit...............9 Video mode screen............10 Video mode icons...............11 Video mode settings............12 System settings..............13 Pairing the Dash Cam to a Smartphone......14 Dash Cam interface screen..........15 Dash Cam video and photo gallery screen......16 Video mode settings screen..........17... -
Page 4: Package Components
Package components G4KDVR20 Dash Cam Adhesive Mounting Bracket 12/24V charging adapter 16 GB Micro SD Card... -
Page 5: Product Structure
Product structure 1) GPS 2) Recording Indicator 3) WiFi Indicator 4) Dash Cam mount 5) Power button 6) Touch screen 7) Camera lens 8) Micro SD card slot... - Page 6 Product structure 9) Camera Lens 10) Rear camera input 11) DC-in interface...
-
Page 7: Installation Of Dash Cam
Installation of the Dash Cam 1. Check the mounting position of the Dash Cam camera first before installation. 2. Ensure windscreen is clean and free of debris. Use an Alcohol wipe to enhance adhesion. 3. Place mounting bracket on Dash Cam after checking Dash Cam position. -
Page 8: Fixing The Dash Cam
Fixing the Dash Cam Suggested... -
Page 9: Hard Wiring Kit
Hard wiring kit G4K20HWK (Sold separately) This can be purchased separately from your retailer to hard wire your Dash Cam to your vehicle. NOTE: When installing the hardwire kit, RED wire to ACC, YELLOW wire to constant 12V and BLACK wire to earth. With Automatic parking monitor turned on in the settings. -
Page 10: Video Mode Screen
Video mode screen There is a video camera icon at the top left corner of the LCD to signify you are on video mode. The recording indicator will start flashing RED. A red circle will also flash on the screen and a timer will appear when recording has started. -
Page 11: Video Mode Icons
Video mode icons 1) Video mode 2) Recording Indicator flashes when active 3) WDR icon 4) Wifi icon 5) GPS icon 6) Recording timer 7) Loop recording time 8) Time lapse video icon 9) Switch between front, rear & PIP camera view 10) Video mode settings icon touch screen button 11) Date 12) Time... -
Page 12: Video Mode Settings
Video mode settings Press video camera icon to enter video settings. Select function and select settings to make changes. Press arrow icon to exit the function. Press X icon to exit the settings. Description Function Select from: UHD P24 / QHD P30 / Resolution FHD P60 / FHD P30 / 1440P+720P Boot record... -
Page 13: System Settings
System settings Press wheel icon to enter video settings. Select function and select settings to make changes. Press arrow icon to exit the function. Press X icon to exit the settings. Function Description Time Zone GMT+0.00 TO GMT+12.00 English / Français / Español / Deutsch Language Português / Italiano / Chinese Set system Date/Time... -
Page 14: Pairing The Dash Cam To A Smartphone
Select your Dash Cam model (G4KDVR20). Enter the password 12345678. Once paired to your DASH CAM then launch the ‘GATOR G4KDVR20’ Dash Cam APP to access functions. Once connection is successful, the WiFi indicator on your Dash Cam turns blue. Enter the APP to update the current time and date in the APP for GPS location and recordings. -
Page 15: Dash Cam Interface Screen
Dash Cam interface screen Resolution WiFi Connected Live View View files Switch camera view Start/Stop/ Take picture Mode Settings Video & Photo modes... -
Page 16: Dash Cam Video And Photo Gallery Screen
Dash Cam video and photo gallery screen View, videos/photos taken on the Dash Cam to your phone. Press select button to download or delete. Alternatively you can also remove the SD card from the Dash Cam and plug the card directly into your computer to access files. -
Page 17: Video Mode Settings Screen
Video mode settings screen... -
Page 18: Photo Mode Settings Screen
Photo mode settings screen... -
Page 19: Connecting To A Computer
In order to see the GPS data, you will need to download the video from the Dash Cam to your computer and view it through the free downloadable software (JMS GPSPlayer) from our website. Go to www.gatordriverassist.com and search for the model G4KDVR20. This software is only for PC platforms. JMS GPSPlayer... -
Page 20: G-Sensor Sensitivity
G-sensor sensitivity This function activates in the case of a car accident by determining the gravitational acceleration (1g = 9.8 meters/second^2). When this function activates the Dash Cam will automatically sync a 10 second video clip and save it to the Event folder on the SD card. -
Page 21: Product Specifications
Product specifications Display 2.7" High-resolution LCD touch screen Color Black Video 4K UHD 2160P @ 24fps Resolution NOVATEK 96660 WiFi & GPS In built, tracking via App Picture format Picture Viewing Angle 160 Degree wide angle lens Functions WDR, G-Sensor, Loop recording OSD Language Multiple Audio... -
Page 22: Troubleshooting Guide
Troubleshooting guide If there are problems with the device, please refer to the following methods to resolve. Cannot take pictures or record video? Please check whether there is enough space on the micro SD card or internal storage. Stopping automatically while recording? Due to the high amount of HD video data being recorded, please use a high-speed Micro SD card. -
Page 23: Safety Information
Please pay attention to cleaning the lens surface, use a moist soft cloth to clean the lens before use, to avoid poor video footage. Gator is NOT responsible for the loss of any recorded video during operation. Although designed to withstand high impact of car collision, Gator does NOT guarantee recording of accidents where the impact may cause the device to be damaged. -
Page 24: Technical Assistance
Product specifications Technical assistance If you need assistance setting up or using your Gator product now or in the future, call Gator Support. Australia TEL: 03 – 8587 8898 FAX: 03 – 8587 8866 Mon-Fri 9am – 5pm AEST Please retain this user guide for future reference.
Need help?
Do you have a question about the G4KDVR20 and is the answer not in the manual?
Questions and answers