
Related Manuals for VWR PCR Workstation


Summary of Contents for VWR PCR Workstation
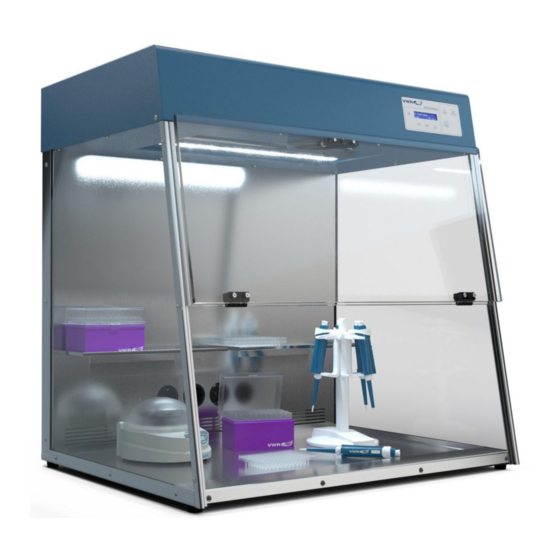
- Page 1 ® PCR Workstation INSTRUCTION MANUAL Catalogue Numbers: Euro Plug: 732-2840 (assembled) 732-3337 (not assembled) UK Plug: PEQL90-UV/PCR2-UK Version: Issued: 01 June 2018...
- Page 2 Legal Address of Manufacturer United States Europe VWR International, LLC VWR International bvba 100 Matsonford Rd Researchpark Haasrode 2020 Radnor, PA 19087 Geldenaaksebaan 464 800-932-5000 B-3001 Leuven http://www.vwr.com + 32 16 385011 http://be.vwr.com Country of origin Germany VWR Collection PCR Workstation HEPA...
-
Page 3: Table Of Contents
CONTENTS CONTENTS INTRODUCTION GENERAL WARNING SAFETY INSTRUCTIONS DELIVERY CONTENTS UNPACKING ASSEMBLING THE PCR WORKSTATION SPECIFICATIONS VWR PCR Workstation Power supply CONNECTIONS AC power inlet AC power outlets OPERATING THE PCR WORKSTATION Use of PCR equipment inside the workstation Operating the overhead UV and white lights... -
Page 4: Introduction
Safety and protection of the user cannot be ensured if the PCR Workstation is used in any manner that is not specified in these instructions. Special notice must be taken of the following:... - Page 5 If you detect any damage of the PCR Workstation or one of its accessories, do not connect the PCR Workstation to the AC wall outlet and do not use the device in any manner! Caution: Optical radiation Do not switch on the PCR Workstation if not completely assembled.
-
Page 6: Delivery Contents
After receipt of the system, please check if the following items are included in the shipment: 1. Base (1x) 2. Rear panel (1x) 3. Side panel (2x) 4. Front panel (1x) 5. Shelf (2x) 6. Top assembly (1x) VWR Collection PCR Workstation... -
Page 7: Unpacking
The instrument must be connected to the power supply with the power cord supplied. It is recommended that users should thoroughly read this manual prior to use Contact your supplier if you experience any difficulties with this instrument VWR Collection PCR Workstation... -
Page 8: Assembling The Pcr Workstation
ASSEMBLING THE PCR WORKSTATION The PCR Workstation should be assembled by two people, directly at the site of operation. We recommend the wearing of safety gloves for hand protection. Step 1 Put the base 1 on an even surface with the... - Page 9 Front panel 4 panels 3. Hold the front panel 4 in place. Side panel 3 Screw the front panel 4 to both side panels 3 using 3 screws 8 each. Use the screwdriver 9. VWR Collection PCR Workstation...
- Page 10 Finally connect the system to the power supply by plugging the power plug from the back panel 2 into the local power outlet. The system is now ready for operation now. VWR Collection PCR Workstation...
-
Page 11: Specifications
/h (UV Air Recirculator) Power supply EU/UK Version: 220 - 240 V AC, 50/60 Hz, max. 1650 VA US version: 120 V, 60 Hz, max. 900 VA Fuse: 10 AT, 5 x 20 mm For indoor use, only! VWR Collection PCR Workstation... -
Page 12: Connections
Before first use, ensure that the voltage requirements of the PCR Workstation exactly match your local AC power supply. Connect the PCR Workstation to the AC power supply only by the AC power cord delivered with your PCR Workstation. Only connect the PCR Workstation to electric power systems with an earth conductor. -
Page 13: Ac Power Outlets
The sum of the maximum power ratings of devices connected to these power outlets must not exceed the values specified for the PCR Workstation. See chapter "OPERATING THE PCR WORKSTATION ", page 13, for further information. VWR Collection PCR Workstation... -
Page 14: Operating The Pcr Workstation
The fluorescent white light provides a bright light within the PCR Workstation. Operating the UV Air Recirculator The VWR PCR Workstation includes a built-in UV Air Recirculator for elimination of airborne microbes during experiments. NOTE: The UV Air Recirculator can operate while the front panel is open. -
Page 15: Timer
A magnetic sensor is built into the bottom of the front panel. When the front panel is opened, the ultraviolet light will automatically shut off! Note: Do not attempt to perform PCR procedures with the germicidal lamp on. The germicidal lamp is used to decontaminate the chamber between experiments. VWR Collection PCR Workstation... -
Page 16: Control Panel Description
It automatically activates the programme to decontaminate the workspace. The default time for the decontamination process is 30 minutes. The display will show the remaining time of the decontamination programme. Remaining time could be change with the arrow buttons. Switch Recirculator on and off VWR Collection PCR Workstation... -
Page 17: Select Day And Time
Set up UV Surface time Select “UV Surface” and click on . The time starts flashing. Pressing the button will modify the time between 30 min and 5 min in steps of 5 minutes. To store the selected value press VWR Collection PCR Workstation... -
Page 18: Set Up Auto Decontamination Routine
Press to confirm and select the next day after selecting the last value (S = Sunday) will store the settings. Press to go back to the decontamination routine parameters. VWR Collection PCR Workstation... - Page 19 Note: During Auto-Decontamination all selected functions will be activated automatically, after reaching the selected time only the UV Light will be deactivated. All other selected functions (e.g. Recirculator) are still active to protect the device from re-contamination. VWR Collection PCR Workstation...
-
Page 20: Checking And Resetting The Hours Of Duty
When "duty hours exceeded" message is displayed, press to reset the duty hours of the items directly (short cut). After replacing UV light tubes it is necessary to reset the hours of duty in the software manually! VWR Collection PCR Workstation... -
Page 21: Settings
Select “Language” and press on Press the buttons to modify the selected language. Languages are: English, German, Espanola, Francis, Italian and Portuguese. Press to confirm and store the selected language. Press to go back to the Settings parameters. VWR Collection PCR Workstation... - Page 22 YES or NO for the reset. Press to confirm and store the settings. Press to go back to the Settings parameters. The Default parameters are: Language: English Time Format: Brightness: Contrast: UV Surface Time: 30 min Auto Deco: VWR Collection PCR Workstation...
-
Page 23: Measuring Uv Tube Intensity
When it is time to measure the UV intensity inside the PCR Workstation, the sensors can be placed on the floor of the PCR Workstation. Close the front panel and turn on the UV tubes. Please refer to the UV radiometer manual on how to perform the measurement. It is recommended that the user records an initial value upon receipt and assembly of the PCR Workstation. -
Page 24: Bacterial Destruction Chart
Dysentery bacilli 4200 Influenza 6600 Shigella paradyseneriae 3200 Spirillum rubrum 6160 PROTOZOA Staphylococcus albus 5720 Paramecium 200000 Staphylococcus aereus 6600 Nematode eggs 9200 Streptococcus 5500 Chlorella vulgaris (algae) 22000 hemolyticus Streptococcus lactis 8800 Streptococcus viridans 3800 VWR Collection PCR Workstation... -
Page 25: Maintenance
Drawing shows tube location in top assembly. Outer tubes are the shortwave 254 nm UV and the middle tube is white light. We recommend you change the UV tubes after 1000 – 1500 hours of operation. VWR Collection PCR Workstation... -
Page 26: Replacing The Uv Air Recirculator Uv Tube
Replacing the filter of the UV Air Recirculator The UV Air Recirculator fan filter is located on the inner top of the PCR Workstation in front of the light tubes (see picture to the right). To change the filter, take off the plastic cover with the filter attached to it and replace it with a new filter. -
Page 27: Ordering Information
(2) years from date of delivery. If a defect is present, VWR will, at its option and cost, repair, replace, or refund the purchase price of this product to the customer, provided it is returned during the warranty period. -
Page 28: Disposal Instruction
By doing so, you will help to conserve natural and environmental resources and you will ensure that your equipment is recycled in a manner that protects human health. Thank you VWR Collection PCR Workstation... - Page 29 INHALT INHALT EINLEITUNG ALLGEMEINE WARNHINWEISE SICHERHEITSHINWEISE LIEFERUMFANG AUSPACKEN AUFBAU DER PCR WORKSTATION SPEZIFIKATIONEN VWR PCR Workstation Stromversorgung ANSCHLÜSSE AC Netzversorgung AC Steckdosen BEDIENUNG DER PCR WORKSTATION Verwendung von PCR Zubehör innerhalb der Workstation Bedienung des UV- und Weißlichts Bedienung des UV Luft-Rezirkulator...
-
Page 30: Einleitung
Haut oder den Augen hervorrufen, wenn ein direkter Kontakt mit UV-Strahlung erfolgt. Bevor Sie mit dem Gerät arbeiten, stellen Sie sicher, dass die PCR Workstation Pro nicht beschädigt ist und alle Hinweise zur Anwendung befolgt werden. Zum Schutz des Anwenders vor UV-Strahlung schaltet ein integrierter Sicherheitsmechanismus das UV-Licht sofort ab, sobald die Frontscheibe geöffnet wird. - Page 31 Stromversorgung verbunden oder in irgendeiner Weise genutzt werden! Vorsicht vor optischer Strahlung Schalten Sie die PCR Workstation Pro nicht ein, wenn sie nicht komplett aufgebaut wurde, siehe auch "AUFBAU DER PCR WORKSTATION PRO", S.7. Schauen Sie nicht direkt in die UV-Lampen.
-
Page 32: Lieferumfang
LIEFERUMFANG Bitte kontrollieren Sie, ob sämtliche Teile der Workstation bei Lieferung vorhanden sind: 1. Boden (1x) 2. Rückwand (1x) 3. Seitenscheibe (2x) 4. Frontscheibe (1x) 5. Regalelement (2x) 6. Haube (1x) VWR Collection PCR Workstation... -
Page 33: Auspacken
Das Gerät muss mit dem mitgelieferten Netzkabel an das Stromnetz angeschlossen werden Vor Inbetriebnahme sollten Sie diese Bedienungsanleitung sorgfältig lesen und die Sicherheitshinweise unbedingt befolgen! Wenden Sie sich an Ihren Lieferanten, wenn Sie Schwierigkeiten mit der Benutzung des Gerätes haben VWR Collection PCR Workstation... -
Page 34: Aufbau Der Pcr Workstation
AUFBAU DER PCR WORKSTATION Wir empfehlen, die Montage der PCR Workstation Pro direkt am Einsatzort durch zwei Personen durchzuführen und Sicherheitshandschuhe zum Schutz der Hände zu tragen. Schritt 1 Legen Boden Rückwand 2 Gummifüßen nach unten Sensorkabeldose nach vorne auf eine Boden 1 ebene Fläche. - Page 35 Setzen Sie die Haube 6 auf. Achten Sie dabei darauf die Kabel, die aus der Rückwand 2 Rückwand ragen, nicht einzuklemmen. Verschrauben Sie die Haube zwei Mal mit der Rückwand 2. Verwenden Sie hierzu die Schrauben 8 und den Schraubendreher 9. VWR Collection PCR Workstation...
- Page 36 Lüfterabdeckung 7 positionieren Sie es wie gewünscht auf der Arbeitsfläche. Verbinden Sie das System abschließend mit der Stromversorgung, indem Sie den Netzanschluss an der Rückwand 2 an das lokale Stromnetz anschließen. Das Gerät ist jetzt betriebsbereit. VWR Collection PCR Workstation...
-
Page 37: Spezifikationen
/h (UV-Luft-Rezirkulator) Stromversorgung EU/UK Version: 220 - 240 V AC, 50/60 Hz, max. 1650 VA US Version: 120 V, 60 Hz, max. 900 VA Sicherung: 10 AT, 5 x 20 mm Nur für den Einsatz im Innenbereich! VWR Collection PCR Workstation... -
Page 38: Anschlüsse
Sollte ein Service für das Gerät notwendig werden, kontaktieren Sie bitte Ihren lokalen Händler oder den Hersteller (siehe "TECHNISCHER SERVICE", S.27). Die Geräte-Seriennummer ist an der Rückseite der PCR Workstation Pro angebracht. Der Austausch einzelner Bauteile des Gerätes (mit Ausnahme der Polycarbonat-Scheiben, der UV-Röhren, der Sicherung und der Filter) darf nicht durch den Nutzer durchgeführt werden, sondern ausschließlich... -
Page 39: 4X Ac Steckdosen
AC Steckdosen 4x AC Steckdosen Die 4 AC Steckdosen können für Kleingeräte zum Betrieb innerhalb der PCR Workstation Pro genutzt werden. Die Gesamtsumme des maximalen Stromverbrauchs aller angeschlossenen Geräte darf die für die PCR Workstation Pro vorgegebenen Werte nicht überschreiten! Siehe "BEDIENUNG DER PCR WORKSTATION", S.13, für weitere Informationen. -
Page 40: Bedienung Der Pcr Workstation
An den innenliegenden Steckdosen können für PCR Experimente benötigte Kleingeräte wie z.B. Schüttler, Wippen etc. angeschlossen werden. Die Geräte können so zwischen den Experimenten dekontaminiert werden. Um die Geräte innerhalb der PCR Workstation Pro betreiben zu können, müssen sie mit den Steckdosen verbunden werden. Es wurden spezielle Steckdosen installiert, siehe Abbildung "AC Steckdosen", S.12. -
Page 41: Timer
HINWEIS: In der Frontscheibe ist ein magnetischer Sensor integriert. Sobald die Frontscheibe geöffnet wird, schaltet das UV-Licht automatisch ab! HINWEIS: Versuchen Sie nicht, die offenen UV-Röhren während der Arbeit in der PCR Workstation Pro einzuschalten. Diese sind zur Dekontamination der Workstation zwischen den Experimenten gedacht. -
Page 42: Beschreibung Der Bedieneinheit
Es aktiviert automatisch das Programm zur Dekontamination des Arbeitsbereichs. Die Standardzeit für den Dekontaminationsprozess beträgt 30 Minuten. Auf dem Display wird die verbleibende Zeit des Dekontaminationsprogramms angezeigt. Die verbleibende Zeit kann mit den Pfeiltasten geändert werden. Schaltet den UV-Luft-Rezirkulator an und aus VWR Collection PCR Workstation... -
Page 43: Einstellen Des Tages Und Der Uhrzeit
Wählen Sie “UV Oberfläche” aus und drücken Sie . Die eingestellte Zeit beginnt zu Blinken. Durch drücken der oder Tasten kann der Wert zwischen 30 min und 5 min in Schritten von 5 Minuten eingestellt werden. Speichern durch drücken von VWR Collection PCR Workstation... - Page 44 Tasten oder verändert die Auswahl von aktive (gefüllte Box) zu inaktiv (leere Box). Drücken von bestätigt die Auswahl und aktiviert den nächsten Wochentag. Erneutes Drücken von bestätigt die Auswahl und aktiviert den nächsten Wochentag. Nach dem VWR Collection PCR Workstation...
- Page 45 Um eine laufende Auto-Dekontamination zu beenden wählen sie Stoppen? JA aus und drücken Sie Nach Beendigung der Auto-Dekontamination wird die Uhrzeit zum Zeitpunkt der Beendigung im Display angezeigt. Durch drücken von gelangen Sie zurück zum Startbildschirm. VWR Collection PCR Workstation...
-
Page 46: Überprüfen Und Zurücksetzen Der Betriebsstundenzähler
Sanduhr (maximale Betriebsstundenanzahl erreicht). Erscheint die Meldung “Maximale Betriebsstundenanzahl erreicht” auf dem Display, kann durch drücken der Taste der Betriebsstundenzähler direkt gelöscht werden. Nachdem UV-Lichtröhren ersetzt worden sind, muss der Betriebs-stundenzähler manuell auf null gestellt werden! VWR Collection PCR Workstation... -
Page 47: Einstellungen
, ein Fortschrittsbalken beginnt zu blinken der den Kontrast des Displays anzeigt. Drücken der Tasten oder verändert die Auswahl. Drücken Sie um den Wert zu bestätigen und zu speichern. Durch Drücken der Taste gelangen Sie zur Auswahl der Parameter – Einstellungen. VWR Collection PCR Workstation... - Page 48 Auswahl bestätigt und die Werkseinstellungen wiederhergestellt. Durch drücken der Taste gelangen Sie zur Auswahl der Parameter – Einstellungen. Die Werkseinstellungen sind: Sprache: Englisch Zeitforrmat: Helligkeit: Kontrast: UV-Timer 30 min Oberfläche: Auto Deco: VWR Collection PCR Workstation...
-
Page 49: Messen Der Uv-Intensität
Anwender überprüft werden. Zur Durchführung kann der Sensor des UV-Meters auf der Arbeitsplatte der PCR Workstation Pro platziert werden. Schließen Sie die Frontscheibe und schalten Sie UV- Beleuchtung an. Bitte halten Sie sich an die Instruktionen im Manual Ihres UV-Meters für die genaue Durchführung der Messung. - Page 50 Dysentery bacilli 4200 Influenza 6600 Shigella 3200 paradyseneriae Spirillum rubrum 6160 PROTOZOEN Staphylococcus albus 5720 Paramecium 200000 Staphylococcus 6600 Nematode eggs 9200 aereus Streptococcus Chlorella vulgaris 5500 22000 hemolyticus (algae) Streptococcus lactis 8800 Streptococcus viridans 3800 VWR Collection PCR Workstation...
-
Page 51: Wartung
Zeit normal. Diese Rissbildung kann vermindert werden, indem die UV-Bestrahlung auf ein Minimum reduziert wird. Haarrisse innerhalb der Garantiezeit werden als normaler Verschleiß angesehen und unterliegen nicht der Garantie. Die Polycarbonat-Scheiben der PCR Workstation Pro sind als Ersatzteile erhältlich und können ersetzt werden. -
Page 52: Austausch Der Uv- Oder Weißlichtröhren Im Geräteinneren
Halterung ein. Drehen Sie die Röhre um 90°, bis sie in der richtigen Position einrastet. Die Abbildung zeigt die Position der Röhren von unten in der Haube der PCR Workstation Pro. Bei den äußeren Röhren handelt es sich um die 254 nm UV-Röhren, die mittlere Röhre ist die Weißlichtröhre Wir empfehlen die UV-Röhren nach 1000 –... -
Page 53: Austausch Der Sicherung
Um die Sicherung zu entfernen, kann die Abdeckung mit einem Schlitz-Schraubendreher geöffnet und die Sicherung herausgezogen werden. Setzen Sie die neue Sicherung ein und drehen Sie sie mit Hilfe des Schraubendrehers bis sie in der richtigen Position einrastet. VWR Collection PCR Workstation... -
Page 54: Bestelliformationen
Sie vwr.com. GARANTIE VWR International garantiert, dass dieses Produkt für einen Zeitraum von zwei (2) Jahren ab Lieferdatum frei von Material- und Herstellungsfehlern ist. Wenn ein Mangel vorliegt, wird VWR dieses Produkt nach eigenem Ermessen und auf eigene Kosten reparieren, ersetzen oder den Kaufpreis zurückerstatten, sofern es während der Garantiezeit zurückgegeben wird. -
Page 55: Einhaltung Von Lokalen Gesetzen Und Vorschriften
Genehmigungen zu beantragen und einzuholen, die für den Betrieb oder die Verwendung des Produkts in seiner lokalen Umgebung erforderlich sind. VWR haftet nicht für eine damit zusammenhängende Unterlassung oder die Nichteinholung der erforderlichen Genehmigung oder Genehmigung, es sei denn, die Ablehnung ist auf einen Mangel des Produkts zurückzuführen. - Page 56 Lokale VWR Niederlassungen in Europa und Asia Pacific Austria Germany Poland VWR International GmbH VWR International GmbH VWR International Sp. z o.o. Graumanngasse 7 Hilpertstrasse 20a Limbowa 5 1150 Vienna D - 64295 Darmstadt 80-175 Gdansk Tel.: +43 1 97 002 0 Freecall: 0800 702 00 07 Tel.: +48 058 32 38 210...
Need help?
Do you have a question about the PCR Workstation and is the answer not in the manual?
Questions and answers