
Related Manuals for VWR HIGH PERFORMANCE PIPETTOR


Summary of Contents for VWR HIGH PERFORMANCE PIPETTOR
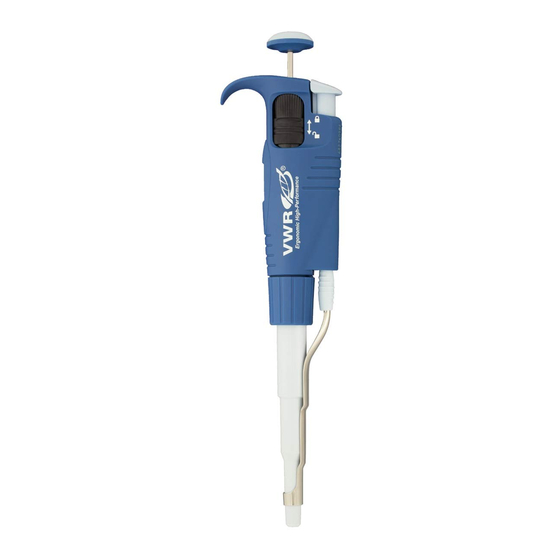
- Page 1 HIGH PERFORMANCE PIPETTOR ® USER GUIDE Light-Weight Ergonomics Precise & Reliable Secure Results...
-
Page 2: Table Of Contents
HIGH PERFORMANCE PIPETTOR ® Contents Page 1- INTRODUCTION 2- PARTS CHECK LIST 3- DESCRIPTION 4- SETTING THE VOLUME 5- USER ADJUSTMENT 6- PIPETTING 7- GENERAL GUIDELINES FOR GOOD PIPETTING 8- ACCESSORIES AND STAND 9- GLP FEATURES 10- TROUBLESHOOTING 11- LEAK TEST... -
Page 3: 1- Introduction
USER’S GUIDE 1 - INTRODUCTION The VWR High Performance Pipettor is an air displacement mechanism and is used with disposable pipette tips. This pipettor line provides: • Light and comfortable body • Low pipetting forces ensuring ergonomics and users’ well-being •... -
Page 4: 3- Description
HIGH PERFORMANCE PIPETTOR ® 3 - DESCRIPTION Single channel models Multichannel models Color-coded push-button Lock/Unlock mechanism & Tip- ejector button Handle Counter Ejector clip Connecting nut Ejector support Tip-holder Ejector lock Tip-ejector Cover Tip-holders FIGURE 1 3 - DESCRIPTION For 2µL and 10µL Single channel models, a tip-ejector extention is supplied to fit with short tips models. - Page 5 USER’S GUIDE To remove a tip-ejector extention: Gently twist the extention Pull it away from the pipettor Ejector spacer for Multichannel models (X10µL only) Multichannel models fit with long collar tips. If you use short collar tips, you might have to insert the ejector spacer especially indicated for that: •...
-
Page 6: 4- Setting The Volume
HIGH PERFORMANCE PIPETTOR ® 4 - SETTING THE VOLUME The volume of liquid to be aspirated is set using the volumeter. The digits are colored either black or red to indicate the position of the decimal point, depending on the model (see examples below). - Page 7 USER’S GUIDE Lock system: For trusted results, the volume selection is lockable. First step, with the thumb, unlock the tip-ejector button by pushing it up Unlocked Position Second step, the volume is set by turning the push button 3 Third step, push down the tip-ejector button.
-
Page 8: 5- User Adjustment
® 5 - USER ADJUSTMENT The calibration of the VWR High Performance Pipettor has been performed with distilled water and very high precision volumetric instruments. Adjusting the pipettor can be necessary for different solutions due to their density, viscosity, surface tension and/or vapor pressure etc. - Page 9 USER’S GUIDE Use the calibration key to adjust the pipettor FIGURE 7 a. Insert the metal rod into the calibration key on the circle tip side (see figure 7). Lock into place. should feel FIGURE 8 internal part of the calibration key clamped and clipped on firmly.
-
Page 10: 6- Pipetting
® 6 - PIPETTING Fitting the tips VWR High Performance Pipettor have been designed to fit VWR tips. Pre-rinse the tips Some liquids (e.g.protein-containing solutions and organic solvents) can leave a film of liquid on the inside wall of the tip; pre-rinse the tip to minimize any errors that may be related to this phenomenon. - Page 11 USER’S GUIDE Aspirate Press the push-button to the first stop (this corresponds to the set volume of liquid). Hold the pipettor vertically and immerse the tip in the liquid. Release the push-button slowly and smoothly (to top position) to aspirate the set volume of liquid.
-
Page 12: 7- General Guidelines For Good Pipetting
HIGH PERFORMANCE PIPETTOR ® 7 - GENERAL GUIDELINES FOR GOOD PIPETTING Make sure that you operate the push-button slowly and smoothly. Table Immersion Depth and Wait Time When aspirating, keep the tip at a constant Model Immersion Wait Time... -
Page 13: 8- Accessories And Stand
To store your pipettors, several stands are available. To avoid the possibility of liquid running back into the pipettor, store the pipettor vertically. VWR High Performance Pipettor is sold with the plastic tip ejector but it is available in stainless steel as a spare part. -
Page 14: 10- Troubleshooting
Replace the tip-holder Worn O-ring or seal Replace both parts and lubricate Low quality tips Use VWR tips to have optimum fit correctly results of the pipetting system Dirty tip-holder Clean the tip-holder with isopropanol or ethanol Tips fall off or do not fit... -
Page 15: 11- Leak Test
USER’S GUIDE For Multichannel models Symptom Possible Cause Action Low quality tips Use VWR tips to have optimum results of the pipetting system Tip-ejector damaged Replace tip-ejector Tips fall off or do not fit correctly Ejector spacer damaged Replace ejector spacer... - Page 16 • Replacing spare parts. • Greasing the piston assembly. Lubricant tube 1g is available under (check the spare parts list on VWR.com) 2µL and 10µL Single channel models should not be disassembled, so you may only replace the push-button, tip-ejector, and its adapter.
- Page 17 USER’S GUIDE Changing the tip-ejector FIGURE 15 To remove Push the ejection button. Push laterally (to the left) the tip-ejector. Slide and remove the tip-ejector. To refit Push the ejection button. Slide the tip-ejector along the tip-holder. ...
- Page 18 HIGH PERFORMANCE PIPETTOR ® Leave exposed the piston, clean it with isopropanol or ethanol and lubricate lightly. For 20µL, 100µL, 200µL Single channel models: lubricate only the useful part of the piston (20 ±5 mm length) and the O-ring.
- Page 19 USER’S GUIDE FIGURE 16 Color-coded push-button (volume setting) 20µL 100µL 10mL 200µL Connecting nu t Piston assembly 1000µL Tip-ejector Tip-holder...
- Page 20 HIGH PERFORMANCE PIPETTOR ® 12B - MAINTENANCE FOR THE MULTICHANNEL MODELS ONLY Routine maintenance will help keep your pipettor in good condition, ensuring a continued high level of performance. Maintenance is limited to: • Cleaning or sterilization (see Chapter 13 - Cleaning and Sterilization) •...
-
Page 21: 13- Cleaning And Sterilization
FIGURE 18 Ejector spacer 13 - CLEANING AND STERILIZATION VWR High Performance Pipettor are designed so that the parts normally in contact with liquid contaminants, can easily be cleaned and decontaminated. because the models 2µL and 10µL single channel models... - Page 22 HIGH PERFORMANCE PIPETTOR ® Wipe the entire pipettor with a soft-cloth or lint-free tissue impregnated with soap solution, to remove all dirty marks. If the pipettor is very dirty, a brush with soft plastic bristles may be used. Wipe the entire pipettor and the tip-ejector with a soft cloth or lint-free tissue ...
- Page 23 USER’S GUIDE Wipe the entire pipettor with a soft cloth or lint-free tissue impregnated with the cleaning solution. Wipe it with distilled water. Leave the parts to dry by evaporation or wipe them with a clean soft-cloth or ...
- Page 24 HIGH PERFORMANCE PIPETTOR ® For the multichannel models: The following components only can be immersed in a decontamination solution: tip- ejector and ejector spacer. Remove the tip-ejector and the ejector spacer. Immerse the tip-ejector and ejector spacer in the decontamination solution ...
-
Page 25: 14- Specifications
USER’S GUIDE 14 - SPECIFICATIONS VWR High Performance Pipettor are high quality. These pipettors are compatible with universal tips. Checking and recalibrating your pipettor with the tips that you use may be needed. Each pipettor is inspected and validated by qualified technicians in accordance with the VWR Quality System. -
Page 26: 15- Spare Parts
® The data given in the tables are achieved with VWR standard length series pipette tips. If you are using VWR 10 µL extended length series pipette tips, you will need to recalibrate your pipettor to comply with specifications. Multichannel models... -
Page 27: 16- Maintenance & Calibration
VWR warrants that this product will be free from defects in material and workmanship for a period of 36 months from date of delivery. If a defect is present, VWR will, at its option and cost, repair, replace, or refund the purchase price of this product to the customer, provided it is returned during the warranty period. -
Page 28: 19- Compliance With Local Laws And
Product in its local environment. VWR will not be held liable for any related omission or for not obtaining the required approval or authorisation, unless any refusal is due to a defect of the product. - Page 29 LT801587/A © 12/2017...
Need help?
Do you have a question about the HIGH PERFORMANCE PIPETTOR and is the answer not in the manual?
Questions and answers